Free Crochet Corn Amigurumi Pattern for Beginners
Sweet golden corn tucked inside a leafy green husk turns into the cutest beginner amigurumi ever. Grab your hook, pick two yarn colors, and stitch up pure farmhouse charm today.
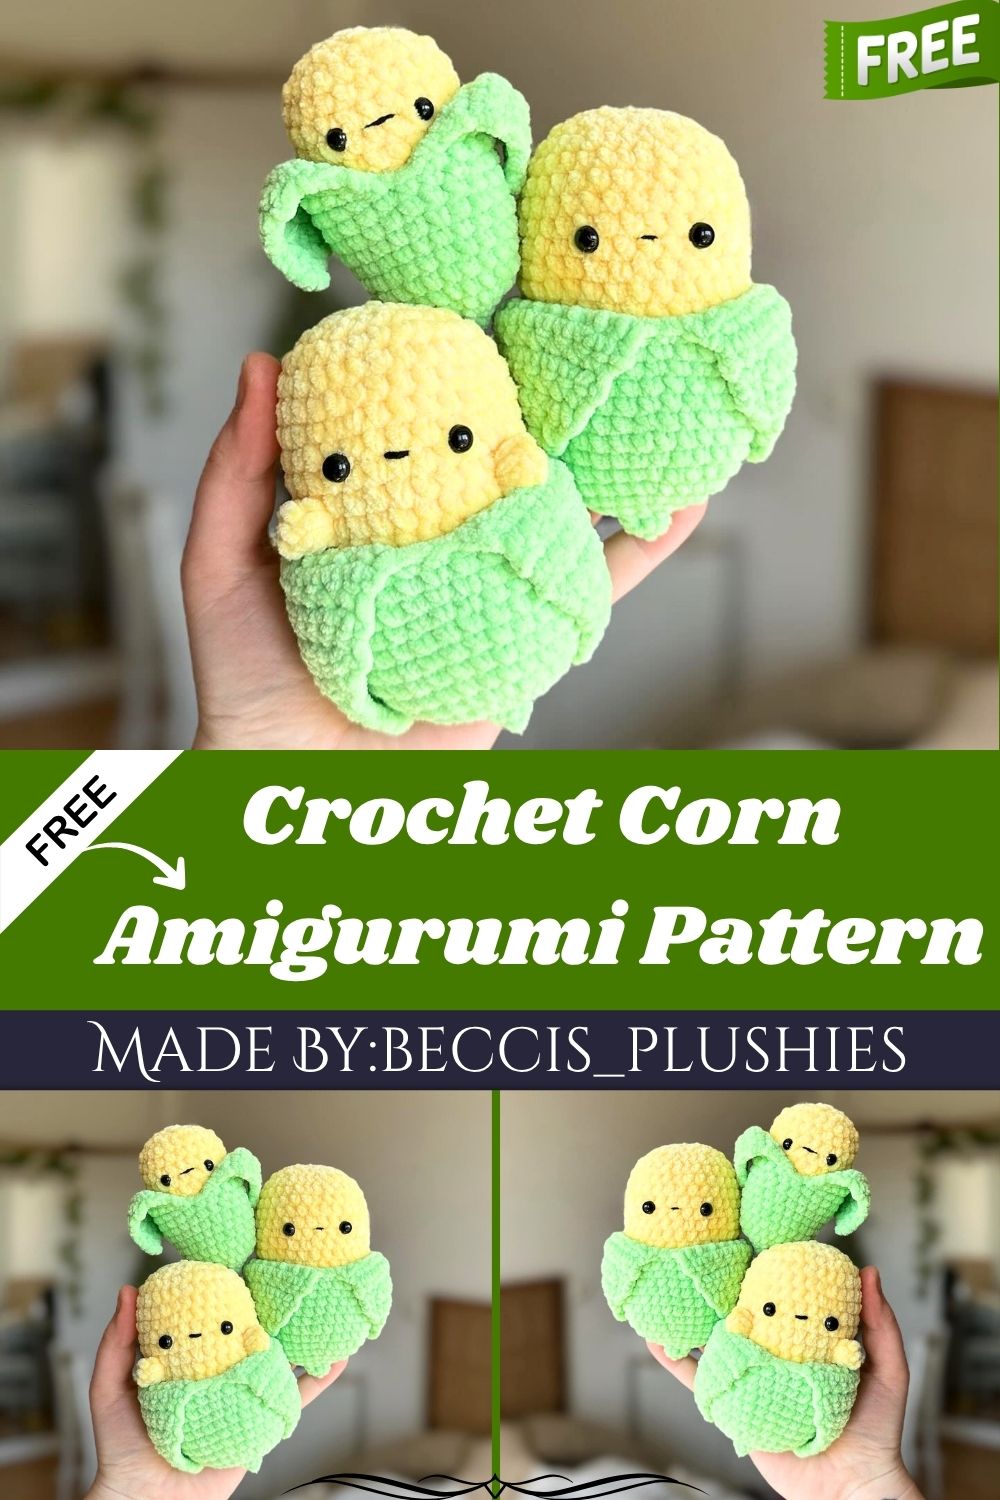
Crochet corn amigurumi combines two simple shapes into one irresistible plushie: a plump yellow cob and a folded green husk with hanging leaf details. Beginners will love how forgiving the stitches feel, while safety eyes and a tiny embroidered mouth add real personality, perfect for kitchen shelves, nurseries, or gifts.
Skill Level
Beginner-friendly overall, though the folded leaf shaping and turned rows add light intermediate challenge. Comfortable with magic ring, single crochet, increases, decreases, and basic shaping will finish this confidently.
Pattern Overview
- Leaf/husk piece — worked in continuous green rounds, then split into a single hanging leaf shaped with turned rows and gradual decreases.
- Corn cob piece — worked in yellow rounds from a magic ring, shaped into a cylinder, stuffed firmly, then closed at the top.p
- Optional arms — small bobble stitches added on either side of the cob for extra personality
- Assembly — the finished corn simply nests inside the folded leaf husk, no sewing required
- Uses US crochet terminology throughout, so double-check abbreviations if you usually work in UK terms.
Special Techniques
- Magic ring (MR) starts both the leaf and the corn cleanly, with no visible hole at the center
- Back loop only (BLO) on one row of the leaf creates a subtle ridge, giving the folded leaf a crisper, more realistic edge.
- Turned rows switch the leaf from working in continuous rounds to back-and-forth rows, which is what allows it to lie flat and fold over naturally
- Bobble stitch (BO) forms the tiny optional arms using four unfinished double crochets pulled through five loops
- Keeping every turning chain-1 tight is the real secret technique here, since a loose chain leaves a sloppy edge along the leaf
Materials
Suggested yarn: #3 DK light worsted weight (YarnArt Dolce Baby used in original sample)
- Green
- Yellow
Tools and extras:
- 3mm crochet hook
- Black acrylic yarn for the mouth
- 6mm safety eyes (or your preferred size)
- Tapestry needle
- Scissors
- Stuffing
- Stitch marker
Abbreviations
- BO: Bobble stitch (4 unfinished double crochet, 5 loops on hook)
- BLO: Back loop only
- CH: Chain
- DEC: Decrease
- F/O: Fasten off
- INC: Increase
- MR: Magic ring
- R: Row/round
- SC: Single crochet
- ST: Stitch
Leaf Part (with green yarn)
R1: 4sc in MR (4) R2: sc around (4) R3: inc x4 (8) R4: inc x8 (16) R5: (sc, inc) x8 (24) R6: (2sc, inc) x8 (32) R7-R15: sc around 9 rows (32)
Now create the first hanging leaf:
R16: 16sc, ch1 and turn your work (16) R17: BLO only this row, 16sc, ch1 and turn (16) R18-R21: 16sc, ch1 and turn 4 rows (16) R22: dec, 12sc, dec, ch1 and turn (14) R23: dec, 10sc, dec, ch1 and turn (12) R24: dec, 8sc, dec, ch1 and turn (10) R25: dec, 6sc, dec, ch1 and turn (8) R26: dec, 4sc, dec, ch1 and turn (6) R27: dec, 2sc, dec, ch1 and turn (4) R28: dec x2, ch1 and turn (2) R29: dec (1)
Make the turning ch1 very tight for a cleaner edge. F/O and weave in ends, then fold the leaf over.
Insert your hook in the stitch of R15 directly beside the first leaf and pull up a loop with green yarn, repeat all steps from R16-R29, then F/O and weave in ends.
Corn (with yellow yarn)
R1: 8sc in MR (8) R2: inc x8 (16) R3: (sc, inc) x8 (24) R4: (2sc, inc) x8 (32) R5-R20: sc around 16 rows (32)
Place safety eyes between R9 and R10 (adjust for your tension), 5 visible stitches apart. Embroider the mouth between the eyes, one stitch wide.
R21: (2sc, dec) x8 (24) stuff firmly R22: (sc, dec) x8 (16) R23: dec x8 (8)
F/O, finish stuffing, close the hole, and weave in ends.
Arms (optional, with yellow yarn)
Insert your hook in a stitch between R11 and R12, one stitch beside and below the eye. Pull up a loop with yellow yarn, make a bobble stitch (BO), and F/O. Repeat on the other side, 7 stitches next to the first arm, also one stitch beside the eye.
Weave in all ends, tuck the corn into the leaf husk, and it’s ready.
Customization and Variation
- Swap the yellow for cream or white yarn for a fun “white corn” variation
- Use variegated green yarn on the husk for a more textured, hand-painted look
- Make it mini by using a lighter yarn weight and a smaller hook for keychain-size corn
- Add a tiny felt or embroidered blush under the eyes for extra cuteness
- Skip the arms entirely for a cleaner, minimalist cob-and-husk look
- Try a closed-eye or sleepy expression instead of safety eyes for a softer feel
Common Mistakes
- Placing safety eyes before checking spacing, which throws off the whole face symmetry
- Loosening the turning chain-1 on the leaf rows, leaving a messy, uneven edge
- Forgetting the back loop-only instruction on R17, which changes the leaf’s texture
- Under-stuffing the corn cob, causing it to look flat instead of plump
- Rushing the fold on the leaf before it’s fully fastened off and secured
Frequently Asked Questions
Can I sell plushies made from this pattern? Yes, finished plushies can be sold as long as the pattern creator is credited.
What yarn weight works best? A #3 DK light worsted yarn, like YarnArt Dolce Baby, gives the best stitch definition.
Is this pattern suitable for beginners? Mostly, yes. The rounds are simple, though the turned leaf rows need a bit more focus.
Does the corn need to be sewn to the husk? No sewing needed. The finished cob simply nests inside the folded leaf pocket.
Finishing Tips
- Weave in every end securely before folding the leaf over the corn
- Fluff and shape the leaf gently by hand once it’s fastened off
- Double-check eye placement against both sides before finally securing the safety eyes
- Stuff the corn firmly but evenly to avoid lumps along the sides
- Steam block the leaf lightly if the edges curl after folding
Gifting Ideas
- Pair it with a mini crochet vegetable set as a kitchen-themed gift basket
- Tuck it into a farmhouse-style nursery gift alongside other harvest-themed plushies
- Use it as a quirky teacher’s gift during autumn or harvest season
- Add it to a baby shower gift as a soft, huggable keepsake
- Turn it into a keychain-size version for a fun stocking stuffer
Conclusion
Corn amigurumi proves that even a simple vegetable can become an adorable handmade keepsake. Between the folded leaf husk and the plump stuffed cob, this pattern offers just enough technique to keep beginners engaged without feeling overwhelming, making it a satisfying weekend project.
Important Remarks
Pattern written in US crochet terminology. Original design credit: @beccis_plushies. Finished plushies made from this pattern may be sold, provided the pattern creator is credited. Do not repost, copy, or resell the pattern itself.