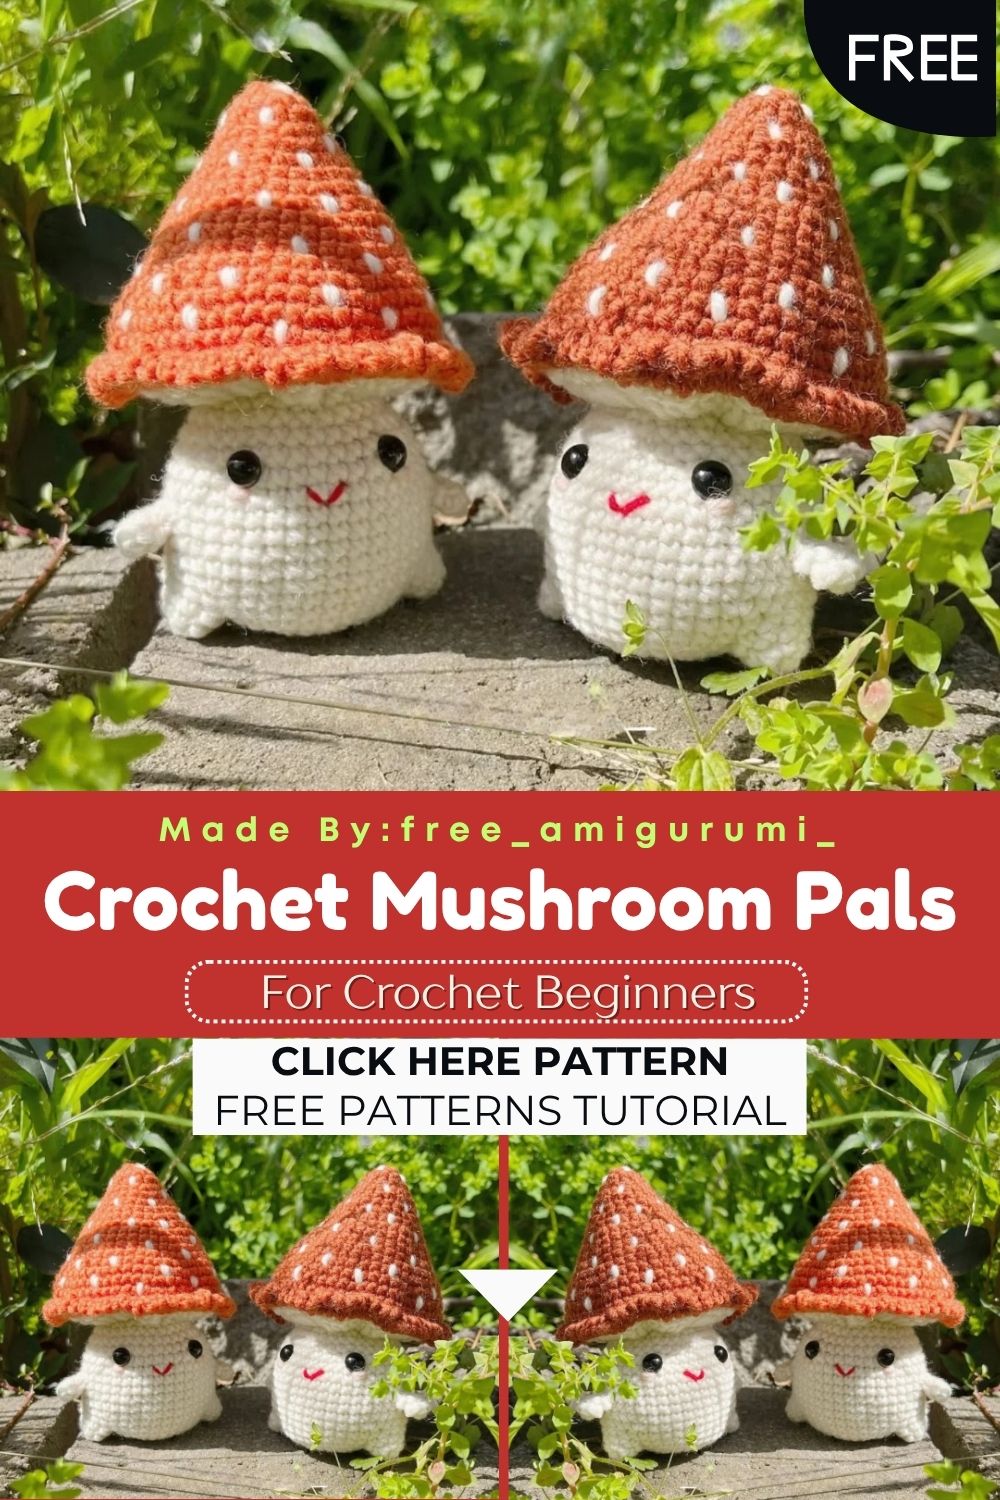
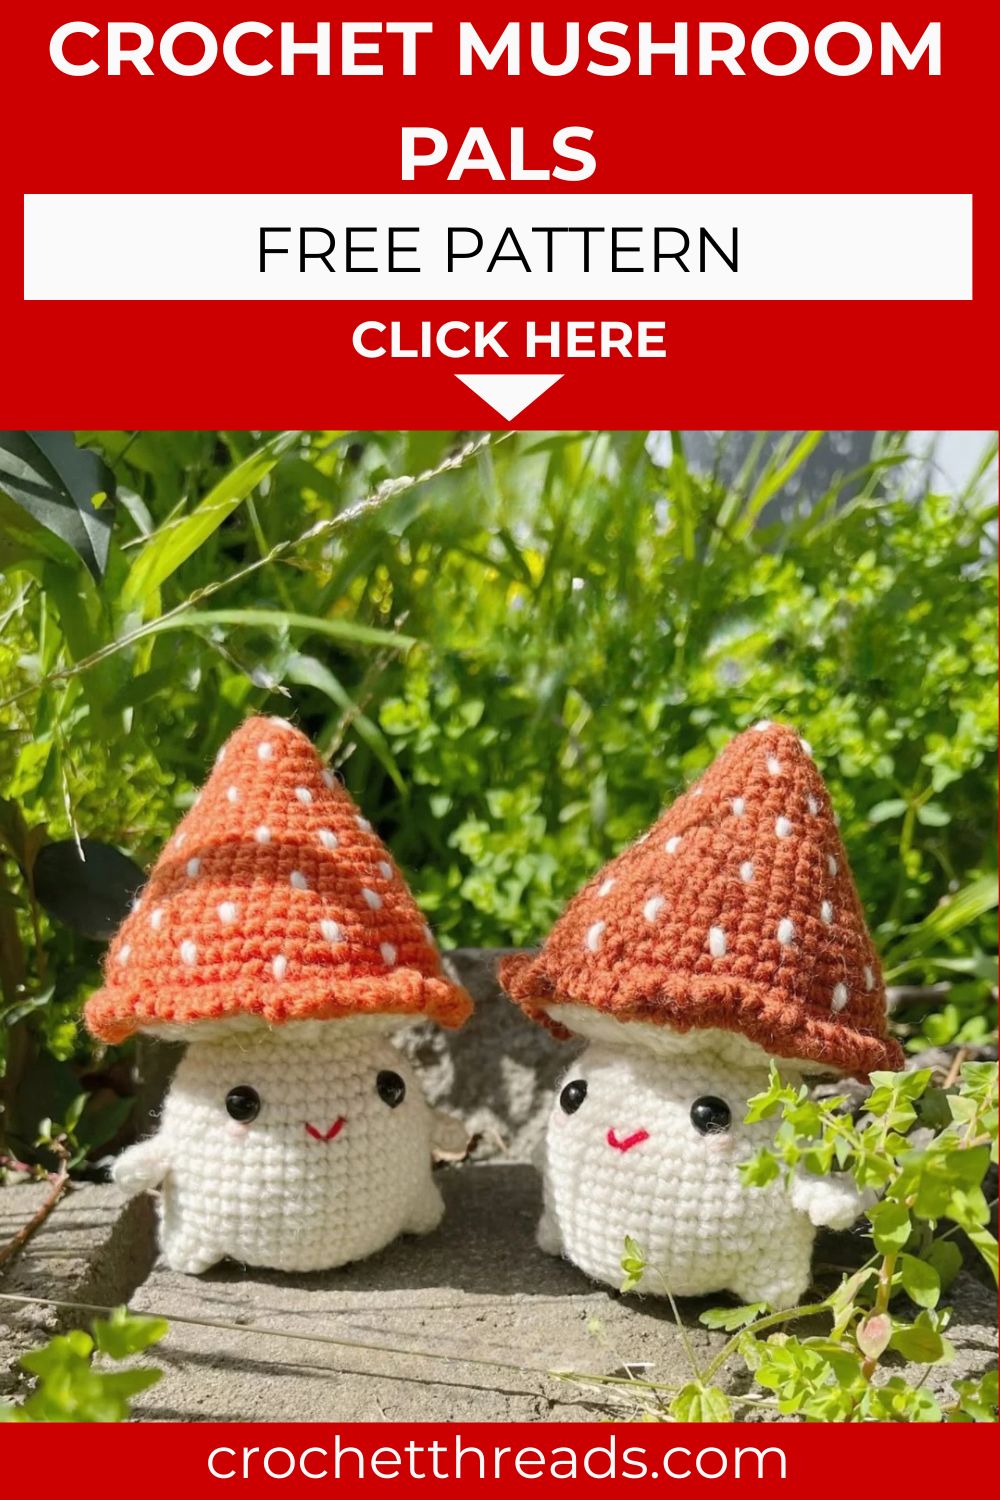
Charming Crochet Mushroom Pals – Free Amigurumi Pattern
Dark amber spots, a creamy white stem, and the most endearing little face you have ever stitched this mushroom amigurumi is cottagecore perfection in yarn form!
Mushroom amigurumi have a specific kind of magic about them. Something about the domed cap sitting perfectly on a rounded stem just works every single time, and this pattern nails that silhouette with a construction method that keeps everything clean and satisfying to put together. The cap and body are worked separately, then joined along the edge using a simple chain loop technique that creates a lacy, decorative seam. Feet are integrated directly into the body rounds rather than sewn on afterward, and arms are attached with just a few anchoring stitches. The whole thing sits flat on any surface without tipping.
Skill Level
Beginner to intermediate. Standard single crochet rounds carry most of the pattern. The foot integration technique and the chain-join edge for the cap assembly introduce new skills that become genuinely useful across many future amigurumi projects.
Materials You Will Need
Yarn:
- Dark amber 8ply wool yarn for the mushroom cap and spot details
- Cream white 8ply wool yarn for the body and stem
Other Supplies:
- Crochet hook — 3mm
- Plastic safety doll eyes
- Stitch markers
- Yarn needle
- Scissors
Abbreviations
- CH — Chain Stitch
- SC — Single Crochet
- DC — Double Crochet
- SLST — Slip Stitch
- MR — Magic Ring
- INC — Increase (2 sc in same stitch)
- FLO — Front Loop Only
- DC INC — Double Crochet Increase
- DEC — Decrease
- FO — Fasten Off
Pattern: Mushroom Cap (Top)
Using dark amber yarn
R1: 6 sc in MR (6) R2: 6 inc (12) R3: 12 sc (12) R4: (sc, inc) x6 (18) R5: 18 sc (18) R6: (sc, inc, sc) x6 (24) R7: 24 sc (24) R8: (3sc, inc) x6 (30) R9: (2sc, inc, 2sc) x6 (36) R10–11: 36 sc for 2 rounds (36) R12: (5sc, inc) x6 (42) R13: (3sc, inc, 3sc) x6 (48) R14: 48 sc (48) R15: (7sc, inc) x6 (54) R16: (4sc, inc, 4sc) x6 (60) R17: 60 sc, slst, ch1 do not cut yarn (60)
Set the cap aside with the working yarn still attached. The yarn from this piece will be used later to join the cap and body together around the edge.
Adding the Spots
Starting from the very top of the cap and working downward in a gentle spiral direction, sew cream white spots onto the cap surface in your preferred arrangement. Tie each spot off securely on the back side of the cap. Vary the spot sizes slightly for the most natural, organic mushroom look.
Pattern: Arms Make 2
Using white cream yarn
R1: 6 sc in MR (6) R2: 6 sc (6)
Fasten off, leaving a long tail for sewing. Set both arms aside for assembly later.
Pattern: Feet Make 2
Using white cream yarn
R1: 6 sc in MR (6) R2: (sc, inc) x3 (9)
Do not fasten off either foot; both are integrated directly into the body construction during R6 and R7.
Pattern: Body and Stem
Using white cream yarn
R1: 6 sc in MR (6) R2: 6 inc (12) R3: (sc, inc) x6 (18) R4: (sc, inc, sc) x6 (24) R5: (3sc, inc) x6 (30)
R6: 8 sc, then merge 3 sc with the first foot piece (right sides facing each other), followed by 12 sc, then merge 3 sc with the second foot piece, followed by 4 sc (30)
R7: 8 sc, merge the remaining 6 sc of the first foot piece, followed by 12 sc, merge the remaining 6 sc of the second foot piece, followed by 4 sc (36)
R8: 36 sc (36)
R9: 14sc, inc, 10sc, inc, 10sc (38)
R10–15: 38 sc for 6 rounds (38)
R16: (17sc, dec) x2 (36)
R17: 36 sc (36)
R18: (2sc, dec, 2sc) x6 (30)
R19: 30 sc (30)
R20: FLO — 30 dc inc (60)
This front loop only double crochet increase round creates the decorative ruffled edge that will sit against the cap once the two pieces are joined.
R21: 60 sc, fasten off and weave in ends (60)
Eyes and Face
Starting from the bottom center of the body, count upward to round 15. Insert both safety eyes at this height with a gap of 6 stitches between them, one on each side.
Embroider the mouth below the eyes using a simple curved stitch in dark thread. Add small circular blush details beside the eyes using pink yarn or felt.
Assembly
Stuff both the cap and the body firmly before joining. The body should be stuffed just enough to sit flat on a table without tipping. Avoid overfilling the bottom section, since a flat base is what allows this mushroom to stand steadily in any display.
Once both pieces are stuffed, align the cap with the body so both pieces have exactly 60 stitches along the joining edge.
Using the uncut working yarn still attached to the cap from R17, crochet sc, ch2, repeat all the way around the edge to join both pieces together in a lacy chain loop seam. Fasten off and weave in all ends.
Sew the arms onto the body, positioned 8 rows directly above the side of each foot for natural, balanced placement.
To gather the top of the cap into a slightly more rounded dome shape, start from the back of the cap and run a continuous running stitch along the top surface. Pull the thread tight and fasten off securely once the desired shape is achieved.
Customization and Variation Ideas
- Swap the dark amber cap for a deep forest red and white spot combination for a classic fairy tale mushroom that photographs beautifully in botanical-styled settings.
- Use pastel yarn soft lilac cap with cream spots for a dreamy, kawaii mushroom variation that suits nursery decor perfectly.
- Add a tiny crocheted hat or flower crown to the top of the finished cap for an extra character detail.
- Make a pair of mushrooms in two different sizes for a mother-and-child mushroom duo displayed together.
- Try variegated amber yarn for the cap to create a naturally mottled forest mushroom look without any extra color changes.
- Skip the face details entirely for a purely decorative botanical version that works beautifully as a minimalist home accessory.
Common Mistakes to Avoid
- Cutting the yarn after R17 of the cap: This yarn is essential for joining the two pieces together. Cutting it means rejoining later, which creates an extra seam at the joining point.
- Merging the feet at the wrong stitch count: The foot integration happens at specific stitch positions in R6 and R7. Count carefully and use stitch markers to track the exact merge points before starting each round.
- Overstuffing the body base: A mushroom that cannot sit flat on a surface loses most of its display appeal. Check the base flatness after every handful of stuffing added during the closing rounds.
- Working R20 in both loops instead of the front loop only: This round must be FLO for the ruffled edge to sit correctly when the cap is joined. Working both loops produces a flat rather than flared edge.
- Placing eyes too high or too low: Count upward from the base carefully to reach R15 before inserting eyes. Eyes placed off this landmark sit in the wrong position relative to the mouth and blush.
- Rushing the joining seam: The chain loop join at the edge takes a few minutes longer than a standard slip stitch seam, but the decorative lacy result is what makes the mushroom look genuinely finished and polished.
Finishing Tips
- After joining the cap and body, gently press the seam flat with your fingers and check from all angles that the cap sits centered and level above the body.
- Use matching yarn when sewing on the arms so the joining stitches disappear completely against the cream body surface.
- Anchor each arm at two points, the top and bottom of the arm base, rather than a single central stitch, for a more secure, natural-looking attachment.
- The running stitch gathered on the cap top works best when pulled to just a slight tension rather than pulled fully tight. This keeps the dome shape natural rather than puckered.
- Photograph the finished mushroom from eye level on a natural wood surface with a few dried flowers for a cottagecore presentation that shows off the spot detail beautifully.
- Store finished mushrooms upright to maintain the flat base and avoid any compression of the dome shape between uses.
Gifting Ideas
- Nestle the finished mushroom inside a small wooden box lined with preserved moss for a gift that looks like a miniature fairy garden scene straight out of a storybook.
- Pair with a small packet of real mushroom growing substrate or a tiny potted plant for a nature-lover’s gift that feels genuinely cohesive.
- These mushrooms make wonderful autumn and winter gifts, especially in the dark amber and cream colorway that suits harvest and cottagecore aesthetics perfectly.
- Make a trio of mushrooms in different cap colors and present them together on a small wooden tray as a complete botanical display.
- Attach a small loop of yarn to the underside of the cap for a hanging ornament version ideal for a woodland-themed holiday tree.
- These sell consistently at craft markets whenever the styling is right; a small basket of mushrooms on a mossy surface draws attention from across any market space.
Conclusion
Ngl, mushroom amigurumi are one of those designs that never get old, and this particular pattern earns its place in any maker’s permanent collection. The foot integration keeps the build clean, the chain loop join at the edge is genuinely clever, and the flat base detail is the kind of practical thinking that separates a good pattern from a great one. Work the FLO round carefully, count your foot merge stitches, and do not rush the joining seam. That decorative edge is worth every extra second it takes. In conclusion, your mushroom pal is ready to find a mossy corner to call home.
Happy crocheting! Cannot wait to see your mushroom cutie sitting somewhere beautiful.