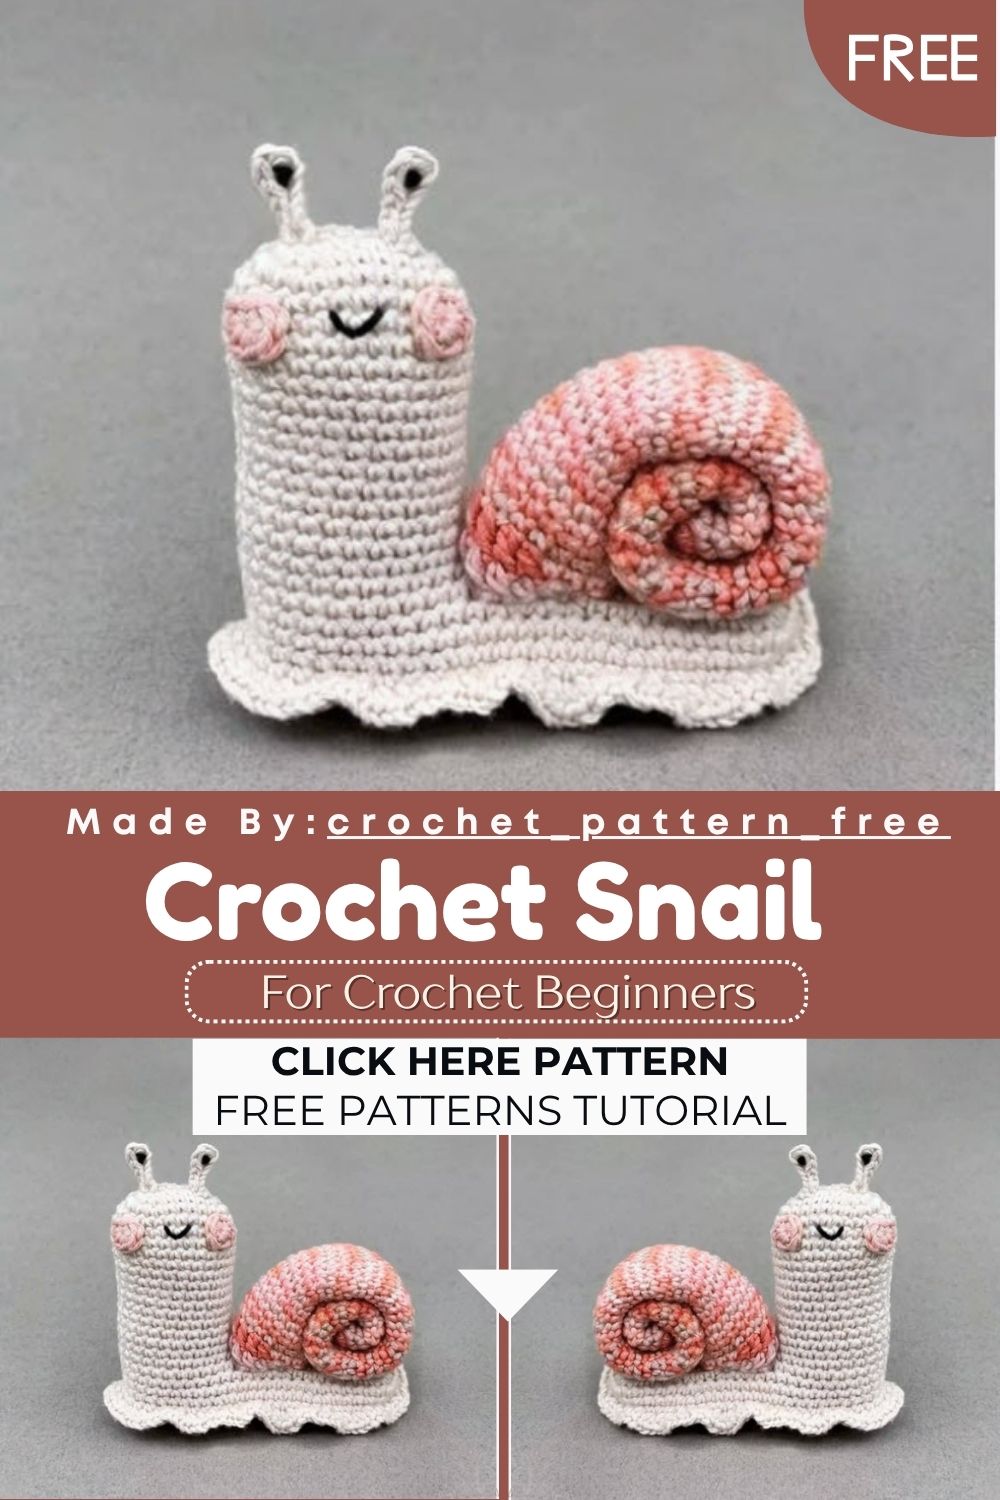
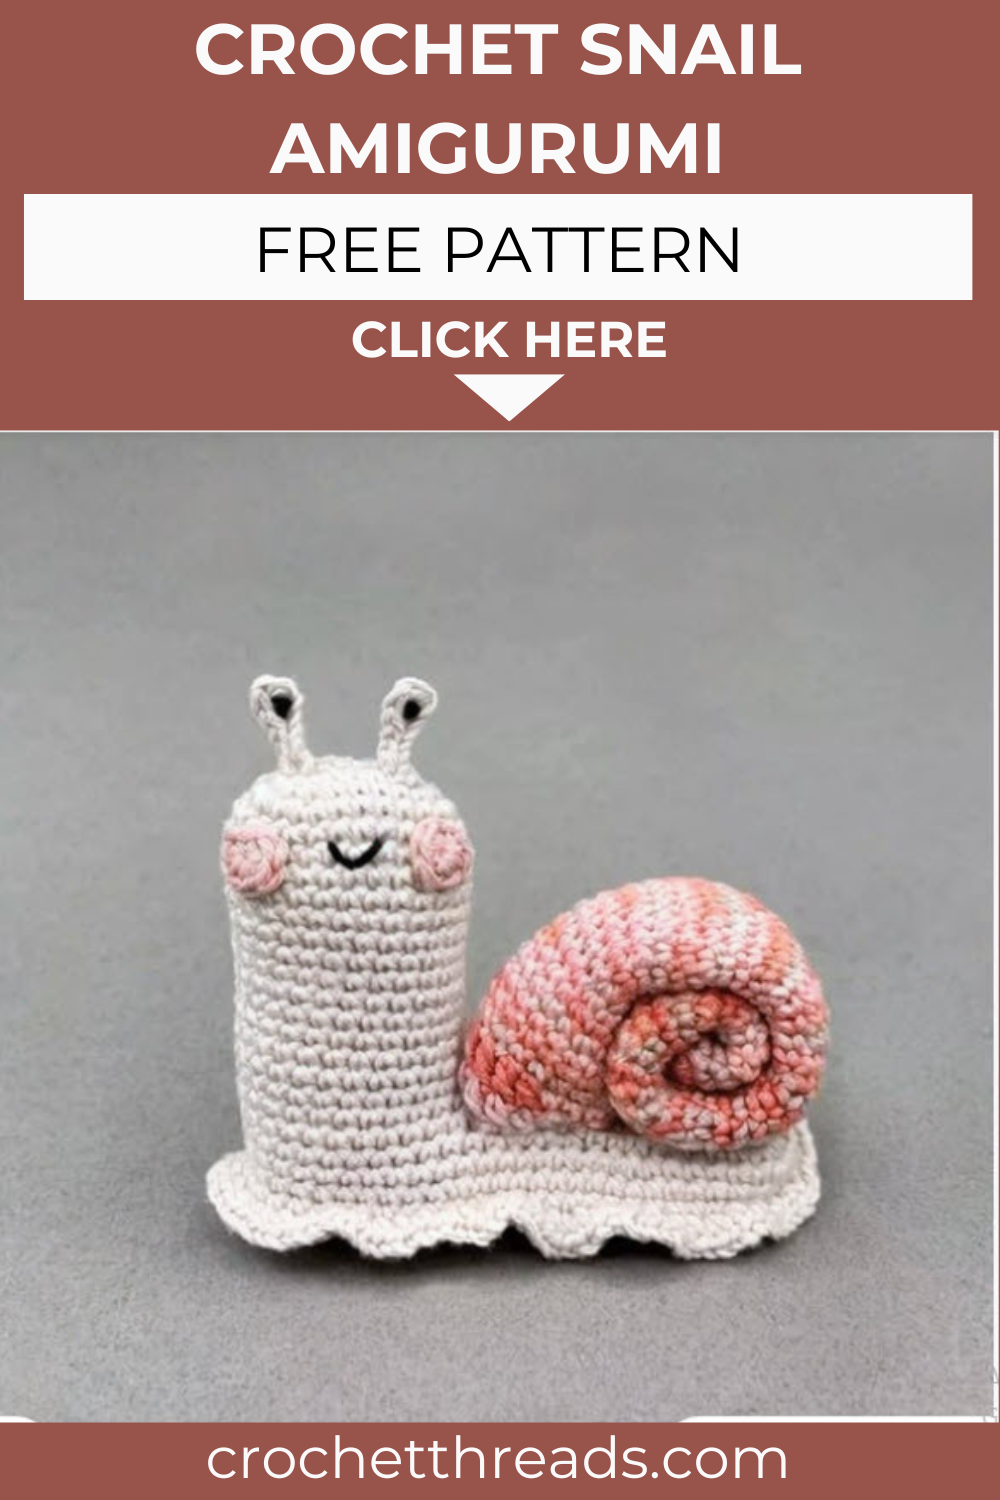
Free Crochet Snail Amigurumi Pattern for All Levels
Crochet lovers, get ready to make the cutest little snail that fits right in your palm. Soft cotton yarn, simple stitches, and a swirly shell come together in one fun afternoon project. Beginners and seasoned makers both find real joy here.
Honestly, snails do not get enough love in the amigurumi world. They carry their tiny homes around, and that makes them weirdly charming. With this free crochet snail amigurumi pattern, you stitch up a soft body, two cute eyes, rosy blush cheeks, and a tightly rolled spiral shell. The whole thing works up fast on a quiet day. Grab your hook, pick a color you love, and let us begin.
Skill Level
Beginners can handle this snail with a bit of patience. You only need basic stitches and simple shaping. Trust me, even your very first amigurumi can look adorable here.
Materials
- Cotton yarn (Ricorumi)
- Crochet hook: 2.5 mm
- Yarn needle
- Fiberfill for stuffing
- Stitch marker
- Scissors
Abbreviations
- Rnd: round / tour
- MR: magic ring / cercle magique
- Ch: chain / chaînette
- sl st: slip stitch / maille coulée
- sc: single crochet / maille serrée
- dc: double crochet / bride
- inc: increase / augmentation
- dec: decrease / diminution
- ( )*: repeat till the end of round / répéter jusqu’à la fin du tour
- [ ]: total number of stitches in the round / nombre total de mailles du tour
Pattern Overview
Here is a quick map of what you build before you start hooking:
- Bottom part: the flat base your snail rests on, worked around a long chain.
- Head and body: the curved shape that carries the face and gives the snail its lift.
- Shell: a long strip rolled tightly into a spiral, then fixed in place.
- Eyes: two tiny pieces that bring the face to life.
- Blush: two small rounds that add a sweet, rosy touch to the cheeks.
Work each piece on its own, then join them at the end. Low-key, that order keeps things stress-free. None of these parts need fancy stitches, so the pace stays relaxed throughout. Read the whole pattern once before you cast on, and the steps click into place fast.
Special Techniques
A few small skills make this snail come out clean. Read these before you dive in:
- Working around a chain: you crochet along both sides of the foundation chain, not in a flat row. Place stitches on the top, hook three into the end stitch, then come back along the bottom.
- Magic ring: the blush starts in a tight loop that you cinch closed. No joke, it stops that annoying hole in the center.
- Spiral shell rolling: wrap the strip snugly as you go, and secure each turn so it never loosens. For real, tension is everything here.
- Marking rounds: drop a stitch marker in the first stitch of each round. You will thank yourself when the count gets tricky.
- Invisible joins: when you fasten off, weave the tail through the front loops for a smooth, seamless finish.
Practice each move on a scrap first if you feel unsure. A two-minute warm-up beats frogging a whole round later.
Bottom Part
Start with the bottom part. Make a Ch 24, then crochet around the chain.
1: 22 sc, 3 sc in last ch, 21 sc, inc [48]
2: inc, 21 sc, 3 inc, 21 sc, 2 inc [54]
3: 1 sc, inc, 21 sc, (1 sc, inc) x 3, 21 sc, (1 sc, inc) x 2 [60]
Fasten off.
Head & Body
Make a Ch 7 and crochet around the chain, starting in the 2nd ch from the hook.
Rnd 1: 5 sc, 3 sc in last ch, 4 sc, inc [14]
Fasten off, leaving a long tail for sewing to the body.
Shell
Scroll the shell tightly. Glue or sew the strip as you wrap it, turn by turn. Keep the roll firm so the spiral holds its shape and sits proudly against the body.
Eyes (x 2)
Ch 6, then work inc, 4 sl st. Fasten off.
Blush (x 2)
In a MR, crochet 6 sc, then 1 sl st. Fasten off.
Common Mistakes
New makers trip over the same spots every time. Dodge these and your snail stays crisp:
- Loose tension: floppy stitches let the stuffing peek through. Pull your yarn a touch firmer than you think you need.
- Skipping the stitch marker: miscounting a round throws off the whole shape. Mark every first stitch, no exceptions.
- Overstuffing the body: too much fiberfill stretches the fabric and warps the curve. Add a little at a time.
- Rushing the shell roll: a lazy wrap unravels later. Tighten each turn and fix it before moving on.
- Sewing pieces too early: attach parts only once every section is done. Real talk, it saves you from unpicking seams.
Most flaws trace back to speed, not skill. Slow your hands down, count twice, and the finished snail rewards your patience.
Assembly
Now you bring all the pieces together into one snail. Take it slow, because the final look depends on neat seams. Follow this order for the cleanest result:
- Stuff the head and body firmly, but stop before the fabric strains.
- Sew the head and body onto the bottom part using the long tail you left.
- Position the rolled shell on the back and stitch it down so it stands upright.
- Pin the eyes in place, check the spacing, then sew them on.
- Add the blush cheeks just below the eyes for that sweet, rosy face.
- Weave in every loose end and trim the extra yarn close to the fabric.
Step back and check the balance. Ngl, a quick nudge here and there makes the face look just right. Hold the snail at arm’s length, too. That little distance shows you any seam that needs a touch-up before you call it done.
Important Remarks
Keep these notes handy while you stitch your snail:
- The pattern works in continuous rounds, so do not slip stitch to close unless the step says so.
- Stitch counts in brackets confirm your total at the end of each round. Match them before you continue.
- Ricorumi cotton gives clean stitch definition, yet any light cotton in a 2.5 mm gauge works fine.
- Swap colors freely. A bright shell over a soft body reads adorable every single time.
- This free crochet snail amigurumi pattern suits handmade gifts, nursery decor, and small market stalls.
- Block the pieces lightly if your stitches look uneven, then let them dry before assembly.
Conclusion
And there you have your very own little snail, ready to perch on a shelf or hide in a gift basket. The mix of a flat base, a curved body, and a tight spiral shell keeps the build interesting from start to finish. For real, watching the shell roll into shape is the best part. Take your time with the tension, lean on your stitch marker, and let each round guide you. Beginners walk away with a confidence boost, and seasoned makers get a quick, satisfying win. Once you finish one, you will probably want a whole colorful family of them.