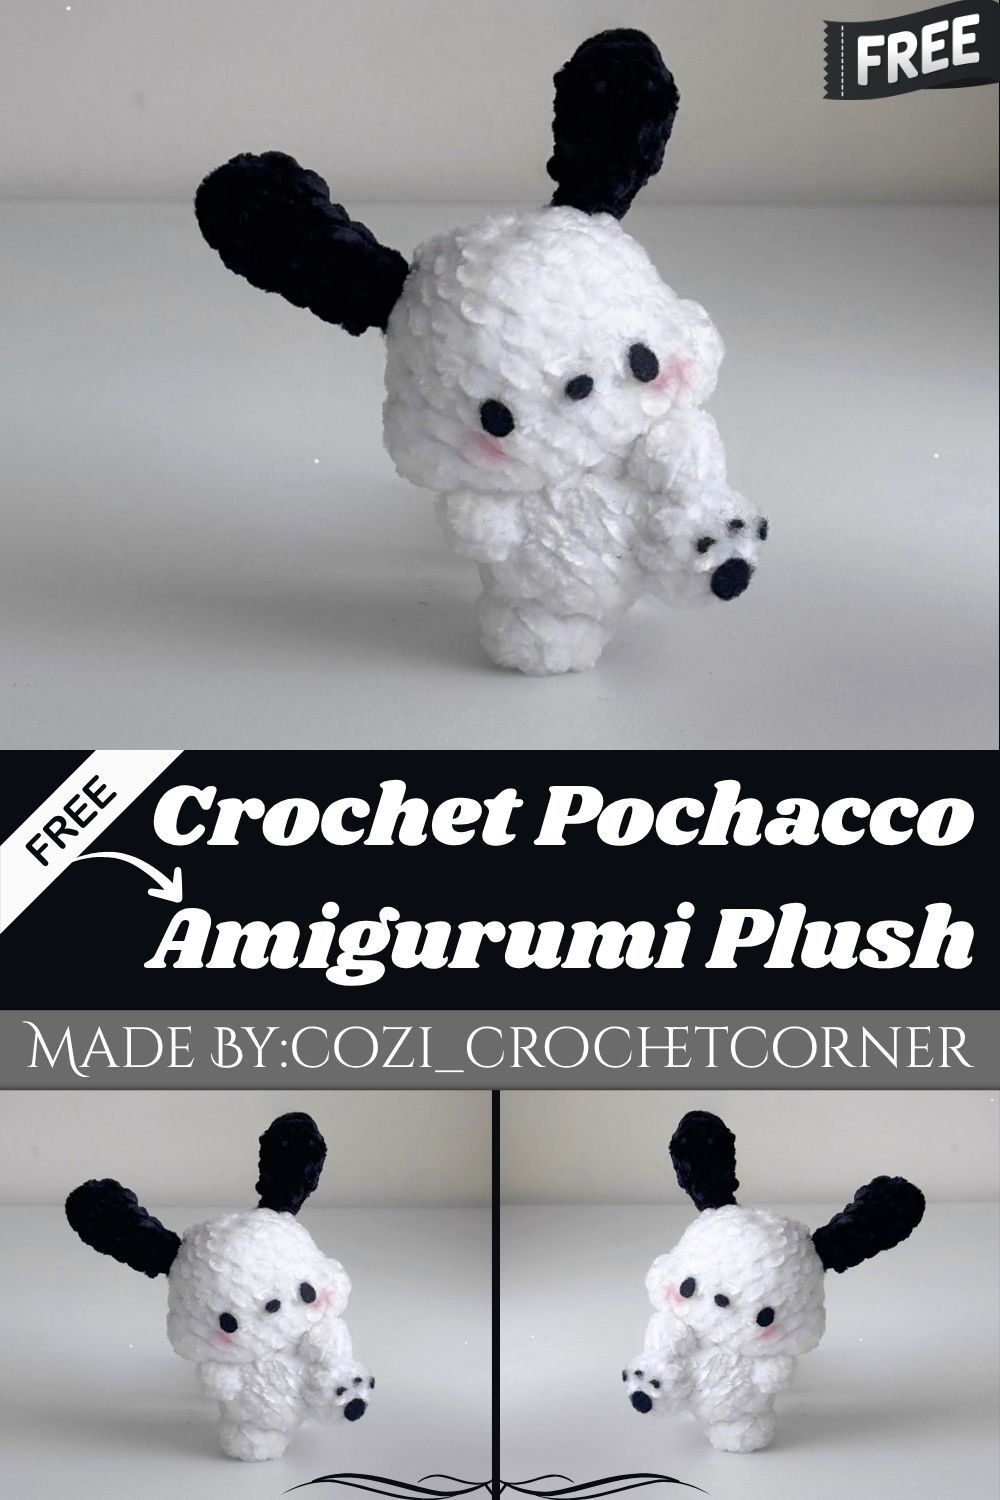
Crochet Pochacco Amigurumi Plush – The Perfect Kawaii Companion
Fluffy ears, round cheeks, and a playful expression make this amigurumi impossible to resist. Honestly, this kawaii plush comes together with simple rounds and minimal color changes, making it a rewarding project for beginners that still looks polished enough for gifting or shelf display.
Kawaii-style amigurumi patterns continue gaining popularity because they combine cute proportions with genuinely approachable stitch counts for makers at any level. White yarn forms the rounded head and body, while small black felt details bring the face to life without fussy embroidery. Compact ears, tiny feet, and short arms attach quickly once the main pieces finish, keeping total project time reasonable for a single weekend. Real talk, few characters translate this smoothly from flat reference images into a three-dimensional plush shape. Crafters of every skill level find satisfaction watching the personality emerge stitch by stitch.
Materials
- White yarn
- Black yarn
- Felt
- Stuffing
- Yarn needle
- Scissors
- Stitch markers
- Crochet hook (3mm recommended, velvet yarn works best)
Abbreviations
- MR = magic ring
- sc = single crochet
- dc = double crochet
- inc = single crochet increase
- dec = single crochet decrease
- FO = finish off
- ch = chain
- slst = slip stitch
- dc inc = double crochet increase
Skill Level
Beginner to intermediate crafters manage this pattern without difficulty. Standard single crochet stitches, increases, and decreases repeat throughout every piece. Felt cutting and basic sewing skills complete the finishing touches nicely.
Pattern Instructions
Head (in White)
- R1: 6sc in MR (6)
- R2: inc, sc, 2inc, sc, inc (10)
- R3: inc, 3sc, 2inc, 3sc, inc (14)
- R4: 2inc, 4sc, 3inc, 4sc, inc (20)
- R5-7: 20sc around [3 rounds] (20)
- R8: 2dc inc, 7sc, 3dc inc, 7sc, dc inc (26)
- R9: 2dec, 7sc, 3dec, 7sc, dec (20)
- R10: (2sc, dec)x5 (15) — stuff firmly
- R11: (sc, dec)x5 (10)
- R12: 5dec (5)
- FO, leave a short tail, no need to close the hole
Body (in White)
- R1: 5sc in MR (5)
- R2: 5inc (10)
- R3: (sc, inc)x5 (15)
- R4: inc, 6sc, inc, 7sc (17)
- R5: (2sc, dec)x4, sc (13)
- FO, leave a long tail, stuff firmly, sew onto row 10 of the head
Ears (Make 2)
- R1: 4sc in MR (4)
- R2: 4inc (8)
- R3: 8sc around (8)
- R4: (2sc, dec)x2 (6)
- R5-6: sc around [2 rounds] (6)
- R7: (sc, dec)x2 (4)
- Stuff after round 6 only if needed; velvet yarn usually holds shape without it
- FO, leave a long tail
Feet (Make 2)
- R1: 4sc in MR (4)
- R2: 4inc (8)
- R3: sc around (8)
- FO, stuff firmly, leave a tail for sewing
Arms (Make 2)
- R1: 4sc in MR (4)
- R2: sc around (4)
- FO, leave a tail for sewing
Special Techniques
- Double crochet increases on round eight add extra height and dimension to the head shape
- Combining decrease clusters on round nine smooths the transition from head to closing rounds
- Leaving the head’s final hole open avoids unnecessary closing stitches before body attachment
- Velvet yarn’s natural loft replaces stuffing in the ears, keeping the texture soft and light
- Sewing the body directly onto round ten anchors it securely without needing extra reinforcement
Common Mistakes
- Forgetting to leave a long enough tail on the body makes attaching it to the head difficult
- Over-stuffing velvet ears creates a stiff, unnatural look instead of a soft floppy texture
- Misplacing arm spacing on round five throws off the plush’s overall symmetry
- Sewing feet at the wrong angle causes the finished plush to tip forward or sideways
- Skipping stitch markers on the head’s increase-heavy rounds leads to miscounted stitches quickly
Uses & Benefits
Finished plush characters make charming shelf decor, car accessories, or handmade gifts for kawaii and Sanrio-style collectors. Crocheters practicing dimensional shaping, dc increases, and felt detailing build skills transferable to countless future amigurumi designs. Low-key, a handmade plush carries more warmth than anything mass-produced ever could. Working through short, repetitive rounds also offers genuine stress relief, making this project ideal for evenings, travel, or slow weekend afternoons spent relaxing with yarn in hand.
Helpful Beginner Tips
- Mark the beginning of each round clearly since increase-heavy rounds shift quickly
- Cut felt pieces slightly smaller than planned, then trim further once test-fitted
- Work with a firm but comfortable tension to prevent gaps around increase stitches
- Stuff the head before closing completely, checking firmness from multiple angles first
- Practice dc increases separately if unfamiliar, since round eight relies heavily on them
Assembly
- Sew arms onto the sides of round five of the body, spacing them about four stitches apart
- Attach one foot to the bottom of the body between rounds one and three
- Sew the second foot onto the front side of the body directly under the arm
- Position both ears on rounds three and four of the head for accurate placement
- Cut felt pieces for the eyes and nose, testing placement with pins before gluing
- Sew the finished body onto round ten of the head, checking alignment before securing
Where Can You Use This?
Set the finished plush on a desk, clip it to a bag as a portable companion, or gift it to fans of kawaii-style collectibles. Nurseries, craft fair tables, and small handmade shops all suit this design equally well. Its compact size makes it travel-friendly, while the detailed shaping still holds up nicely for close-up display.
Why Beginners Will Enjoy This Pattern
Clear round-by-round instructions keep this project approachable even for first-time amigurumi makers tackling dimensional shaping. No joke, the limited color palette means fewer yarn changes and less confusion throughout the process. Felt details replace complicated embroidery entirely, letting newer crafters achieve a clean, professional-looking face without advanced stitching skills.
Tips and Tricks for Success
- Test felt eye placement with pins before committing to permanent glue
- Photograph each finished piece before assembly to plan spacing more accurately
- Keep spare stuffing nearby since ears and feet need only small amounts
- Block the head gently if rounds five through seven curl inward slightly
- Store leftover yarn scraps for quick repairs if seams loosen over time
Why This Crochet Pattern Is Trending
Kawaii-style characters continue dominating handmade marketplaces as collectors search for cute, giftable plush designs with genuine personality. Ngl, this particular pattern’s compact size and minimal color palette make it fast to produce and easy to sell in batches. Short-form video platforms have also boosted visibility, since quick assembly clips perform well with crafting audiences.
- Minimal yarn colors keep production costs low for small shop owners
- Compact size suits both display shelves and portable keychain-style accessories
- Recognizable kawaii aesthetics attract steady demand across gifting seasons
Conclusion
Building this plush rewards patience with a genuinely adorable result that suits both beginners and experienced makers alike. For real, the combination of simple shaping, minimal stuffing needs, and felt-based detailing keeps the entire process enjoyable from start to finish. Keep this pattern bookmarked, since it practically invites repeat makes in new yarn shades for an ever-growing kawaii collection.