Adorable Crochet Reindeer Amigurumi Pattern Festive Winter Toy
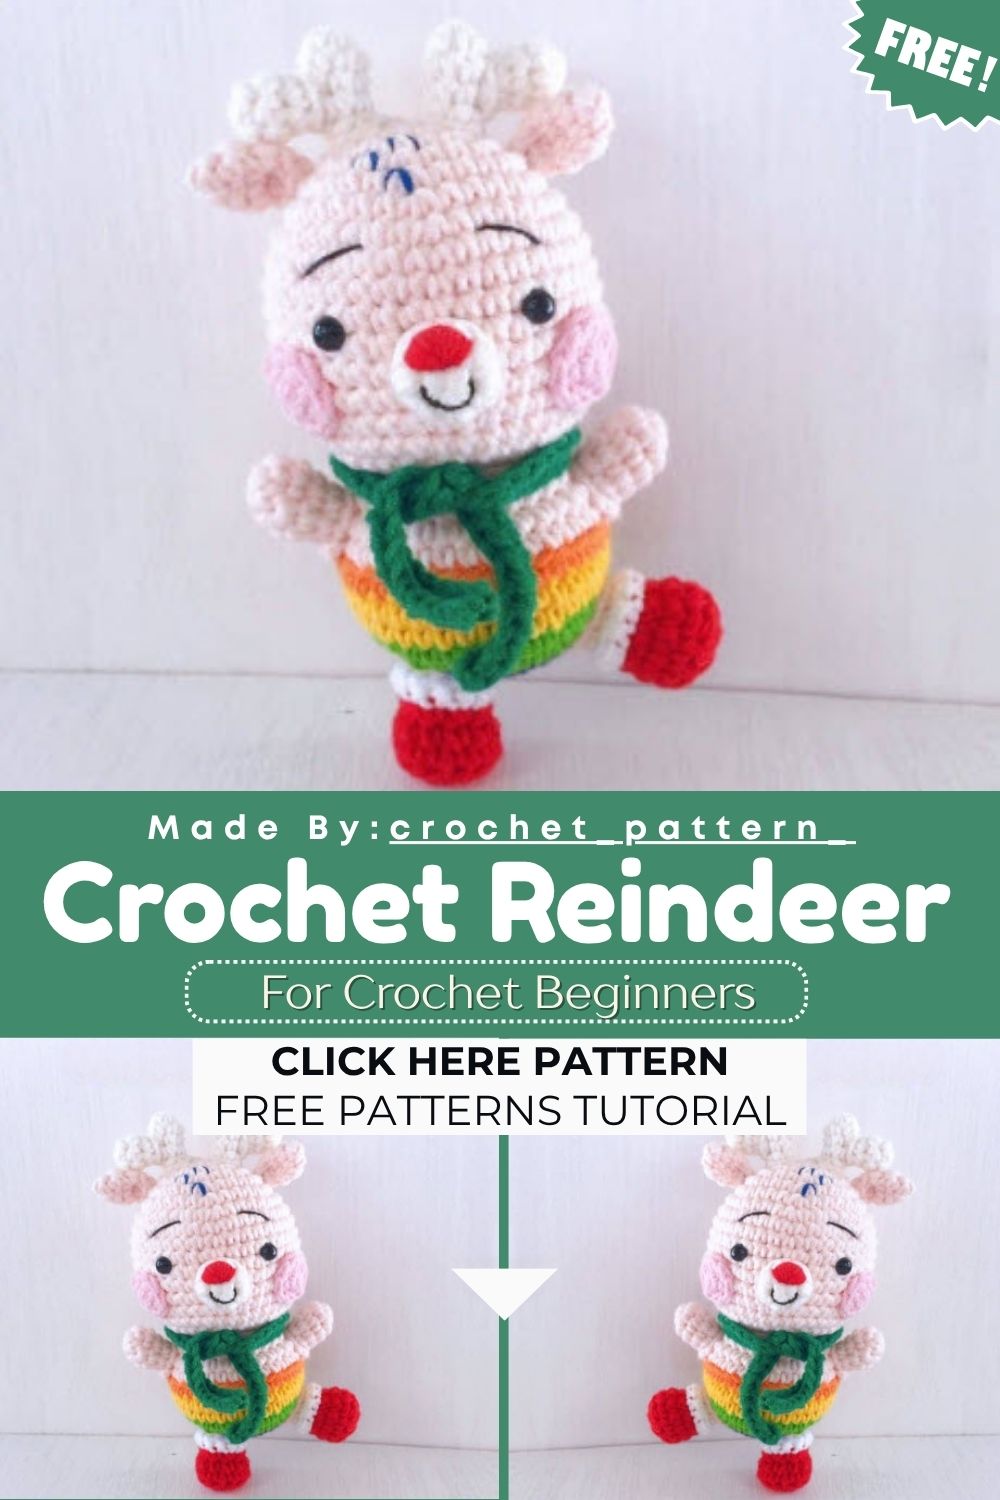
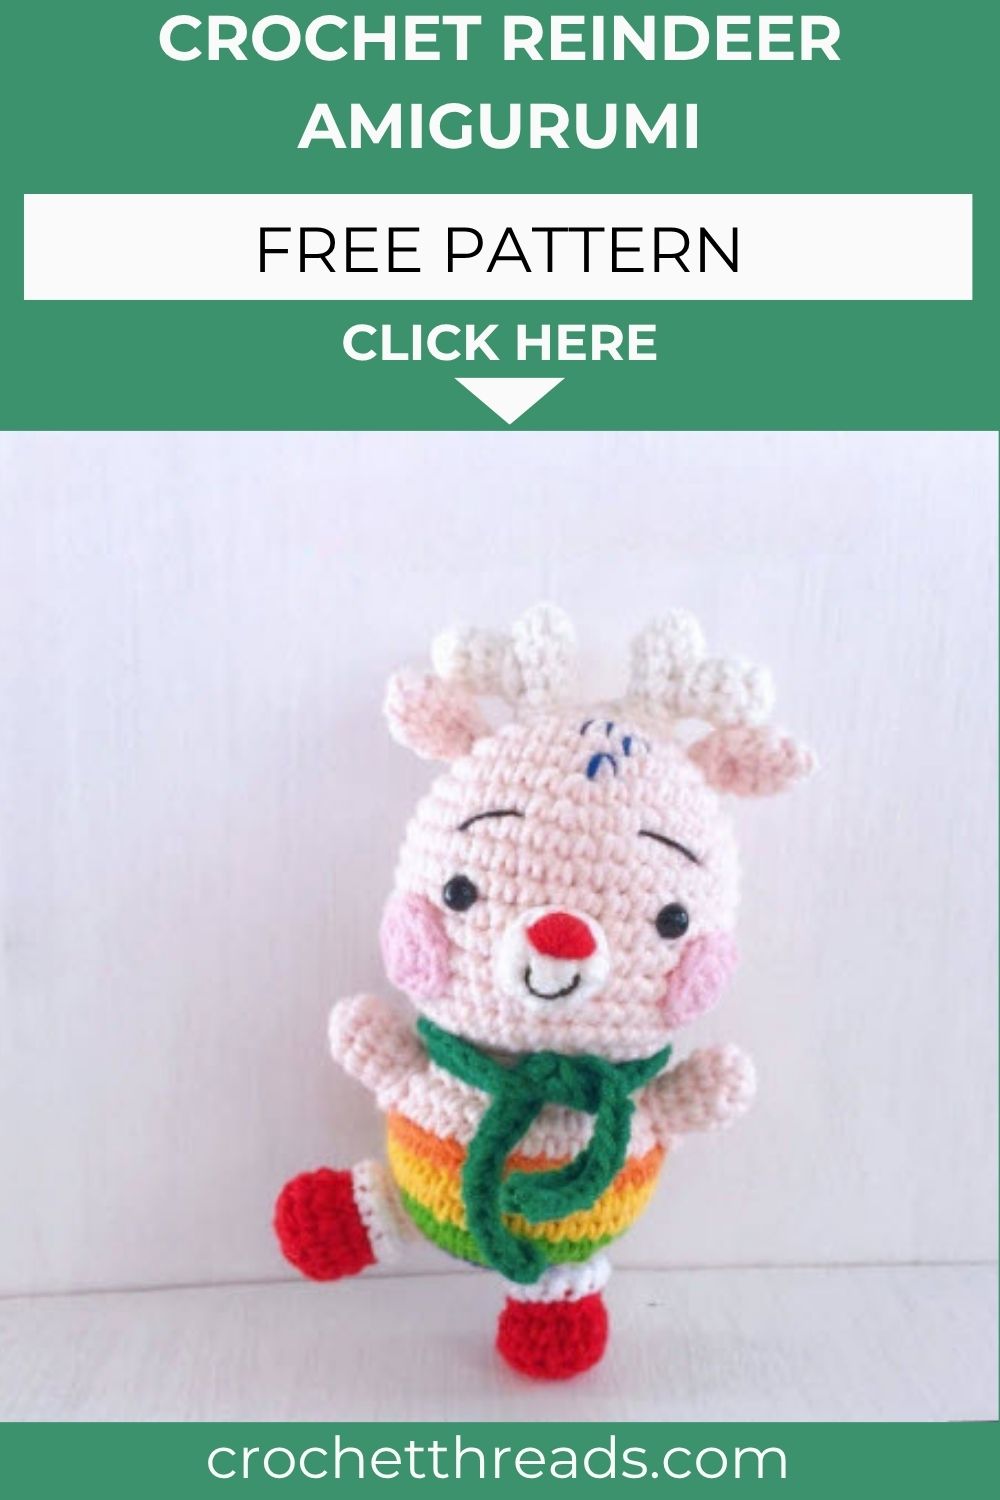
This little reindeer instantly becomes the center of attention among Christmas-inspired amigurumi projects, thanks to its irresistible charm. Made with soft yarn, this adorable amigurumi brings on festive vibes right away with its cozy scarf, tiny antlers, and rosy cheeks. It’s a perfect choice for Christmas decor, handmade gifts for kids, or a charming addition to any cozy winter living room ideas.
Crochet lovers will fall for this Crochet Reindeer Amigurumi Pattern instantly among winter projects. Made with soft DK yarn, the amigurumi brings a cheerful Christmas feel with its cozy scarf, tiny antlers, and friendly smile. It’s a great pick for shelf decor, a handmade gift, or a soft toy. Just follow the pattern rounds, and before long, your own festive reindeer will be ready.
Skill Level
This Crochet Reindeer Amigurumi Pattern suits confident beginners and intermediate crocheters who already know single crochet, increases, and invisible decreases well. Color changes and embroidery add challenge, though the shapes stay simple.
Pattern Overview
- A jointed-style amigurumi reindeer made from a head, body, two legs, two arms, a tail, and a wrapped scarf
- Antlers built from two stacked horn pieces for a branched, realistic look
- Blush-toned face with embroidered eyebrows, a red nose, and a stitched smile
- Blue embroidered spots decorate the head for a playful winter touch
- A forest green scarf wraps around the neck for the finishing festive detail
- Safety eyes and fiberfill stuffing give the toy a soft, huggable shape
Special Techniques
- Color changes: Several pieces switch yarn color mid-round, so carry or weave in unused strands as you go to avoid bulk
- BLO and FLO rounds: Working in the back loop only or front loop only creates a visible ridge, which shapes the leg cuffs and snow paws
- Invisible decrease: Used throughout the head, body, and legs for smooth, gap-free shaping
- Magic ring start: Every piece begins with a magic ring to keep the center tight and closed
- Embroidery detailing: The face and spots are added after assembly using embroidery thread, not crochet stitches
Materials and Tools
Gather the following before starting the reindeer.
Yarn: DK Light, in these colors:
- Red
- Blush
- Purple
- Sunshine
- Blue
- Spring Green
- Forest Green
- Snow
- Ivory
Embroidery thread: Red and Black
- 7mm Black safety eyes
- Fiberfill
- Pins
- Yarn needle
- Sewing needle
- Stitch Marker
- 2.75mm Crochet hook
- Scissors
Stitches and Abbreviations
(US Terminology)
Rnd – Round | Sc – Single crochet | Inc – Increase (2 single crochet in 1 stitch) | Dec – Invisible decrease | Slst – Slip Stitch | Sts – Stitches | Ch – Chain | BLO – Back Loop Only | FLO – Front Loop Only | (…) x = Repeat instructions in the round bracket for the indicated number of times | [ ] = number of stitches in each round/row
Instructions
Head (Blush)
- Rnd 1: 6 Sc in magic ring. [6]
- Rnd 2: (Inc) x 6. [12]
- Rnd 3: (1 Sc, Inc) x 6. [18]
- Rnd 4: (2 Sc, Inc) x 6. [24]
- Rnd 5: (3 Sc, Inc) x 6. [30]
- Rnd 6: (4 Sc, Inc) x 6. [36]
- Rnd 7: (8 Sc, Inc) x 4. [40]
- Rnd 8-15: 40 Sc (8 rounds). [40]
Insert safety eyes between round 10 and 11, 8 stitches apart. Start stuffing the head, continue as you crochet.
- Rnd 16: (8 Sc, Dec) x 4. [36]
- Rnd 17: (4 Sc, Dec) x 6. [30]
- Rnd 18: (3 Sc, Dec) x 6. [24]
- Rnd 19: (2 Sc, Dec) x 6. [18]
- Rnd 20: (1 Sc, Dec) x 6. [12]
- Rnd 21: (Dec) x 6. [6]
Fasten off; leaving long tail for closing. Thread the yarn end through a yarn needle. Insert the needle below the front loop of the 6 stitches, then pull through. Fasten, weave in, then cut the yarn.
Body (Start with Purple)
- Rnd 1: 6 Sc in magic ring. [6]
- Rnd 2: (Inc) x 6. [12]
Change to Blue.
- Rnd 3: (1 Sc, Inc) x 6. [18]
- Rnd 4: (2 Sc, Inc) x 6. [24]
Color to Spring Green.
- Rnd 5: (3 Sc, Inc) x 6. [30]
- Rnd 6: (4 Sc, Inc) x 6. [36]
to Sunshine.
- Rnd 7-8: 36 Sc (2 rounds). [36]
color to Tangerine.
- Rnd 9: 36 Sc. [36]
Change color to Blush.
- Rnd 10: BLO 36 Sc. [36]
- Rnd 11: 36 Sc. [36]
- Rnd 17: (4 Sc, Dec) x 6. [30]
- Rnd 18: (3 Sc, Dec) x 6. [24]
Fasten off, leaving enough tail for sewing. Stuff the body.
Legs (Make 2, Start with Red)
- Rnd 1: 6 Sc in magic ring. [6]
- Rnd 2: (Inc) x 6. [12]
- Rnd 3: BLO 12 Sc. [12]
- Rnd 4: 12 Sc. [12]
- Rnd 5: (2 Sc, Dec) x 3. [9]
Change color to Blush.
- Rnd 6: BLO 9 Sc. [9]
- Rnd 7: 9 Sc. [9]
Fasten off; leaving enough tail for sewing. Stuff the legs.
With Snow yarn, crochet in the FLO of round 6.
- Rnd 1: (2 Sc, Inc) x 3. [12]
Fasten off; weave in yarn ends.
Horn 1 (Make 2, Ivory)
- Rnd 1: 6 Sc in magic ring. [6]
- Rnd 2-4: 6 Sc (3 rounds). [6]
Fasten off; leaving enough tail for sewing. Stuff the horn.
Horn 2 (Make 2, Ivory)
- Rnd 1: 6 Sc in magic ring. [6]
- Rnd 2-5: 6 Sc (4 rounds). [6]
Fasten off; leaving enough tail for sewing. Stuff the horn.
Ears (Make 2, Blush)
- Rnd 1: 3 Sc in magic ring. [3]
- Rnd 2: (Inc) x 3. [6]
- Rnd 3: (1 Sc, Inc) x 3. [9]
- Rnd 4: 9 Sc. [9]
- Rnd 5: (1 Sc, Dec) x 3. [6]
Do not stuff the ears. Flatten and fold in half. 1 Sc on both sides. Fasten off; leaving enough tail for sewing.
Arms (Make 2, Blush)
- Rnd 1: 6 Sc in magic ring. [6]
- Rnd 2: (2 Sc, Inc) x 2. [8]
Fasten off; leaving enough tail for sewing. Stuff the arms.
Cheeks (Make 2, Pastel Pink)
- Rnd 1: 4 Sc in magic ring. [4]
- Rnd 2: (Inc) x 4. [8]
Fasten off; leaving enough tail for sewing.
Tail (Blush)
- Rnd 1: 3 Sc in magic ring. [3]
- Rnd 2: (Inc) x 3. [6]
- Rnd 3: (2 Sc, Inc) x 2. [8]
Fasten off; leaving enough tail for sewing. Stuff the tail.
Scarf (Forest Green)
Ch 55, insert hook in the 2nd ch from the hook and crochet along the foundation chain.
- Row 1: 54 Sc. [54]
Fasten off, weave in yarn ends.
Common Mistakes
- Skipping the safety eye placement guide, which throws off the whole face symmetry once the head is closed
- Forgetting to switch to BLO or FLO on the marked rounds, which flattens the ridge detail on the legs and paws
- Under-stuffing the head before closing round 21, leaving a soft dent at the top
- Losing track of color change rounds on the body, especially between Sunshine and Tangerine
- Sewing the horns on before checking that horn 1 and horn 2 are stacked in the right order
Customization and Variation
- Swap Red and Blue for a classic brown-and-white reindeer palette if you prefer a more traditional look
- Add a small jingle bell to the scarf for a bit of sound and sparkle
- Use a bigger hook and thicker yarn to scale the whole reindeer up into a nursery-sized plush
- Skip the scarf and add a tiny red nose highlight for a Rudolph-style variation
- Felt or embroider a small snowflake on the body instead of the blue spots for a different pattern
Assembly
- With black embroidery thread, sew eyebrows about 3 stitches long on round 8, 5 stitches apart.
- Sew the snout on rounds 11 to 13. With red embroidery thread, sew the nose. With black embroidery thread, sew the smile.
- Sew the cheeks on rounds 12 to 14.
- With blue embroidery thread, sew 3 spots on the head.
- Sew horn 1 to horn 2. Sew the horn onto the head on rounds 2 and 3.
- Sew the ears on round 5.
- Sew the body onto the head.
- Sew the arms in place.
- Sew the left leg on rounds 2 and 3, and the right leg on rounds 5 and 6.
- Sew the tail on rounds 5 and 6.
- Wrap the scarf around the neck.
Finishing Tips
- Pin every piece in place before sewing so you can check the reindeer’s balance and posture first
- Keep stitches small and tight when attaching limbs so no fiberfill peeks through
- Steam or lightly block the scarf before wrapping it, so it sits flat instead of curling
- Weave in every yarn tail twice through a few stitches to stop them from working loose later
- Brush the finished reindeer gently with your fingers to fluff the stitches and even out the shape
Gifting Ideas
- Tie the reindeer to a wrapped gift box as a handmade topper for the holidays
- Pair it with a matching scarf or hat for a coordinated kids’ gift set
- Add it to a stocking alongside hot cocoa packets for a cozy winter bundle
- Turn it into an ornament by sewing a small loop onto the back of the head
- Offer it as a teacher or classroom gift, since the pattern works up quickly in one sitting
Conclusion
This Crochet Reindeer Amigurumi Pattern is a quick, satisfying make for the winter season, blending simple shaping with a few fun embroidery details. Whether it ends up on a shelf, under the tree, or in a child’s arms, it is bound to become a favorite piece of handmade holiday decor.