Free Crochet Ripe Grape Shorts Pattern For Beginners
Leftover yarn finally finds a lovely purpose with this Crochet Ripe Grape Shorts Pattern, and the result looks far more refined than a typical stash-buster project. Bold color stripes come together in simple rows to create a charming striped look, making this great for beginners too since it skips complicated shaping. Anyone sitting on a pile of half-used yarn will find this an easy, satisfying way to turn it all into a useful, genuinely wearable pair.
Simple, repeating rows define this pattern from start to finish, with color changes doing most of the visual work. Two contrasting shades stripe across the fabric in a rhythm that feels playful without requiring any advanced stitch counting. This design suits scrap yarn projects, everyday summer wear, or a quick weekend build especially well.
Because the design leans on basic single crochet, new crocheters can focus entirely on color changes and consistent tension rather than learning unfamiliar stitches. Scrap yarn projects rarely feel this intentional, and that’s exactly what makes this one worth adding to a beginner’s project list.
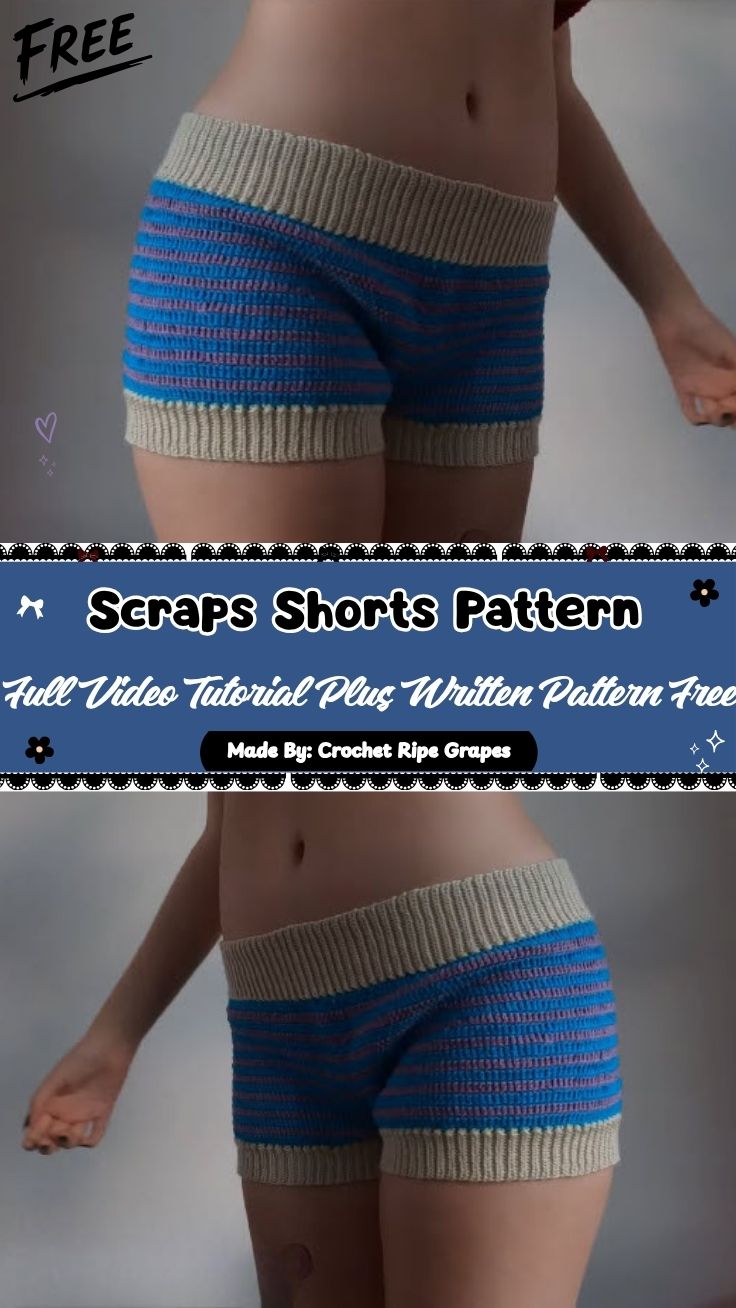
Project Details
- Skill Level: Beginner
- Finished Size: Customizable to fit; adjust chain length and row count for your measurements
- Estimated Time Required: 5–7 hours, depending on size and crochet speed
- Recommended Yarn Weight: Worsted weight (Medium, 4), any leftover scraps in coordinating weights
- Crochet Hook Size: 5.0mm, or size needed to achieve gauge
Materials Needed
- Worsted weight scrap yarn in two or more colors (purple and teal shown here)
- 5.0mm crochet hook
- Tapestry or yarn needle for joining and seaming
- Stitch markers to track color changes and row starts
- Scissors
Crochet Stitches & Techniques
- Slip Knot
- Chain Stitch (ch)
- Single Crochet (sc)
- Color Change (carrying or cutting yarn between stripes)
- Seaming (joining pieces together at the waist and sides)
- Fastening Off
Working single crochet in consistent stripes is genuinely beginner-friendly, though clean color transitions take a little practice before they start looking effortless.
Pattern Instructions
Step 1: Making the Slip Knot
Every stripe in this project traces back to one simple starting move. Loop your first color around itself, pull the working yarn through to form a slip knot, and slide it onto your hook snugly but not too tight. Getting this first loop comfortable to work with makes the following chain far easier to control.

Step 2: Starting the Color-Changing Chain
Chaining begins here, and this is often where the first stripe transition happens. Work your initial chain in one color, then switch to a second shade partway through, leaving a short tail to weave in later. Keeping tension even across the color switch prevents an awkward gap right where the new yarn joins in.
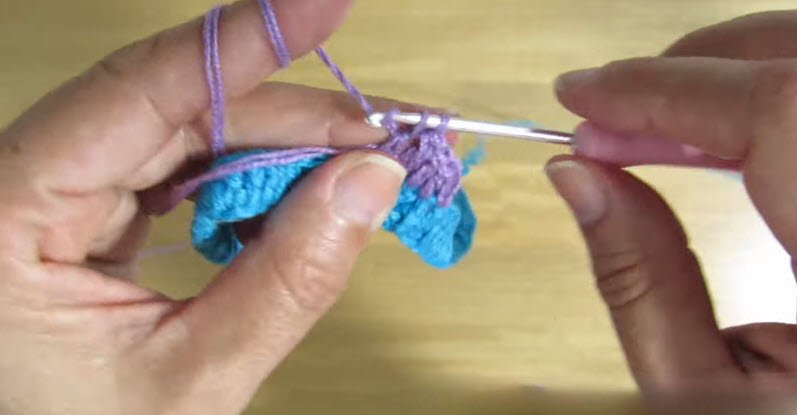
Step 3: Building the Striped Panel
Row after row, alternating colors at set intervals creates the bold striped fabric this pattern is known for. Work single crochet consistently across each row, switching colors at the end of a row for the cleanest transition line. Continue building the panel until it reaches the length needed for your shorts, checking width periodically against your intended size.
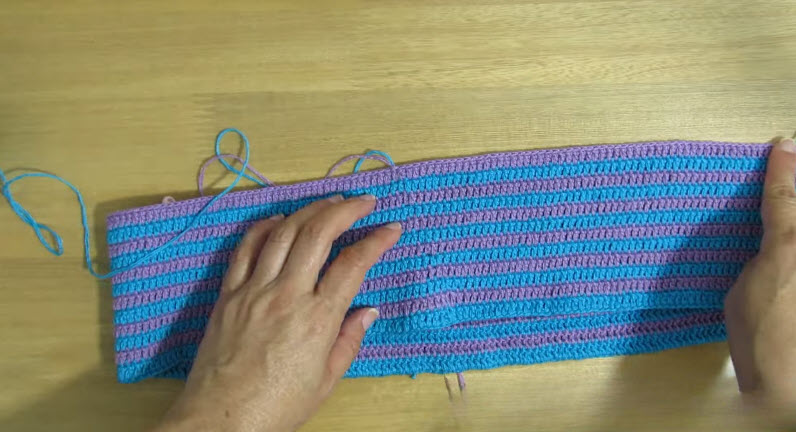
Step 4: Joining the Panels Together
Two finished striped panels come together at this stage, forming the basic shape of the shorts. Line up the stripes so they match across the seam, then work your hook through corresponding stitches to join the pieces securely. Take care to align the waist and leg openings evenly, since a mismatched seam becomes far more noticeable once the piece is finished and worn.
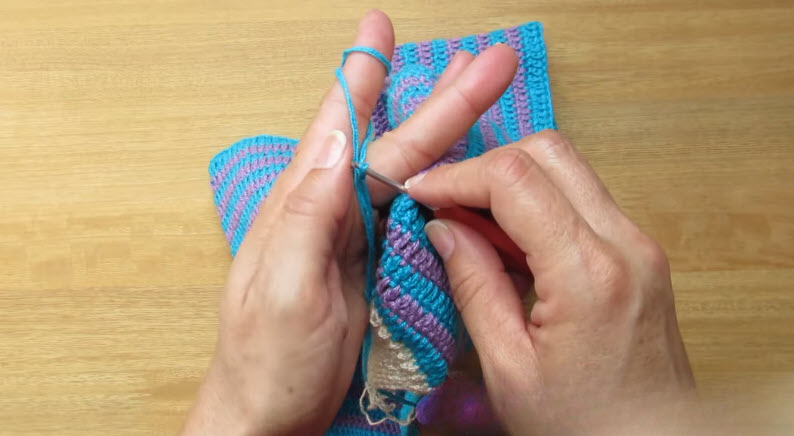
Final Assembly
With both panels joined, check that the waistband and leg openings sit evenly before securing all remaining seams. Weave in every yarn tail from each color change, working them into the wrong side so the stripes stay crisp on the outside. A light steam or gentle wash afterward helps the stitches settle and gives the shorts a smoother, more finished look.
Tips for Success
- Keep a consistent stitch count across every row so stripes stay aligned
- Cut and rejoin colors at the row’s end for the cleanest transition
- Save yarn tails until seaming, since they can help reinforce the join
- Match stripe patterns carefully when joining the two panels
- Block or lightly steam the finished shorts for a more even, polished fit
Personalization Ideas
Mix More Than Two Colors
Add a third or fourth color into the rotation for a more eclectic, rainbow-inspired stripe pattern.
Vary the Stripe Width
Work two or three rows per color instead of one for a bolder, chunkier stripe effect.
Add a Contrast Waistband
Finish the top edge in a solid neutral color to frame the stripes and add definition.
Turn It Into a Skirt
Skip the leg division and continue the panel as a single tube for an easy matching skirt.
Add Fringe or Tassels
A few tassels at the hem bring extra texture and a playful, finished touch.
Common Mistakes to Avoid
Carrying yarn sloppily between color changes is one of the most common beginner slip-ups, and it often leaves loose strands visible on the inside of the fabric. Losing track of row counts between color switches can throw off stripe symmetry, so counting carefully matters more than it might seem at first. Rushing the panel-joining step tends to create uneven seams, especially when stripes aren’t lined up before stitching begins. Skipping a gauge check before starting often leads to shorts that run too tight or too loose, since scrap yarn projects can vary slightly in thickness between skeins.
Frequently Asked Questions
Can I use more than two colors of scrap yarn?
Yes, this pattern works well with as many coordinating scraps as you have on hand, since the stripe pattern easily accommodates extra colors.
Why do my stripes look uneven?
This usually happens when row counts vary slightly between color changes, so keeping a written tally as you work helps keep things consistent.
How much yarn do I actually need?
Amounts vary by size, but most scrap-based versions use small partial skeins, making this an ideal project for using up leftovers rather than buying new yarn.
Can this Crochet Ripe Grape Shorts pattern be resized for different body types?
Yes, adjusting your foundation chain length and row count allows for a fully customized fit.
What’s the best way to hide yarn tails from multiple color changes?
Weaving each tail in immediately after finishing a stripe, rather than waiting until the end, keeps the inside tidy and prevents tangling.
Is this pattern suitable for someone who has never crocheted before?
Yes, since it relies mainly on single crochet and basic color changes, making it a solid choice for first-time garment makers.
How do I keep the waistband from feeling too loose?
Working a slightly tighter row at the very top edge, or adding a drawstring, helps the waistband hold its shape better.

Conclusion
Turning a pile of mismatched scraps into a finished pair of shorts feels like one of the most rewarding kinds of crochet projects out there. Take the color changes slowly, and the stripes will come together into something that looks intentional rather than random. Once this first pair is finished, it’s easy to see why so many crocheters keep a scrap bin specifically for projects like this one. Share your finished shorts and let others see how your color combination turned out.