Joyful Crochet Teddy Bear Amigurumi Free Pattern
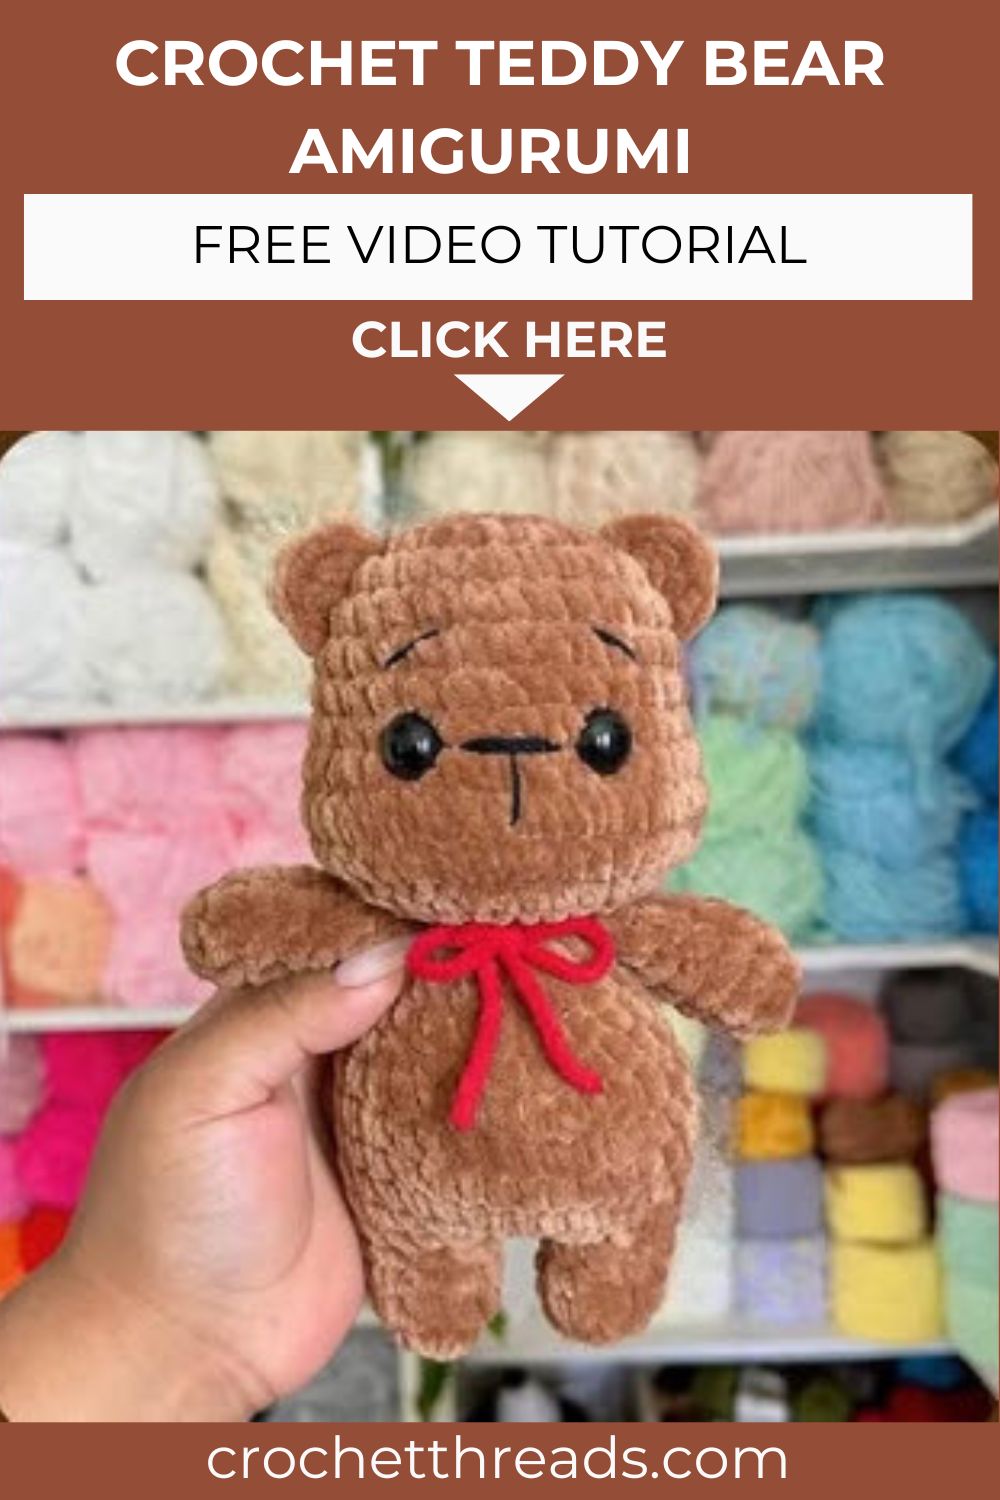
Fair warning, this little Crochet Teddy Bear Amigurumi might just steal your heart. He’s soft, he’s smiley, and he works up from one single ball of Vanilla Bean yarn. Ready to make one?
There’s a reason the Crochet Teddy Bear Amigurumi is the toy so many of us crochet first. It’s simple, it’s quick, and honestly, it forgives the odd miscounted stitch. This one keeps things gentle on your hands and ends up looking warm and classic in that creamy Vanilla Bean shade.
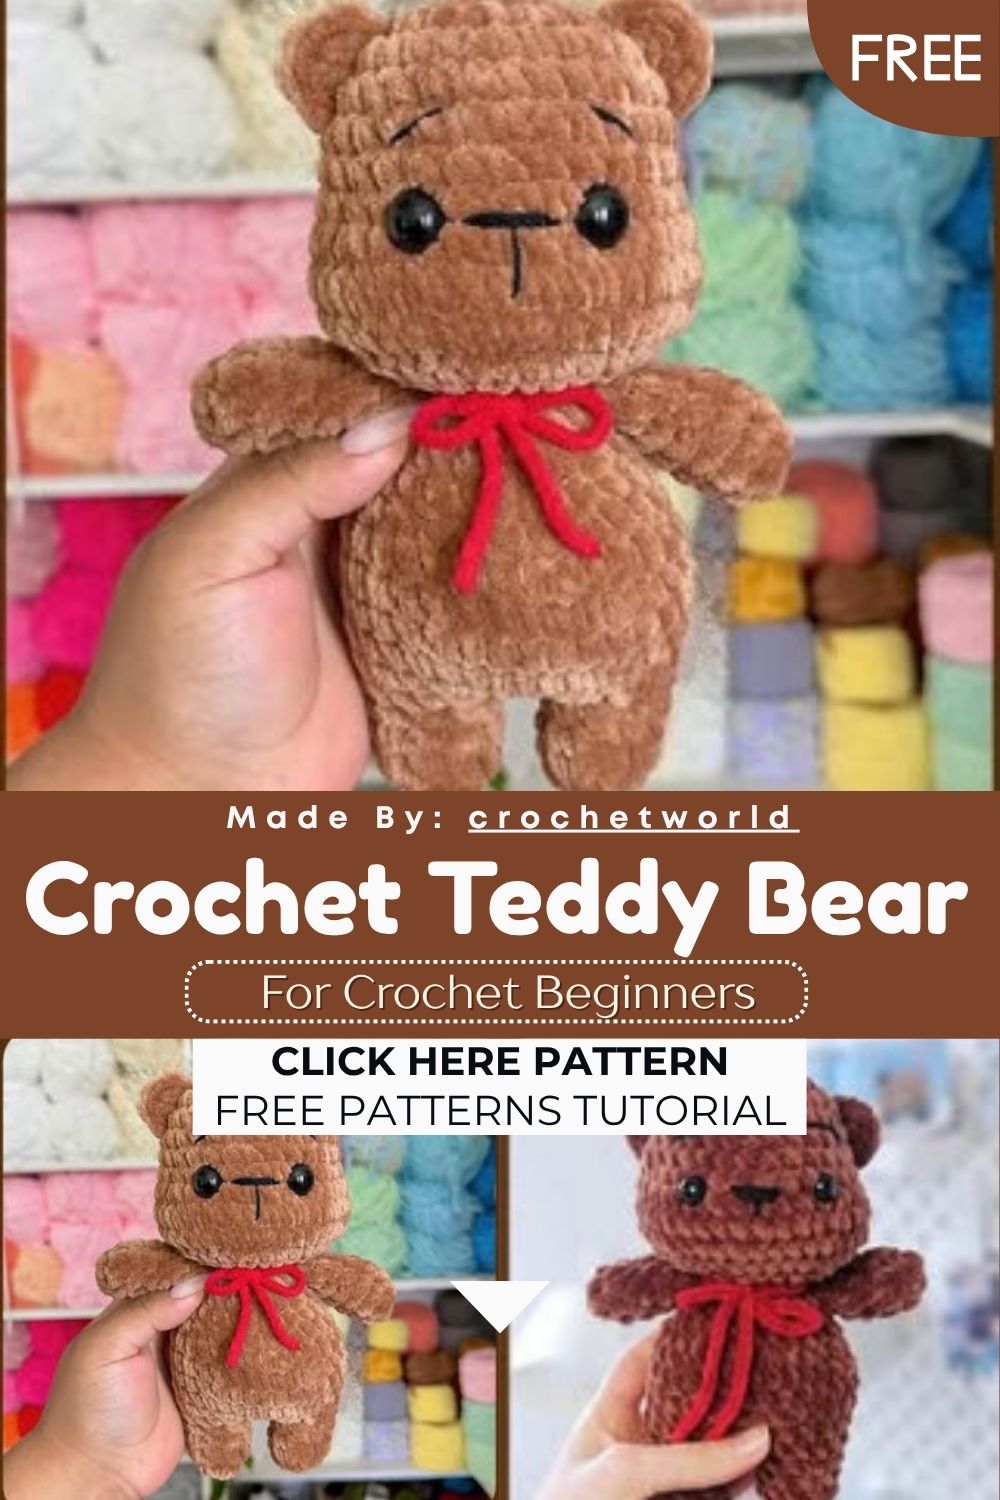
And here’s the fun part: this Crochet Teddy Bear Amigurumi bends to whatever you want. Swap the yarn color and you’ve basically made a different friend. Tie on a bowtie, stitch a heart over his chest, clip on a little name tag, and suddenly he belongs to one specific person. New crocheters pick up the core amigurumi skills along the way. Experienced ones can knock him out in a single evening. Win-win, really.
Skill Level
I’d call this an advanced beginner make. Comfortable with the basics and happy working in the round? Then you’ve got this. Nothing here is tricky once you get going.
Pattern Overview
Give this a quick read before you start. It’ll help the whole thing click together later.
- The bear comes in five pieces: a head, the legs and body worked as one, two arms, and two ears stitched right onto the head.
- You’ll crochet in a continuous spiral, which means hardly any joining or turning as you go.
- Keep a stitch marker parked in the first stitch of every round. That tiny habit saves a lot of frustration.
- Stuff each piece little by little while you close it, not in one rushed go at the end.
- Final size lands somewhere in the small-to-medium plushie range, though your tension and stuffing decide the exact height.
- Once the pieces are ready, a bit of sewing brings them together and your teddy is done.
Materials
- 10 mm safety eyes (size can shift a little depending on your hook and yarn)
- Big Twist Posh yarn in Vanilla Bean
- 4 mm crochet hook
- Polyfill or stuffing
- Stitch marker
- Darning needle
- Scissors
- Optional: a strip of ribbon for a bowtie
Abbreviations
- MC — magic circle
- SC — single crochet
- HDC — half double crochet
- DC — double crochet
- inc — increase (2 sc in the same stitch)
- dec — invisible decrease
- st — stitch
- slst — slip stitch
- ch — chain
- FO — fasten off
The Pattern
Head
- R1. 8 sc in MC (8)
- R2. 8 in (16)
- R3. (sc, inc) x8 (24)
- R4. (3 sc, inc) x6 (30)
- R5–R8. 30 sc for 4 rounds (30)
- R9. 8 sc, 4 inc, 6 sc, 4 inc, 8 sc (38)
- R10–R11. 38 sc for 2 rounds (38)
- R12. 8 sc, 4 dec, 6 sc, 4 dec, 8 sc (30)
- Pop the safety eyes in between R8 and R9, roughly 5 stitches apart.
- R13. (3 sc, dec) x6 (24)
- Start stuffing the head firmly now.
- R14. 12 dDec slst (12)
- Finish stuffing, then leave a long tail so you can sew the head onto the body later.
Legs + Body
- R1. 5 sc in MC (5)
- R2. 5 in (10)
- R3–R5. 10 sc for 3 rounds (10)
- Fasten off leg #1. Work R1–R5 again for leg #2, but this time don’t fasten off.
- Ch 1, then join to leg #1 with a sc. That sc counts as the first stitch of the next round.
- R6. 8 sc, 5 inc, 4 sc (27)
- R7. 10 sc, (sc, inc) x3, 11 sc (30)
- R8–R11. 30 sc for 4 rounds (30)
- Start stuffing the legs and body here.
- R12. (3 sc, dec) x6 (24)
- R13. 24 sc (24)
- R14. (2 sc, dec) x6 (18)
- Keep adding stuffing as you close up.
- R15. 18 sc (18)
- R16. (sc, dec) x6 (12)
- R17. 12 sc, FO
Arms (make 2)
- R1. 8 sc in MC (8)
- R2–R6. 8 sc for 5 rounds (8)
- Stuff lightly, only up to about row 4.
- R7. (2 sc, dec) x2 (6)
- Flatten the opening and work 3 sc across to close it. Leave a long tail for sewing.
Ears (worked onto the head)
- Right ear: Slide your hook in between R5 and R6 of the head. Slip stitch, then sc into that same spot. Work 4 DC into the same stitch, then slip stitch down into R3–R4. Fasten off and weave in the ends.
- Left ear: Slide your hook in between R3 and R4. Slip stitch, then work 4 DC into the same stitch. Sc and slip stitch up into R5–R6. Fasten off with a short tail, tie it off with the other loose end, and you’re set.
Special Techniques
A few moves here sound harder than they are. Once you’ve done them once, they’re second nature.
- The magic circle closes off the center of your first round ,so there’s no gap. That matters most on the face, where a hole would let the stuffing peek through. Not done one before? Practice the loop on its own first.
- The invisible decrease works through the front loops only, which hides those ugly little bumps a regular decrease leaves behind. On a round head, it’s the difference between smooth and lumpy.
- Joining the two legs trips people up at first. Just keep your tension snug right at the join so no gap opens between the legs, and the body builds up cleanly from there.
- Ears on the head spare you the bother of sewing two fiddly pieces. Go slow, and count your DC stitches both times so the ears come out matching.
Common Mistakes
Most of us slip up in the same places. Here’s what to keep an eye on.
- Forgetting the stitch marker. A spiral has no obvious starting point, so without that marker your counts wander off fast.
- Stuffing too late. Wait until a piece is almost shut and you simply can’t get the filling in right. Add it as you go.
- Rushing the eyes. Safety eyes lock in for good, so check the placement between R8 and R9 and the spacing before you press them home.
- Loose stitches. Amigurumi should feel firm. If white fluff shows through the gaps, drop down a hook size and try again.
- Mismatched ears. One ear tighter than the other and your bear looks a bit off. Count those DCs twice and you’re fine.
Assembly
Here’s where a heap of separate pieces finally becomes a bear.
- Sit the head on top of the body and pin it so it faces forward. Have a look from a couple of angles before you commit to sewing.
- Thread that long head tail onto your darning needle and stitch all the way around, then tuck the tail back inside to hide it.
- Pin the arms to either side, level with each other, and sew them on with their tails. A slight forward tilt makes him look huggable.
- Double-check that both ears are firmly attached and shaped the way you like.
- Adding a bowtie? Knot the ribbon under his chin and snip the ends tidy.
Important Remarks
A handful of last things that’ll save you a headache or two.
- Check the count in parentheses after each round. If your number matches, carry on with confidence.
- Thicker yarn and a bigger hook make a bigger bear, so feel free to size him up if you want a chunkier version.
- Making this for a baby? Skip the safety eyes and embroider the face instead. Small parts and little ones don’t mix.
- No blocking needed. Just nudge the bear into shape with your hands once he’s stuffed to round out any flat spots.
- Always leave your tails long enough actually to sew with. A stub of a tail is misery at the worst possible moment.
Conclusion
So there he is, a whole little Crochet Teddy Bear Amigurumi born from one ball of yarn and a relaxed afternoon. The lovely thing about amigurumi is that every bear turns out slightly different, so yours will have its own quiet character. Set him on a shelf, wrap him up for someone special, or hand him to a kid who’ll drag him everywhere. Take it round by round, don’t chase perfection, and just enjoy the rhythm of it. Happy crocheting, and may your yarn always outlast your hook.