Adorable Crochet Wallet Card Holder Step-by-Step Pattern
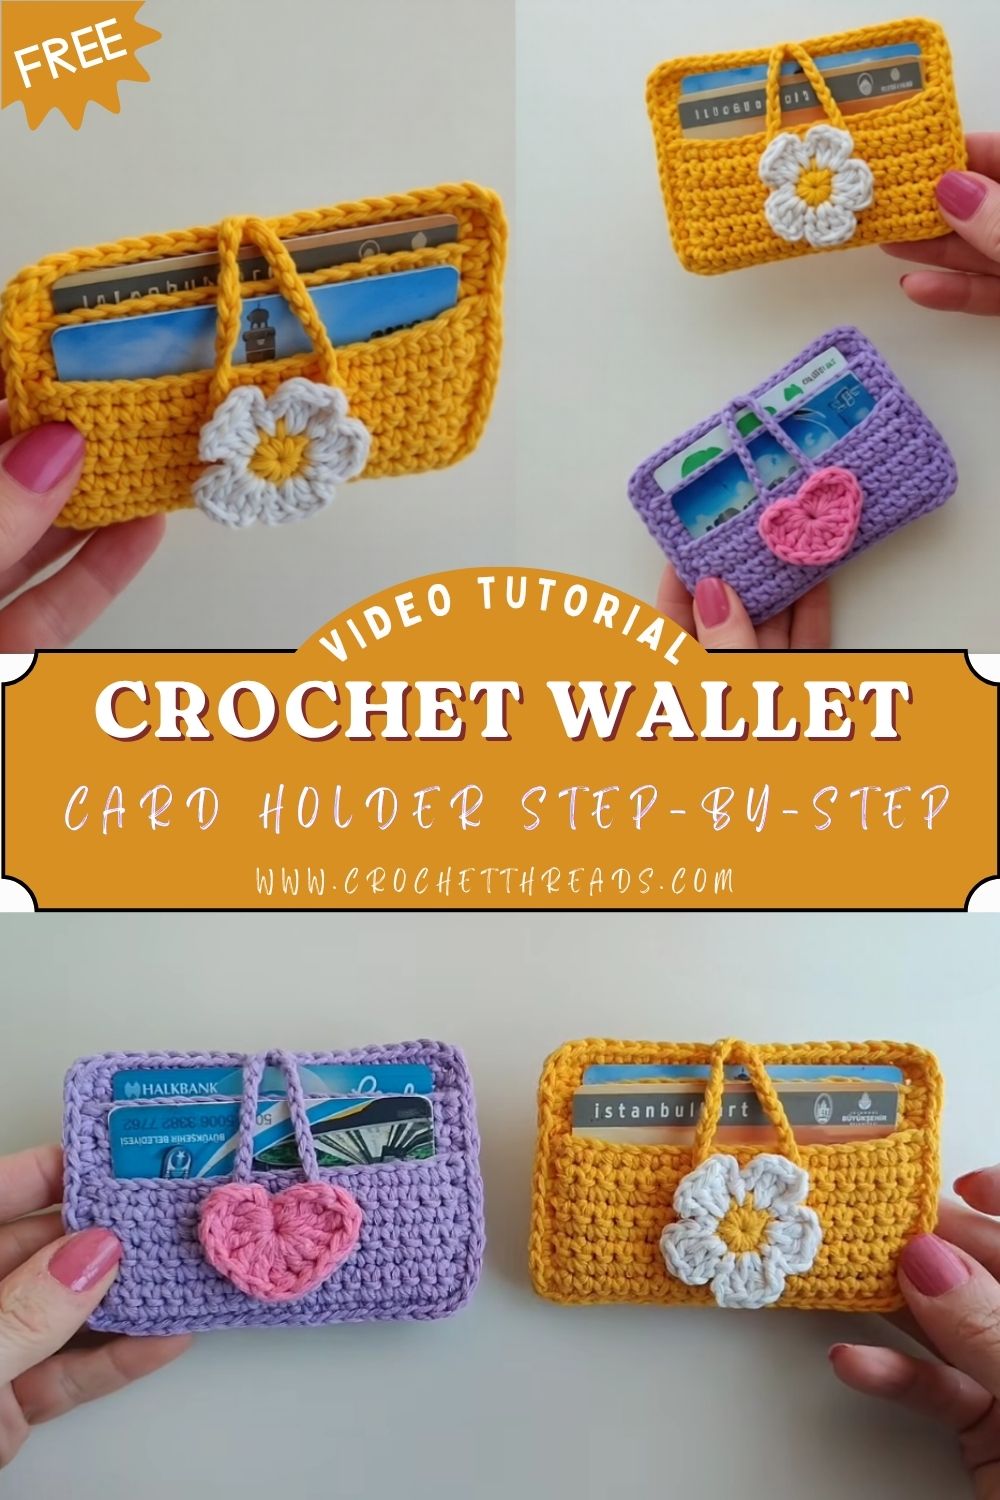
Want a small handmade accessory that is both practical and pretty? This Adorable Crochet Card Holder Wallet is small, useful, and perfect for using up leftover yarn. It fits in your pocket, holds your essential cards, and shows off your handmade skills. This guide walks you through every step, from picking your materials to adding the finishing touches.
If you have been searching for an easy crochet wallet pattern that does not eat up all your yarn stash, this project is exactly what you need. This crochet card holder is special because it is quick to finish, budget-friendly, and small enough to carry anywhere without adding bulk. It is ideal for anyone who wants a handmade crochet card holder for daily use, as a gift, or simply to practice new stitching skills while creating something truly useful.
What Is a Crochet Card Holder Wallet?
A crochet card holder wallet is a compact pouch made with basic stitches, designed to hold a few cards, cash, or a small ID. It is smaller than a full wallet, which makes it faster to finish and easier to carry in a bag, pocket, or even a coat sleeve.
This little accessory has become popular because it combines practicality with creativity. It also makes a thoughtful, budget-friendly handmade gift for friends and family.
Skill Level
This pattern is rated Beginner to Easy Intermediate. If you know how to make a single crochet stitch and a slip stitch, you can complete this project in an afternoon. It is also a great choice for someone who has finished a few simple projects and wants to try something a little more structured.
Materials and Tools You Will Need
Before you start, gather the following supplies so your project goes smoothly:
- Medium-weight cotton yarn (cotton holds its shape better than acrylic for wallets)
- A crochet hook sized to match your yarn (usually a 3.5mm to 4mm hook works well)
- Scissors
- A yarn needle for weaving in ends
- Stitch markers (optional, but helpful for keeping track of rounds)
- A button, snap closure, or short strip of hook-and-loop fastener
- Measuring tape or ruler
- Fabric lining (optional, for extra durability)
Cotton yarn is recommended because it is sturdy and holds up well to daily use, unlike softer yarns that may stretch out of shape over time.
Key Techniques Used in This Pattern
A card holder wallet is a simple project, but a few techniques make the final result look neat and professional:
Single Crochet (sc)
This is the main stitch used throughout the body of the wallet. It creates a tight, dense fabric that holds cards securely without gaps.
Slip Stitch (sl st)
Used to join rounds and to create a clean, finished edge.
Increasing and Decreasing
These techniques help shape the base of the wallet and taper the edges for a polished look.
Working in Rows vs. Rounds
Some versions of this pattern are worked flat in rows and folded, while others are worked in the round for a seamless pouch. Both methods are covered here so you can choose what suits you best.
Step-by-Step Guide
Step 1: Prepare Your Materials
Wind your yarn into a manageable ball if it isn’t already, and pick a hook size that gives you a firm, tight fabric. A looser fabric will not hold cards well, so it is better to size down if you are unsure.
Step 2: Create the Base
Start with a foundation chain of about 16 to 18 stitches, depending on how wide you want your wallet to be. This will form the bottom edge of your pouch.
- Chain the desired number of stitches.
- Turn your work and single crochet into the second chain from the hook.
- Continue single crocheting across the row.
Step 3: Build the Body
Once your base row is complete, continue working single crochet rows back and forth. This forms the main body of the wallet.
- Keep your tension even so the fabric stays flat.
- Work until the piece measures about 3.5 to 4 inches tall, which is enough to hold standard-sized cards.
- Count your stitches at the end of each row to make sure you have not accidentally added or dropped any.
Step 4: Fold and Shape
Fold your rectangle in half to see how the pouch will look. This helps you decide where the top flap should start.
- Mark the midpoint with a stitch marker.
- If you want a flap that folds over the top, continue working a few extra rows on one side only, tapering the width slightly with a few decrease stitches.
Step 5: Assemble the Sides
With your rectangle folded in half, join the side seams using a slip stitch or a simple whip stitch with your yarn needle.
- Line up the edges carefully before stitching.
- Work slowly along each side to keep the seam even and hidden.
- Leave the top open so you can insert cards.
Step 6: Add the Closure
A closure keeps your cards safely inside the wallet.
- Sew a button onto the front flap and create a small chain loop on the body to act as a buttonhole.
- Alternatively, attach a snap closure or a small strip of hook-and-loop fastener for a quick, no-fuss option.
Step 7: Weave In Ends and Finish
Use your yarn needle to weave in any loose ends on the inside of the wallet so they don’t show or unravel.
- Trim excess yarn close to the fabric.
- Check the wallet from every angle to make sure no ends are visible.
Step 8: Optional Lining
For a wallet that lasts longer and holds its shape better, add a fabric lining.
- Cut a piece of fabric slightly smaller than the inside of the wallet.
- Hand-stitch it in place along the edges before closing the side seams completely.
Helpful Tips for Beginners
- Always work a small test swatch first to check your gauge and stitch tightness.
- Use stitch markers to keep track of your rows, especially if you get interrupted often.
- Choose a smaller hook size than you normally would for garments, since a tighter fabric works better for wallets.
- Practice your seam stitching on scrap fabric before joining the final pieces.
- Keep your project in a small bag so you can work on it during short breaks.
Common Mistakes to Avoid
- Using yarn that is too thin or too stretchy: This can cause the wallet to lose its shape after a few uses.
- Skipping the gauge swatch: This often leads to a wallet that is too small or too large for standard cards.
- Uneven tension: Switching between tight and loose stitches creates a lumpy, unprofessional look.
- Forgetting to count stitches: Missing a stitch can shift your shape and make the sides uneven.
- Rushing the seam: A messy seam is one of the most noticeable mistakes on a finished wallet, so take your time here.
Customization Ideas and Variations
- Add pockets: Create an extra inner pocket for coins or small receipts.
- Try color-blocking: Use two or three colors in stripes for a bold, modern look.
- Personalize with initials: Add a small embroidered letter or a tiny appliqué.
- Change the closure style: Try a drawstring tie instead of a button for a different look.
- Make it a set: Create a matching keychain or coin pouch using the same stitch pattern.
Frequently Asked Questions
1. How long does it take to make a crochet card holder wallet?
Most beginners can finish this project in about 2 to 4 hours, depending on experience and the size of the wallet.
2. What is the best yarn for a card holder wallet?
Cotton yarn is the top choice because it is sturdy, holds its shape, and resists stretching better than acrylic or wool blends.
3. Can I make this wallet without a lining?
Yes, a lining is optional. Many people skip it for a simpler, faster project, though it does add extra durability.
4. How many cards can this wallet hold?
A standard-sized wallet made with this pattern usually holds three to five cards comfortably.
5. What hook size works best for a firm fabric?
A hook one size smaller than what is recommended for your yarn weight usually creates the tight fabric needed for a sturdy wallet.
6. Can I sell wallets made from this pattern?
Many crafters do sell handmade items like this, though it’s always good to check that you’re following the terms of the original pattern source before selling finished pieces.
Conclusion
A crochet card holder wallet is a small project with a big payoff. It is quick to make, uses minimal materials, and results in a practical accessory you will actually use every day. Whether you keep it simple with a single color or get creative with stripes and personal touches, this pattern is flexible enough for any skill level. Grab your hook and a small ball of cotton yarn, and give this project a try. You might just find your new favorite quick-make gift idea.