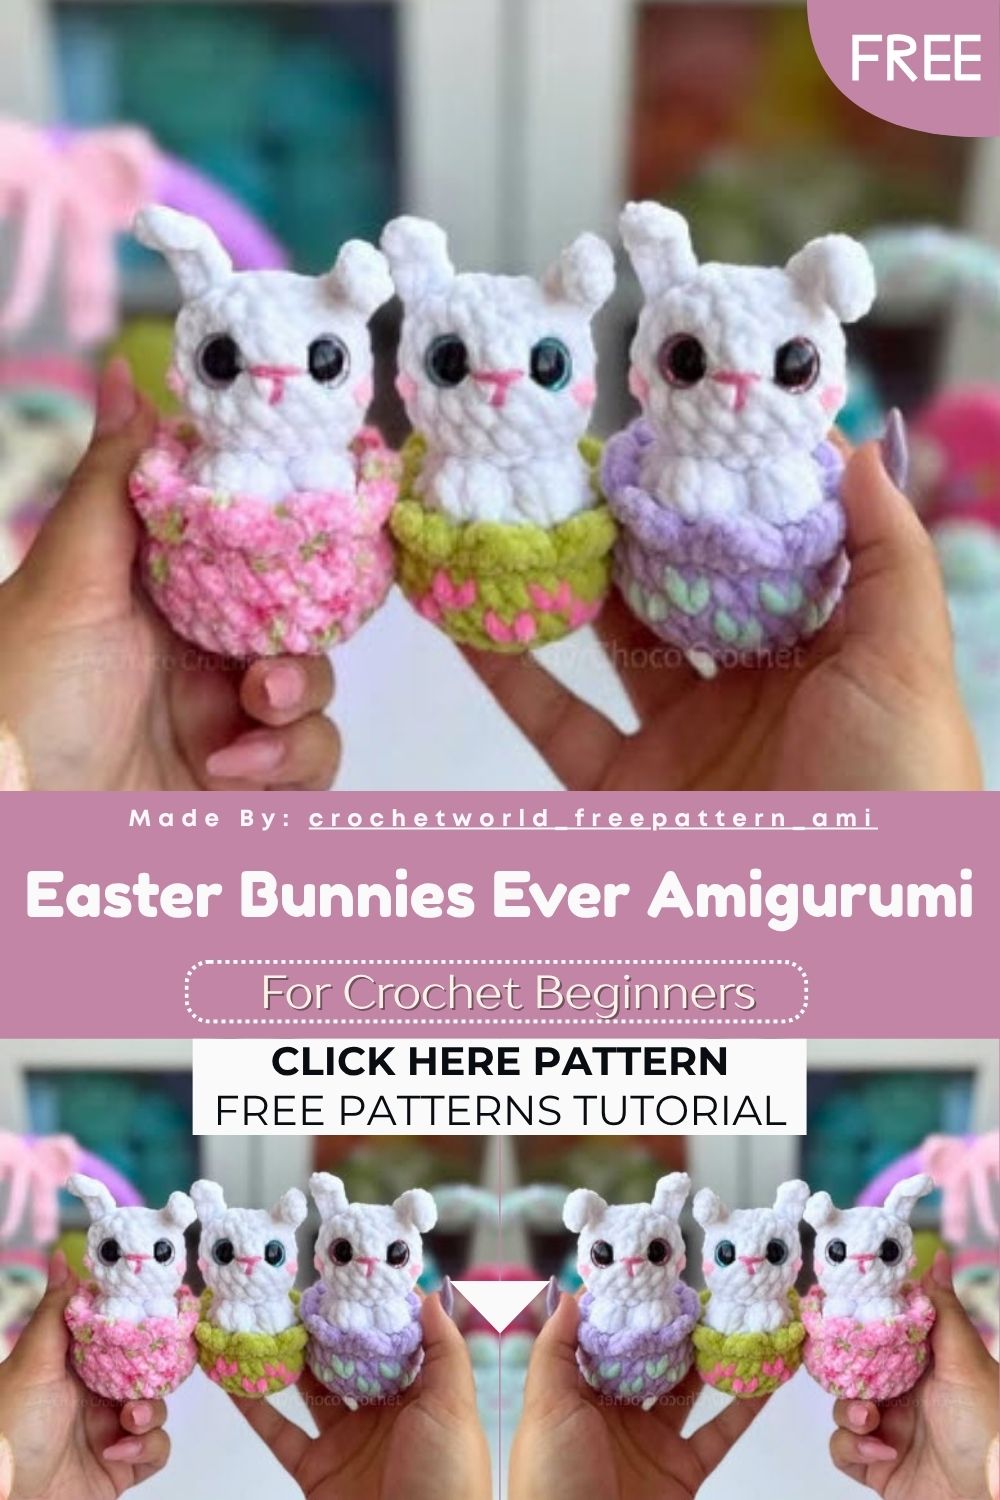
Free Crochet Easter Bunnies Ever Amigurumi Pattern
This hatching bunny might just be one of the cutest crochet projects of the season. Just imagine a tiny rabbit peeking out of an egg, and the best part is that it requires no sewing at all. This Free Crochet Easter Bunnies amigurumi pattern is quick, beginner-friendly, and surprisingly fun.
So what exactly makes this little hatchling bunny so special? It’s the no-sew design. You build the egg, switch colors, and the bunny just grows right out of the top all in one piece. Work it up in any colors you fancy, from soft pinks to baby blues. Seriously, once you get going, you won’t want to make just one.
Pattern Overview
- This is a fully no-sew amigurumi the egg and bunny are crocheted as one continuous piece, so there’s nothing to stitch together at the end.
- You start with the egg color, build the rounded shell, then change color and shape the bunny’s head straight out of it.
- A neat hdc-and-chain border worked into round 7 forms that zig-zag eggshell “crack” around the middle.
- The arms aren’t separate pieces they’re bobble stitches popped right into round 9. Smart and seamless.
- Both ears are surface-crocheted onto the head with a simple chain-and-sc, then knotted and tucked away.
- Color is totally up to you: any egg shade, any bunny shade. Mix and match for a whole basket of them.
Skill Level
This one’s a true beginner project. If you can manage a magic ring, single crochet, and basic color changes, you’ll breeze right through it. The bobble-stitch arms add charm.
Materials
- Yarn: weight 6 super bulky
- Crochet hook: 4.5 mm (or the size recommended for your chosen yarn)
- Safety eyes: 12 mm
- Stuffing (fiber filling)
- Pink acrylic yarn (for cheeks and hearts)
- Stitch marker, scissors, tapestry needle
Abbreviations
- Mr.: Magic ring
- sc: single crochet
- dec: decrease (invisible decrease front loops of 2 stitches together)
- inc: increase (make 2 sc into one stitch)
- fo: fasten off
- slst: slip stitch
- ch: chain
- sts: stitches
- blo: back loops only
- flo: front loops only
- hdc: half double crochet
- bo: bobble stitch (Bo-4dc)
- cc: change color
- ( ): number of stitches at the end of each round
This Free Crochet Easter Bunnies pattern is worked in continuous rounds and written in US terminology.
Special Techniques
A few small techniques give this bunny all its personality, so here’s what to know going in:
- Bobble stitch (Bo-4dc): Worked in round 9 to form the little arms. You make four partial double crochets into one stitch and close them together so they bunch up into a raised bobble.
- BLO and FLO rounds: Round 8 works in back loops only to create the lip where the bunny meets the egg, and round 11 works in front loops only to flare the head back out.
- The eggshell trim: Working (hdc, ch1, hdc) clusters with slip stitches between them along the free front loops of round 7 gives you that pointy, cracked-shell edge.
- No-sew construction: Because the bunny grows out of the egg in continuous rounds, you’ll only ever weave in ends no seaming body parts together.
- Surface ears: Pull up a loop directly on the head, chain, work back down, and slip stitch to anchor. No sewing just knot and hide.
The Pattern
Hatchling Bunny
Keep a stitch marker handy to track your rounds. Begin with your egg color and make a magic ring.
- R1: 8sc into mr (8)
- R2: 8 in (16)
- R3: (sc, inc) x8 (24)
- R4–7: 24sc around for 4 rounds (24)
- R8: cc to bunny color, work in blo; (2sc, dec) x6 (18). (Pic 1) Mark the first front loop of R7 with a stitch marker. (Pic 2)
- R9: (sc, dec) x2, Bo4dc, dec, Bo4dc, dec, (sc, dec) x2 (12). Start stuffing.
- R10: (2sc, dec) x3 (9) (Pics 3–4)
- R11: work in flo; 9inc (18)
- R12–15: 18sc around for 4 rounds (18)
Embroider the nose between rounds 14 and 15. (Pic 5) Insert the safety eyes between rounds 14 and 15, 4 sts apart.
- R16: (sc, dec) x6 (12)
- R17: 6dec (6)
Slst into the next stitch. Fasten off and leave a long tail. Thread the tail through the front loops of the remaining stitches with a yarn needle, then pull tight to close. (Pic 6)
Eggshell Trim
Insert your hook into the first front loop of round 7, pull up a loop in egg color, and chain 1. (Pic 1)
[(hdc, ch1, hdc into same stitch), 2slst] x7, then (hdc, ch1, hdc into same stitch), slst. (Pic 2)
Slst into the first stitch. Fo and weave in the ends. (Pic 3)
Left Ear
Insert your hook between rounds 15 and 16, and pull up a loop. (Pic 1) Chain 6, then starting in the second chain from your hook, work 5sc. (Pic 2) Slst between rounds 16 and 17. Bring both yarn ends out through the same stitch on the head, tie a knot, and hide the knot inside.
Right Ear
Insert your hook between rounds 16 and 17, and pull up a loop. Chain 6, then starting in the second chain from your hook, work 5sc. Slst between rounds 15 and 16. (Pic 3) Bring both yarn ends out through the same stitch on the head, tie a knot, and hide the knot inside. (Pic 4)
Embroider the cheeks below the eyes, and a few little hearts on the egg.
Assembly
Since the body is no-sew, “assembly” here is really just finishing and adding the face:
- Once round 17 closes the head, weave the tail through the front loops and pull tight to seal the top.
- Work the eggshell trim into the marked front loops of round 7 to frame the bunny in its cracked egg.
- Embroider the nose between rounds 14 and 15, then set the 12 mm safety eyes in place 4 stitches apart.
- Surface-crochet the left ear between rounds 15–16, slip-stitching it down between 16–17, then knot and hide the ends.
- Add the right ear the same way, attaching it between rounds 16–17 and anchoring between 15–16.
- Finish with the pink details: little cheeks just below the eyes and a few tiny hearts dotted across the egg.
Common Mistakes
A handful of spots trip people up, so keep an eye out:
- Stuffing too late. Start packing the egg at round 9, before the opening narrows. Wait too long and you can’t reach back in.
- Missing the round 7 marker. You need that free front loop later for the eggshell trim, so mark it the moment round 8 tells you to.
- Working the bobbles too loosely. Keep them snug, or the arms flop instead of standing out as cute little nubs.
- Spacing the eyes unevenly. They sit between rounds 14 and 15, exactly 4 stitches apart. Eyeball it and they’ll end up crooked.
- Pulling the eggshell clusters too tightly. Those (hdc, ch1, hdc) points should fan out tight tension flattens the crack effect.
- Mixing up the ear placement. The left and right ears attach at slightly different rows, so double-check the rounds for each one.
- Forgetting to adjust for your yarn. The Free Crochet Easter Bunnies pattern is yarn-flexible, but a thinner yarn means a smaller, looser hatchling, so tweak your tension.
Conclusion
And just like that, you’ve got a tiny Free Crochet Easter Bunnies peeking out of its egg. For real, this is one of those makes that looks fiddly but comes together way faster than you’d think and the no-sew part is a total game-changer. Make a pastel one, a bright one, a whole Easter basket of them. They’re great for gifts, baskets, or just brightening up a shelf. So grab your hook, pick two happy colors, and give it a go. You’ll be charmed, promise.