Free Crochet Popsicle Keychain Amigurumi Pattern
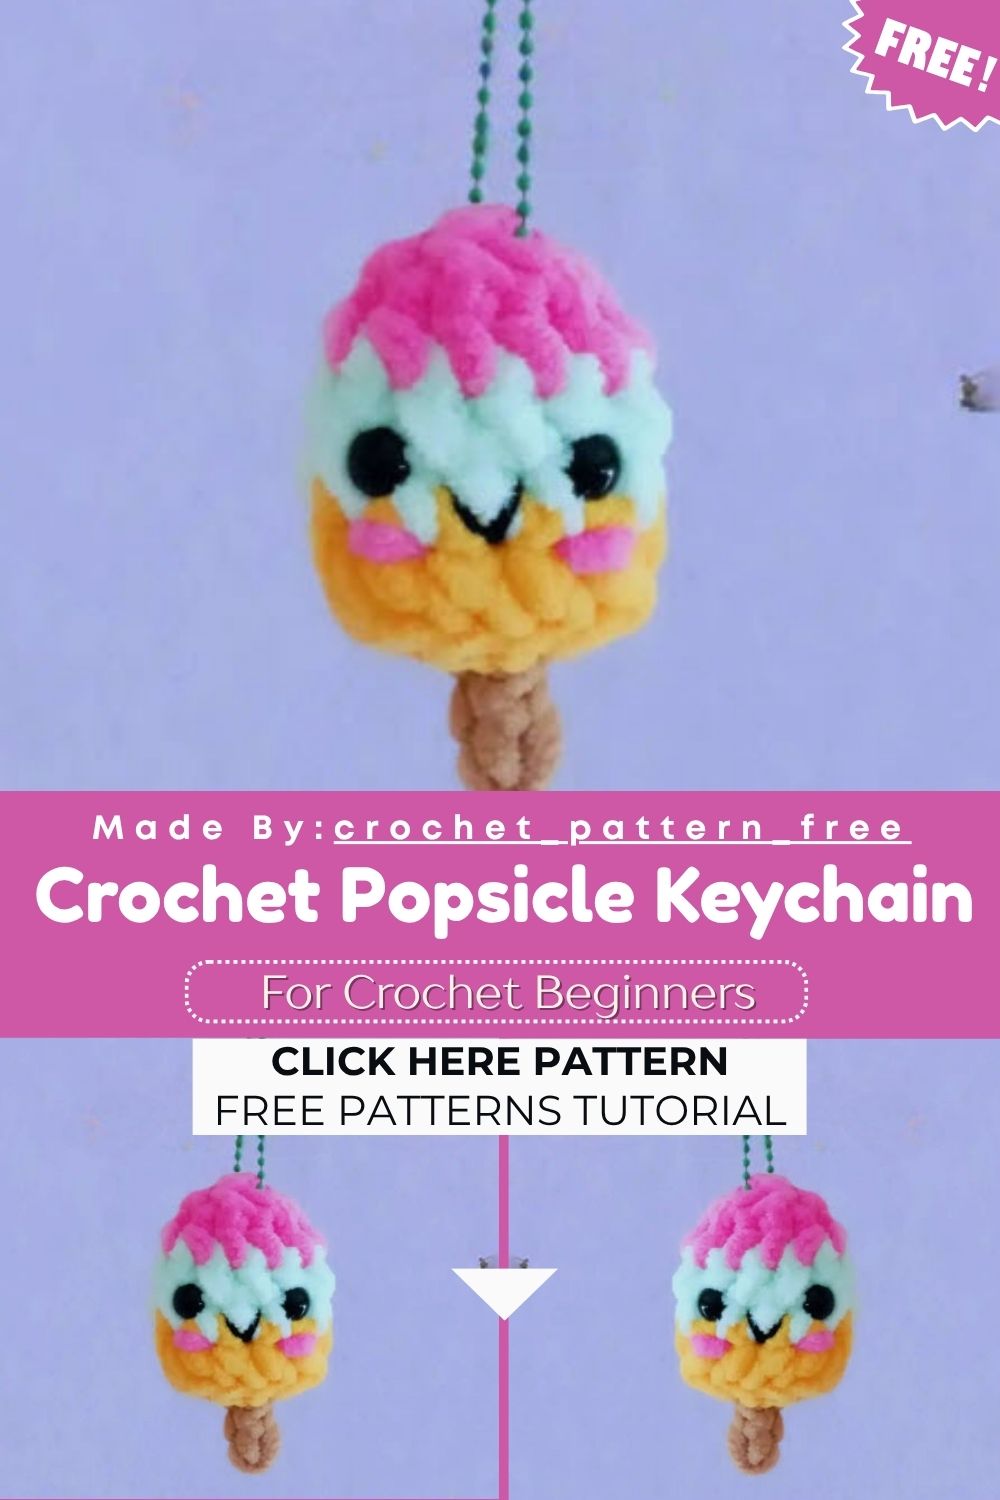
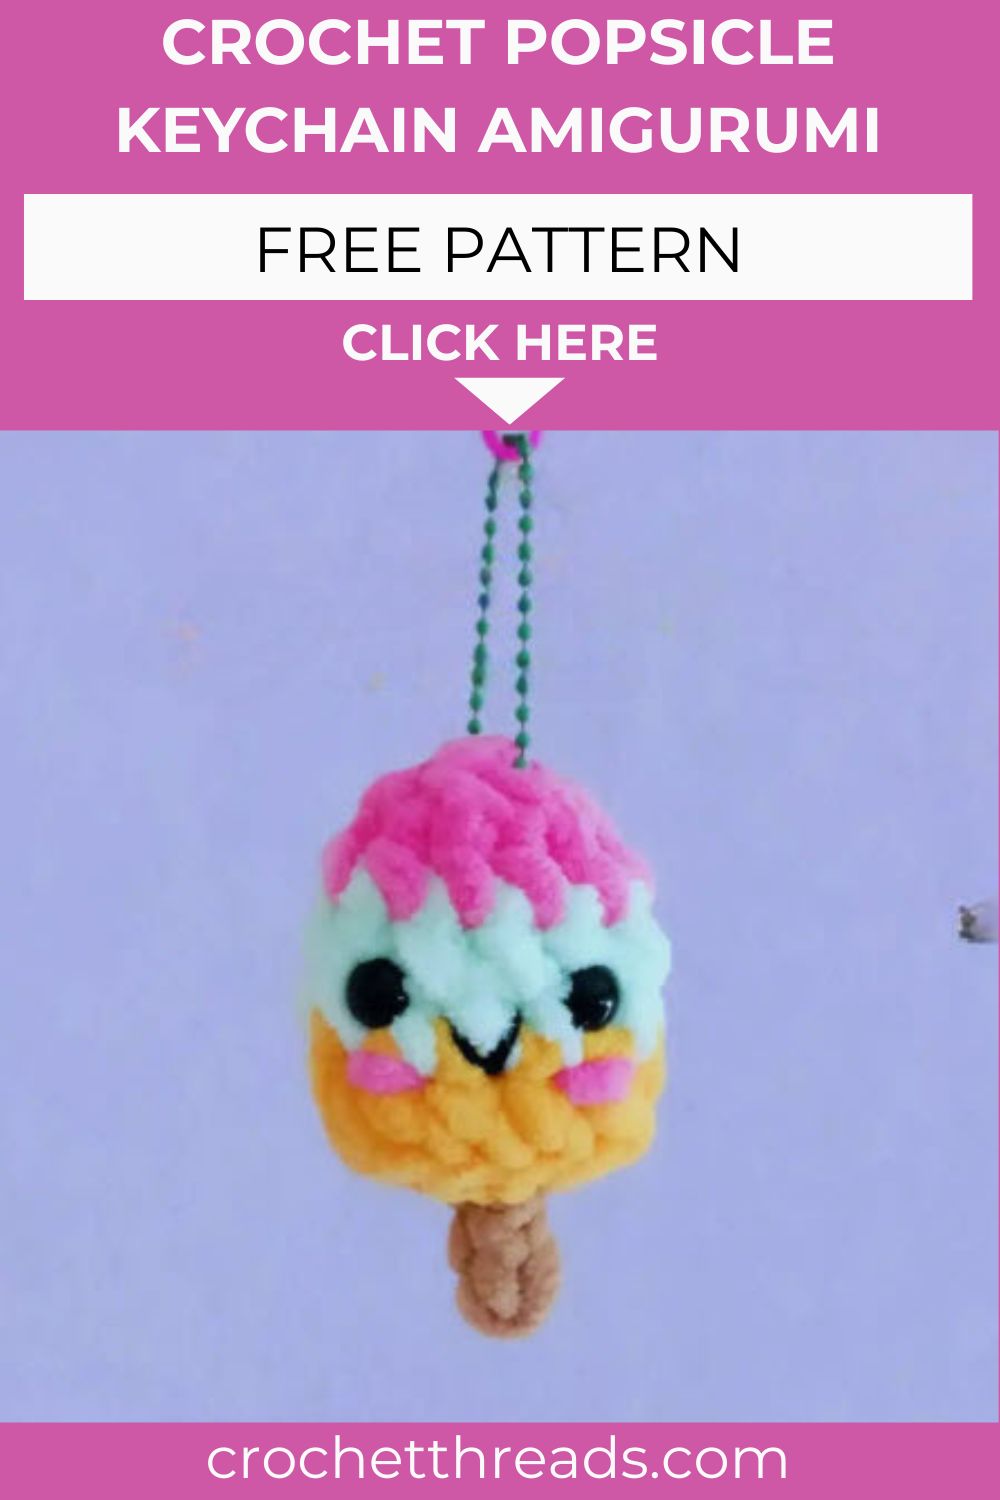
Summer-inspired crochet projects always bring a sense of joy, and this Free Crochet Popsicle Keychain Amigurumi is one of them. With its colorful and charming shape, this tiny keychain instantly adds a splash of summer to any bag, keys, or carabiner. Made quickly with super bulky yarn, this project is easy even for beginners, and proves to be a great choice for a last-minute handmade gift or a cute little accessory.
Trust me, this Free Crochet Popsicle Keychain Amigurumi Pattern is the kind of project that disappears from your hook in one relaxed afternoon. Four bold yarn colors stack together to build a striped popsicle body, finished off with safety eyes, a stitched mouth, and a tiny stick. Beginners can finish it, gift it, or sell it at craft fairs without stress. Grab your hook and start this sweet pattern now.
Free Crochet Popsicle Keychain
Skill Level
Beginner-friendly, no joke. You only need single crochet, decreases, and one color change. No complicated shaping, just steady rounds and simple stuffing, approachable even for a first free Crochet Popsicle Keychain amigurumi project.
Pattern Overview
- The body starts as a flat oval base worked from a foundation chain, giving the popsicle its signature rounded-bottom shape instead of a typical round base.
- Four yarn colors are stacked in single crochet rounds to create the classic striped popsicle look that this pattern is named for.
- Safety eyes get placed low on the body, between specific rounds, giving the popsicle a friendly cartoon face rather than a flat, plain surface.
- A quick decrease round closes the top before stuffing is finished and the opening gets sewn shut with a yarn needle.
- A small crocheted stick is added afterward, anchored into the center bottom of the popsicle body for balance and shape.
- The whole amigurumi finishes at a compact size, roughly palm-sized once stuffed, ideal for keychains, bag charms, or zipper pulls.
- Super bulky yarn keeps the project quick, since fewer stitches are needed compared to a worsted weight version of the same design.
- The finished piece works equally well hung from a backpack, clipped to a diaper bag, or gifted as a small stocking filler.
- Because the design uses only basic stitches from start to finish, it also makes a solid teaching pattern for anyone introducing a friend to amigurumi.
Special Techniques
- Working in the back loop only (BLO) on round two creates a subtle ridge, separating the base from the striped body above it, and this detail is easy to miss if you rush.
- Color changes happen at the start of a new round, keeping stripe lines clean and avoiding messy jogs where colors overlap unevenly.
- The oval base uses a chain-six start rather than a magic ring, which keeps the bottom flat and stable for a keychain that needs to sit right when it hangs.
- Eye placement between two rounds, spaced evenly apart, keeps the finished face centered and symmetrical, so take a moment to double-check spacing before pushing the posts through.
- The stick uses a short chain and slip stitches worked back along itself, giving it a slim, rigid look without extra bulk or floppiness.
- Since super bulky yarn hides small tension differences well, this pattern forgives slightly uneven stitches better than a fine-weight amigurumi would.
- A stitch marker on the first stitch of each round keeps track of where rounds begin, which matters more here since there is no continuous spiral join.
Common Mistakes
- Skipping the BLO instruction on round two, which flattens the ridge detail and makes the base blend into the body instead of standing apart.
- Placing the safety eyes too high or too low, throwing off the popsicle’s friendly expression and making the face look uneven.
- Forgetting to stuff firmly before closing the decrease round, leaving the head area soft and floppy once it gets handled.
- Joining new colors mid-round instead of at the start, which creates a visible color jog in the stripes that stands out.
- Rushing the stick attachment, which can leave it loose or crooked once the keychain hardware gets added and used regularly.
- Using a hook smaller than 6.5mm with super bulky yarn, which tightens gauge and makes the finished popsicle noticeably smaller than intended.
- Leaving safety eye backs loose instead of pressing them fully in place, which can let an eye pop out over time.
Assembly
- Weave in all loose ends from each color change before starting assembly, so nothing tangles during stuffing or peeks out later.
- Insert the 10mm safety eyes between rounds three and four, spacing them three stitches apart, and secure the backs firmly from the inside.
- Stuff the body evenly while working, adding small amounts as you go rather than packing it all in at the end.
- Complete the decrease round, finish stuffing, then fasten off and sew the top hole closed with a yarn needle and matching yarn.
- Join color D at the bottom center, chain three, and work the slip stitches back along the chain to form the stick.
- Weave the loose stick yarn end down through the body for a hidden, secure finish rather than tying it off on the surface.
- Embroider a small curved mouth using black yarn once the stick is secured in place, keeping the stitches short and even.
- Give the whole piece a final light shaping squeeze, smoothing the stuffing so no lumps show through the outer stripes.
- Attach a keyring or lobster clasp to the top of the popsicle once everything is dry and secure, checking that it hangs straight.
Important Remarks
- Always keep small parts like safety eyes away from children under three years old, since this is a choking hazard.
- A 6.5mm hook paired with super bulky yarn keeps stitches tight enough to prevent stuffing from showing through the finished fabric.
- Swap yarn colors freely to match different popsicle flavors, seasonal palettes, or personal color preferences without changing the stitch count.
- Store finished keychains away from direct sunlight for long periods, since bright dyed yarn colors can fade slightly over time.
- If gifting to a child, double-check that all hardware and safety eyes are secured tightly before handing it over.
Abbreviations
MR – Magic Ring | R – Round | CH – Chain | SC – Single Crochet | ST/STS – Stitch/Stitches | SLST – Slip Stitch | INC – Increase | DEC – Decrease | BLO – Back Loop Only
Materials
First, gather everything in one place so your workflow stays smooth.
- Yarn: Super bulky weight (4 colors)
- Popsicle base/stripe color (Color A): 20 g (approx. 15–18 m)
- Second stripe color (Color B): 15 g (approx. 10–12 m)
- Third stripe color (Color C): 15 g (approx. 10–12 m)
- Stick color (Color D): 5 g (approx. 5–6 m)
- Black medium weight yarn: small amount, for embroidering the mouth
- Crochet hook: 6.5 mm; size up slightly if your tension runs tight
- Safety eyes: 10 mm (1 pair)
- Stitch marker: 1, for tracking the start of each round
- Stuffing: 20–25 g polyester fiberfill
- Tapestry/yarn needle: for seaming and weaving in ends
- Scissors
Instructions
- Work from bottom to top. With Color A, chain 6 and start working in the 2nd chain from the hook.
- Round 1: Work 4 sc, then 3 sc in the 5th chain from the hook. Continue working on the other side of the foundation chain: 3 sc, then 2 sc in the last stitch. (12 sts)
- Round 2: Working in the back loop only (BLO), sc around. (12 sts)
- Round 3: Switch to Color B. Sc around. (12 sts)
- Round 4: Sc around. (12 sts)
- Round 5: Switch to Color C. Sc around. (12 sts)
- Place the safety eyes between Round 3 and Round 4, spacing them 3 stitches apart. Start stuffing the body firmly.
- Round 6: Dec x 6. (6 sts)
- Finish stuffing, fasten off, and sew the hole closed using a yarn needle.
- Stick (Color D): Make a slip knot and join the yarn on the bottom of the popsicle, in the center.
- Chain 3, starting in the 2nd chain from the hook, make 2 slip stitches, then slip stitch in the same stitch you joined.
- Weave in the loose end of the stick yarn down through the body to finish securely.
- Embroider a small mouth using black yarn once the stick is in place.
- Attach a keyring or lobster clasp to the top of the popsicle to complete the keychain.
Conclusion
Real talk, this free Crochet Popsicle Keychain is one of those patterns that looks far more impressive than the effort it actually takes. It stitches up quickly and uses minimal materials. It also makes a fun handmade accessory for summer bags, keys, or party favors. The striped design is a great stash-buster project because leftover super bulky scraps work perfectly for the color changes. Once you finish one, you will probably want a whole rainbow set. Keep them on your hook queue and make one for every friend on your gift list this season.