Crochet Bow & Bell Christmas Pattern for Everyday Wear
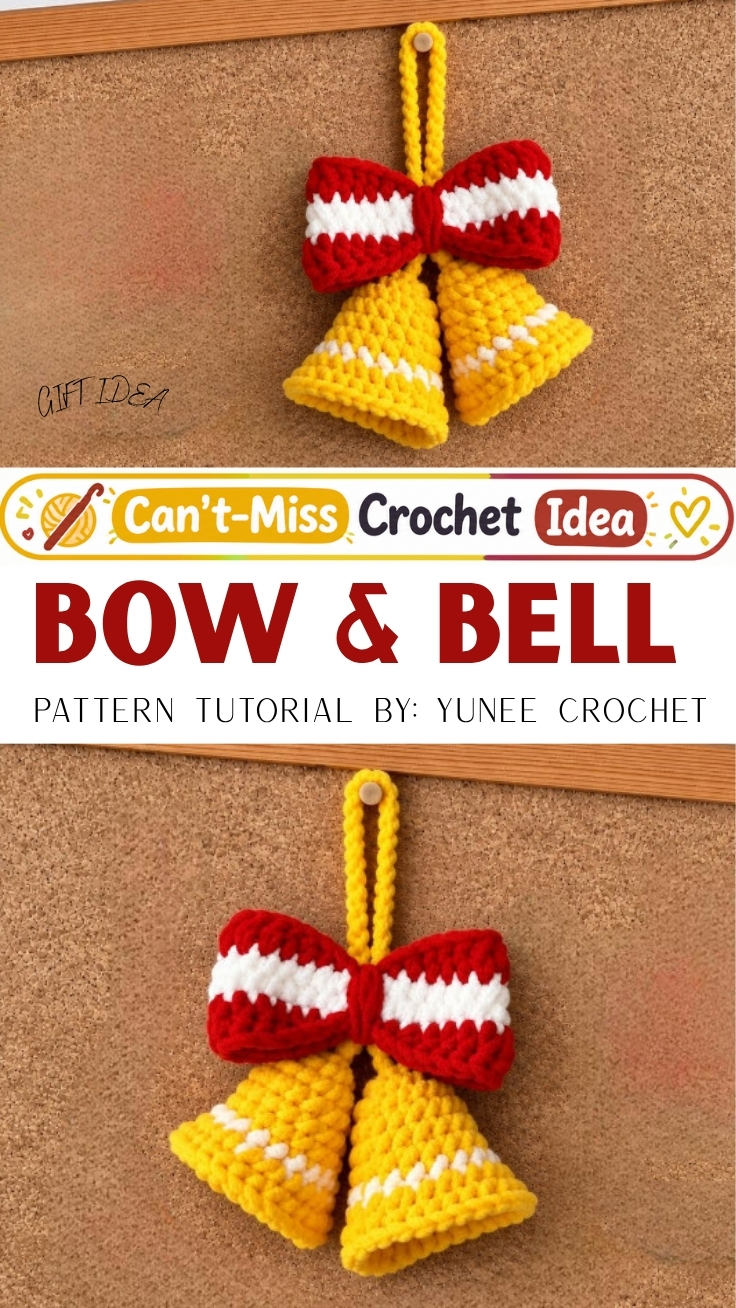
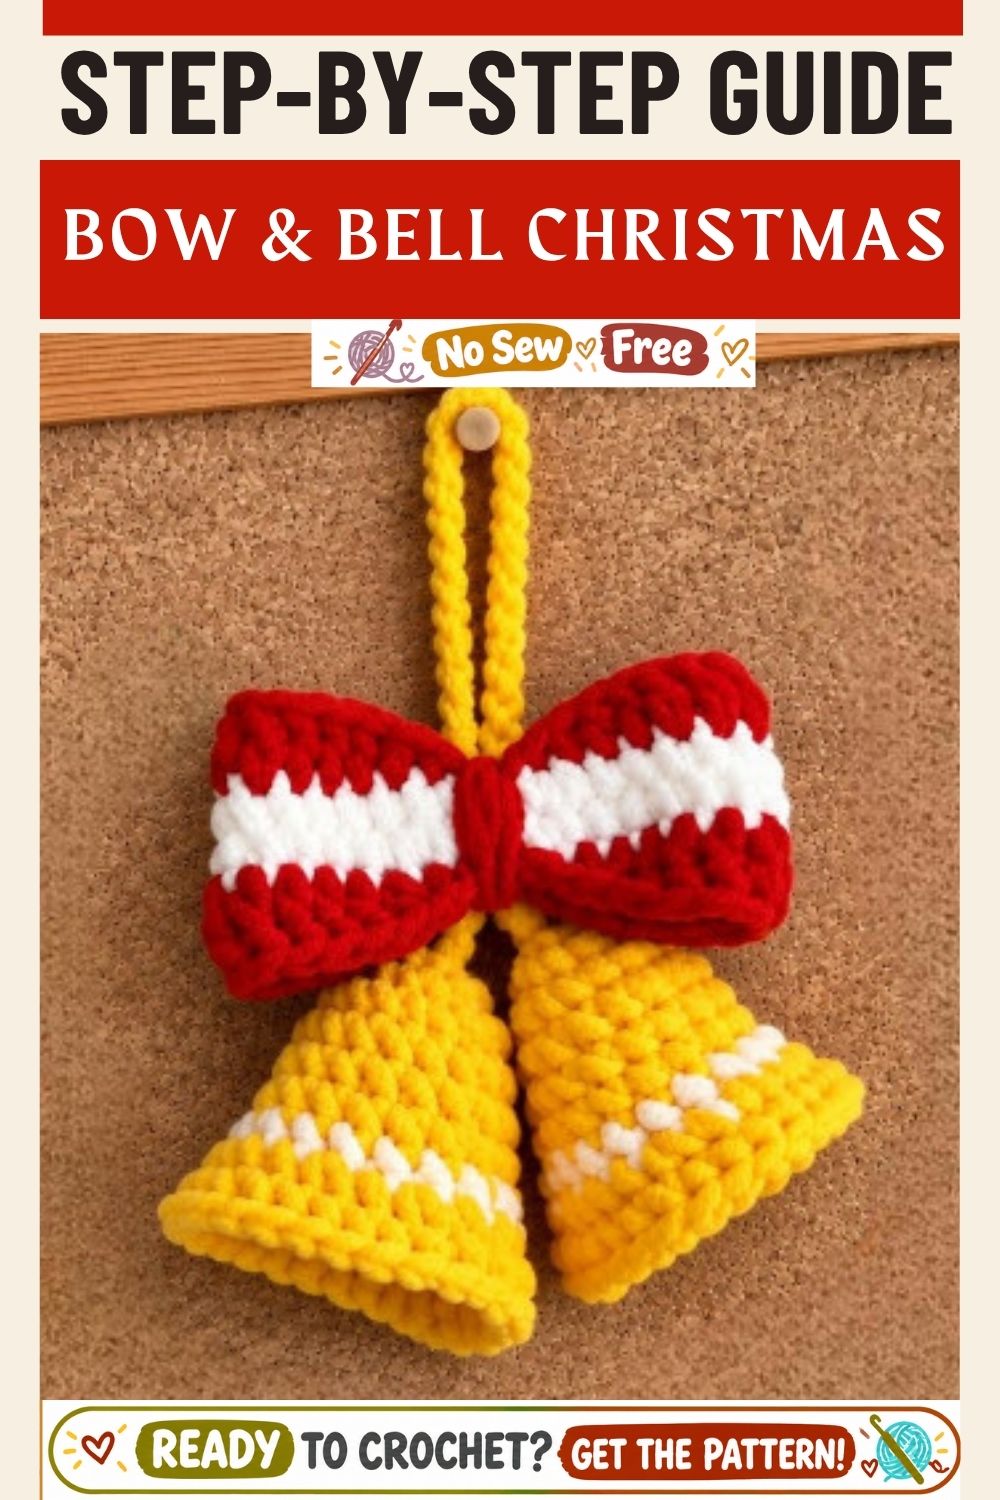
Scarlet, snow white, and sunshine yellow come together in the Crochet Bow & Bell Christmas Pattern for Everyday Wear, a tiny festive charm. Stripes wrap the bow, a rounded bell hangs below, and the finished piece clips onto bags, jackets, or gift ribbons.
Small projects earn their place when they finish fast and serve a purpose. Here, a fluffy yellow dome pairs with a candy-striped ribbon, creating a Christmas bell amigurumi that doubles as a bag charm. Color changes add visual pop, yet the shapes stay simple. Anyone who owns a hook and three yarn colors can build a polished striped bow ornament in a single evening.
Who the Pattern Is Great For
Beginners who have learned the magic ring will find the crochet bow & bell approachable. Intermediate makers can treat it as practice for clean color changes. Craft-fair sellers benefit too, since each charm stitches up quickly. Likewise, holiday hosts can prepare a matching batch as table favors. Finally, anyone who loves bright accessories gets a smart use for scrap yarn.
Time and Skill Reality Check
Plan on roughly 90 minutes from first loop to final seam. Prep takes about 10 minutes, stitching takes 60 to 70 minutes, and finishing needs 15 minutes. Skill level sits at confident beginner. The magic ring, spiral rounds, and two color changes make up the trickiest parts. However, nothing here calls for advanced shaping, so patient learners can succeed.
What You’ll Need
- Yarn: Three colors of soft light-worsted yarn in sunny yellow, cherry red, and snow white. A chenille-style skein gives the bell a plush finish.
- Hook: A 2.5 mm hook with a comfortable handle.
- Marker: One locking stitch marker to flag the start of each round.
- Needle: A blunt tapestry needle for the final seams.
- Filling: A small pinch of polyester fiberfill, optional.
- Extras: A keychain clasp or jump ring for hanging.
Stage 2: Making It Successfully
Step-by-Step Process
Follow the seven photo steps below to complete the crochet bow & bell from first loop to final stitch.
Step 1: Form the Starting Ring
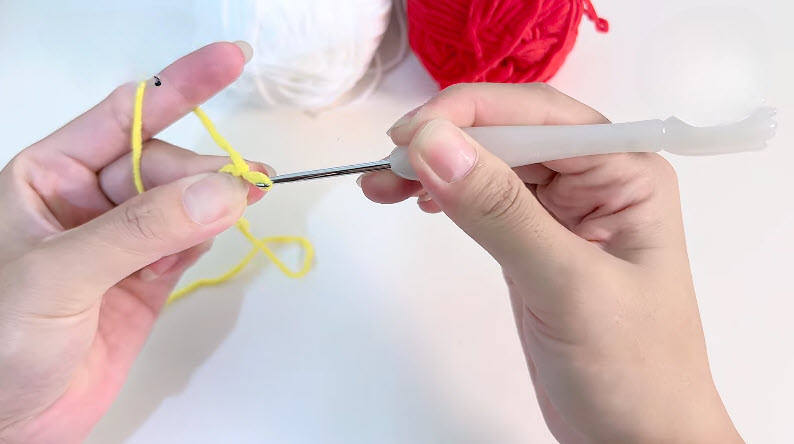
First, drape the yellow yarn over the fingers of the left hand. Next, wrap it into a loop and slide the hook inside. Then pull the working yarn through to anchor the ring.
Why it matters: a snug ring keeps the crown of the bell free of gaps.
Step 2: Work the First Round
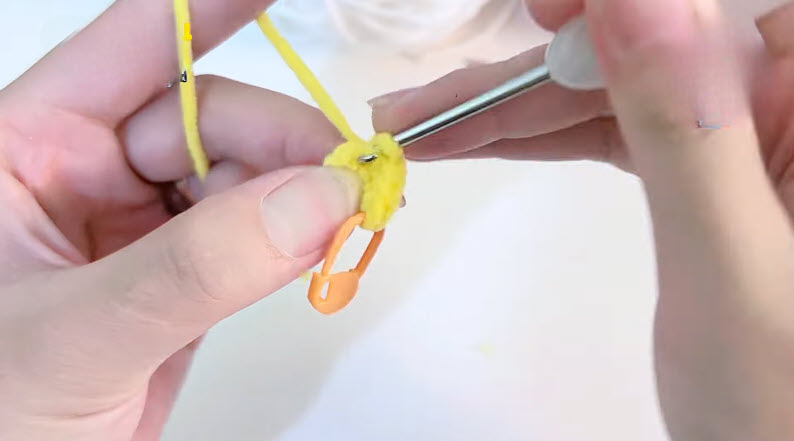
Stitch the opening round directly into the ring, then tug the tail to close the center. Afterward, clip the locking marker into the first stitch. The small yellow disc should sit flat and feel firm.
Pro-Tip: Slide the marker up after every round so the spiral never gets lost.
Step 3: Build the Dome and Add White (Photo 3)
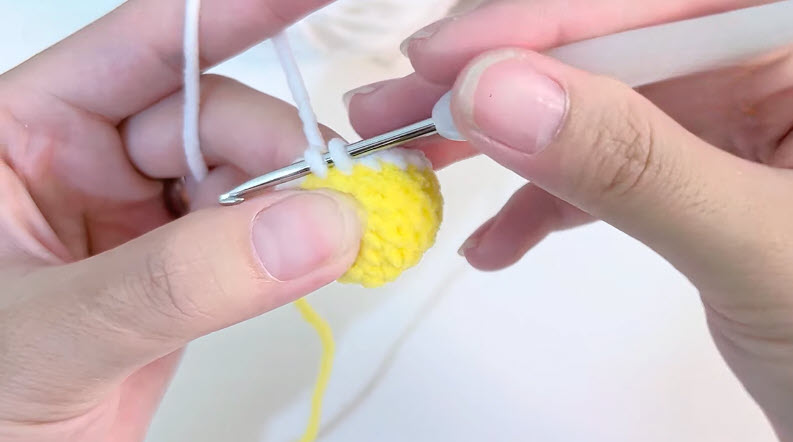
Keep stitching in spirals, and the disc will curve into a dome. Once the yellow reaches the desired height, bring in the white yarn for the stripe round. Meanwhile, let the yellow strand rest at the back so the color change stays neat.
Why it matters: a clean switch keeps the stripe crisp instead of blurry.
Step 4: Check the Finished Bell Body
After the stripe, fasten off and leave a tail for sewing. Then hold the piece up and study the shape. A rounded crown, an even white band, and a slightly flared rim signal success.
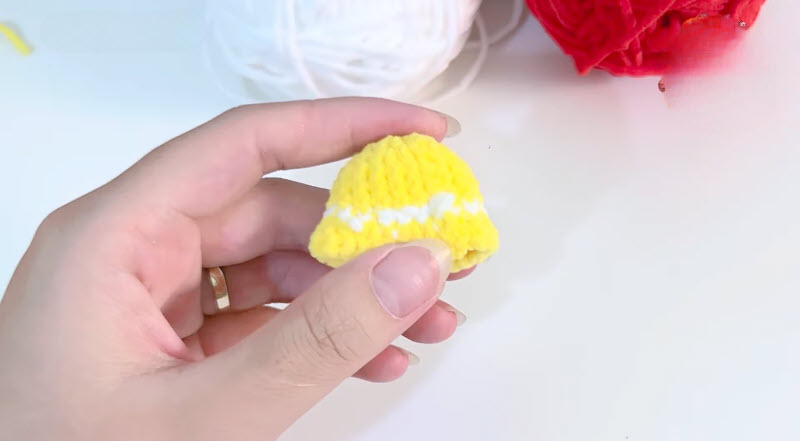
Step 5: Start the Bow Band
Next, set the bell aside and pick up the red yarn. A long white strip curls beside the hook, so attach the red yarn at its edge. Then begin the first red row along that edge.
Pro-Tip: Keep the white strip untwisted so the red rows lie straight.
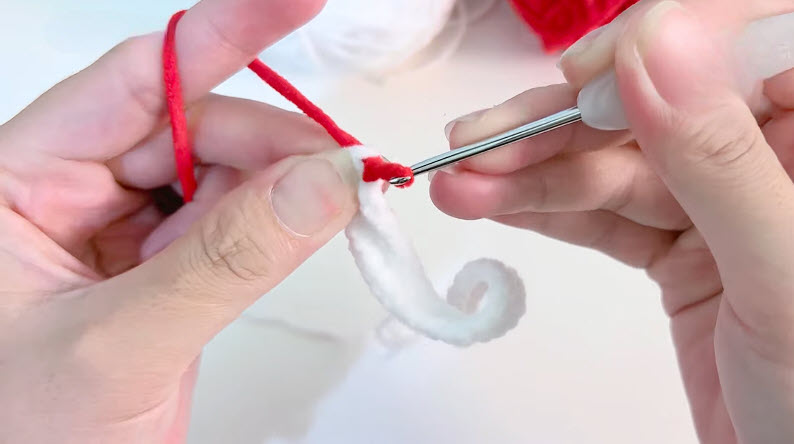
Step 6: Build the Stripes
Continue stitching flat rows until red, white, and red bands sit side by side. Meanwhile, keep the edges straight and the tension even. Afterward, lay the strip flat and compare band widths.
Why it matters: matching stripe widths make the bow look balanced once folded.
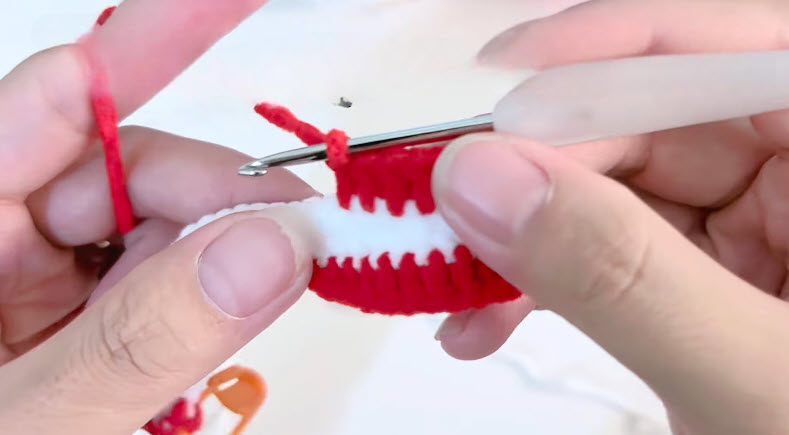
Step 7: Assemble Bow and Bell
Finally, thread the tapestry needle with yellow yarn. Next, sew the yellow piece across the center of the striped loops so the red bands fan out on both sides. Then let the bell dangle below and stitch it firmly in place. Last, weave in every tail.
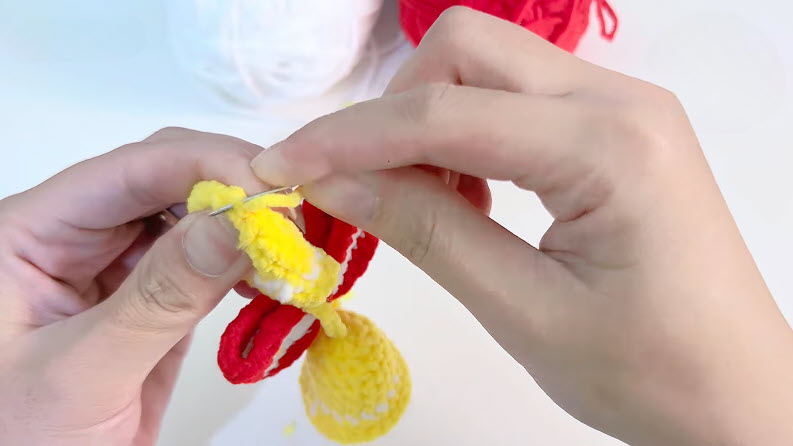
Where Beginners Usually Go Wrong
- Loose starting ring. Gaps appear at the crown.
Fix: Tug the tail firmly after the first round and knot it once. - Lost round start. Spirals blur without a guide.
Fix: Clip the marker into the first stitch every round. - Tight color carrying. The stripe puckers the bell.
Fix: Leave a relaxed strand behind the work instead of stretching it. - Uneven stripe widths. Bow bands look lopsided.
Fix: Stitch each band to the same row count and check both edges.
Troubleshooting Extra
- Bell leans sideways. Uneven seaming usually causes the tilt.
Fix: Re-sew the bell at the bow’s center and add one anchoring stitch on each side. - Bow loops sag. Soft yarn relaxes over time.
Fix: Sew a small tack behind the center wrap to hold the fold. - Bell looks flat. Light stitching can leave the dome hollow.
Fix: Slip a pinch of fiberfill inside before sewing the bell to the bow. - Yellow fuzz clings to the white stripe.
Fix: Trim stray fibers with small scissors, then pat the stripe with a lint roller.
Signs You Did It Right
- The magic ring stays closed with no visible hole.
- The white stripe circles the bell at an even height.
- Red and white bands share matching widths.
- Both bow loops fan out symmetrically.
- The bell hangs straight beneath the center.
Stage 3: Keeping It Looking Good
Washing and Care Basics
Handle the crochet bow & bell gently, because small charms collect dust and lint. First, spot clean with a damp cloth and mild soap. Then press the fabric between clean towels and let it air dry flat. Skip the dryer, since heat can flatten fuzzy yarn. Also avoid bleach near the white stripe.
Storage Tips
Keep finished pieces in a breathable pouch or a tissue-lined cardboard box. Store them away from direct sunlight, because bright light fades red yarn. Additionally, stack them loosely so the bow loops keep their shape.
Creative Projects You Can Make With the Bow and Bell
Small festive makes pair well with the pattern. For example, readers can browse related crochet Christmas ornament ideas, amigurumi keychain patterns, and gift topper tutorials. Similarly, a row of tiny bells can become a mini garland. Meanwhile, a larger version in chunky yarn could turn into a door hanger.
Ways to Style or Display It
Clip it onto a tote strap, or attach it to a zipper pull. Hang it from a tree branch, tuck it into a wreath, or tie it onto a gift ribbon. For a lapel accessory, sew a small pin back behind the bow. Dangle a few together from a curtain rod for a cheerful holiday cluster.
Bonus: Color Swap Palette Ideas
Swap the palette to change the mood. Mint, white, and silver create a frosty look. Meanwhile, burgundy, cream, and gold feel rich for evening events. Alternatively, pink, white, and red suit Valentine’s gifts, which stretches the pattern past winter.
Why It’s Popular Right Now
Handmade holiday accessories are trending as makers look for quick, giftable projects. Small scale and bold color explain much of the appeal.
- Fast finish: One evening produces a gift-ready piece.
- Scrap-friendly: Leftover yarn covers all three colors.
- Flexible use: One design works as a charm, ornament, or gift tag topper.
FAQ
Is the pattern beginner friendly?
Yes, for anyone comfortable with a magic ring and basic rounds. The color changes need patience, but no complex shaping appears.
Can cotton yarn replace the fuzzy yarn?
Absolutely. Cotton shows stitches more clearly, so the bell will look smoother and less plush.
How big is the finished piece?
Expect a compact charm that rests easily in the palm. Thicker yarn and a larger hook will scale it up.
How can the pattern become a keychain?
Stitch a jump ring or clasp through the top of the bow center. Then secure it with two or three anchoring stitches.
Bringing It AllTogetherr
The crochet bow & bell proves that tiny projects can still deliver big festive charm. Stripes, a soft dome, and a tidy seam bring the whole design together. Once the color changes feel easy, try a larger bell in thicker yarn or add a second bow for a fuller cluster.