
Crochet Christmas Snoopy Dogs Amigurumi Pattern for Home Accents
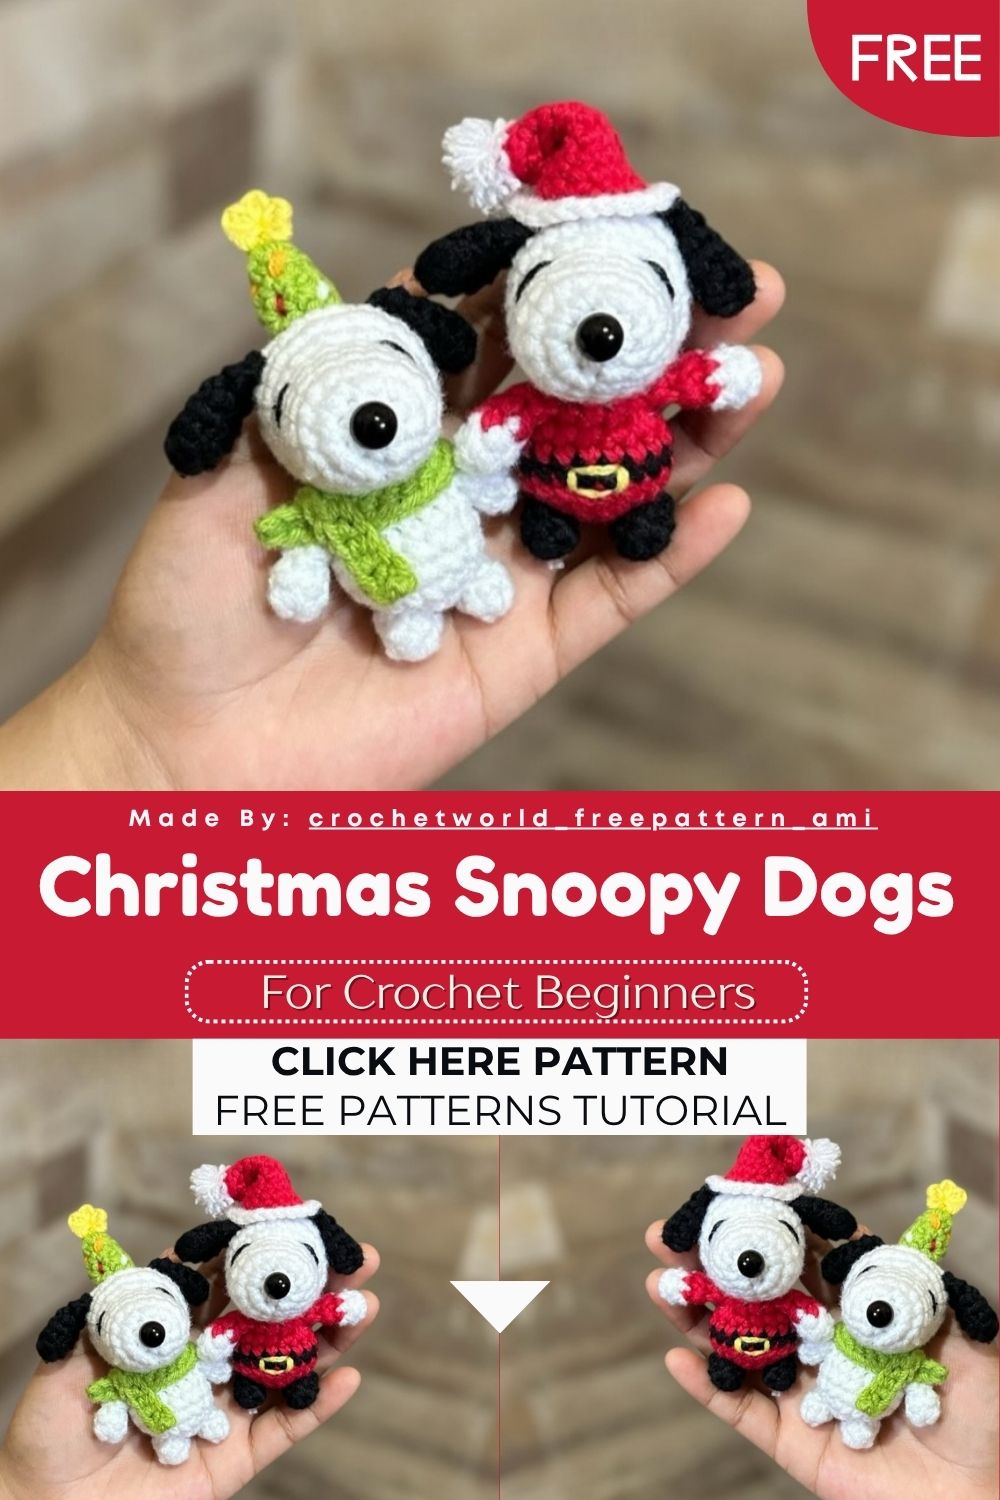
Meet the cutest little Crochet Christmas Snoopy Dogs for your holiday shelf: two tiny Snoopy dogs, one in a cozy hat and scarf, the other dressed up as a jolly Santa. Small, sweet, and quick to make.
If you love beagles and Christmas, this is the Crochet Christmas Snoopy Dogs project for you. These two little Snoopy dogs work up fast in milk cotton yarn, and they look adorable side by side. One wears a hat and a striped scarf, while the other goes full Santa mode. Perfect for gifting, tree ornaments, or a festive shelf.
Pattern Overview
Here is a quick look at what you are getting into before you grab your hook:
- Two designs in one: a classic winter Snoopy and a Santa Claus Snoopy, so you can make a matching pair or just pick your favorite.
- Compact size: both pieces are small thanks to the 3 mm hook and milk cotton yarn, which keeps the stitches tight and neat.
- Simple shapes: the head, body, ears, arms, and legs are all worked in short rounds, nothing fussy.
- Cute extras: the winter version comes with a little hat, a tiny star on top, and a scarf you can stripe in any colors you like.
- Festive details: the Santa version uses color changes for the suit, belt, and hat, plus an embroidered buckle for that storybook look.
- Beginner-friendly counts: every round ends with a clear stitch count in brackets, so you always know where you stand.
Special Techniques
There is nothing scary in this pattern, but a few small skills make a big difference. The first is the magic ring, which lets you start every piece with a tight, closed center so there are no holes. The second is invisible color changes, used heavily on the Santa Snoopy. When you switch from red to black to red again, finish the last stitch of the old color by pulling the new color through, and the change will sit flat and clean.
You will also use simple embroidery for the belt buckle on Santa, worked in yellow over the black band. And finally, there is a little flat-piece star made from chains and slip stitches inside a magic ring, which is a fun, fast way to add a topper without any complicated shaping. Take these slowly the first time and they quickly become second nature.
Skill Level
This is an advanced beginner project. If you can work a magic ring, single crochet, increases, decreases, and a basic color change, you have every skill you need to finish both little dogs.
Materials I Used
- Milk cotton yarn
- 3 mm hook
- 8 mm safety eye
- Stitch marker
- Tapestry (yarn) needle
- Stuffing/fiberfill
- Scissors
Abbreviations
- R – round
- MR – magic ring
- sc – single crochet
- inc – increase
- dec – decrease
- ch – chain
- sl st – slip stitch
Note: this Crochet Christmas Snoopy Dogs pattern is written in US crochet terms.
The Pattern
Winter Snoopy
Head
- R1: 8 sc in MR
- R2: 8 in [16]
- R3–6: 16 sc
- R7: 4 sc, 8 inc, 4 sc [24]
- R8: 10 sc, (sc, inc) x2, 10 sc [26]
- R9: 26 sc
- R10: 10 sc, (sc, dec) x2, 10 sc [24]
Body
- R1: 6 sc in MR
- R2: 6 iin[12]
- R3: (sc, inc) x6 [18]
- R4–6: 18 sc
- R7: (7 sc, dec) x2 [16]
- R8: (2 sc, dec) x4 [12]
- Leave a tail and sew the body to the head.
- Add a safety eye right in the magic ring to form the nose.
Hat
- R1: 6 sc in MR
- R2: 6 sc
- R3: (sc, inc) x3 [9]
- R4: 9 sc
- Sew or glue the hat to the head.
Little Star
- Make a magic ring, ch 2 and sl st into the ring. Repeat 4 more times.
- Close the magic ring tightly, then sew or glue the star on top of the hat.
Scarf
- Ch 28. Starting from the 2nd chain, work 27 sc.
- Weave in the ends.
- I added a few lines in different colors to look like little string lights.
Ears
- R1: 6 sc in MR
- R2: (2 sc, inc) x2 [8]
- R3–4: 8 sc
- R5: (2 sc, dec) x2 [6]
- Fold and work 3 sc to close them.
- Sew them at eye level, about 3 rounds behind.
Arms
- R1: 6 sc in MR
- R2–4: 6 sc
- Close the little arms with 3 sc.
Legs
- R1: 6 sc in MR
- R2: 6 sc
- R3: (sc, dec) x2 [4]
- Sew at rounds 2–3.
Snoopy Santa Claus
Body
- Start with red.
- With yellow, embroider the belt buckle.
- R1: 6 sc in MR
- R2: 6 in [12]
- R3: (sc, inc) x6 [18]
- R4: 18 sc
- Change to black.
- R5: 18 sc
- Change to red.
- R6: 18 sc
- R7: (7 sc, dec) x2 [16]
- R8: (2 sc, dec) x4 [12]
- Leave a tail and sew the body to the head.
- Make the legs in black.
Arms
- Start with white.
- R1: 6 sc in MR
- R2: 6 sc
- Change to red.
- R3–4: 6 sc
- Close the little arms with 3 sc.
Hat
- R1: 5 sc in MR
- R2: 5 sc
- R3: (sc, inc) x2, sc [7]
- R4: 7 sc
- R5: (2 sc, inc) x2, sc [9]
- R6: 9 sc
- R7: (3 sc, inc) x2, sc [11]
- R8: 11 sc
- R9: (4 sc, inc) x2, sc [13]
- R10: 13 sc
- With white:
- R11: inc in each sc [26]
- Weave in the end.
- Fold the tip of the hat and add a few stitches so it points downward.
Common Mistakes
A few small slip-ups can trip you up, so watch out for these:
- Skipping the stitch marker. With so many short 6 to 118-stitch rounds, it is very easy to lose your starting point. Move your marker up every single round.
- Stuffing too late or too little. Once the body closes to 12 stitches, it is hard to add more filling. Stuff firmly as you go, especially the head.
- Rushing color changes on Santa. If you change colors a stitch early or late, the red, black, and white bands will look crooked. Count carefully on rounds 4, 5, and 6.
- Making the nose eye too loose. The safety eye for the nose sits in the magic ring, so pull that ring tight before locking the eye in place.
- Forgetting the parentheses repeats. A note like (sc, inc) x6 means you repeat the whole bracket six times, not just once. Read each round twice.
Assembly
Once all your pieces are done, here is how everything comes together:
- Sew the body to the head, keeping the head tilted slightly forward so it looks alert and friendly.
- Attach the ears at eye level, set back about three rounds, so they frame the face like a real beagle.
- Sew the arms onto the sides of the body, and the legs to the lower front using rounds 2 to 3 as your anchor.
- For winter Snoopy, sew or glue the hat on top, add the little star, and wrap the scarf around the neck.
- For Santa Snoopy, place the black legs, attach the white-cuffed red arms, and pin the folded Santa hat so the tip flops to one side before stitching it down.
- Step back and check that both pieces sit evenly before you weave in any remaining ends.
Important Remarks
- Work in a continuous spiral unless a round says otherwise, and do not join rounds.
- Keep your tension firm; loose milk cotton stitches will let the stuffing peek through.
- The scarf colors are totally up to you, so use leftover scraps to make each dog unique.
- Safety eyes are not recommended for babies or toddlers; embroider the nose with yarn instead if this is a gift for a little one.
- Both dogs are small, so a 3 mm hook is ideal, but you can size them up with a larger hook and thicker yarn.
- Save your color-change tails neatly inside the body so the outside stays clean.
Conclusion
And that is your Crochet Christmas Snoopy Dogs pair, ready to bring some holiday cheer to any shelf, mantel, or tree. Whether you make the cozy winter version, the cheerful Santa, or the full duo, these little dogs are quick, beginner-friendly, and endlessly giftable. Grab your milk cotton yarn, take the rounds one at a time, and enjoy the process.


