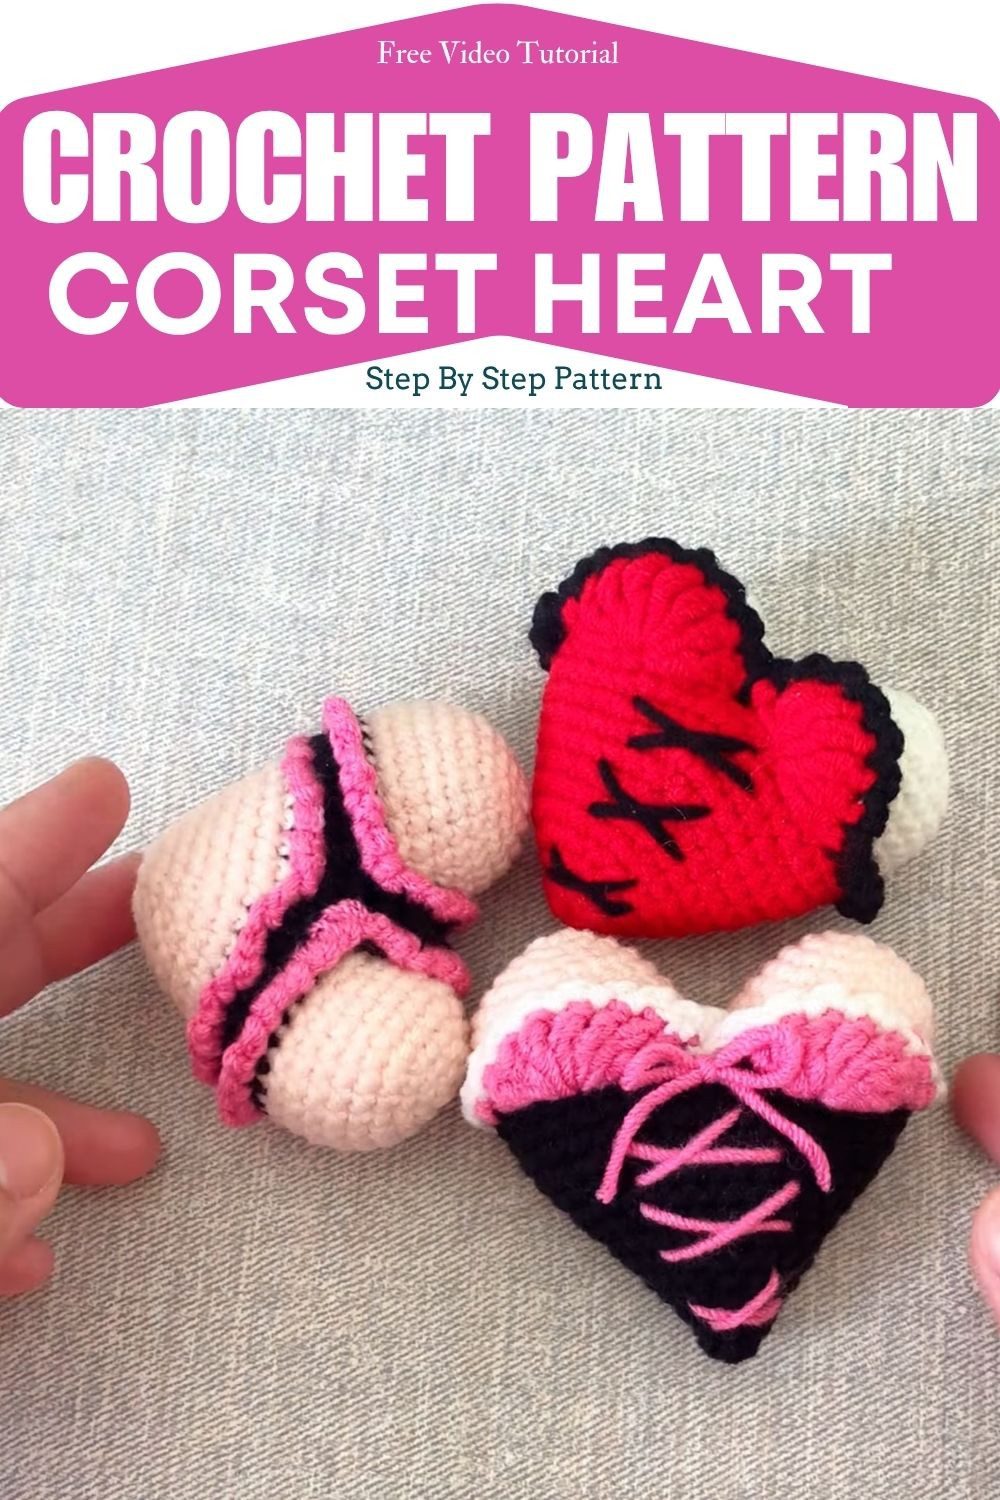
Crochet Corset Heart Pattern with Pink Ribbon Lacing
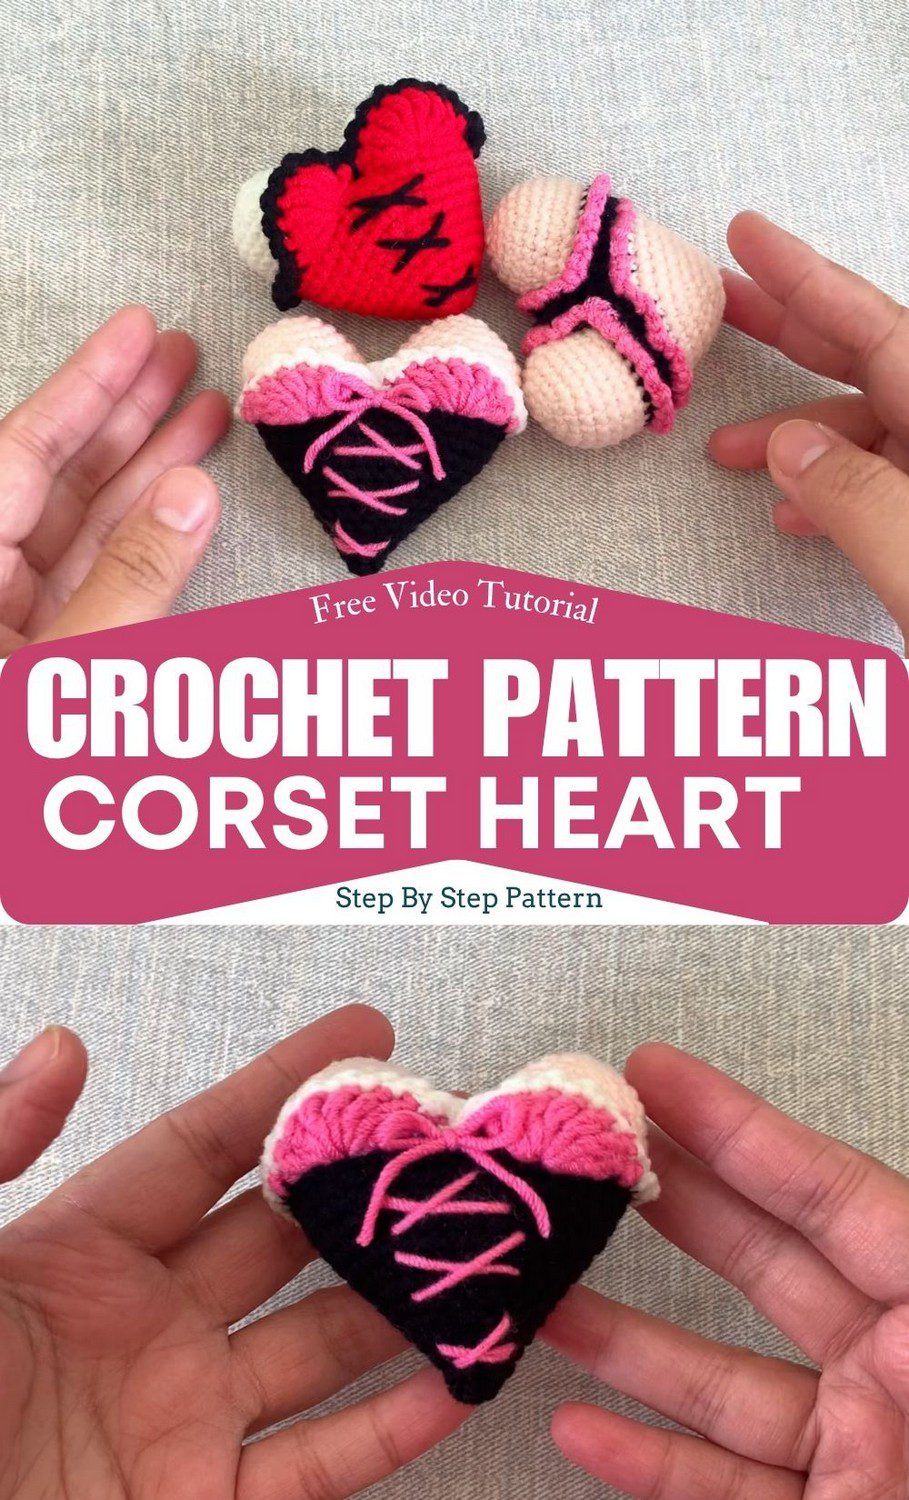
This free crochet corset heart pattern is simple and sweet, and the pink ribbon lacing gives it a warm, personal touch. The crochet amigurumi heart has a cute, handmade shape, and the ribbon makes it look like a tiny corset. It is a beginner-friendly crochet pattern, so it suits everyone, even if you are new to crochet. The techniques are simple, and the whole thing makes an easy crochet project that you can enjoy from start to finish
Here you will find an easy crochet heart tutorial with clear step-by-step instructions. These small crochet hearts are quick to make, which makes this a quick crochet project for any spare moment. Once they are done, you can use them in many ways. Make a crochet heart keychain, use one as a handmade heart decoration for your home, or turn one into a crochet hanging ornament. They also make thoughtful handmade gifts and cute decorative accessories. So stay with me, and I will teach you how to make them.
Project Overview
Skill level: Confident beginner / easy
Finished size: Approximately 7–9 cm (2.75–3.5 inches) wide and 6.5–8.5 cm (2.5–3.3 inches) tall with 4-ply or 5-ply cotton yarn and a 2.5–3.0 mm hook
The heart is worked in continuous spiral rounds, so no seam line runs down the body. Both lobes use the same stitch counts, and the body then decreases evenly to a point. A black trim goes around the base edge, and the contrasting lacing is added at the very end.
Materials You Will Need
- Yarn A (heart body): about 25 g of smooth 4-ply or 5-ply Milk Cotton or DK weight yarn in pale pink, red, or white
- Black yarn: a small amount for the trim
- Yarn B or ribbon (lacing): about 80 cm of contrasting yarn or 3 mm thin satin ribbon
- Hook: 2.5 mm or 3.0 mm
- Notions: 1 locking stitch marker, polyester fiberfill, a blunt tapestry needle, and scissors
- Optional for a keychain: a jump ring, or extra matching yarn for a crochet loop
Smooth yarn gives clean stitch definition. A hook slightly smaller than the label suggests keeps the fabric tight, so the stuffing stays hidden.
Abbreviations (US Terms)
MR: Magic Ring
sc: Single Crochet
inc: Increase (2 sc in the same stitch)
inv dec: Invisible Decrease (2 front loops together)
sl st: Slip Stitch
FO: Fasten Off
(…) x N: Repeat the instructions in brackets N times
Special Techniques
Magic Ring
Wrap the yarn tail around your index and middle fingers twice. Cross the working yarn over the tail to form an “X”. Slide the hook under the first strand, catch the second strand, and pull it through. Yarn over and pull through that loop to lock the ring. That chain does not count as a stitch. Work Round 1 into the ring over both the loop and the tail, then pull the tail until the hole closes.
Invisible Decrease
Insert the hook into the front loop only of the next stitch. Immediately insert it into the front loop only of the following stitch, leaving 3 loops on the hook. Yarn over and pull through the first two loops. Yarn over again and pull through the remaining 2 loops. As a result, no bumps appear on the outside of the heart.
Continuous Spiral Rounds
Do not join rounds with a slip stitch or a chain. Instead, work the first stitch of each new round into the first stitch of the previous round. Clip a marker into that stitch and move it up every round. Count your stitches at the end of each round before moving on.
Joining New Yarn at an Edge
Make a slip knot with the new yarn and place it on your hook. Insert the hook into an edge stitch, yarn over, and pull a loop through the stitch and the slip knot. Leave a tail of about 15 cm (6 inches) to weave in later.
Fastening Off
Cut the yarn with a 15–20 cm (6–8 inch) tail. Yarn over, pull the tail through the final loop, and tug gently to secure it.
Time Box
- Prep: Gather the yarn, hook, stuffing, and needle, and get your marker ready.
- Stitching: Work both lobes first. After that, join them and crochet the body down to the point.
- Finishing: Close the tip, add the black trim, lace the front, and tie the bow. A keychain loop adds a few extra minutes
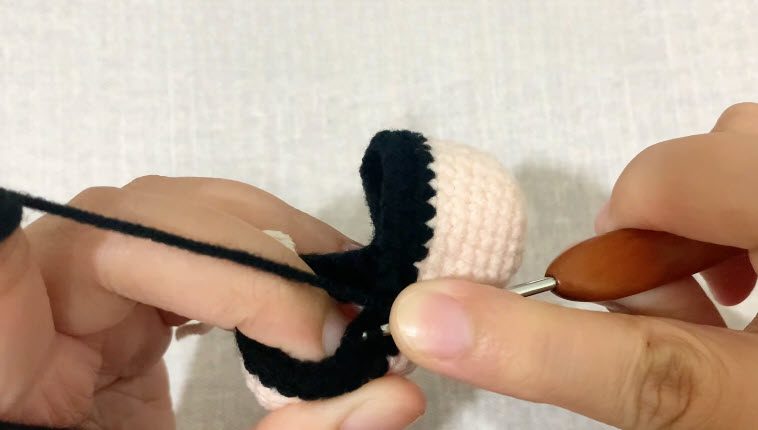
Joining the Black Yarn to the Pink Base
- Make a slip knot with the black yarn and place it on your hook.
- Hold the pink piece with the right side facing you. Choose the first edge stitch where the black round will begin.
- Insert the hook into that stitch, going under both loops.
- Yarn over with the black yarn and pull a loop through the stitch. Pull it through the slip knot loop on the hook as well. The black yarn is now attached.
- Leave a tail of about 15 cm (6 inches) to weave in later. Work the first black stitch into the same edge stitch, then continue along the rim.
- At the end of the round, weave in the black tail inside the piece so it doesn’t show.
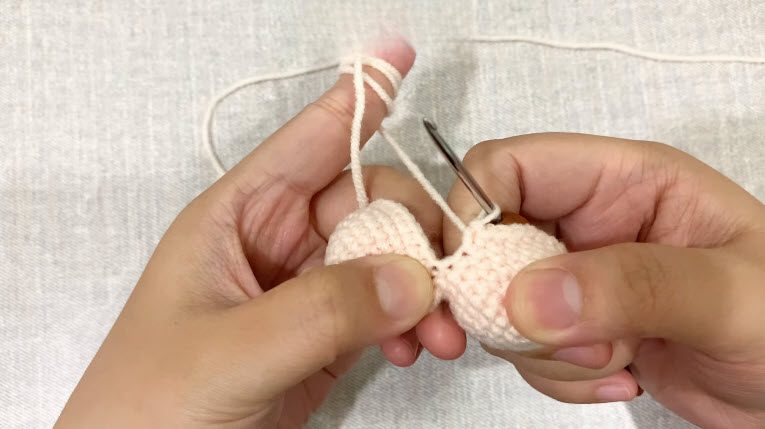
Underwear / Corset Details
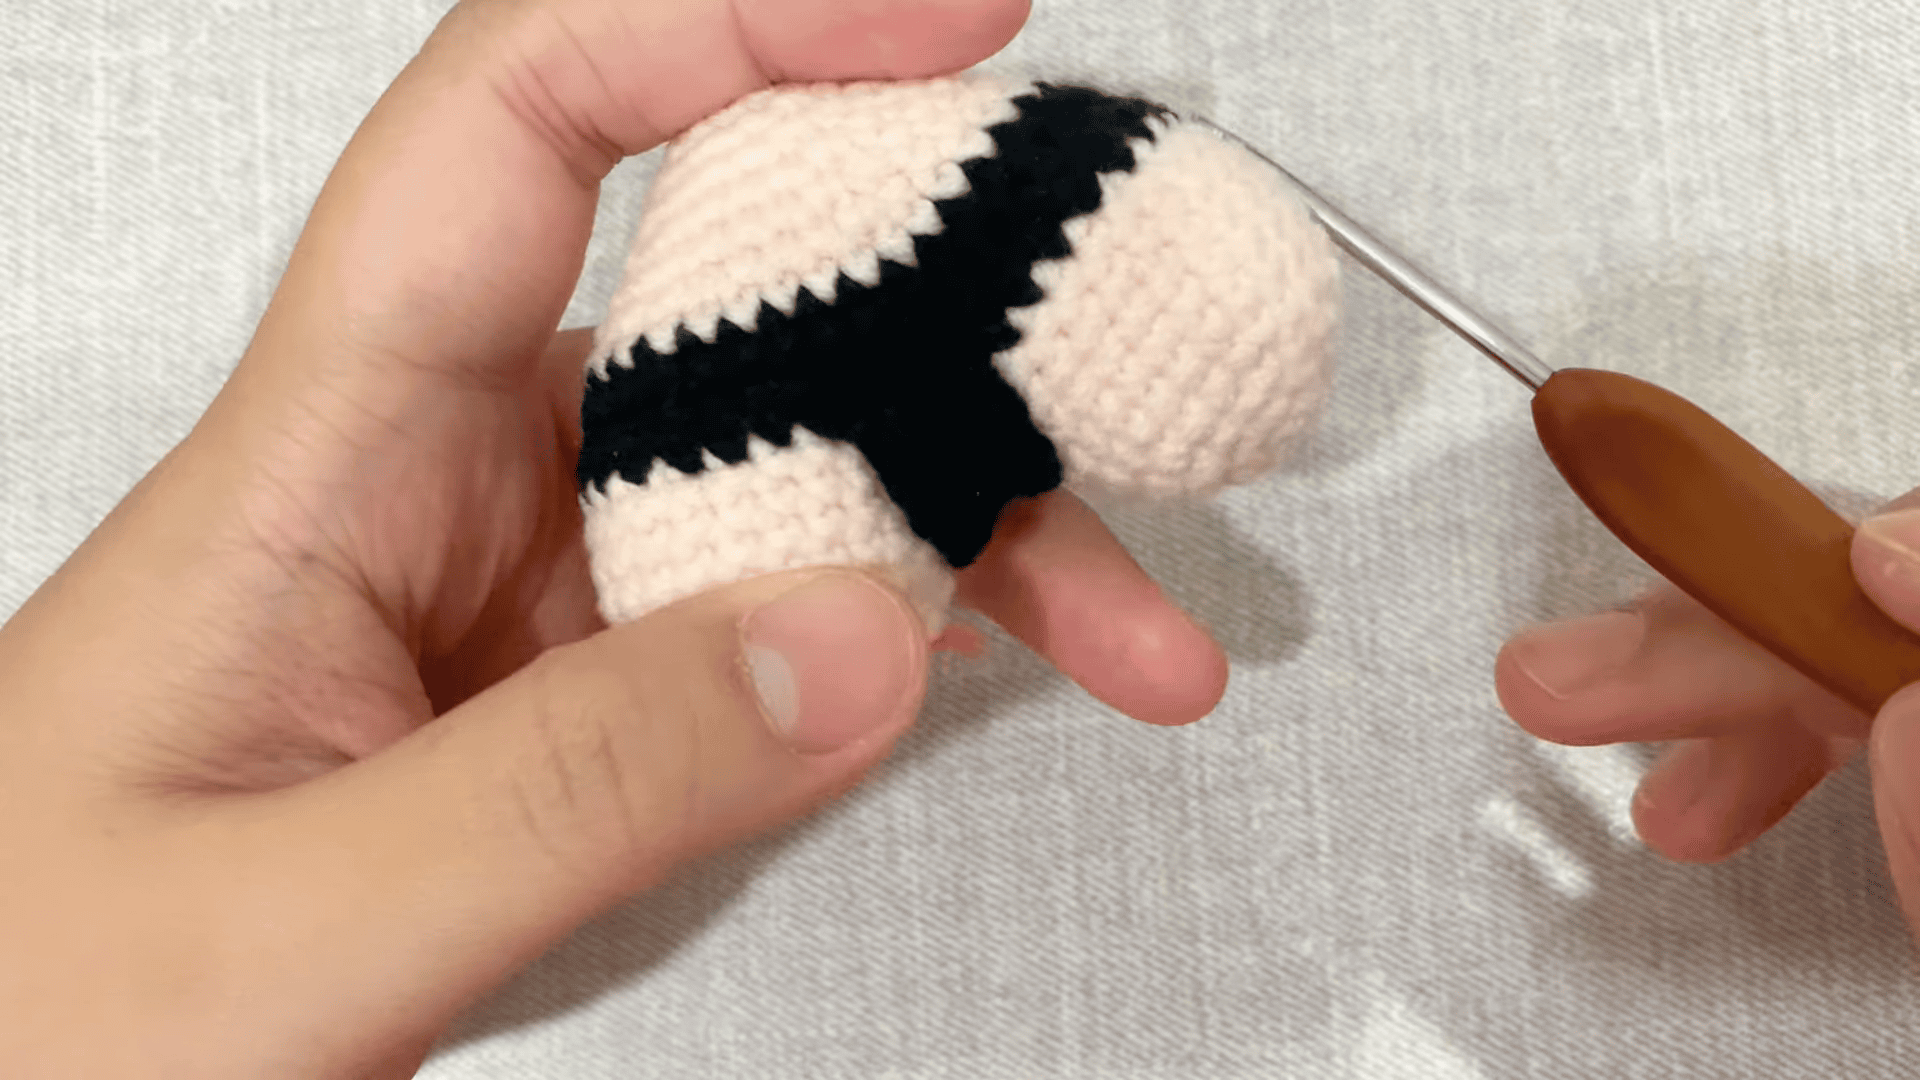
: Black trim. Join black yarn to the pale pink base. Make a slip knot, insert the hook into an edge stitch with the right side facing you, and pull a loop through. Leave a 15 cm (6 inch) tail. Work a round of black stitches along the rim, keeping them even, so they form a neat band that folds outward. Weave the black tail into the piece afterwards.
Pro-Tip: Keep your fingers close to the hook while you work. Consequently, each black stitch lands in the same spot, and the band stays smooth.
Corset lacing.
- Cut 80 cm of contrasting yarn or 3 mm satin ribbon and thread it onto a blunt tapestry needle.
- Find the front centre, right below the cleft between the two lobes.
- Bring the needle out at the upper-left corset point (Round 7, 2–3 stitches left of centre). Leave half the length hanging at the front.
- Cross diagonally down to the right, to Round 9 (2–3 stitches right of centre). Slide the needle under one single crochet post and pull through.
- Cross diagonally down to the left, to Round 11 (2–3 stitches left of centre). Slide under one single crochet post and come out at the bottom-left corset point.
- Thread the other half and repeat the mirror-image path: Round 7 right, then Round 9 left, then Round 11 right. Both ends meet at the bottom centre (Round 12).
- Tie a double-loop bow and trim the ends evenly.
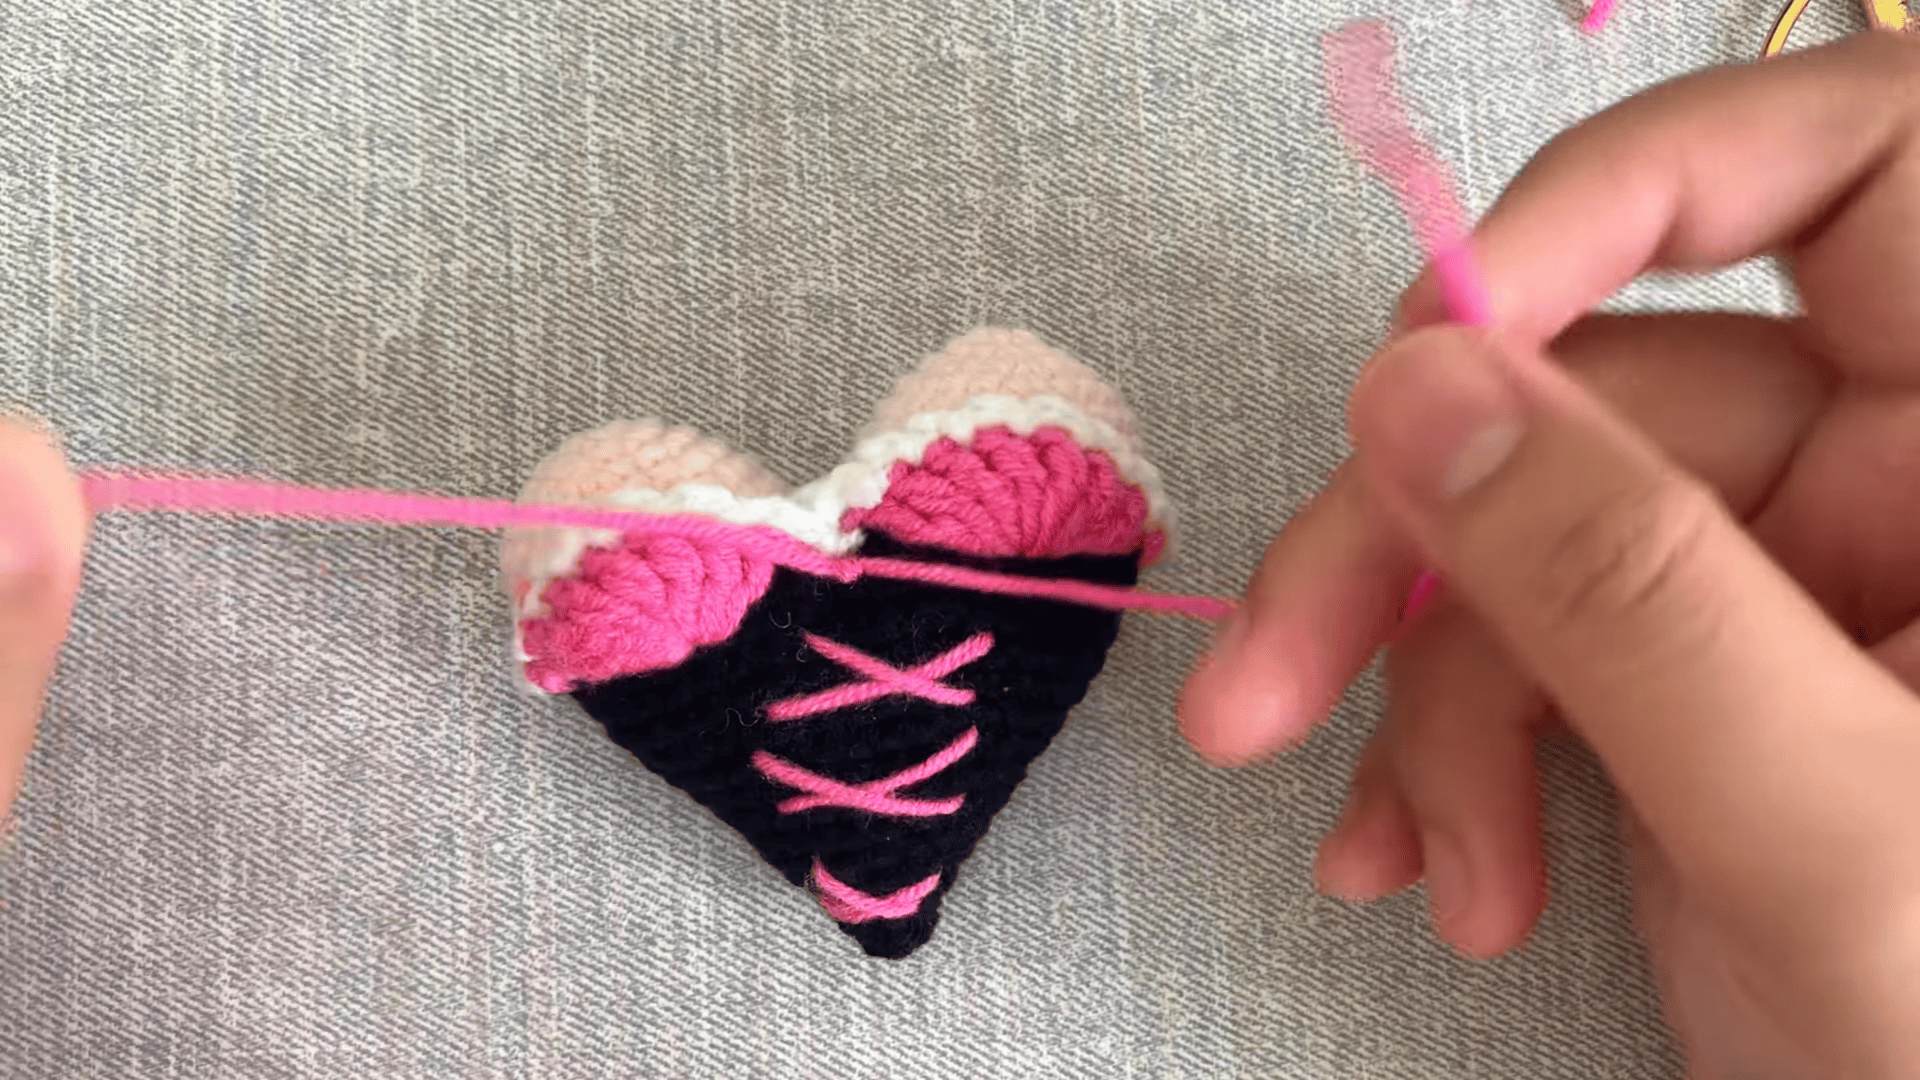
Step 5: Lacing / Corset Ties
- Cut 80 cm of contrasting yarn or 3 mm satin ribbon and thread it onto a blunt tapestry needle.
- Find the front centre, right below the cleft between the two lobes.
- Bring the needle out at the upper-left corset point (Round 7, 2–3 stitches left of centre). Leave half the length hanging at the front.
- Cross diagonally down to the right, to Round 9 (2–3 stitches right of centre). Slide the needle under one single crochet post and pull through.
- Cross diagonally down to the left, to Round 11 (2–3 stitches left of centre). Slide under one single crochet post and come out at the bottom-left corset point.
- Thread the other half and repeat the mirror-image path: Round 7 right, then Round 9 left, then Round 11 right. Both ends meet at the bottom centre (Round 12).
- Tie a neat double-loop bow at the bottom centre.
- Trim the tails evenly. Cut satin ribbon ends at a 45° angle to prevent fraying.
Pro-Tip: Keep the left and right points the same number of stitches from the center. As a result, the X lies flat and stays symmetrical.
Safety: For children under 3, skip long ties. Tack the lacing down with hidden stitches and bury all knots inside the stuffing.
: Finishing
- Check the closed tip. The bottom point should be tightly closed, with the tail already hidden inside, as in Step 4.
- Weave in the ends. Weave in the black yarn tail and any other loose ends. Hide them inside the stuffing.
- Shape the heart. Roll and gently pinch the stuffed heart between your fingers. The fiberfill then spreads evenly into both lobes and the bottom point.
- Trim the ribbon. If you used satin ribbon, cut the tails at a 45° angle to prevent fraying.
- Verify the shape. Lay the heart flat and check three things:
- Both upper lobes match in size.
- The bottom tip sits directly beneath the centre cleft.
- The X-lacing lies flat without puckering the fabric.
Optional keychain or charm
- Crochet loop: Join matching yarn at the centre cleft between the lobes. Chain 12–15, work a sl st into the same stitch, fasten off, and weave in the ends.
- Metal keychain: Attach a jump ring through 2–3 stitches at the top of one lobe or at the cleft, using matching yarn.
Safety: For children under 3, leave off loose ribbons, long ties, buttons, and plastic safety eyes. Tack the lacing down securely, and bury every knotted end deep inside the stuffing.