Quick Free Crochet Spider-Man Beanie Pattern for Winter
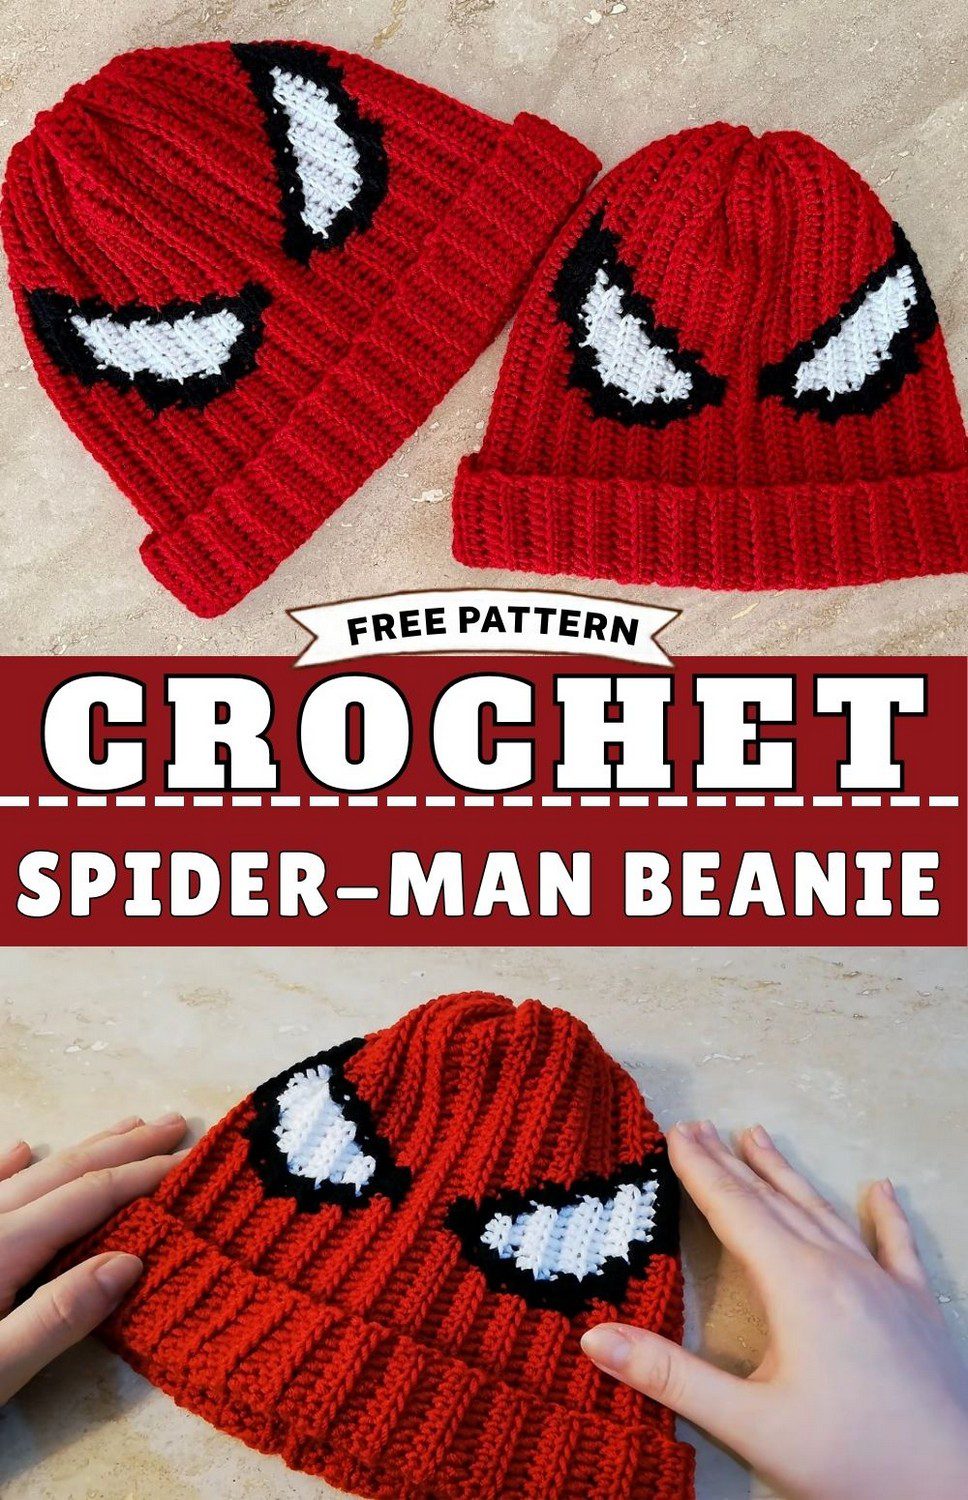
Two white mask eyes are all it takes to turn a plain red beanie into something instantly recognisable. This Free Crochet Spider-Man Beanie pattern keeps the construction simple, because you work one long ribbed rectangle, seam the sides, and then cinch the top closed.
Cold days are coming, so a warm, stretchy hat is a smart project right now. Since the steps are easy to follow, you only need red yarn plus small amounts of black and white.
Crochet Spider-Man Beanie Pattern Overview
This Free Crochet Spider-Man Beanie pairs bright red yarn with a stretchy ribbed band. Next, two black-and-white mask eyes add a comic-style look. Because the ribs run upward, the fit feels snug. Also, the supply list stays short. After that, the crown gathers into a tidy cinch, so you can wear the brim flat or folded.
Skill level: Intermediate (several small bobbins, keep side edges neat)
Finished size: Adult women’s size, about 48 cm around unstretched and about 21-22 cm tall. Because the ribbed fabric stretches, it fits head sizes of roughly 56-57 cm.
Materials and Tools for the Crochet Spider-Man Beanie Pattern
First, gather these supplies.
- Main colour (MC): bright red anti-pilling acrylic yarn, about 100 g
- Contrast colour 1 (CC1): black anti-pilling acrylic yarn, small scraps or a mini bobbin
- Contrast colour 2 (CC2): pure white anti-pilling acrylic yarn, small scraps or a mini bobbin
- Hook: 4.0 mm (use 3.0 mm if you crochet loosely or want a tighter fabric)
- Tapestry needle, measuring tape, scissors, and small yarn bobbins for the colour work
Yarn details: Anti-pilling acrylic suits cold weather because it resists pilling. Regular acrylic, cotton blends, or wool also work, as long as you choose worsted or Aran weight. However, if you crochet loosely, switch to the 3.0 mm hook for a firmer fabric.
Abbreviations Used in the Crochet Spider-Man Beanie Pattern
- ch: chain
- hdc: half double crochet
- sl st: slip stitch
- st(s): stitch(es)
- yo: yarn over
- BLO / ribbed hdc: working into the middle horizontal “third loop” of the hdc to get a stretchy, knit-like rib
- CC: colour change
Special Techniques for the Spider-Man Beanie
Working sideways: First, crochet one long rectangle from side edge to side edge. As a result, the ribs run vertically when you wear the hat.
Ribbed half double crochet: Next, work each hdc into the third loop, which is the bar behind the usual top loops. In this way, the fabric gets a stretchy, knit-like rib.
Intarsia colour changes: Intarsia uses small, separate black and white bobbins instead of carrying yarn across the back. Consequently, there are no long floats behind the red. To change colour, follow these steps:
- Work the last hdc of the current colour until 3 loops remain on the hook.
- Drop the old colour.
- Pick up the new bobbin, yo with it, and pull through all 3 loops.
- Let the unused strands hang on the wrong side.
Step-by-Step Crochet Spider-Man Beanie Pattern
Follow the pattern one step at a time. Also, keep exactly 50 stitches in every row from Row 1 onward.
Step 1: Foundation Chain
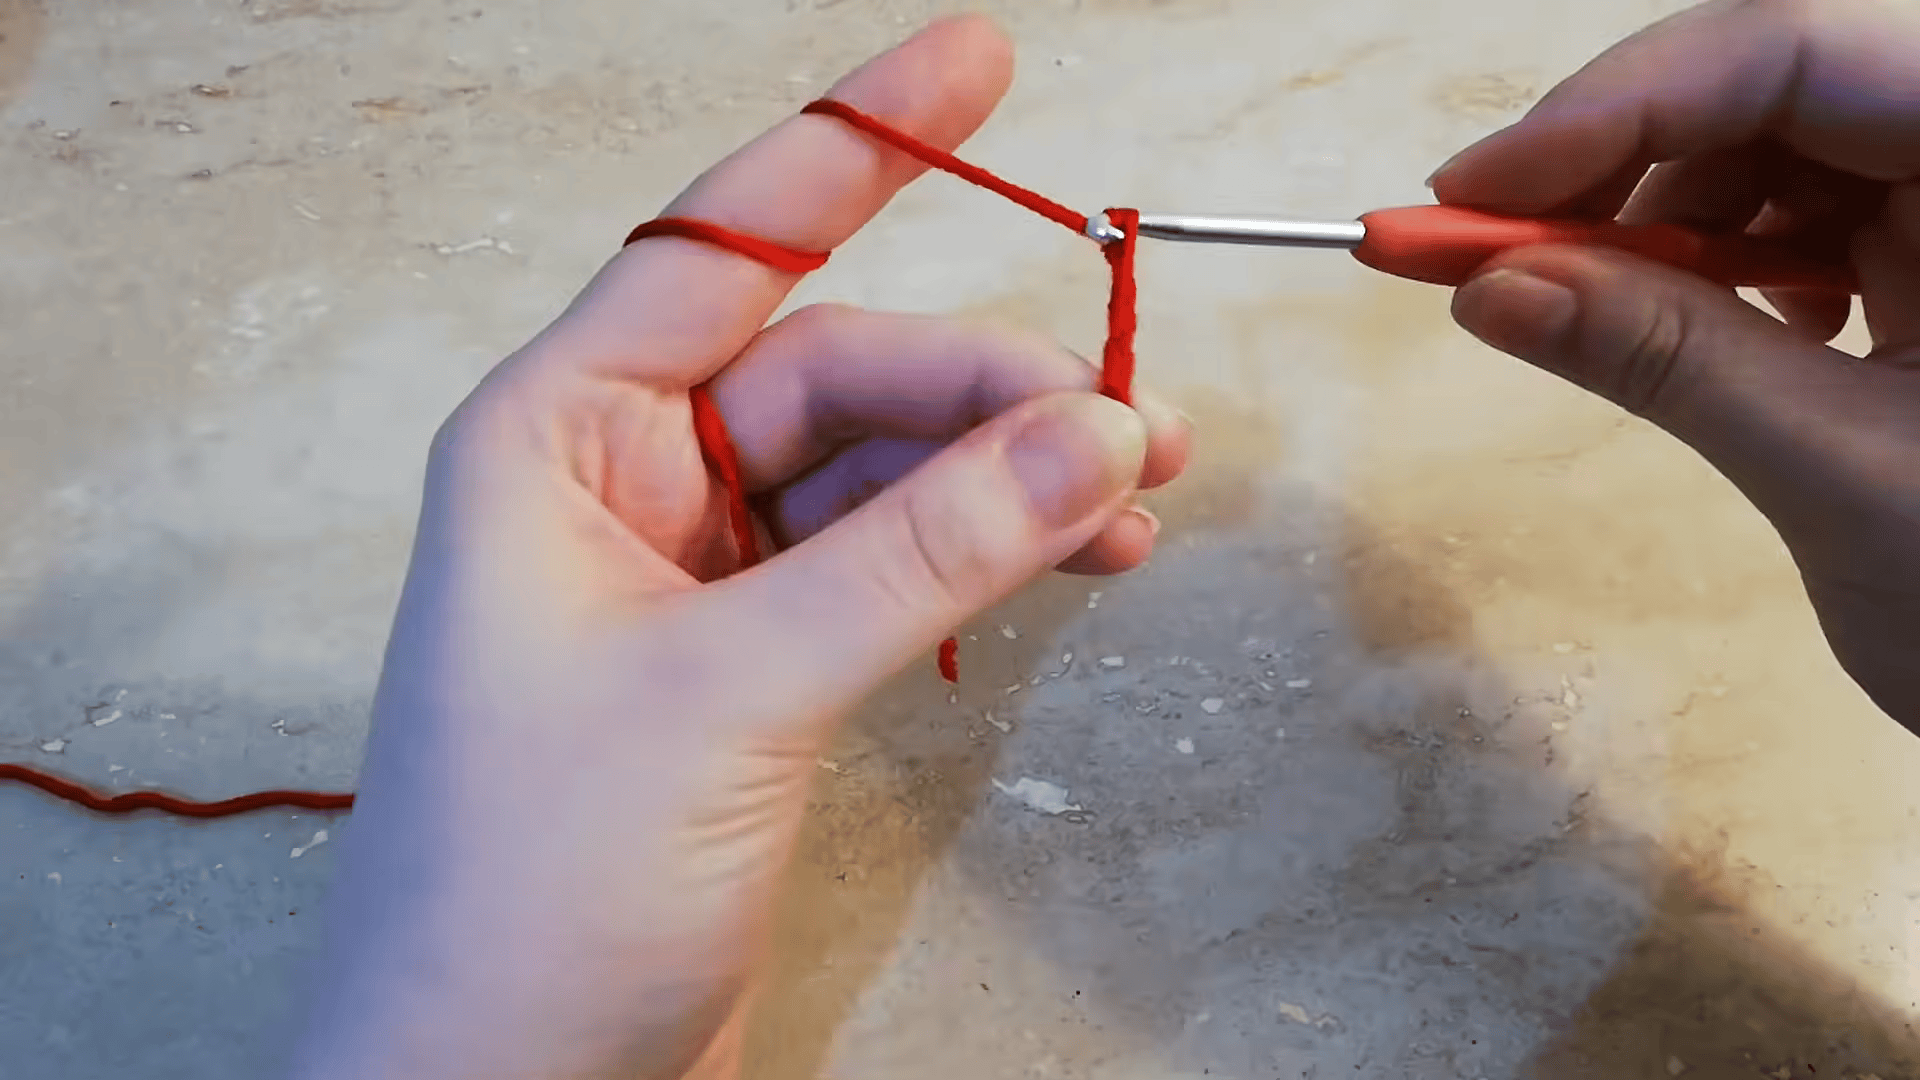
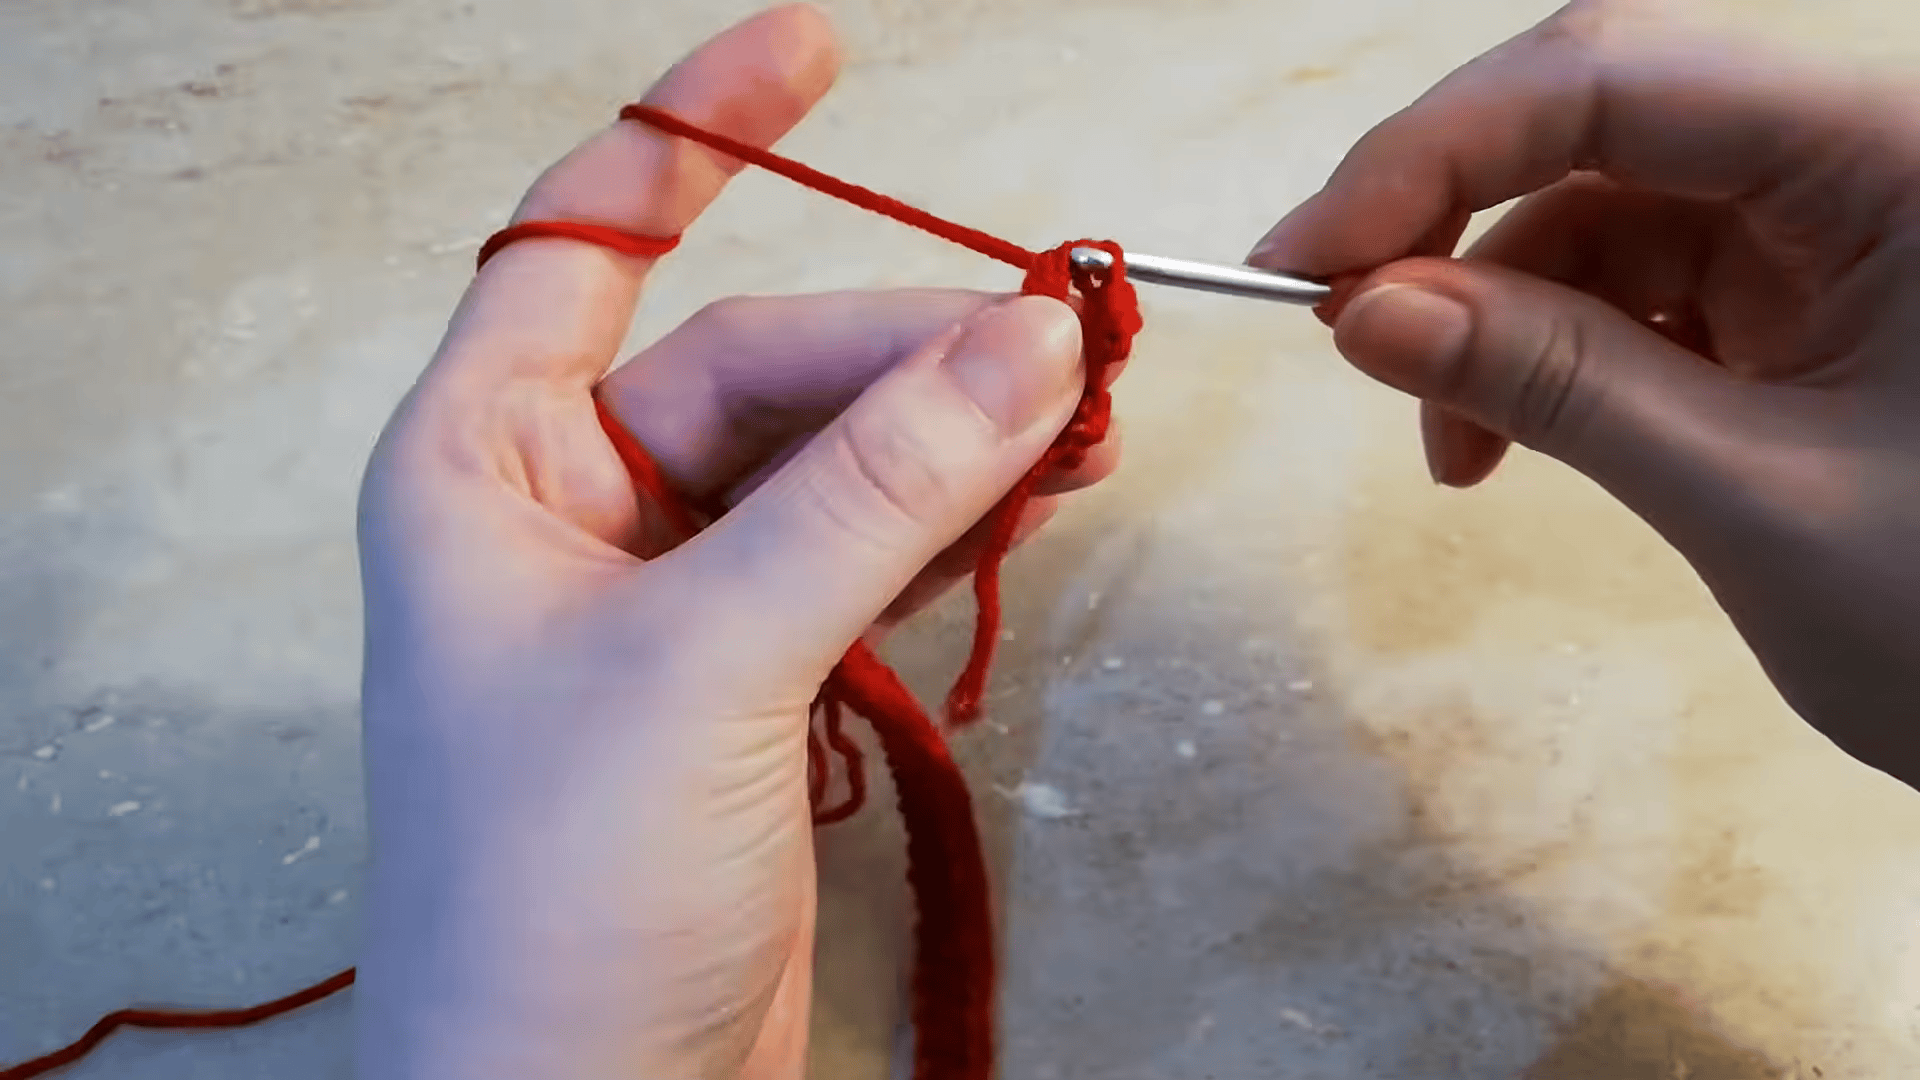
First, wrap the red yarn around your index finger. Next, pinch the chain base between your thumb and middle finger. Then chain 52, which is 50 plus 2 turning chains.
Stitch check: the finished chain should measure about 30 cm.
Step 2: Main Body (Elastic Stitch)
Row 1: In red, ch 52, and then hdc into the 3rd chain from the hook and every chain across (50 hdc). Ch 2, turn.
Rows 2 to 14: Ribbed hdc, 50 sts, and ch 2, turn at the end of each row.
Width check: after Row 14, the band is about 12 cm wide.
Step 3: Spider-Man Eye Pattern
Next, work the first eye while keeping exactly 50 stitches in every row. Meanwhile, ribbed hdc continues throughout, so only the colours change. At the end of every eye row, ch 2 and turn.
10 red, 8 black, 32 red (Row 15).
31 red, 2 black, 2 white, 4 black, 11 red (Row 16).
12 red, 3 black, 4 white, 2 black, 29 red (Row 17).
28 red, 2 black, 5 white, 3 black, 12 red (Row 18).
13 red, 3 black, 5 white, 2 black, 27 red (Row 19).
27 red, 2 black, 5 white, 3 black, 13 red (Row 20).
13 red, 3 black, 5 white, 2 black, 27 red (Row 21).
28 red, 2 black, 4 white, 3 black, 13 red (Row 22).
14 red, 2 black, 4 white, 2 black, 28 red (Row 23).
29 red, 8 black, 13 red (Row 24).
Pro-Tip: End the last hdc with 3 loops on the hook, then pull the new colour through.
Pro-Tip: Keep bobbin strands loose and even, because tight pulling warps the fabric.
Gap and Second Eye (Rows 25 to 37)
Three plain red rows separate the eyes. After that, the second eye repeats the first one exactly.
Rows 25 to 27: Red, 50 sts, and ch 2, turn at the end of each row.
Rows 28 to 37: Repeat Rows 15 to 24 exactly, using the same stitch counts and colours.
Pro-Tip: Recount to 50 stitches every row, so no edge stitch goes missing.
Step 4: Assembly and Side Seaming
Rows 38 to 44: Red ribbed hdc, 50 sts, and ch 2, turn at the end of each row.
Row 45: Red ribbed hdc, 50 sts. The flat piece should now measure about 48 cm wide. Then fasten off, leaving a long tail.
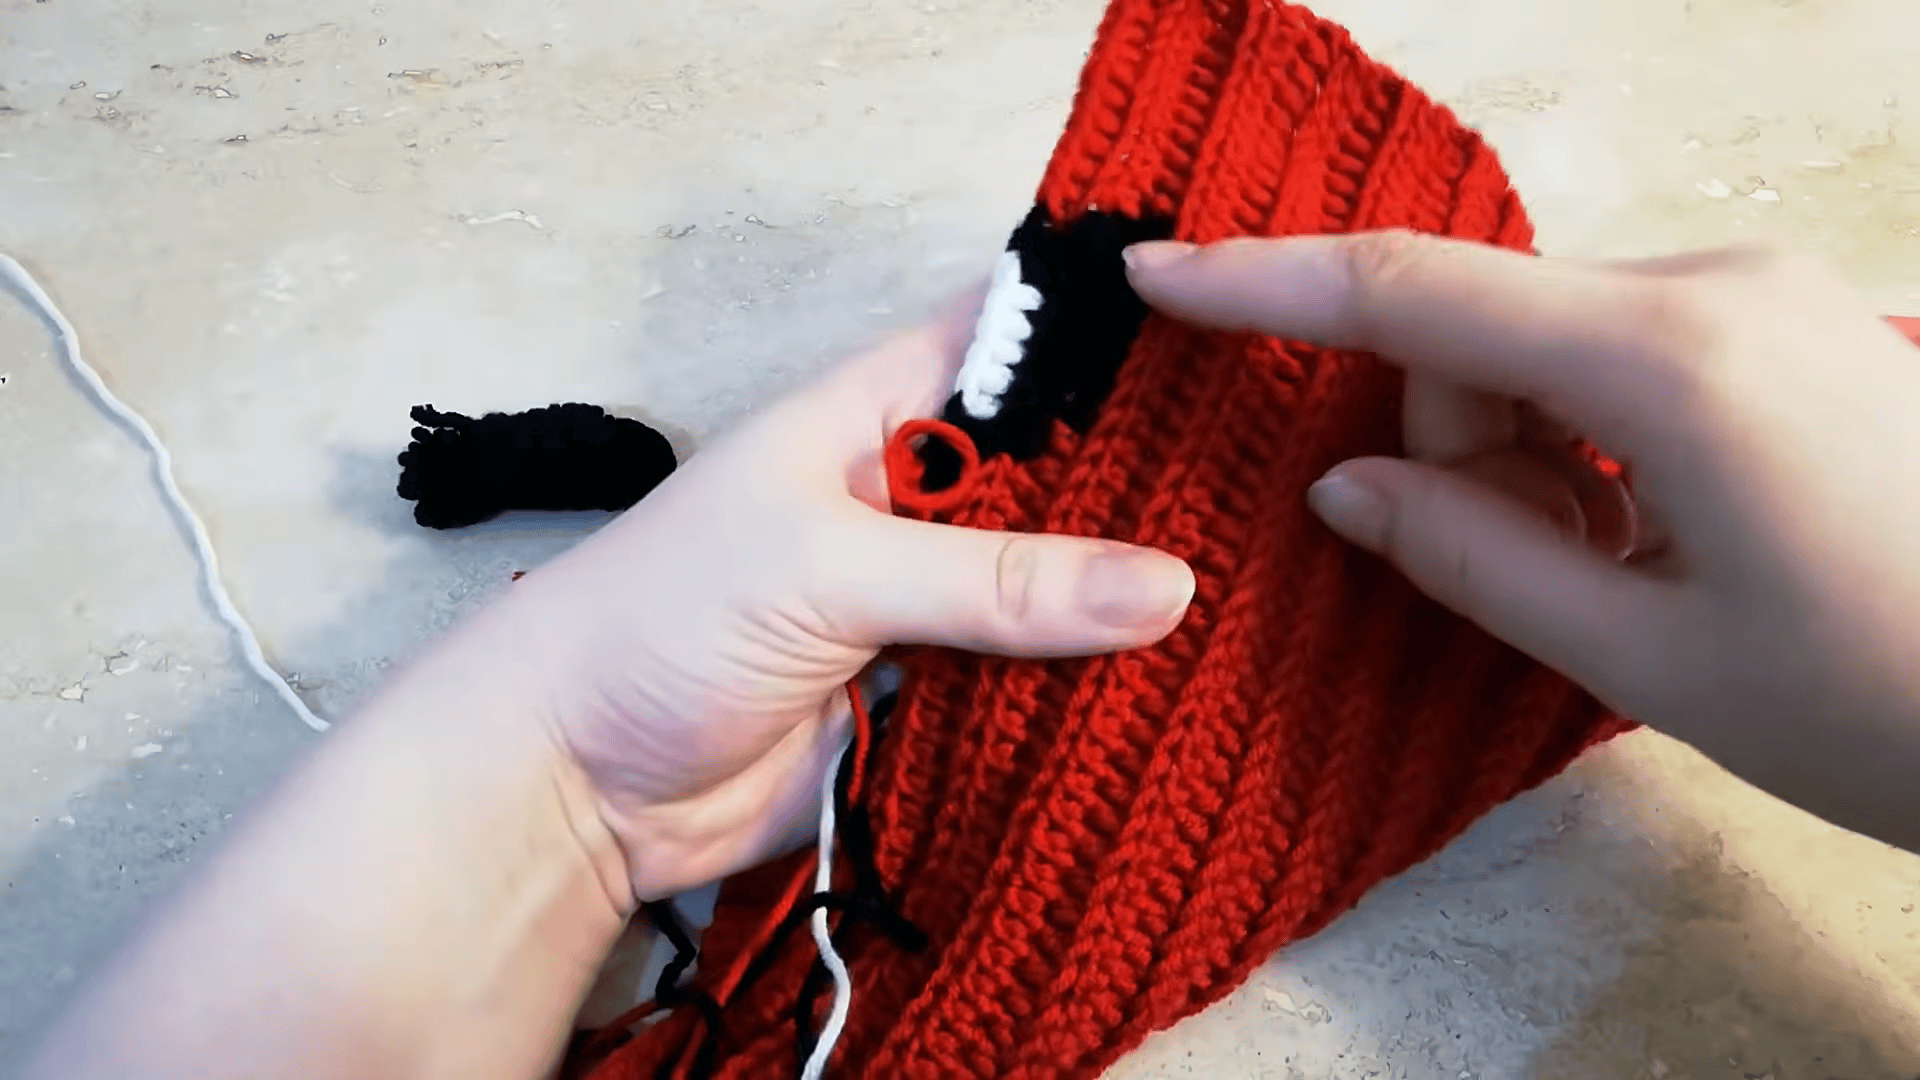
To seam the sides, fold the rectangle in half with the wrong side out, matching Row 1 with the last row. Then sl st them closed from the brim up to the top edge.
Next, thread the long tail onto a needle, weave it around the top opening, and pull tight. After that, knot it several times and turn the beanie right side out.
Finally, weave in every colour-change tail on the wrong side. Run each one back and forth through neighbouring stitches, and then trim flush.
Bonus: Quick Eye Placement Check
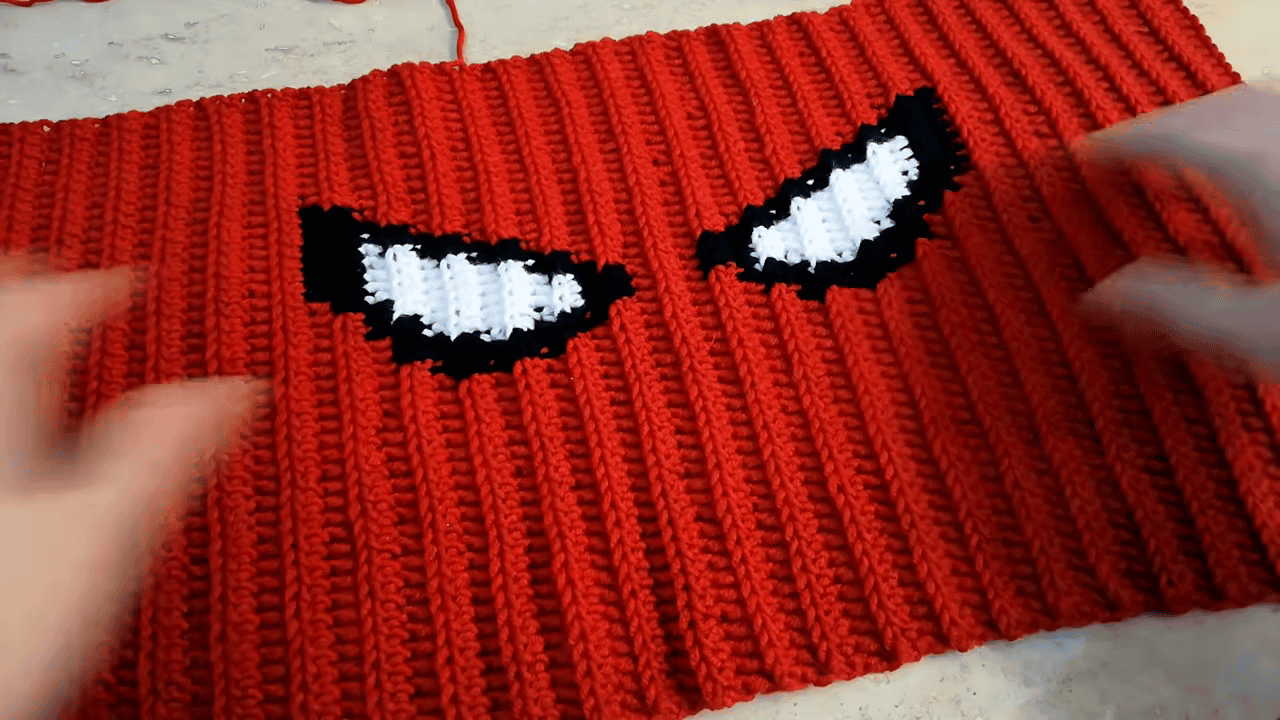
Both eyes follow the same chart, so once the first one makes sense, the second is easy. Rows 15 to 24 form the first eye, and Rows 28 to 37 repeat it exactly. Three plain red rows (Rows 25 to 27) sit between them.
Before you start the next row, add up the red, black, and white stitches. They must total 50. For example, Row 16 reads 31 red, 2 black, 2 white, 4 black, and 11 red, which equals 50. If a row comes out short or long, find the slip first, because one lost edge stitch makes the eyes lean.
Common Mistakes in the Crochet Spider-Man Beanie Pattern
Two slips can spoil this beanie, but both are easy to prevent.
Puckered colour work: tight bobbin strands warp the fabric, so keep your tension loose and even.
Stitch count drift: recount often and keep exactly 50 stitches, because a lost edge stitch makes the eyes lean.
Yarn Swap Ideas
- Budget-friendly: Lion Brand Vanna’s Choice or Premier Everyday Anti-Pilling Worsted
- Cotton blend: Drops Paris or Lily Sugar’n Cream. However, the hat will be sturdier and less stretchy.
Why Make This Spider-Man Hat?
This hat keeps your head warm on cold days. Because the fabric stretches, it fits comfortably, and the foldable brim adds extra warmth. Anti-pilling acrylic also stays neat, and the yarn washes easily.
The ribbed texture feels cosy, while the bold eyes catch attention. As a bonus, the bright red hat makes a thoughtful gift for comic fans, teenagers, and anyone who enjoys bold handmade style.
Styling and Personalisation Ideas
Besides wearing it as it is, you can style the beanie in a few easy ways.
- Street-style outfit: pair your mask-eyes crochet hat with a black hoodie, faded denim, and sneakers.
- Casual cosplay: on cold days, wear the beanie with a red-and-blue scarf.
- Gifts for comic fans: comic fans and teenagers will love it as a handmade birthday gift.
- Other colours later: once you feel confident, try the same pattern in other colours.
Wash and Care Guide for Your Beanie
First, follow your yarn label. Anti-pilling acrylic washes easily, so gentle care keeps it neat. Afterward, reshape the hat and dry it flat.
Crochet Spider-Man Beanie Pattern FAQ
Which hook size works for this beanie?
Use a 4.0 mm hook. Alternatively, choose 3.0 mm if you crochet loosely or want a tighter fabric.
Why is the hat worked sideways?
One long rectangle makes the ribs run vertically, much like a knitted beanie.
Will the Spider-Man hat fit my head?
It is an adult women’s size. Because the ribbed fabric stretches, it fits head sizes of roughly 56-57 cm.
Is the crochet Spider-Man beanie pattern hard?
It is intermediate, since you handle several small bobbins. Still, the rows are short, and the eye chart repeats.
Can I swap the yarn?
Yes. Cotton blends work too, though they feel sturdier and less stretchy.
How do I stop the eyes from leaning?
Keep exactly 50 stitches in every row, because a lost edge stitch makes the eyes lean.
Grab Your Red Yarn and Start
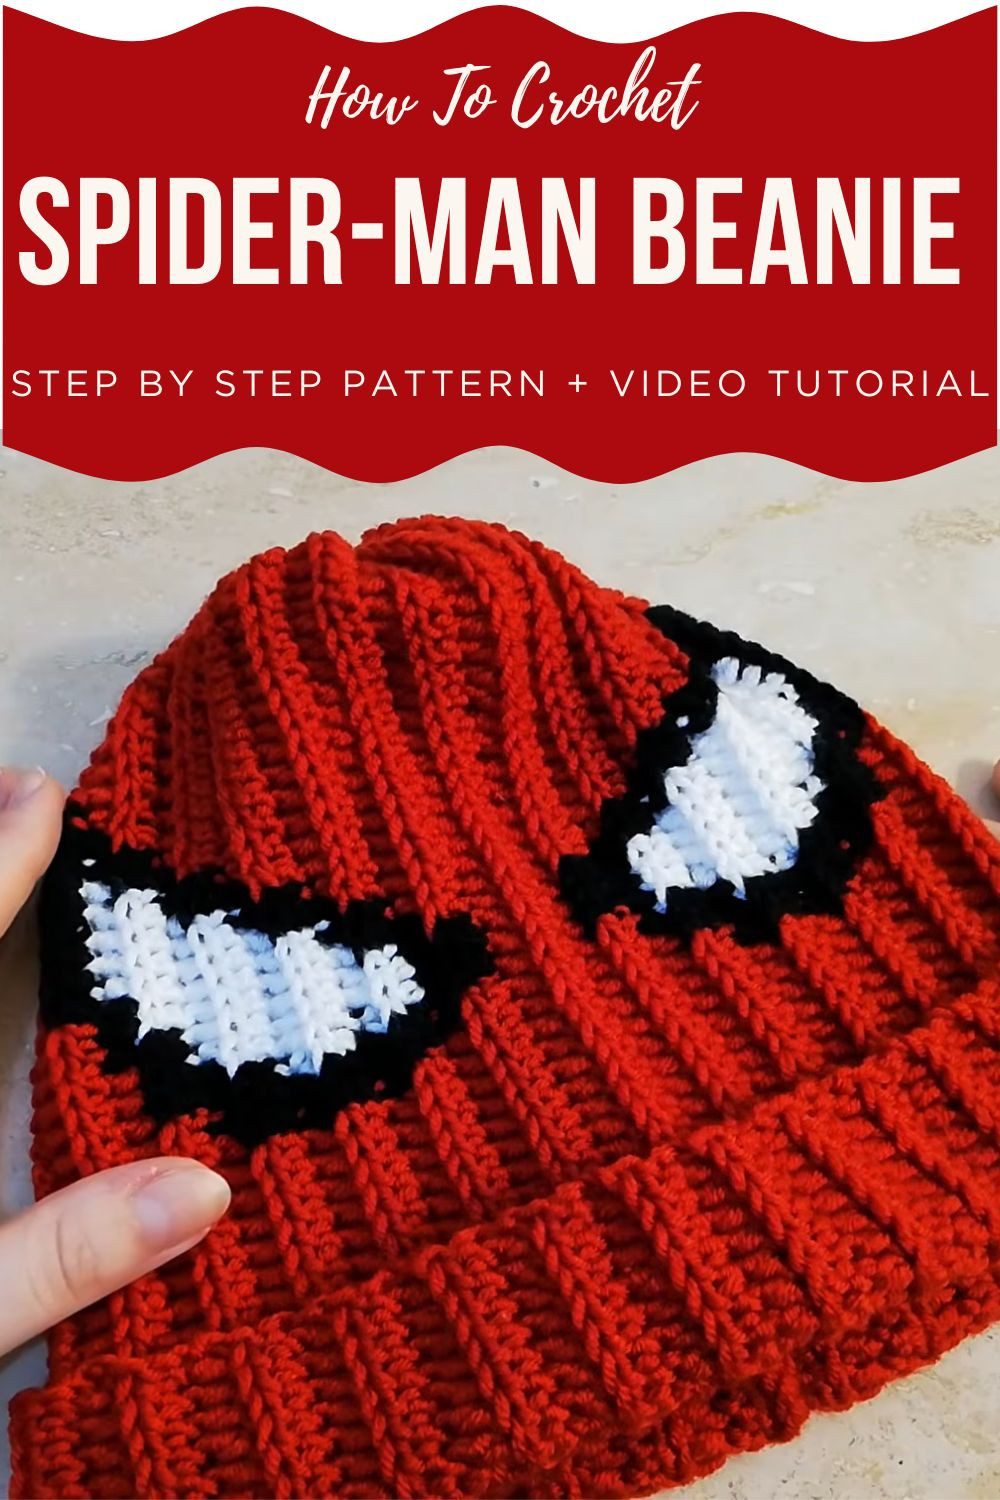
Okay, here’s my advice. Make the red one first, before you try any other colour. The eyes look harder than they really are, so just follow the rows and keep your bobbins loose.
If a stitch slips at a colour change, don’t stress about it. Just recount, fix it, and keep going. Once the hat is done, pull it on and grin, because saying “I made it myself” feels great. After that, go stitch one for a friend too.