Crochet Crown Hair Clip Pattern with Tiny Pearl Accents
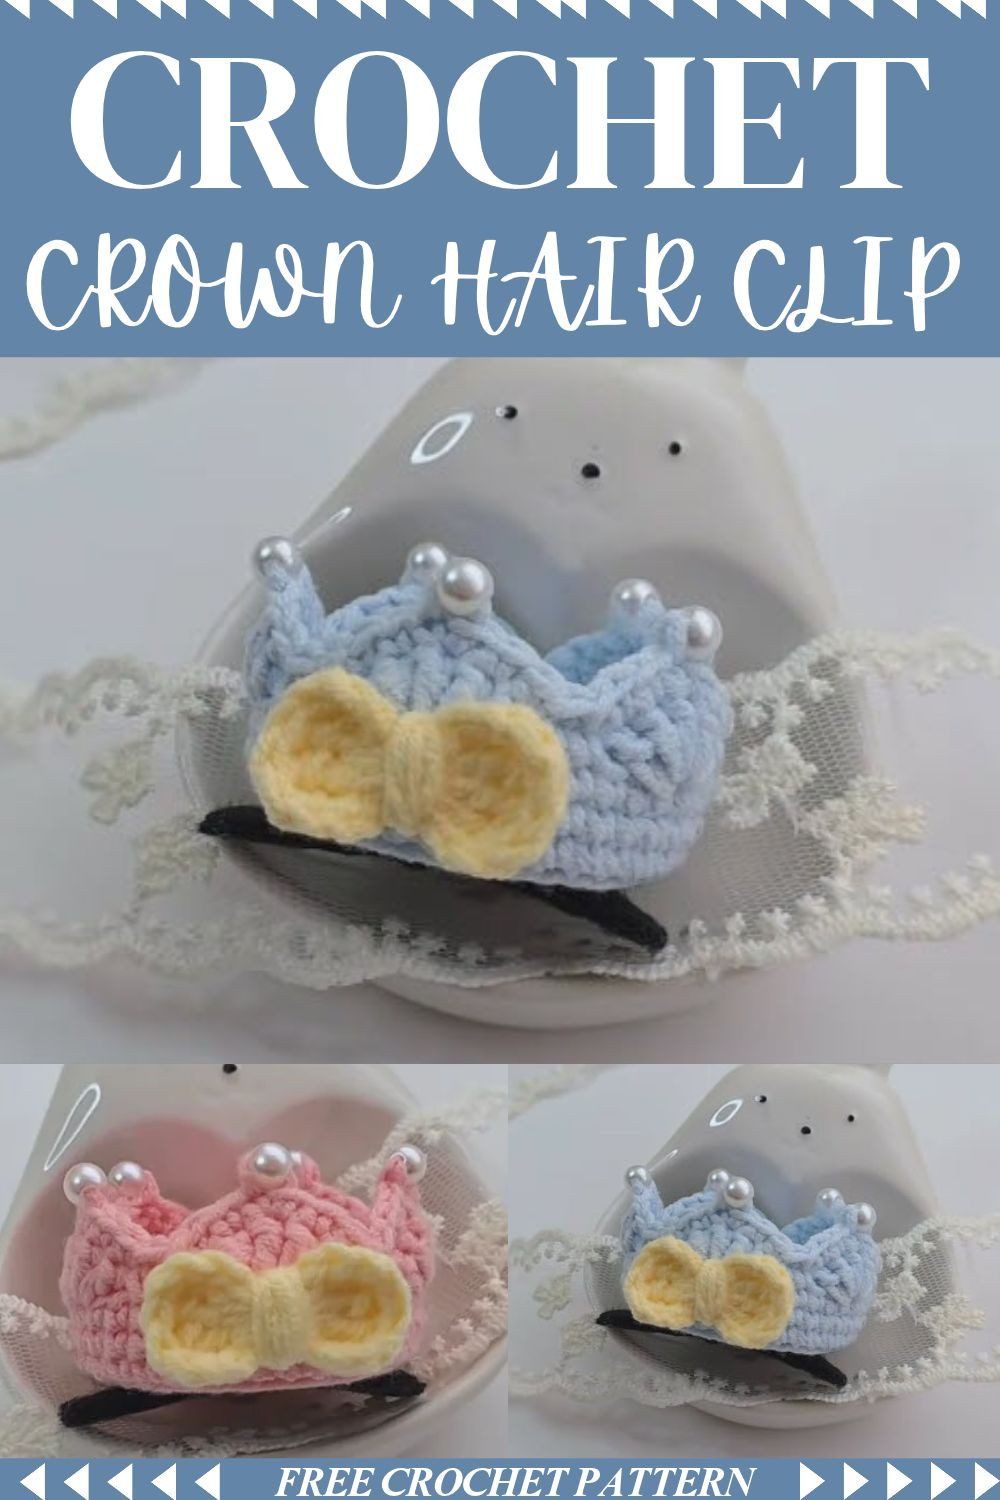
This little crown clip looks fancy, but it is easy to make. You get five pearl-topped points and a tiny bow below the centre. Follow this crochet crown hair clip pattern and make a cute princess accessory for any birthday.
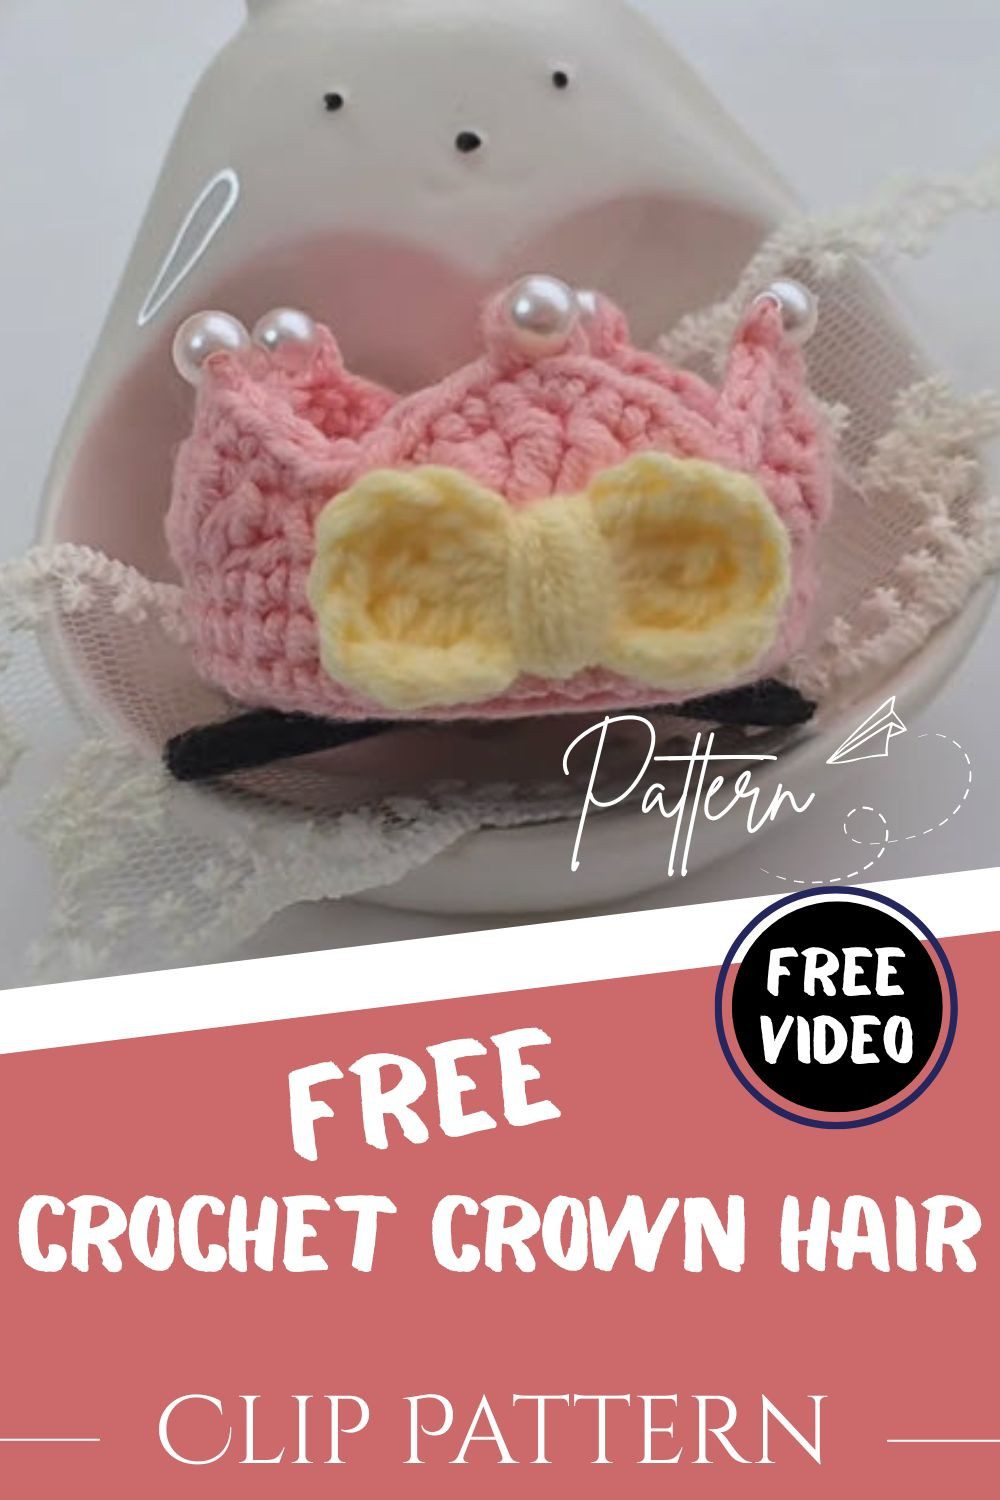
Here is a hair clip that looks fancy but stays simple to make. This crochet crown hair clip starts with a small circle and grows into a neat wall. Next, you make five scalloped points and add a pearl to each one. Finally, a tiny bow is glued just below the centre point. Because the stitches are easy, beginners and intermediate crafters can enjoy it. It is a lovely accessory for infants, toddlers and children, and it suits birthdays, photoshoots and dress-up. So pick up your yarn and start now.
Crochet Crown Hair Clip Project Overview
This crochet crown hair clip is a princess accessory worked in rounds with US terminology. It suits beginners and intermediate crafters who want a personalized piece for infants, toddlers or children. Besides that, it is a good fit for birthdays, photoshoots and dress-up.
- Skill level: Beginner to intermediate
- Finished size: About 2 inches (5 cm) wide and 1.5 inches (4 cm) tall, estimated
- Terminology: US crochet terms
How the Crochet Crown Hair Clip Is Built
The project has three parts, namely the crown, the bow and the assembly.
- Crown: First, you work continuous rounds from a circular base that begins with a magic ring. Rounds 2 to 5 use increases to widen the circle to 35 stitches. After that, Round 6 is worked in the back loops only (BLO), which creates a defined edge and starts the vertical wall. Round 9 makes the crown points, where you skip stitches and place 5 dc into a single stitch to form each scallop. Finally, Round 10 adds the five pearls with the smaller 1.5 mm hook.
- Bow: The bow starts from a magic ring, with ch 3 and 4 tr for each petal. It is fastened off with a long tail that wraps around the centre.
- Assembly: The bow is glued to the front of the crown, below the centre point. Meanwhile, the clip gets a felt backing, and then the crown is hot-glued onto the felt-lined clip.
Materials for the Crochet Crown Hair Clip
- Yarn: Milk cotton yarn (4-ply)
- Main hook: 2.5 mm crochet hook, used for both the crown and the bow
- Secondary hook: 1.5 mm crochet hook, used only for adding the pearls
- Embellishments: 6 mm pearls, 5 pieces
- Hardware: Snap hair clip
- Notions: Scissors, felt fabric for the backing, and hot glue or all-purpose adhesive
- Other: Stitch marker
Stitch Abbreviations for the Crochet Crown Hair Clip (US Terms)
- sc: single crochet
- dc: double crochet
- tr: treble crochet
- ch: chain
- st: stitch
- slst: slip stitch
- mr: magic ring
- sk: skip
- inc: increase
- BLO: back loops only
Notes Before Making the Crochet Crown Hair Clip
- Place a stitch marker at the beginning of Round 2 and again at the beginning of Round 10, since it helps you manage the round transitions.
- Also, join Rounds 1 to 8 with a slst at the end of each round.
- However, do not join at the end of Round 9.
- Likewise, leave Round 10 unjoined.
Crown Pattern for the Crochet Crown Hair Clip
Foundation
To start, make a magic ring.
Round 1
First, ch 1 and make 7 sc into the magic ring. Then pull the ring tight and slst into the first st to join. (7 sts)
Round 2
To begin, ch 1 and make 2 sc into each st around. Next, slst to join and place a stitch marker at the beginning of this round. (14 sts)
Round 3
Ch 1, sc in the same st, then inc in the next st. After that, repeat [sc in next st, inc in next st] around and slst to join. (21 sts)
Round 4
Ch 1, sc in the first st, then inc in the next st. Next, repeat [sc in next st, sc in next st, inc in next st] around, ending with sc in the final st. Finally, slst to join. (28 sts)
Round 5
Ch 1, sc in the next 3 sts, then inc in the next st. Then repeat [3 sc, 1 inc] around and slst to join. (35 sts)
Round 6
This time, work in the back loops only (BLO). Then ch 1 and sc in each st around, and slst to join. (35 sts)
Rounds 7 and 8
Then ch 1 and sc in each st around. Finally, slst to join at the end of each round. (35 sts)
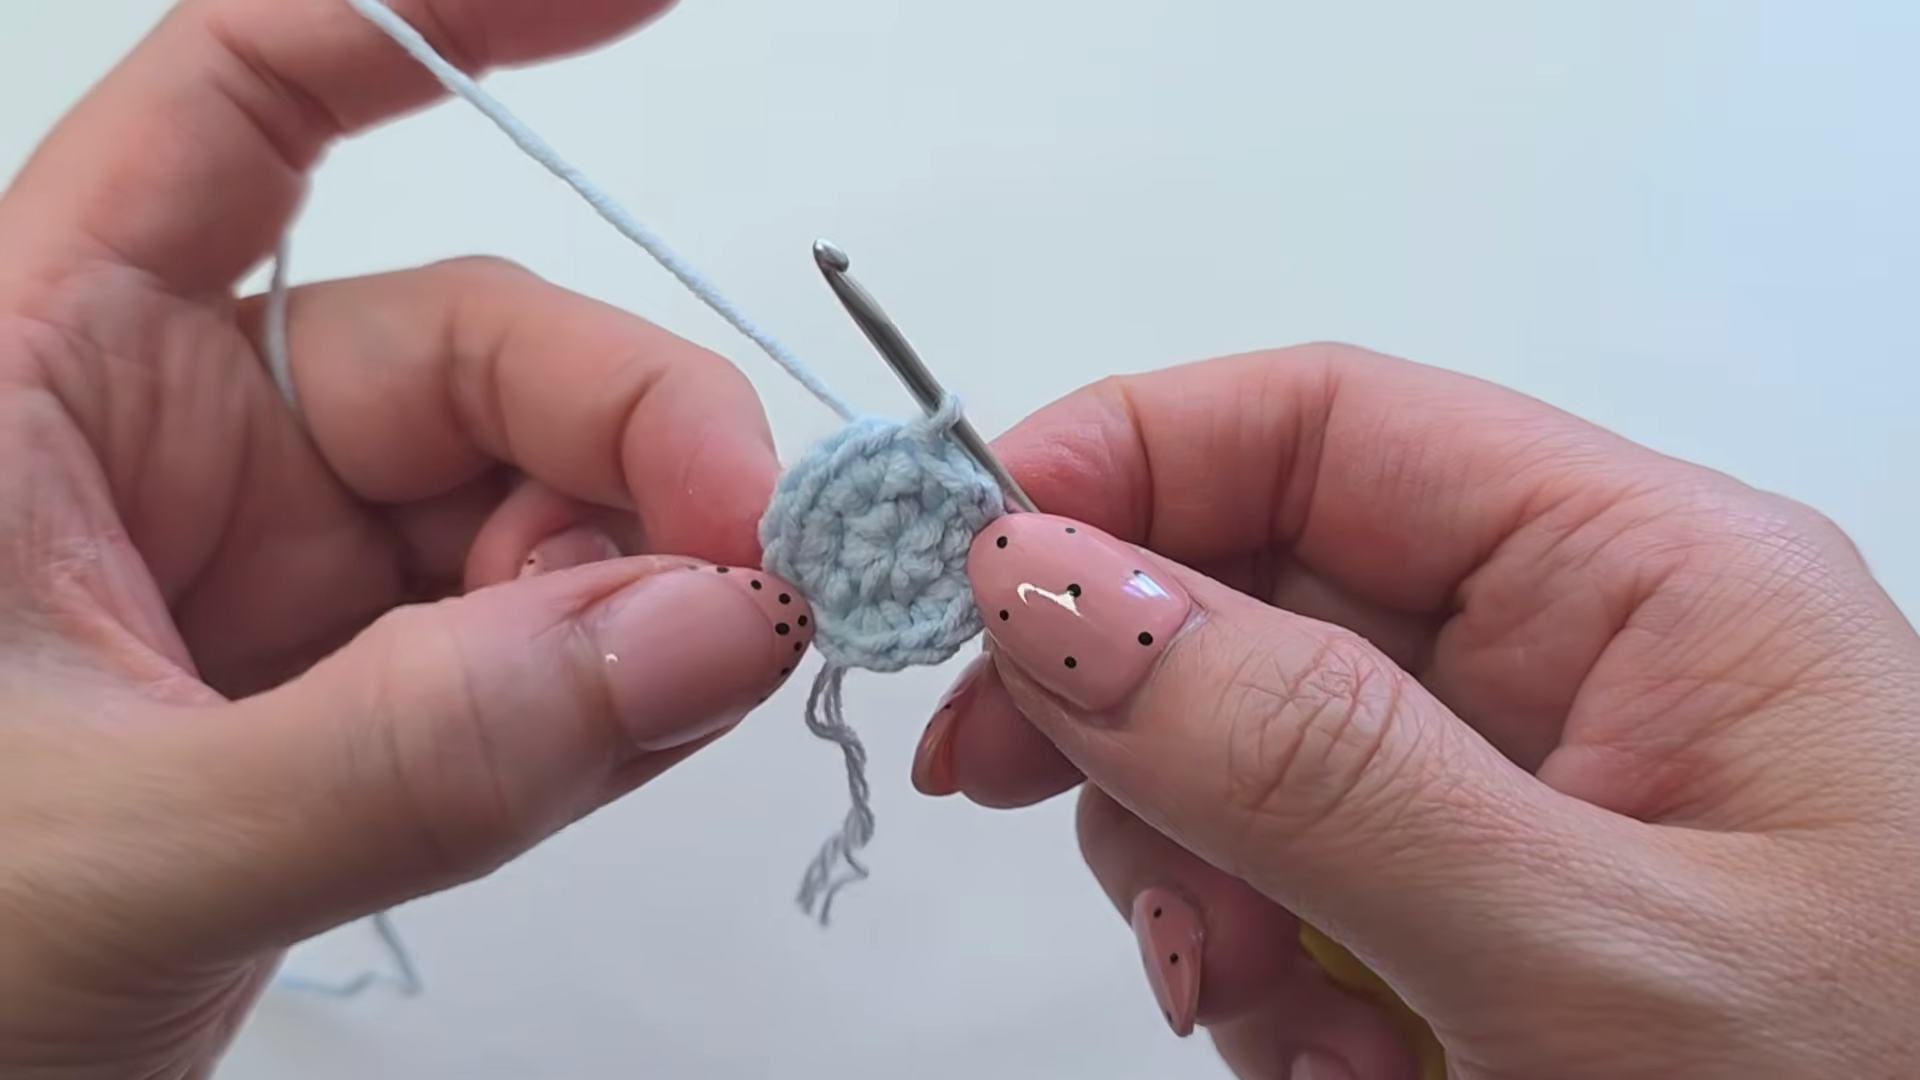
Round 9: Crochet Crown Hair Clip Points
Ch 1, sc into the first st, sk 2 sts, then make 5 dc into the next st. All 5 dc go into the same stitch. After that, sk 2 sts and repeat around. In this way, each group of 5 dc forms one scallop or peak. Do not join.
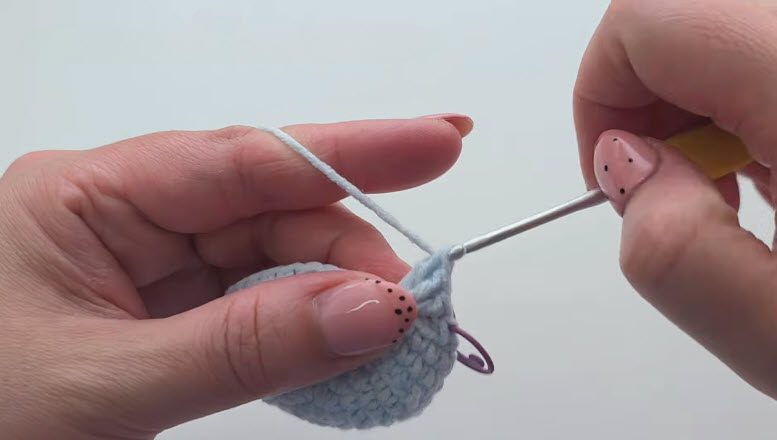
Round 10: Pearls on the Crochet Crown Hair Clip
First, slst into the first st. Since this slst counts as a stitch, place a stitch marker in it. Then sc in the next 2 sts. After the 3rd stitch, add the first pearl by following these steps:
- First, drop the 2.5 mm hook.
- Next, switch to the 1.5 mm hook and pull the yarn through the hole of the pearl.
- Then re-insert the 2.5 mm hook.
- After that, slst into the front loop of the single crochet to secure the pearl.
- Finally, complete the single crochet by making 1 sc in the same st.
Now work 2 sc and 2 slst. Repeat around until you have added 5 pearls in total, one for each of the five crown points. Do not join. Finally, fasten off.
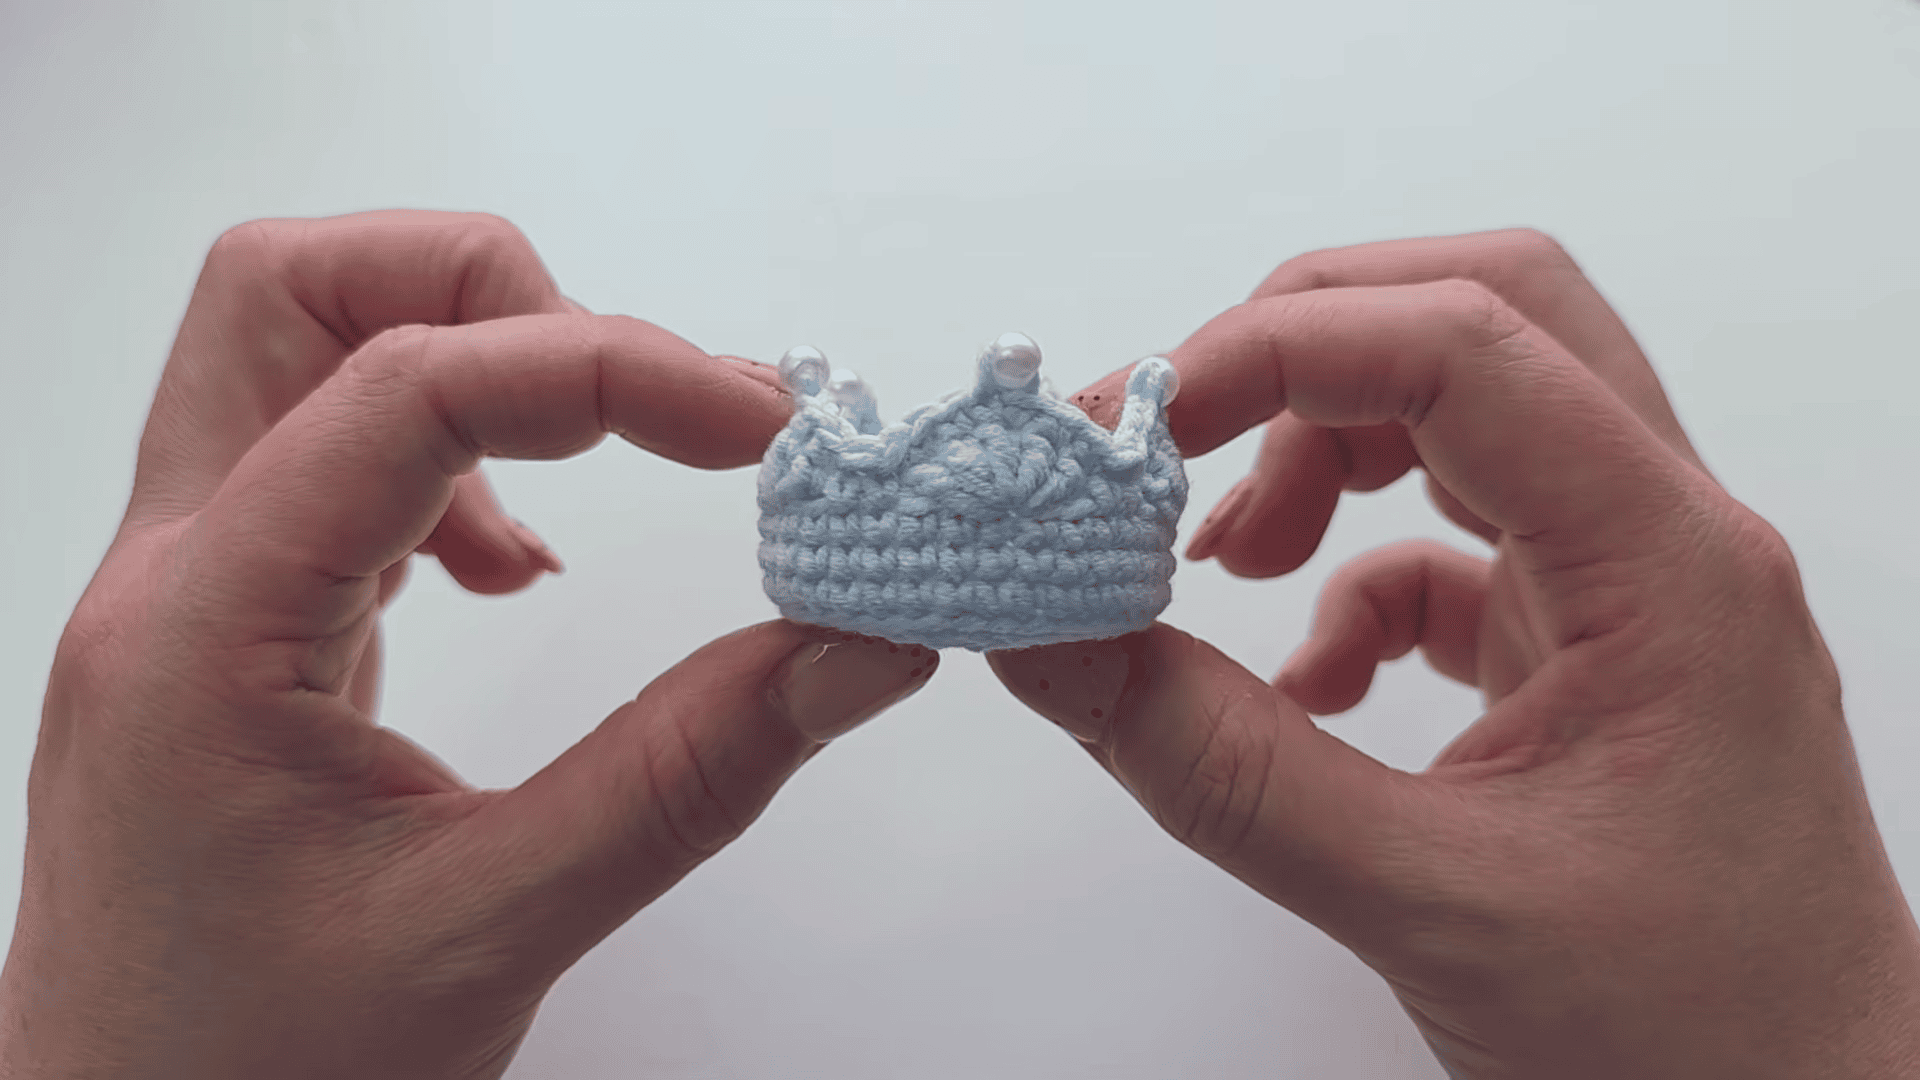
Bow Pattern for the Crochet Crown Hair Clip
Again, use the 2.5 mm hook for the whole bow.
Foundation
Start with a magic ring.
Step 1
Ch 3, make 4 tr into the ring, ch 3, then slst into the ring. As a result, you get the first petal.
Step 2
Repeat Step 1 once more to form the second petal.
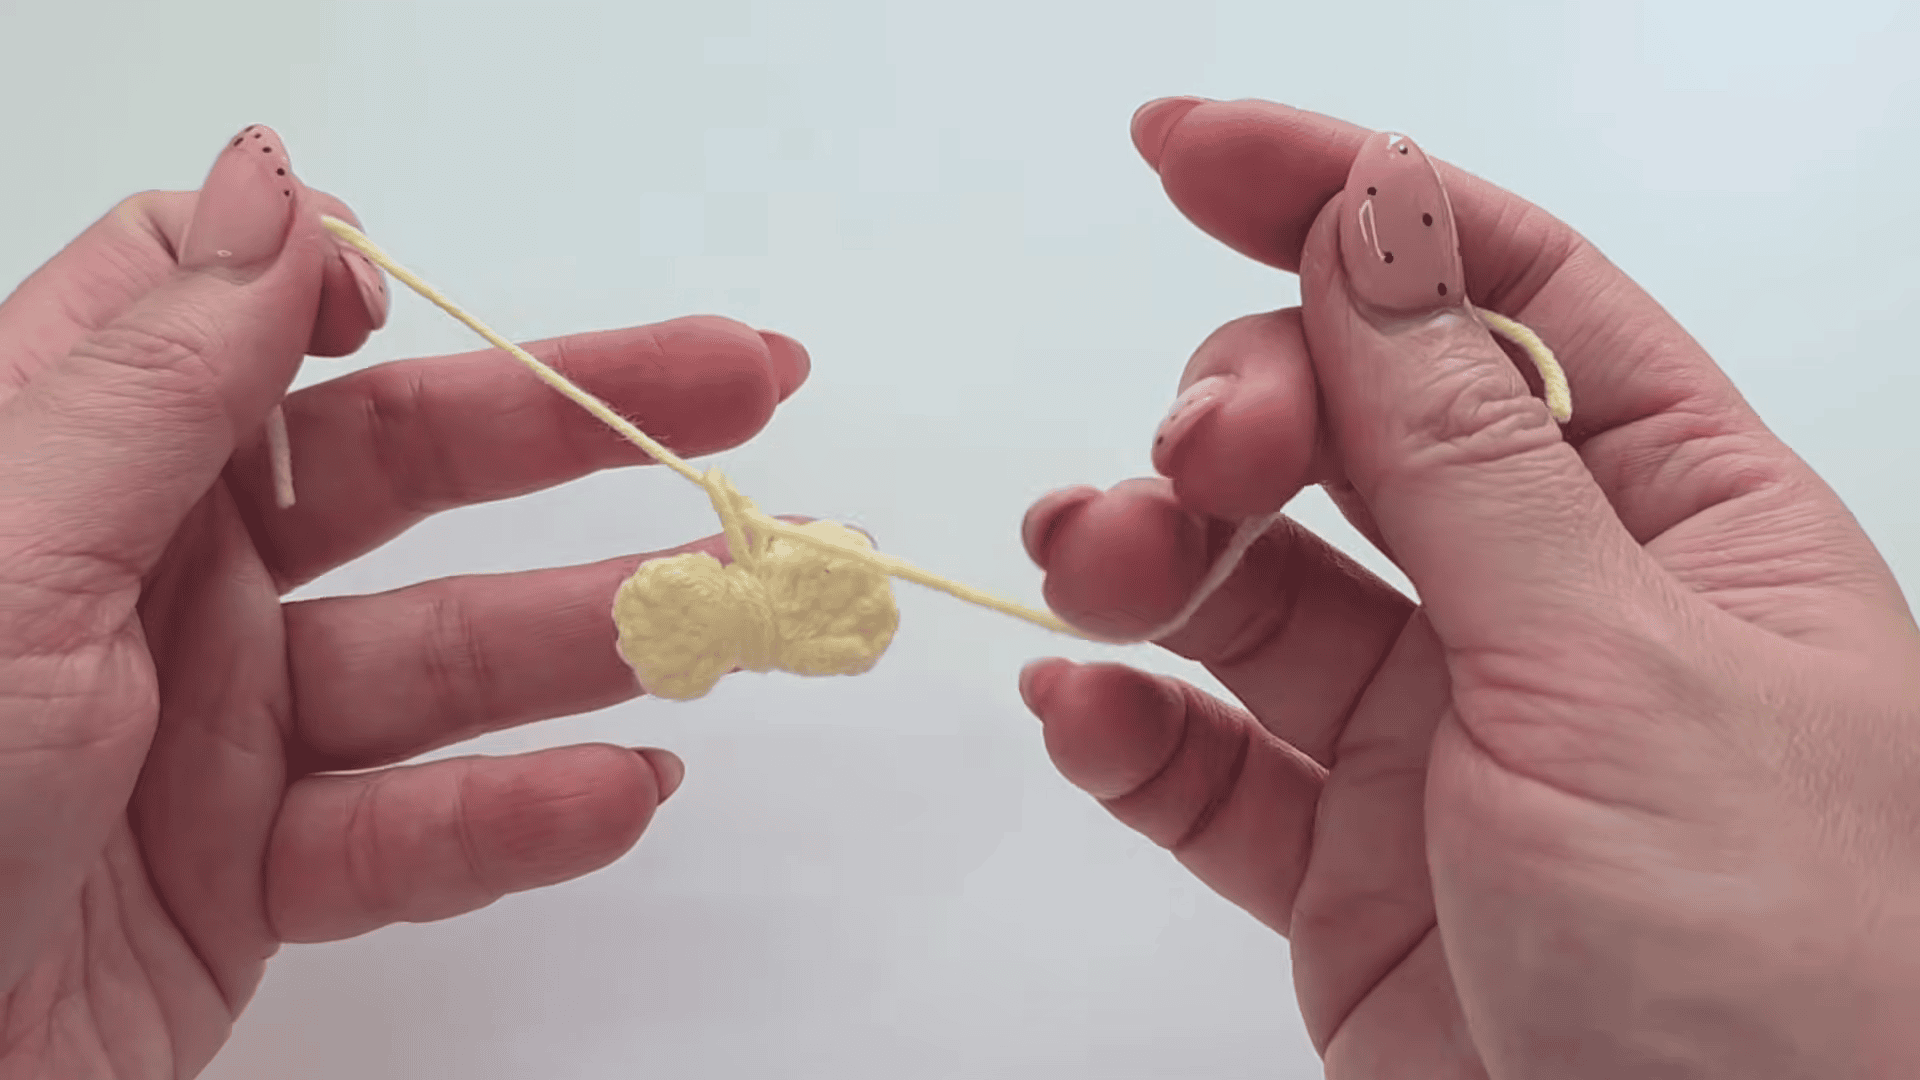
Finishing the Bow
First, pull the magic ring tight to close the centre. Then fasten off, leaving a long yarn tail. Wrap this tail securely around the centre of the bow, because it creates a clean, gathered look.
Assembling the Crochet Crown Hair Clip
Attach the Bow
First, glue the finished bow onto the front of the crown. Then place it directly below the centre point, not between two points. Also, make sure the bow is centred carefully before the glue sets, since this keeps the princess crown symmetrical.
Prepare the Hair Clip
- First, cut two pieces of felt fabric to fit the dimensions of the snap hair clip.
- Next, slide the felt pieces behind the clip mechanism for a clean, covered look.
- Finally, sandwich the hair clip between the two pieces of felt using hot glue. This makes a stable, soft and non-slip base for the crown.
Mount the Crown
Once the felt-lined hair clip is ready, apply hot glue to the bottom of the crown. Then press it firmly onto the felt-covered clip.
Important Observations
- Glue: All-purpose glue or hot glue is essential, as it gives the bow and the crown-to-clip attachment their structural strength.
- Felt base: The felt hides the glue. In addition, it works as a protective layer that keeps the hair clip comfortable for the wearer.
- Precision: Center the bow carefully before the glue sets, so the crown stays symmetrical.
Pro Tips for a Neat Crochet Crown Hair Clip
- Keep your stitch marker in place from the start of Round 2, because it makes the round transitions much easier to follow.
- Also, pull the magic ring tight in Round 1 so that no gap shows in the centre.
- Work Round 6 in the back loops only, since this gives the crown its defined edge.
- When adding a pearl, keep the 1.5 mm hook handy so the switch between hooks stays quick.
- Finally, check that the bow sits exactly below the centre point before the glue dries.
Finishing Tips for the Crochet Crown Hair Clip
- First, weave in any loose ends before gluing, so nothing sticks out from the crown.
- Next, wrap the long yarn tail of the bow firmly around the centre for a clean, gathered look.
- Then use felt on both sides of the clip, so the glue stays hidden and the base feels soft.
- Finally, press the crown firmly onto the felt-covered clip and hold it for a moment while the glue sets.
Common Crochet Crown Hair Clip Mistakes to Avoid
- Joining Round 9 or Round 10. Both rounds are left unjoined.
- Placing the bow between two points. It belongs directly below the centre point.
- Skipping the stitch markers. Without them, it is easy to lose track of where Round 2 and Round 10 begin.
- Using the wrong hook for the pearls. The 1.5 mm hook is only for adding the pearls, while everything else uses the 2.5 mm hook.
- Gluing before centring. Once the glue sets, the bow is hard to adjust.
Uses and Benefits of This Crochet Crown Hair Clip
- A personalised accessory for infants, toddlers and children
- A sweet detail for birthdays and dress-up play
- A cute prop for photoshoots
- A small project made from simple stitches
- A felt-backed clip that stays comfortable for the wearer
Crochet Crown Hair Clip Gift Ideas
- A birthday gift for a little princess
- A small add-on for a handmade gift basket
- A matching accessory for a photoshoot outfit
- A party favour for a princess-themed celebration
- A keepsake for a baby’s first birthday
Bonus: Crochet Crown Hair Clip Colour Combination Ideas
The pattern doesn’t set a colour, so you can choose whatever suits the occasion. Besides, these are only styling suggestions, and the instructions stay exactly the same:
- Soft white crown: a classic look that shows off the pearls.
- Pastel pink crown: pretty for birthdays and baby photoshoots.
- Light yellow crown: a warm, golden feel.
- Two-tone idea: one colour for the crown and a matching or contrasting shade for the bow.
Crochet Crown Hair Clip Frequently Asked Questions
1. What skill level is this crochet crown hair clip?
Overall, it suits beginners to intermediate crafters. In particular, you need single crochet, double crochet, treble crochet and slip stitch, plus a magic ring.
2. What size will the finished crown be?
In general, it measures about 2 inches (5 cm) wide and 1.5 inches (4 cm) tall. Of course, this is an estimate.
3. Which hooks do I need?
You need a 2.5 mm hook for the crown and the bow. Besides that, a 1.5 mm hook is used only for adding the pearls.
4. What yarn is used?
The pattern uses milk cotton yarn (4-ply). Please note that a different yarn may change the finished size.
5. How many pearls do I need?
In total, you need five 6 mm pearls, one for each crown point.
6. Do I join the last rounds?
No, Round 9 and Round 10 are not joined. Rounds 1 to 8, on the other hand, are joined with a slst.
7. How do I attach the crown to the clip?
Back the snap clip with felt first. Then hot-glue the bottom of the crown onto the felt-covered clip.
8. Is this crochet crown hair clip safe for babies and toddlers?
The crown has small pearls and glued parts, so it should only be worn with an adult watching. For that reason, keep it away from little ones who might put things in their mouths.
A Little Crown for Big Moments
Finally, you now have a tiny crown ready to sit on someone’s head. It doesn’t take long, and once the first one is done, the next one feels much easier. So take your time with the pearls, keep the bow centred, and let the glue set properly.
Whether it’s for a birthday, a photoshoot or just playing dress-up at home, this crochet crown hair clip makes any day feel a bit more special. Also, try a few in different colours and see which one gets worn the most.