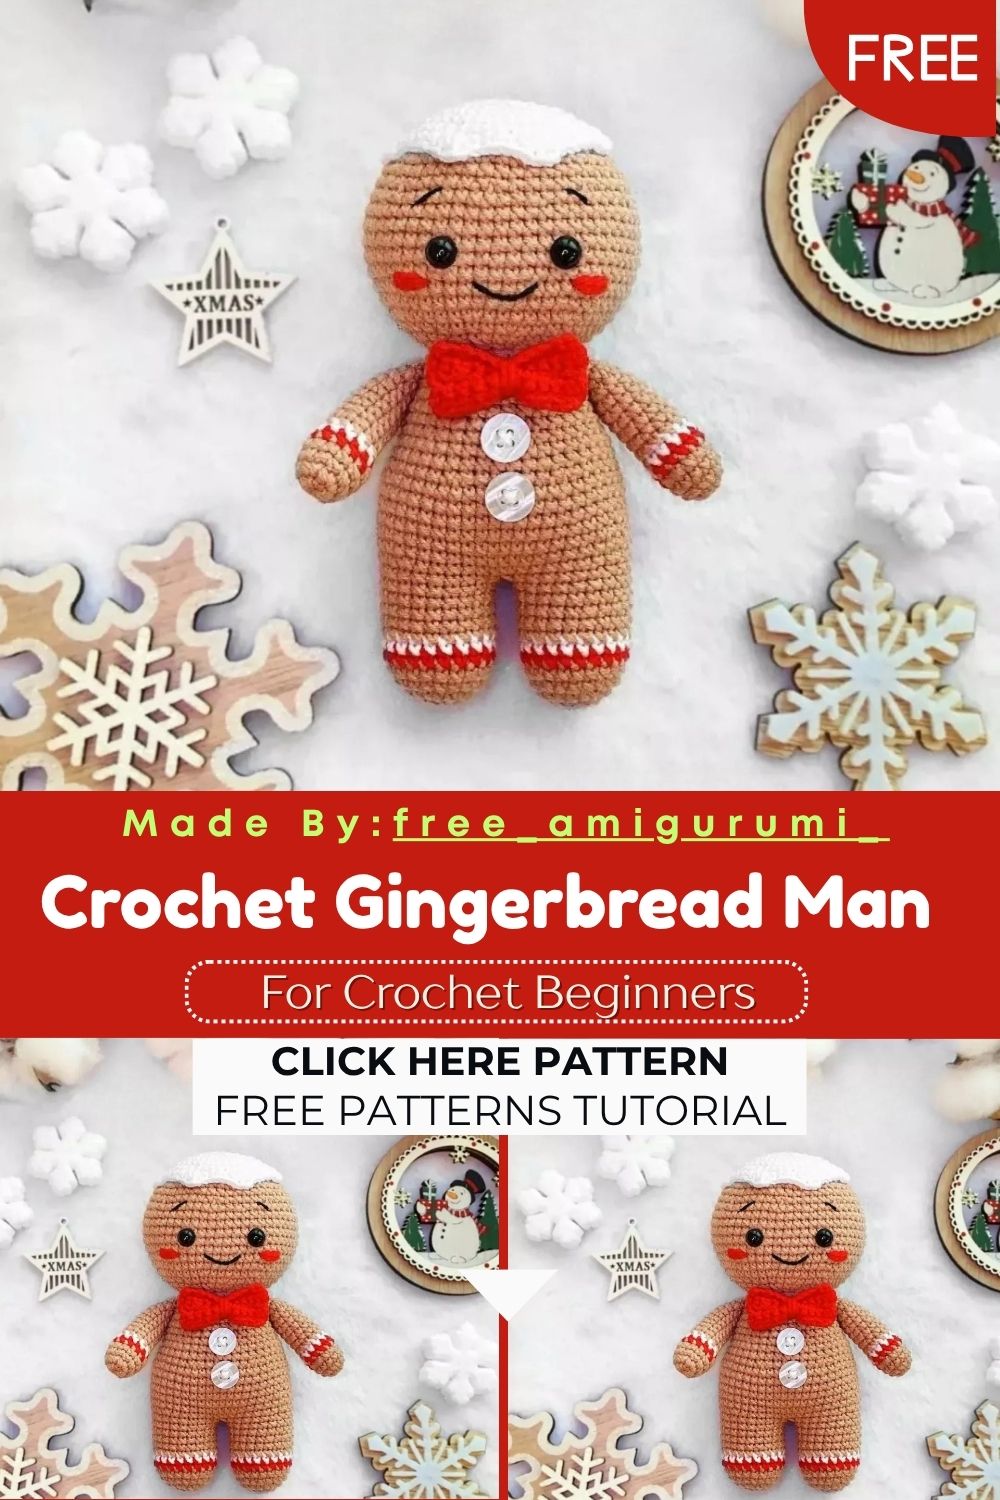
Little Crochet Gingerbread Man – Free Amigurumi Pattern
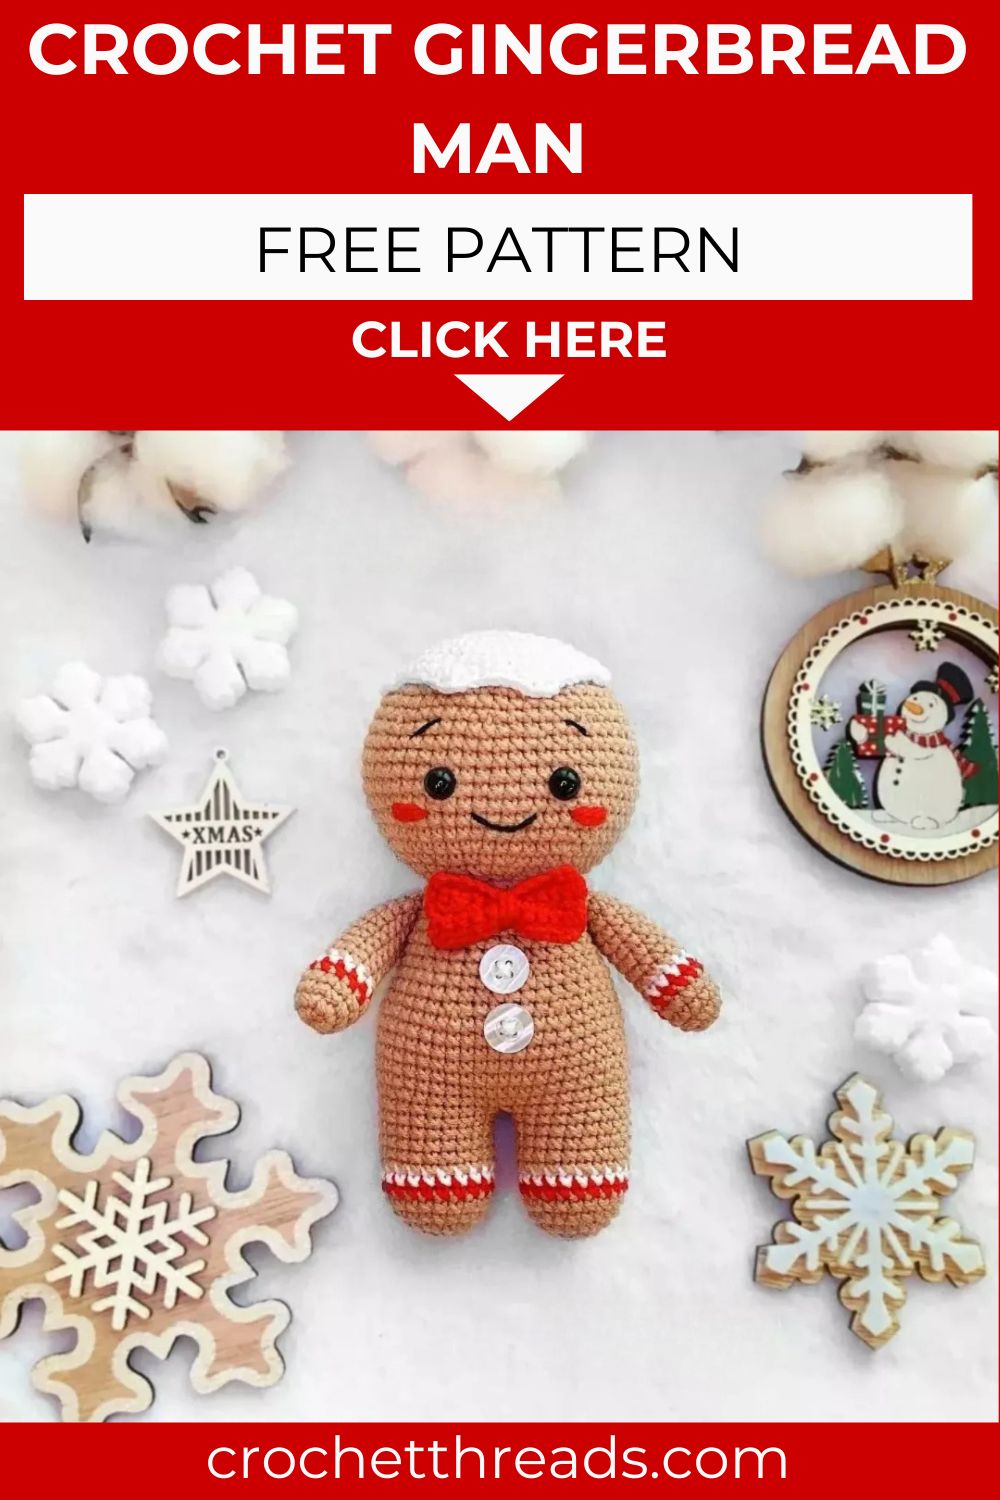
Standing tall with a frosted swirl crown, a sweet red bowtie, and candy-stripe sleeves, this gingerbread man amigurumi is the coziest holiday treat you will ever stitch!
Worked entirely in sport weight yarn at a delicate 2mm hook, this little gingerbread figure stands at a charming 15 to 16 centimeters tall. The candy cane stripe detail on both the arms and legs is created through simple color changes, while the swirled white frosting crown on top of the head uses a clever half-double-crochet shell technique to mimic that classic drizzled icing look. A neatly tied red bowtie with two tiny white buttons completes the festive face, embroidered with simple black eyebrows and a sweet smile. Whether displayed beside a holiday tree, gifted to someone who loves seasonal baking, or added to a growing collection of festive amigurumi, this gingerbread man brings warmth and sweetness to every corner he sits in.
Skill Level
Easy to medium. Single crochet, increase, and decrease form the foundation throughout. Additionally, simple color changes for the candy stripe detail and the frosting shell stitch introduce satisfying new techniques at a manageable pace.
Materials You Will Need
Yarn Sport weight, Alize Cotton Gold or similar:
- Beige (color 446) for the body, arms, legs, and head
- Red (color 56) for the stripe accents and bowtie
- White (color 55) for the stripe accents and frosting detail
Other Supplies:
- Black thread for embroidered eyebrows and mouth
- Safety eyes — 7mm
- Two small white buttons
- Crochet hook — 2mm
- Polyester fiberfill stuffing
Finished size: Approximately 15-16cm (6 inches) tall, using the materials listed.
Pattern: Arms Make 2
Starting with beige yarn. Stuff only two-thirds of the arm, leaving the top portion unstuffed for flexibility.
R1: 6 sc into MR (6) R2: 6 inc (12) R3–4: 12 sc for 2 rounds (12)
Change to red yarn.
R5: 12 sc (12)
Change to white yarn.
R6: 12 sc (12)
Change back to beige yarn.
R7–13: 12 sc for 7 rounds (12)
R14: (4sc, dec) x2 (10)
R15: 10 sc (10)
Fasten off and cut the yarn, leaving a tail for sewing. Set aside arms will be attached to the body at round 17.
Pattern: Legs Make 2
Starting with beige yarn. Stuff as you go.
R1: 6 sc into MR (6) R2: 6 inc (12) R3: (sc, inc) x6 (18) R4: (5sc, inc) x3 (21) R5: 21 sc (21)
Change to red yarn.
R6: 21 sc (21)
Change to white yarn.
R7: 21 sc (21)
Change back to beige yarn.
R8–12: 21 sc for 5 rounds (21)
For the left leg: Fasten off and cut the yarn.
For the right leg: Do not cut the yarn continue directly into the body construction below.
Pattern: Body
Continuing from the right leg with beige yarn
R1: Crochet 6 sc more on the right leg, join the left leg and crochet 21 sc on it. Crochet 21 sc on the right leg and place a stitch marker here (42)
R2: (6sc, inc) x6 (48) R3–8,: 48 sc for 6 rounds (48) R9: 3sc, dec, (6sc, dec) x5, 3sc (42) R10–11: 42 sc for 2 rounds (42) R12: (5sc, dec) x6 (36) R13–14: 36 sc for 2 rounds (36) R15: 2sc, dec, (4sc, dec) x5, 2sc (30) R16–17: 30 sc for 2 rounds (30)
Sew both arms onto the body at round 17, one on each side.
R18: (3sc, dec) x6 (24) R19: 24 sc (24)
Stuff the body firmly, paying special attention to the neck area. Do not cut the yarn — continue directly into the head.
Pattern: Head
Continuing with beige yarn. Stuff as you go.
R1: sc, inc, (2sc, inc) x7, sc (32) R2: (3sc, inc) x8 (40) R3: 2sc, inc, (4sc, inc) x7, 2sc (48) R4: (5sc, inc) x8 (56) R5–12: 56 sc for 8 rounds (56) R13: (5sc, dec) x8 (48) R14–15: 48 sc for 2 rounds (48)
Insert the safety eyes between rounds 8 and 9, with 8 stitches apart between them, leaving 6 stitches visible on either side.
R16: 3sc, dec, (6sc, dec) x5, 3sc (42) R17: (5sc, dec) x6 (36) R18: 2sc, dec, (4sc, dec) x5, 2sc (30) R19: (3sc, dec) x6 (24) R20: sc, dec, (2sc, dec) x5, sc (18) R21: (sc, dec) x6 (12) R22: 6 dec (6)
Make sure the head is stuffed firmly before closing. Close the opening and hide the yarn ends inside.
Face Details
Using black thread, embroider the eyebrows at round 12 and the mouth at round 6 of the head.
Using red yarn, embroider rosy cheeks between rounds 6 and 7, positioned beneath the eyes.
Pattern: Bowtie
Using red yarn
R1: Chain 11 and crochet 10 sc along it, starting in the second chain from the hook.
R2–5: Ch 1, turn, 10 sc for 4 rounds.
Fasten off and cut the yarn. Hide the thread inside the piece.
Thread a needle through the center of the bowtie. Wrap yarn around the center a few times to cinch it into the classic bowtie shape, then tie a secure knot.
Sew the finished bowtie directly under the head, centered on the upper chest. Sew the two small white buttons just below the bowtie for a finished, holiday-outfit look.
Pattern: Frosting
Using white yarn
R1: 8 sc into MR (8) R2: 8 inc (16) R3: (3sc, inc) x6 (24) R4: 2sc, inc, (4sc, inc) x5, 2sc (30) R6: (5sc, inc) x6 (36) R7: 36 sc (36) R8: (5sc, 4 hdc in one stitch) x6
Slip stitch to close. Fasten off and cut the yarn, leaving a long tail for sewing.
The final round creates small raised petal shapes that mimic drizzled frosting icing. Sew the completed frosting piece onto the top of the head, allowing the petal shapes to drape naturally over the crown.
Customization and Variation Ideas
- First, swap the red and white stripes for green and white for a more holly-themed holiday color scheme using the exact same construction throughout.
- Additionally, add tiny embroidered gumdrop shapes scattered across the body using brontrasting thread for an extra candy-coated finished look.
- Moreover, use a darker brown yarn instead of beige for a richer, deeper gingerbread color that mimics a more heavily baked cookie.
- Furthermore, attach a small jump ring to the top of the head for a holiday ornament version that hangs beautifully on a tree.
- Also, make a smaller gingerbread companion using finer thread weight yarn for a tiny matching pair display.
- Finally, embroider small white icing dots down the front of the body in addition to the bowtie and buttons for an even more decorated, festive finish.
Common Mistakes to Avoid
- First, stuffing the arms fully: The pattern specifically calls for stuffing only two-thirds of each arm, leaving the top section soft for easier sewing and a more natural drape against the body.
- Additionally, cutting the yarn on the right leg: The right leg must remain connected to continue directly into the body construction. Cutting it here breaks the seamless transition that the pattern is built around.
- Also, attaching arms before reaching round 17: Always complete the body up to round 17 before sewing on the arms, since this round is specifically marked as the correct attachment point.
- Furthermore, placing safety eyes with incorrect spacing: The pattern specifies 8 stitches apart with 6 stitches visible on either side. Mark with pins first and check symmetry before locking the eyes in place.
- Moreover, forgetting to stuff the neck firmly: A loosely stuffed neck causes the head to droop or wobble. Pay extra attention to this area before continuing with the head construction.
- Finally, sewing the frosting too flat: The final round of the frosting piece creates raised petal shapes specifically designed to drape and cascade. Pulling it too tight against the head flattens this signature icing effect.
Finishing Tips
- First, when joining both legs into the body at round 1, work the connecting stitches at even tension to avoid any gap or pucker at the central seam.
- Additionally, use a single strand of black thread for the eyebrow and mouth embroidery to keep facial details crisp and proportional against the fine sport weight body yarn.
- Moreover, when sewing the bowtie, wrap and knot the center firmly enough to create distinct bow loops without flattening the overall shape.
- Furthermore, position the white buttons evenly spaced beneath the bowtie, checking placement with pins before committing to final stitches.
- Also, gently shape each frosting petal with your fingers after sewing it onto the head, encouraging a few to drape slightly over the front edge for the most realistic icing effect.
- Finally, photograph the finished gingerbread man beside a few real or faux holiday cookies for a charming, cohesive seasonal presentation.
Gifting Ideas
- First, place the finished gingerbread man inside a small gift box lined with brown and white tissue paper for a presentation that mimics an actual cookie box.
- Additionally, pair the gingerbread man with a small bag of cinnamon sticks or a holiday-scented candle for a sensory gift set that ties together beautifully.
- Moreover, these gingerbread figures make wonderful teacher and coworker gifts during the holiday season, offering a sweet handmade alternative to store-bought treats.
- Furthermore, attach a small loop to the top of the frosting crown for use as a tree ornament that adds handmade warmth to any holiday display.
- Also, make a small batch in slightly varied sizes and present them together as a gingerbread family for a complete holiday collection gift.
- Finally, these sell wonderfully at winter craft markets, where the candy cane stripe detail and frosting crown create genuine standout charm among more typical holiday amigurumi offerings.
Conclusion
This little gingerbread man captures all the warmth and sweetness of the holiday season in every single stitch. The seamless leg-to-body-to-head construction keeps the project flowing naturally, while the candy stripe color changes and frosting crown add genuine festive charm without overwhelming complexity. Therefore, stuff the neck firmly, keep your stripe color changes consistent, and take your time shaping that frosting crown for the most realistic icing effect. In conclusion, this sweet little gingerbread man is ready to bring cozy, handmade holiday cheer to wherever he finds his home.