Crochet Granny Square Skirt With Scalloped Hem
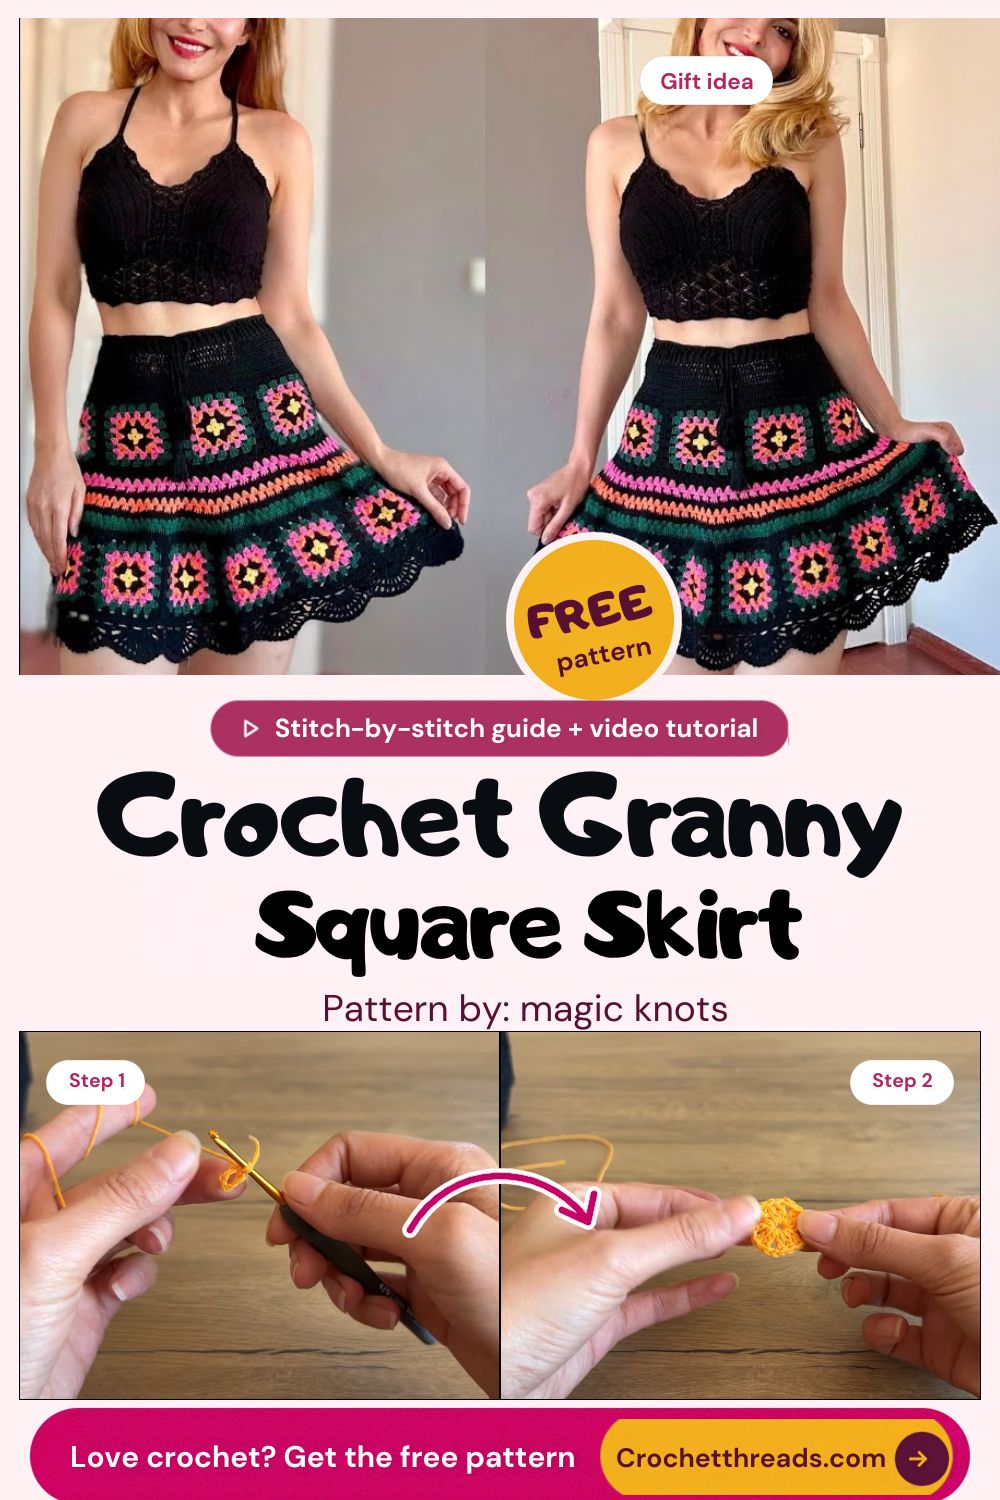
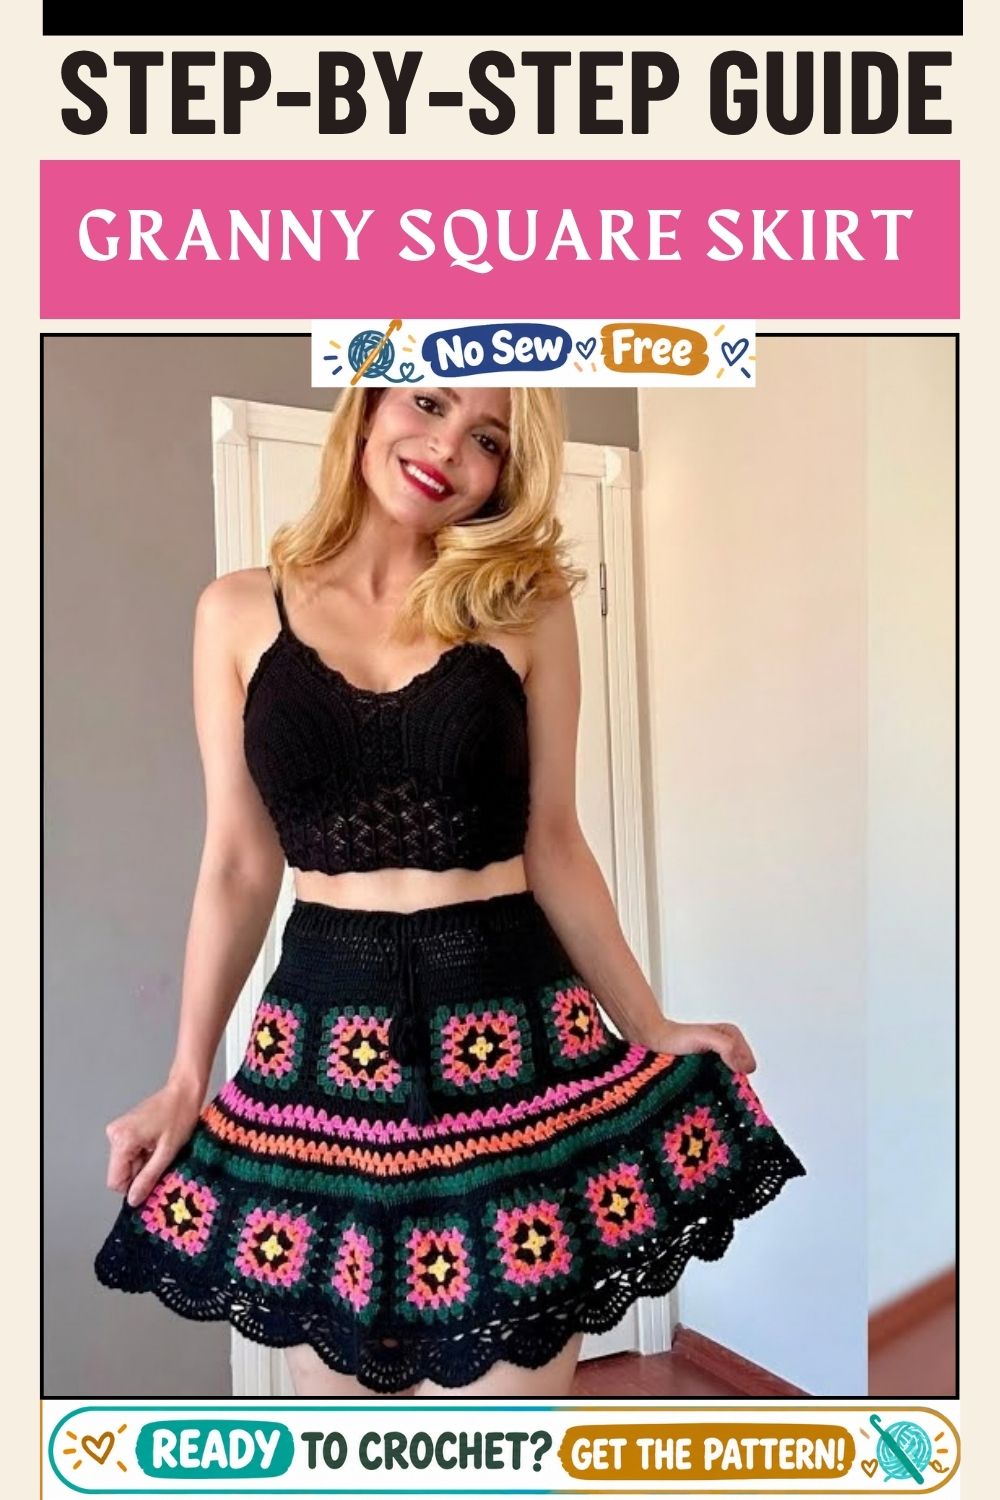
Mustard petals glow against inky black borders in the Crochet Granny Square Skirt With Scalloped Hem, while coral, fuchsia and forest green ripple from motif to motif. Tiny squares link into bold patchwork crochet, and a wavy lower edge adds soft swing with every stride.
Solid-panel skirts rely on long rows, but here the shape grows from small multi-round squares, each holding a clustered flower center. Joined together, they read like a scattered autumn garden, and the black framing ties loud shades together without clashing. A gentle wave along the bottom softens the grid, turning the granny motif skirt into a scalloped edge crochet skirt made for harvest fairs, pumpkin-patch outings and cozy October gatherings.
Pattern Overview
- Flower-center granny squares with a black frame
- Squares joined into strips, then one wide panel
- Panel seamed into a tube sized to the hips
- Black scalloped hem worked along the lower edge
- Waistband with elastic or a drawcord
What You’ll Need
- Yarn: Fine cotton, fingering to light sport weight, in mustard, black, coral, hot pink and forest green
- Hook: 2.5 mm (Japanese 4/0) hook, plus a 3 mm hook for joining
- Tapestry needle: For weaving in tails between color changes
- Sharp scissors: Small embroidery snips work well
- Locking stitch markers: To flag corner spaces and round starts
- Flexible tape measure: For checking motif size and hip width
- Waistband option: Soft elastic or a braided cotton drawcord
Stitches and Abbreviations (US Terms)
- MR – magic ring
- ch – chain
- sl st – slip stitch
- sc – single crochet
- dc – double crochet
- cluster – several unfinished dc in one space, closed together
- BLO – back loop only
Time Box
- Prep: 30 to 45 minutes for swatching and color planning
- Stitching: 18 to 25 hours for the squares, plus 4 to 6 hours for joining
- Finishing: 4 to 6 hours for the hem, waistband and blocking
Plan for roughly 28 to 36 hours spread across two or three weeks. A crochet granny square skirt rewards steady, relaxed sessions rather than one marathon.
Special Techniques
- Crocheting over tails: hold each new color’s tail along the top of the round and work over it, cutting weaving time across dozens of squares.
- BLO slip stitch joins: joining through back loops leaves a neat raised ridge on the right side that frames every motif.
- Shell scallops: groups of dc worked into one stitch, anchored by sc on either side, create the rippling hem.
Quick Sizing Guide
Measure the fullest part of the hips and add about 5 cm of ease. Divide the total by the width of one finished square to find how many squares go around. For length, stack rows until the panel reaches the desired point on the leg, remembering that the scalloped hem adds roughly 2 to 3 cm below the last row.
How to Crochet the Granny Square Skirt
Step 1: Start the Magic Ring
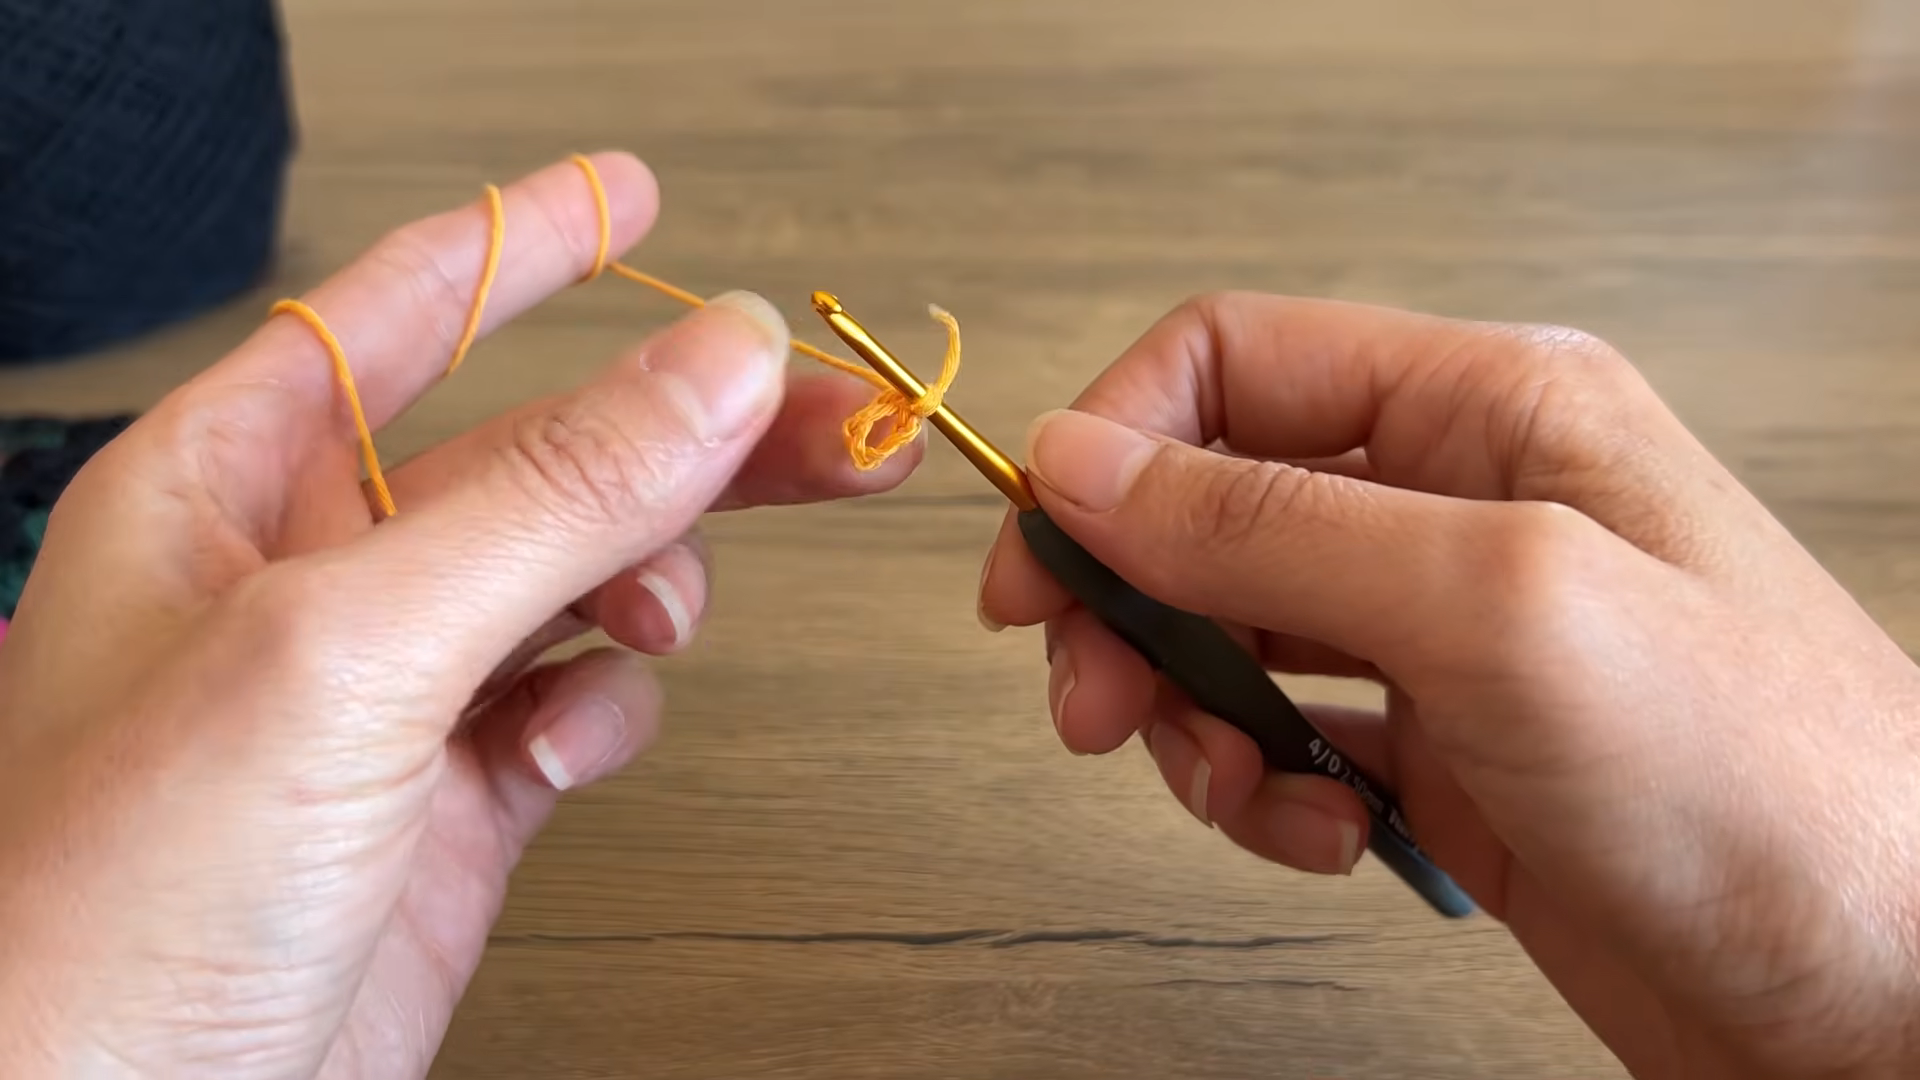
Drape the mustard yarn over your index finger for steady tension and form a magic ring on the 2.5 mm hook. Chain up to begin the first round.
A magic ring pulls completely closed, so no hole shows at the flower’s center.
Step 2: Build the Flower Center
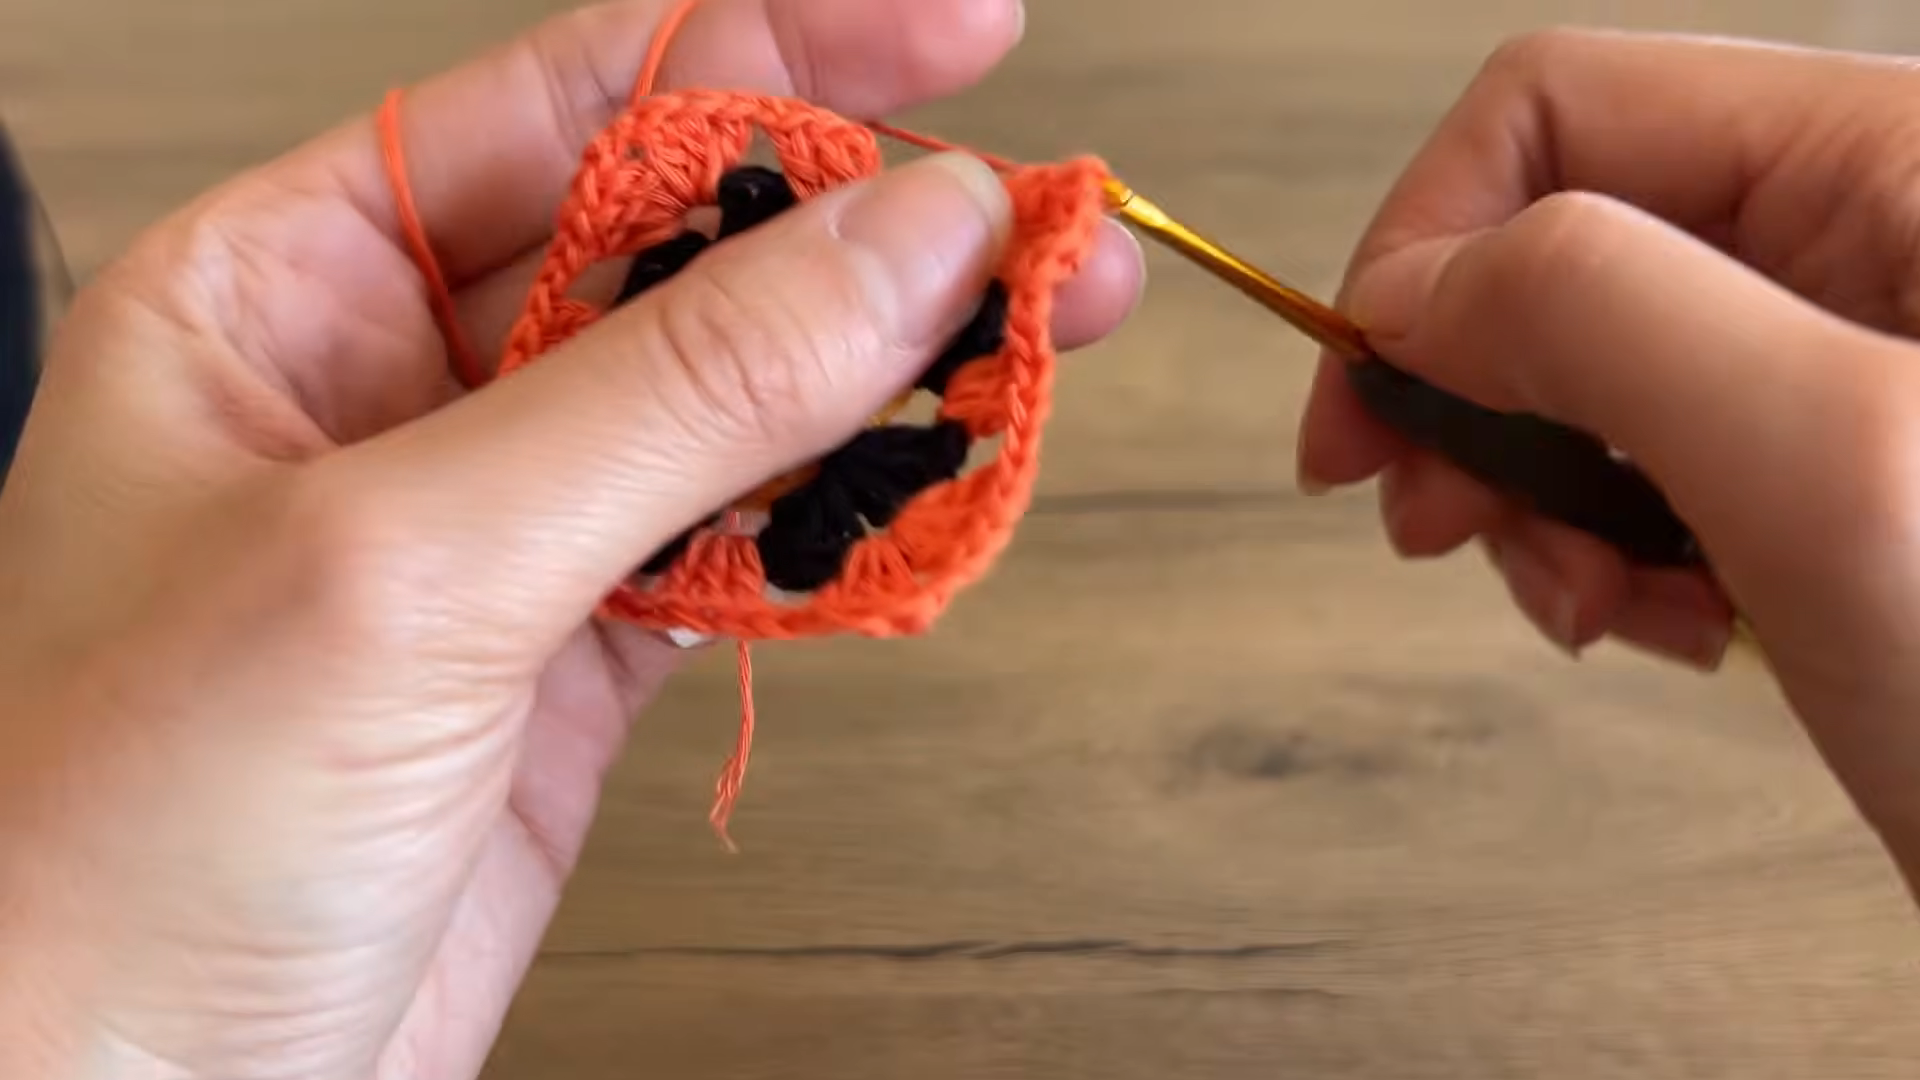
Work four clustered petals into the ring, with a few chains between each cluster. Pull the tail snug to close the center, then join with a slip stitch and fasten off.
Stitch check: Count four evenly spaced petals before cutting the yarn.
Step 3: Frame in Black, Then Add a Bright Round
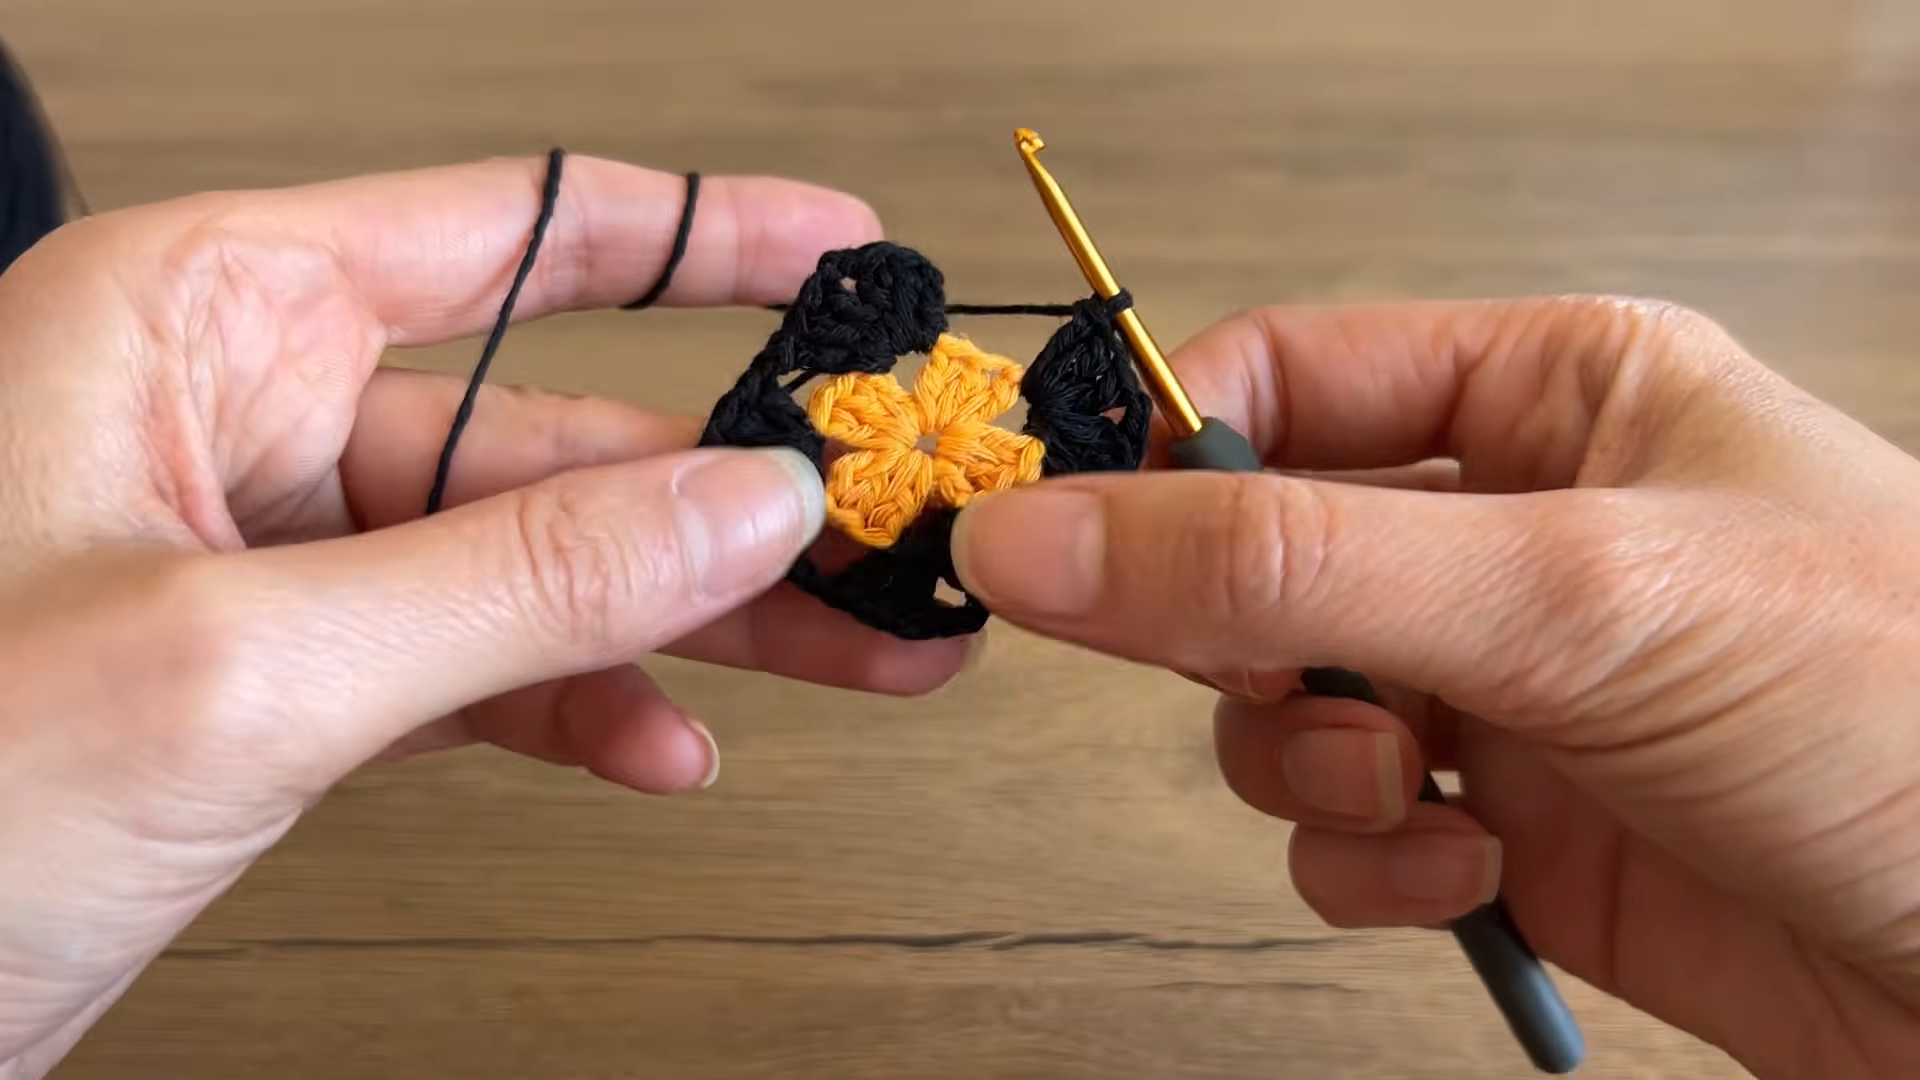
Join black in any chain space. Work 3 dc, ch 2 and 3 dc into each corner, with a short chain between corner groups, to square off the flower. Then join a bright shade such as coral or mustard in a corner space and repeat the corner pattern, placing a 3-dc group into every side gap.
Pro tip: Hold the fresh tail against the back of the work and crochet over it for a few stitches. Across 60-plus squares, the saved weaving time adds up to hours.
Step 4: Finish Each Square and Join Into Panels
Work a final black round in the same corner pattern to frame the motif. Lay the finished squares out in rows to balance the colors, then hold two squares right sides together and join with black slip stitches through the back loops. Link squares into strips, then strips into one wide panel.
Measure now: Compare every new square against the first one before joining. Matching sizes keep the panel even.
Step 5: Seam the Panel Into a Tube
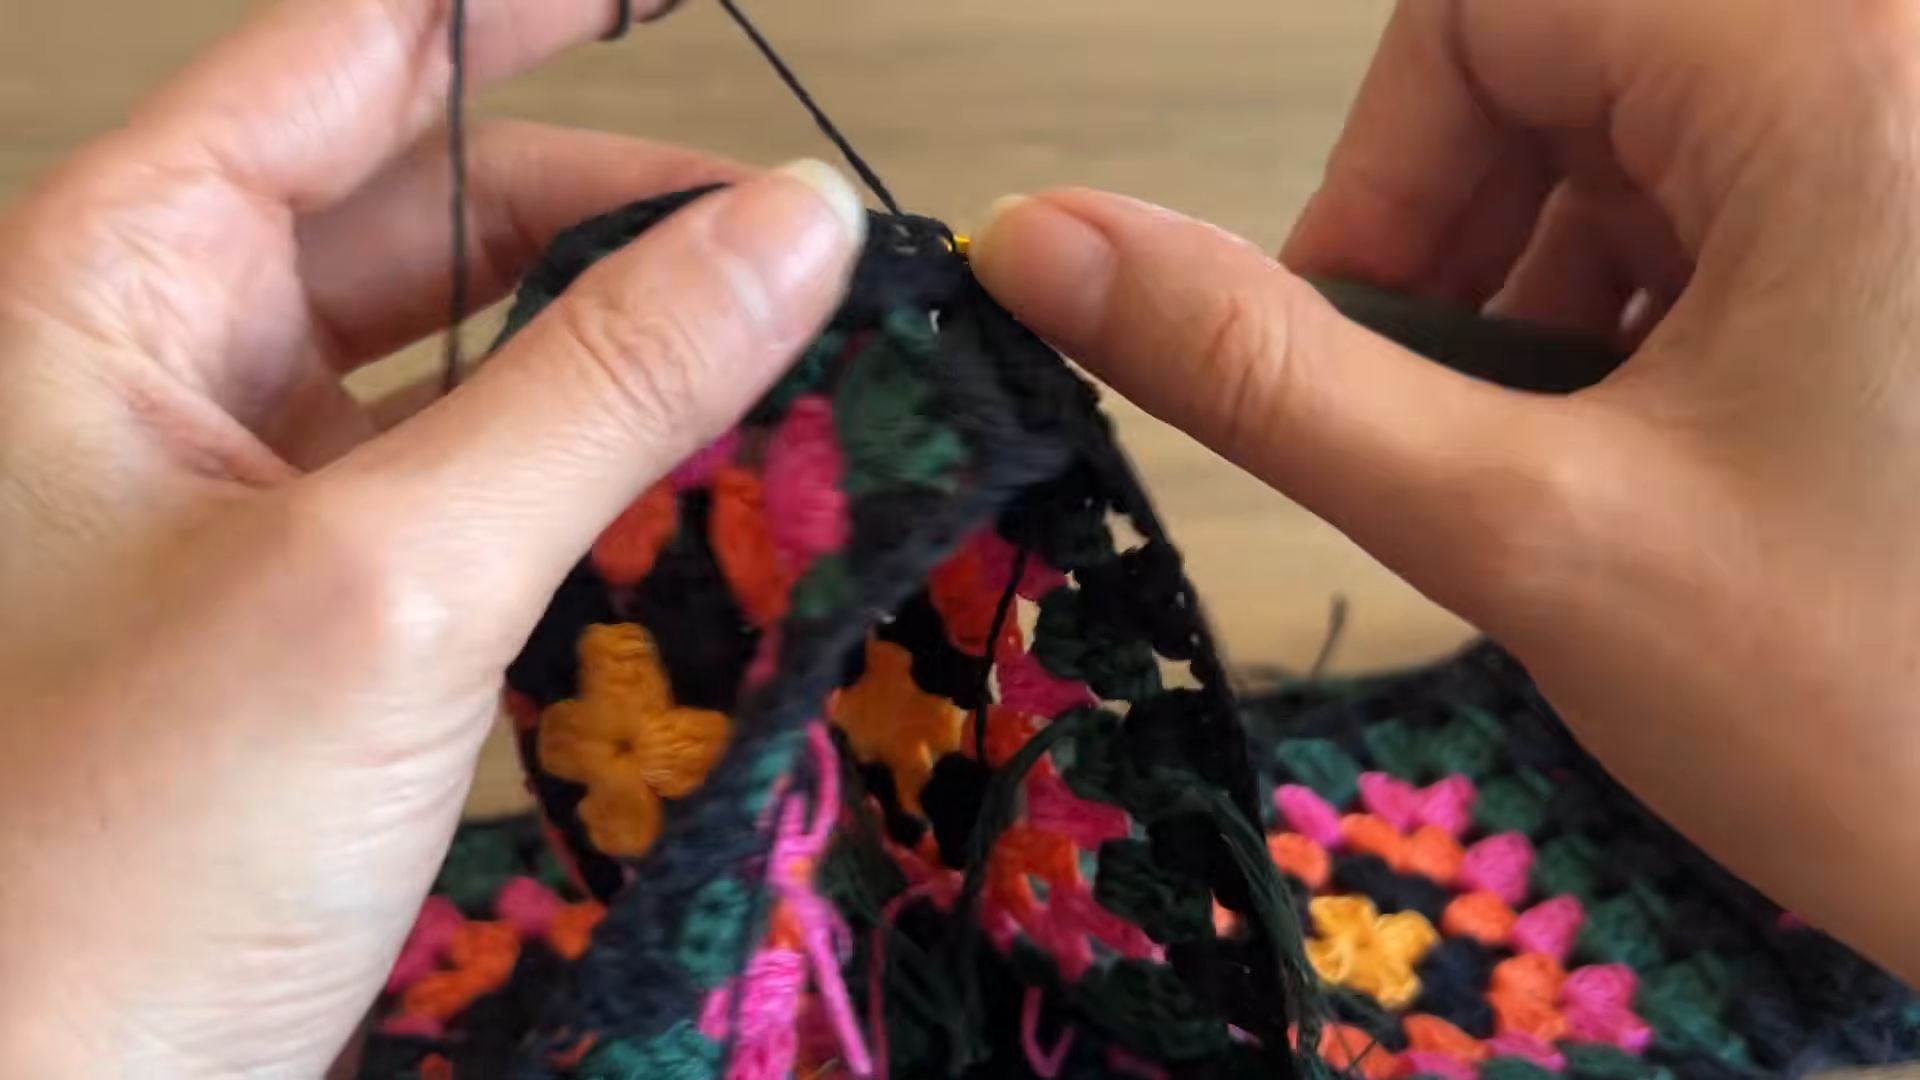
Fold the panel so the two short edges meet at the back, and join them with the same BLO slip stitch method.
Fit check: Wrap the panel around the hips before seaming. It should slide on easily without gaping.
Pro tip: Switch to the 3 mm hook for all seams. Tight joins pull the fabric and cause puckering.
Step 6: Work the Scalloped Hem
Join black at the back seam along the lower edge. Work one round of sc to even out the edge, then create the waves: sc in a stitch, skip two, work 5 dc in the next, skip two, and repeat around. Join and fasten off.
Wave check: Scallops should sit evenly spaced, with no half-wave squeezed in at the seam.
Step 7: Add the Waistband
Join black along the top edge and work a few rounds of sc or dc. Fold the band over elastic and stitch it down, or leave a row of dc open and weave a braided cotton drawcord through the stitches.
Step 8: Block and Finish
Weave in any remaining tails. Lay the skirt flat, pin each scallop into shape, mist lightly with water and let it dry fully.
Common Mistakes and Their Fixes
Small slips repeat across dozens of motifs, so catching them early keeps the whole skirt even.
- A hole in the flower center. Fix: Pull the magic ring tail snugly after the first round.
- Squares cup upward like shallow bowls. Fix: Check for missing side groups, or move up half a hook size.
- Corners ruffle and refuse to lie flat. Fix: Recount corner stitches, since extras often sneak into chain spaces.
- Motifs vary noticeably in size. Fix: Use one hook for every square and relax the yarn hand.
- Scallops curl upward along the hem. Fix: Pin each wave flat, mist with water and let it dry fully.
Beginner Tips
- Make five squares first and join them into a small test strip before committing to the full count.
- Keep a zip bag of finished squares with you for motif-making on the go.
- Weave tails in batches of ten squares so the pile never feels overwhelming.
- Label each yarn color’s leftover length so you know when to buy more.
Planning Your Color Layout
Before joining, spread every square on the floor or a bed and arrange them in rows. Keep matching centers from touching, and scatter the loudest shades evenly so no single area looks heavier. Snap a photo from above, then view it in black and white; any clusters of dark or light squares stand out instantly. Number the squares with small paper tags pinned to each one, and the layout stays intact while you join.
Troubleshooting Guide
- Color bleeding: Coral and pink dyes can transfer onto pale sections. Soak the finished piece in cold water with a color-catcher sheet.
- Sagging shape: Cotton stretches with gravity over time, so fold the skirt flat for storage instead of hanging it.
- Lumpy seams: Tight joins usually cause the problem. Steam block lightly to relax the stitches.
Uses and Benefits
A patchwork skirt built from small motifs is endlessly portable: each square fits in a pocket-sized project bag, so progress happens during commutes and waiting rooms. The design also turns scrap cotton into a statement piece, and adding or removing squares adjusts the fit without rewriting any pattern math. Worn with tights in autumn or bare-legged in late summer, the finished skirt stretches across seasons, and it draws attention at craft fairs.
Washing and Cleaning Instructions
Hand washing protects both the motifs and the joining seams. Fill a basin with cool water and a mild delicate wash, swirl the skirt gently for a few minutes and rinse until the water runs clear. Roll it in a towel to press out moisture, then dry flat in the shade. Avoid wringing, bleach, hot water and tumble dryers.
Personalization Ideas
Harvest Ember Palette
Mustard, coral, hot pink and forest green framed in black, ideal for autumn festivals and bonfire evenings.
Coastal Linen Palette
Sky blue, sand and white bordered in navy, a breezy pick for beach days and summer markets.
Winter Berry Palette
Cranberry, ivory and pine framed in charcoal, paired with tights for holiday parties.
Length and Hem Variations
Add two extra rows of squares for a midi length, or swap the scallops for a simple picot edge. For a lighter, layered look, the crochet tiered mesh skirt shows another hem approach.
Across every palette, a single dark border shade keeps the patchwork unified.
Pairing Ideas
The skirt looks great beside other granny square pieces. A granny square crossbody bag repeats the same patchwork story, while a crochet beret in mustard or black ties the outfit together. A plain ribbed cardigan balances the busy motifs.
Creative Projects You Can Make With the Pattern
The same motif and joining method adapt easily to other makes:
- A granny square slip dress, like the patchwork styles in these crochet dress and maxi patterns
- A planter cover from leftover squares, similar to these granny square plant pot covers
- A two-square pouch, such as the crochet smiley face pouch
- A crochet bucket hat with a flower-center crown, using ideas from these crochet hat patterns
- A patchwork blanket or table runner built from leftover motifs
Ways to Style or Display It
- Pair the skirt with a black fitted top so the motifs stand out.
- Add ankle boots and tights for chilly autumn afternoons.
- Drape it over a dress form near a sunny window as a craft room accent.
- Fold it across a wooden chair for product photos in soft natural light.
Who the Pattern Suits Best
- Beginners who already know the chain, slip stitch and double crochet
- Scrap-yarn savers looking to use up small leftover balls
- Portable crafters who like small motifs they can carry anywhere
- Market sellers who need a statement piece for handmade booths
Why It’s Popular Right Now
Granny squares have moved from blankets onto runways and social feeds, and handmade fashion appeals to shoppers who want something unique and slow-made.
- Retro revival: Seventies-inspired patchwork keeps trending across fashion platforms.
- Scrap-friendly: Small motifs make good use of leftover cotton.
- Customizable fit: Adding or removing squares adjusts the size easily.
FAQs
Can beginners make a crochet granny square skirt?
Yes. It uses chains, slip stitches and double crochet clusters, though patience helps with joining so many squares.
Which yarn works best?
Fine cotton or a cotton blend in fingering weight. Cotton holds the scalloped shape better than acrylic.
How many squares does the skirt need?
Roughly 60 to 90, depending on hip size and length. Use the sizing guide above to calculate your exact count.
How do I stop the waist from slipping?
Thread elastic or a drawcord through the waistband, or crochet a snug ribbed band in black.
Can acrylic yarn replace cotton?
Yes, although acrylic feels warmer and drapes differently. Swatch first to confirm the square size.
Conclusion
Patchwork motifs, crisp black framing and a wavy hem turn simple squares into a true statement piece. Each round builds skill, and every joined strip brings the finished shape closer. Pick a few favorite shades, let the season’s colors guide every square, and when the skirt is done, explore more crochet skirt and shorts patterns for your next wearable project.