Crochet Hand Sanitizer Holder for Pump Bottles
Most pump bottles end up hidden under the sink or ignored on a shelf, but this one gets a face and a personality. This crochet hand sanitizer holder wraps a standard pump bottle in a snug striped sleeve, then adds round glasses, green eyes, curly hair and a bright striped scarf. It looks great on a desk, a classroom shelf, a bathroom counter or in a gift basket.
The sleeve is plain single crochet worked in color bands, then seamed into a tube. The character comes from the hair curls, the embroidered details and the scarf. Nothing here is hard, but the order of the steps matters, so follow them in sequence.

What You Will Need for the Crochet Hand Sanitizer Holder
- Cotton yarn in black, gray, light peach or skin tone, and a reddish-brown for the hair
- A little red and yellow yarn for the scarf
- A crochet hook that suits your cotton yarn (the sample uses a metal hook, and a smaller hook than the label suggests gives a denser, firmer fabric)
- One pump-style hand sanitizer or soap bottle
- Two safety eyes (green in the sample)
- Scissors and a yarn needle
- Stitch markers or a few pins
- A small amount of craft glue
- Optional: an extra length of black yarn for embroidery
Because bottles come in different sizes, this crochet hand sanitizer holder has no fixed stitch count. Instead, you measure your own bottle and make the sleeve to fit it, so the holder stays snug whatever brand you use. If you want to compare cotton yarns, the Craft Yarn Council yarn weight chart is a helpful reference.
Stitches and Abbreviations
All instructions use US terms.
- ch – chain
- sc – single crochet
- sl st – slip stitch
- st(s) – stitch(es)
The body uses only sc, while the hair uses chains and a few extra stitches to make curls.
How the Crochet Hand Sanitizer Holder Is Built
The sleeve is worked flat, in rows, from the bottom edge upward. Each color band becomes a ring once the short edges are seamed together. From bottom to top, the bands are:
- Black for the base
- Gray for the body
- Peach for the face
- Reddish-brown for the hair line at the top
Hair curls, a black band, embroidery, eyes, and the scarf are added after the sleeve is seamed and fitted.
Complete Crochet Hand Sanitizer Holder Pattern
Step 1: Measure and Make the Starting Chain
First, wrap a strip of yarn or a flexible tape measure around the widest part of the bottle’s body. This is the length your sleeve needs. Pull the yarn gently so it sits snug but does not squeeze.
Then start with black yarn and chain until you reach that measurement. If you are between sizes, go slightly shorter. Cotton has little give, but a sleeve that is a touch tight will still slide on, while a loose one will slump and twist.

Step 2: Work the Black Base
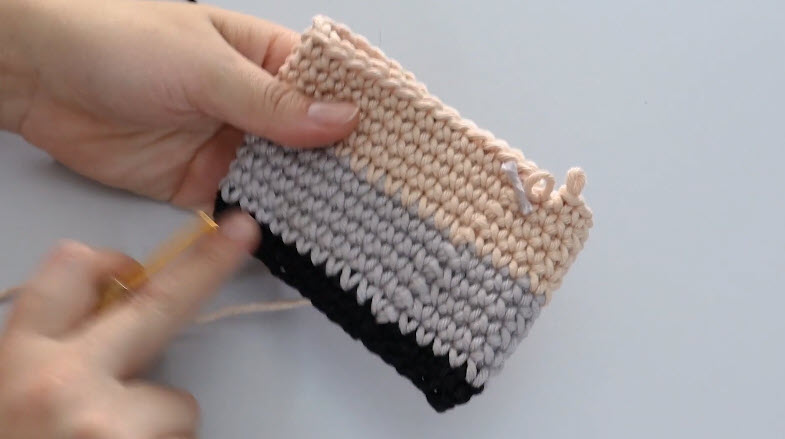
Single crochet across the chain, then turn. Keep working sc rows back and forth. The black base should be about as tall as the bottom edge of your bottle’s body, so it covers the base and hides the bottle’s lower rim.
Work until the black band looks right for your bottle, then switch to gray. To change color, pull the new color through the last loop of the final stitch in the old color. Leave a tail of a few inches on each color change so you can weave it in later.
Keep your tension even from row to row, because a tidy edge now makes the seaming much easier.
Step 3: Add the Gray Body Band
Continue in sc rows with gray. This is the body of the character, and it sits mostly below the scarf. Work rows until the gray reaches roughly the height where you want the neck to be.
As you go, hold the piece against the bottle from time to time. It does not need to wrap fully yet, but checking the proportions as you work saves you from guessing at the end.
Step 4: Work the Peach Face Band
Change to peach and keep working sc rows. This band becomes the face, so make it tall enough to fit two eyes, glasses, and a little space above them for hair. It is usually the tallest band, so give it room.
When you finish this band, set the piece against the bottle again. The peach should end about where the bottle’s pump collar begins, or a little below it, leaving room for the hair band above.
Step 5: Finish With the Reddish-Brown Hair Band
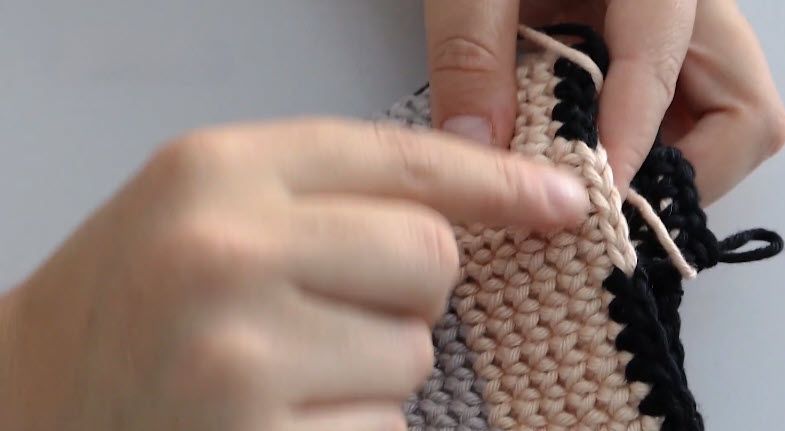
Change to reddish-brown and work a few more sc rows. This narrow band forms the hair line and the foundation that the curls attach to, so keep it shorter than the other bands.
Then fasten off, leaving a long tail if you plan to use it for sewing.
Step 6: Seam the Sleeve Into a Tube
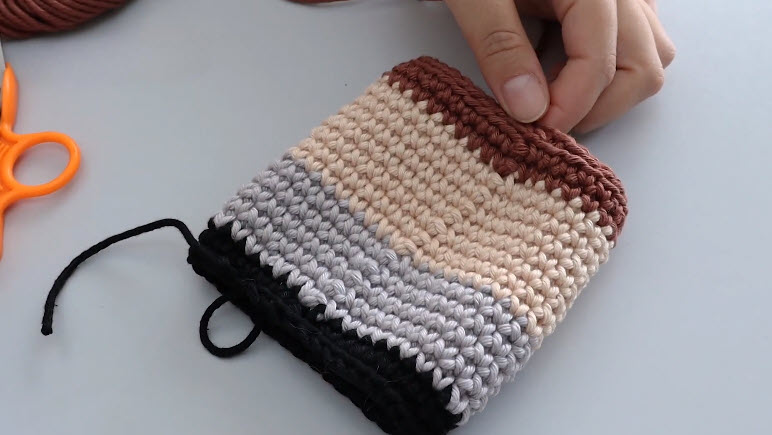
Fold the piece so the two short edges meet, with the bands lined up color to color. Pin or clip them in place so the stripes match.
Next, use a yarn needle to sew the edges together, working through the edge stitches from the bottom upward. Matching the colors as you go keeps the seam nearly invisible. If you prefer, you can sl st the edges together with a hook instead, although sewing gives a flatter seam.
When you reach the top, fasten off. Weave in all loose tails now, while the sleeve is easy to handle.
Step 7: Fit the Sleeve Over the Bottle
Slide the tube over the bottle from the bottom up. The black band should cover the base, and the pump should poke out through the top. If the sleeve is a little snug, ease it on slowly, because stretching it quickly can distort the stitches.
Once it sits correctly, you can adjust any twisting by gently pulling the fabric around the bottle. A drop of glue at a couple of points inside the top edge can keep it from sliding, although a well-fitted sleeve often stays put on its own.
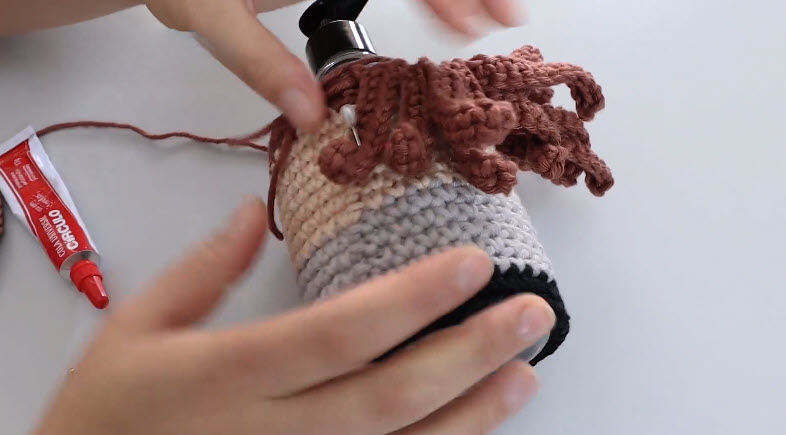
Step 8: Make the Curly Hair
The hair is made of small curled strands in reddish-brown that sit around the top of the head and spill over the hair band.
To make one curl, chain a short length, then work two stitches into each chain. The extra stitches force the chain to twist into a spiral. Make a handful, then vary the lengths slightly so the hair looks natural rather than uniform.
Attach each curl by sewing it to the hair band with the tail, or by working a few stitches around the band edge. Overlap the curls and arrange them so they cover the band evenly, with the longest ones near the front and sides. A pin can hold each curl in place while you sew.
For a fuller look, add more curls until the hair band disappears under them. For a neater, flatter style, make fewer and shorter curls.

Step 9: Add the Black Bangs and Top Band
A black band across the top of the head frames the face. Work a few rows of sc in black to make a narrow strip that fits around the top of the sleeve, or embroider a thick band directly with black yarn.
Next, add short black bangs across the forehead. Embroider a few small V shapes or short stitches along the top edge of the peach band, and keep them uneven so they look hand-drawn rather than mechanical.
Step 10: Set the Eyes and Embroider the Glasses
Place the safety eyes in the peach band, spaced evenly, at about the middle of the face. Check the position against the bottle before you fasten them, because once you attach the backs, they are hard to move.
For the glasses, use black yarn and a needle. Embroider a circle around each eye with small, even backstitches, working carefully around the safety-eye posts. Then add a short bridge between the two circles, and extend a short line outward from each circle toward the sides of the head for the temples.
Pull each stitch only snugly. If it is too tight, the circle puckers, and if it is too loose, it sags.
Step 11: Make the Striped Scarf
The scarf is a narrow tube of alternating red and yellow stripes, long enough to wrap the neck and leave a tail hanging down the front or side. In the sample it is a very slim, knitted-style cord, but you can make something similar with crochet.
An easy alternative is to chain a long length in red, then work sl sts along it and change to yellow every few stitches. You can also make a flat strip in sc and change colors every row or two.
Finally, wrap the scarf around the neck, where the gray meets the peach, and tuck one end through the loop to secure it. Add a dot of glue under the knot if you want it to stay in place.
Finishing Touches
Check that the hair covers the seam at the top, the eyes are secure, the scarf sits straight, and the pump still moves freely. If any curl looks out of place, you can reshape it by hand or sew it down with a stitch or two.
Then trim any stray tails on the inside. Wipe the glue edges and let everything set before using the bottle.

Crochet Hand Sanitizer Holder Tips
- Choose cotton yarn. It holds its shape well and will not stretch the way acrylic can.
- Keep your tension tight. A firm fabric gives a cleaner look and prevents the sleeve from sagging.
- Test fit often. Hold the piece up to the bottle after each band so the proportions stay balanced.
- Place the eyes after the hair. Position them only once the hair and bangs are in place, so you can judge the face as a whole.
- Use a pin first. Pin the curls before sewing so you can rearrange them without undoing stitches.
Troubleshooting Your Crochet Hand Sanitizer Holder
The sleeve is too tight. The starting chain was probably too short, or your tension is tighter than your measurement allowed. Start again with a few extra chains.
The sleeve is too loose. Try a smaller hook or work a slightly shorter starting chain. A dab of glue inside the top edge can also help.
The stripes do not match at the seam. Pin the edges before sewing and match each color band to its partner. If one is off by a row, unpick that section and adjust.
The curls look flat. Add a few more stitches per chain, or use a slightly thicker yarn for a stronger spiral.
The glasses look uneven. Remove the stitches and redo them, and mark the circle positions lightly with pins before embroidering.
Variations You Can Try
- Change the colors. Switch the hair, scarf, and body colors for a whole set of characters.
- Make a smaller version. Use a travel-size pump bottle and shorten the starting chain to match.
- Skip the face. For a simpler holder, leave out the eyes and hair and keep only the stripes.
- Make a class set. Several in different colors make a fun teacher gift or party favor.
Bonus: Cleaning and Care for Your Crochet Hand Sanitizer Holder
This holder is meant to sit on a counter near a bottle that gets handled often, so a little care goes a long way.
- Remove the sleeve before refilling the bottle so sanitizer does not soak the yarn.
- If it gets dirty, hand wash gently in cool water with mild soap and reshape it while damp.
- Let it dry completely before putting it back on the bottle.
- Avoid soaking the glued areas. If a curl or the scarf comes loose, re-sew or re-glue it once it is dry.
Cotton is easy to wash, but the safety eyes and glue can weaken with repeated soaking, so spot cleaning is better for everyday use.
Bonus: Display and Gift Ideas
Because the holder is small and cheerful, it suits more than one spot: a desk, a classroom shelf, a bathroom counter, or a gift basket. For a gift, tuck a small refill bottle beside it and add a short care note, so the recipient knows to take the sleeve off before refilling.
Crochet Hand Sanitizer Holder FAQs
Can I use any pump bottle for this crochet hand sanitizer holder?
Yes, as long as the body is a fairly straight tube. Measure first, then make the sleeve to fit.
What yarn works best?
Cotton is a good choice because it is firm and keeps its shape. Choose a weight you are comfortable with and use a hook that gives a dense fabric.
Do I need safety eyes?
No. You can embroider the eyes with black yarn instead, which also works well if the holder is for a very young child.
Can I make the scarf another way?
Yes. A crocheted chain striped with sl sts, or a narrow flat strip, both work well.
Will the sleeve slip off?
A snug fit usually keeps it in place. A small amount of glue inside the top edge adds extra grip.

Give Your Dispenser a Personality
With a few color bands, a handful of curls, and some simple embroidery, an ordinary pump bottle becomes a small character you will actually enjoy seeing every day. Once you have made one crochet hand sanitizer holder, you will probably want to try a second in different colors.