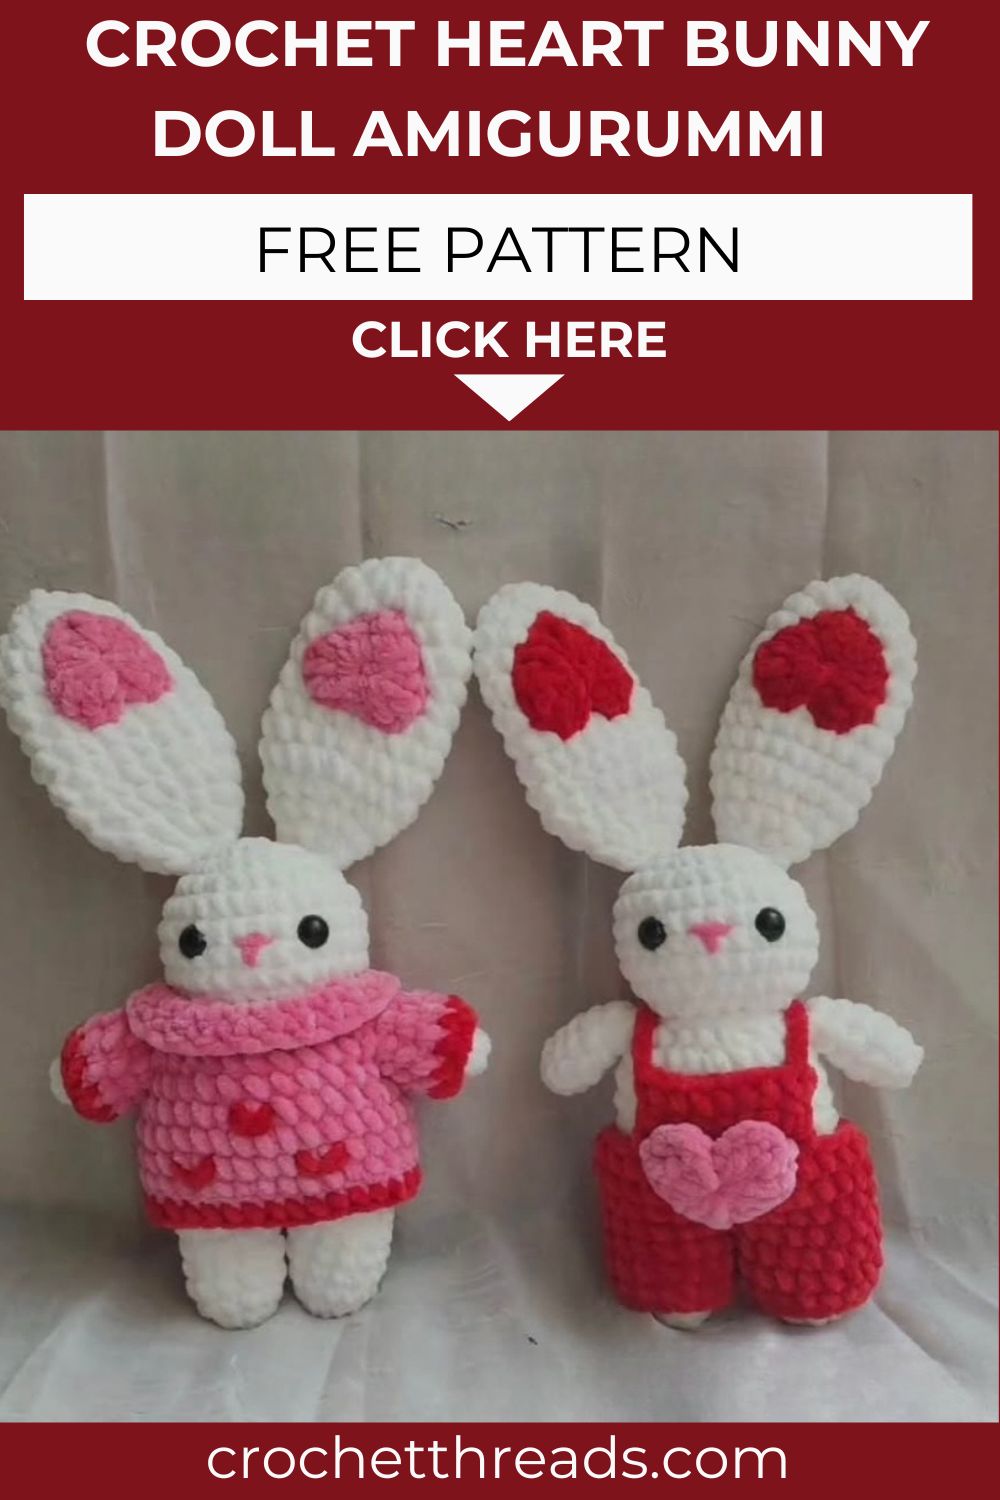
Precious Crochet Heart Bunny Doll With Amigurummi Pattern

Soft floppy ears, a sweet stitched little smile, and charming tiny details add even more to this bunny’s beauty. Dressed in pink overalls and a sweater with red trim, this Crochet Heart Bunny Doll turns any ordinary shelf into a warm, lovely, and inviting little corner. Give it as a gift or make it part of your decor, this tiny bunny is sure to spread its special charm wherever it’s placed.

Crocheting a doll this detailed feels rewarding from the very first round. You build the head and body in easy single crochet, then dress your bunny in cheerful overalls and a snug sweater. Each ear gets its own little heart, sewn on for that signature sweetness. Ngl, the finished bunny makes a heartfelt, handmade gift for birthdays, baby showers, or simply a cozy spot on your own favorite home shelf.

 Precious Crochet Heart Bunny Doll with Amigurummi Pattern
Made By:Pattern

Skill Level

This Crochet Heart Bunny Doll works best for advanced beginners. You will use single crochet, increases, decreases, plus a few half double, double, and treble stitches when shaping the tiny ear hearts.

Pattern Overview

Curious how this Crochet Heart Bunny Doll comes together? This snapshot maps out every piece you will make.

  • The head, ears, and body all start from a basic magic ring.
  • Two little hearts get stitched onto the ears for that lovey-dovey look.
  • Pink overalls with criss-cross straps slip right over the finished body.
  • A cozy sweater with red trim and sleeves keeps your bunny snug.
  • Once each part is done, you sew everything into one cuddle-ready doll.

Special Techniques

A few standout skills shape this bunny’s personality.

  • Color changing: You switch from pink to red on the sweater for a clean, layered finish.
  • Working into a chain: You build the overalls and sweater from a starting chain ring.
  • Heart shaping: You combine tr, dc, and ch stitches inside one magic ring for each heart.
  • Folding and seaming: You flatten the ears and arms, then sc across for tidy edges.
  • Turning rows: You chain and turn on the overall straps to shape the bib cleanly.

Materials

Lay everything out first, and your session stays calm.

  • Yarn in white, pink, and red
  • 4 mm crochet hook
  • 12 mm safety eyes
  • Scissors
  • Darning needle
  • Stuffing

Abbreviations

Keep this list close while you read the rounds.

  • mr: magic ring
  • sc: single crochet
  • hdc: half double crochet
  • dc: double crochet
  • tr: treble crochet
  • inc: increase
  • dec: decrease
  • sl st: slip stitch
  • sk: skip
  • fo: fasten off
  • ch: chain

The Pattern

Work each piece in order, and count your stitches at the end of every round.

Head

  • R1: 6 sc in mr (6)
  • R2: inc x6 (12)
  • R3: (sc, inc) x6 (18)
  • R4: (2 sc, inc) x6 (24)
  • R5: (3 sc, inc) x6 (30)
  • R6–9: sc around (30)

Insert the safety eyes between R7 and R8, 6 stitches apart. Embroider a T-shape nose between the eyes, 2 stitches wide.

  • R10: (3 sc, dec) x6 (24)
  • R11: (2 sc, dec) x6 (18)

Sl st, fasten off, and stuff. There is no need to leave a long tail.

Ears (Make 2)

  • R1: 6 sc in mr (6)
  • R2: inc x6 (12)
  • R3: (sc, inc) x6 (18)
  • R4–11: sc around (18)
  • R12: (sc, dec) x6 (12)
  • R13: sc around (12)
  • R14: dec x6 (6)
  • R15: fold in half and sc across (3)

Sl st, fo, do not stuff, and leave a long tail to sew.

Hearts (Make 2)

Make a magic ring and work only into it.

  • R1: ch 3, 3 tr, 3 dc, ch 1, tr, ch 1, 3 dc, 3 tr, ch 3 (21)

Sl st and fasten off. Leave a long tail to sew.

Body

First leg:

  • R1: 6 sc in mr (6)
  • R2: inc x6 (12)
  • R3–6: sc around (12)

Sl st, fasten off.

Second leg:

  • R1: 6 sc in mr (6)
  • R2: inc x6 (12)
  • R3–6: sc around (12), then ch 2 at the end of round 6
  • R7: join to the first leg with a sc, 11 sc, 2 sc in ch 2, 12 sc, 2 sc in ch 2 (28)

Stuff the legs.

  • R8: (13 sc, inc) x2 (30)
  • R9–13: sc around (30)
  • R14: (3 sc, dec) x6 (24)
  • R15: (2 sc, dec) x6 (18)

Sl st, fasten off, stuff, and leave a long tail to sew.

Arms (Make 2)

  • R1: 6 sc in mr (6)
  • R2: (sc, inc) x3 (9)
  • R3–5: sc around (9)
  • R6: (sc, dec) x3 (6)
  • R7: fold in half and sc across (3)

Sl st, fasten off, and leave a long tail to sew. Do not stuff.

Overalls

Legs (make 2):

  • R1: ch 18 (18)
  • R2: insert your hook into the first chain, sc around (18)
  • R3–4: sc around (18)

On the first leg, sl st and fasten off, leaving a medium tail. On the second leg, do not cut the yarn; we will continue through.

  • R5: join to the first leg with a sc, 35 sc (36)

There will be a little gap between the legs. Sew it closed with the first leg’s tail.

  • R6–7: sc around (36)
  • R8: (4 sc, dec) x6 (30)

Sl st, fasten off, cut the yarn, and hide the tail. Mark the 12th and 19th stitches of R8. We will work between these stitches on R9.

  • R9: from the 12th st to the 19th st, 8 sc, ch 2 and turn (10)
  • R10: 8 sc, ch 2 and turn (10)
  • R11: 8 sc, ch 15 (23)

Join with a sc to the 4th st of R8 (the back of the overall). Work between the 4th st and the 27th st of R8: 8 sc, ch 15 (23). Join with a sl st to the front side of the overall, at the other edge of R11. Fasten off and hide the tail.

Sweater

Start with pink. We will add red parts later.

  • R1: ch 36 (36)
  • R2: join to the first chain with a sc, 35 sc (36)
  • R3–4: sc around (36)
  • R5: (4 sc, dec) x6 (30)
  • R6: sc around (30)
  • R7: 5 sc, ch 5, sk 5, 10 sc, ch 5, sk 5, 5 sc (30)
  • R8: sc around (30)
  • R9: (3 sc, dec) x6 (24)
  • R10–11: sc around (24)

Sl st, fasten off, and hide the tail.

Hold the sweater upside down. Insert your hook into the first chain where we started. Work 36 sc with red yarn, sl st, and fasten off.

For the sleeves, insert your hook into the back of a sleeve. There will be 10 stitches and 2 corners, for 12 stitches total.

  • R1: 12 sc (12)
  • R2–4: sc around (12)

Switch to the red yarn.

  • R5: sc around (12)

Sl st, fasten off, and hide the tail.

Assembly

Once your pieces are ready, bring the bunny to life in this order. Take your time with each seam.

  • Sew the head securely onto the body, keeping it centered and upright.
  • Attach the arms to both sides of the body at matching heights.
  • Stitch the hearts onto the ears, placing them between R3 and R8.
  • Sew the ears between R3 and R4 of the head, 4 to 5 stitches apart, working from behind.
  • Slip on the overalls and sweater, then adjust the fit before the final touches.

Common Mistakes to Avoid

Small slips can throw off a doll this detailed. Sidestep these few.

  • Stuffing the head too soft, which lets the face sink and lose its shape.
  • Sewing the ears unevenly, so one sits noticeably higher than the other.
  • Skipping the stitch markers on the overall, then misplacing the strap rows.
  • Pulling the color change too tight, which puckers the sweater hem.
  • Forgetting to hide tails as you go, leaving messy ends on show.

Important Remarks

Keep these notes nearby as you stitch. They smooth out the trickier moments.

  • Work in a continuous spiral unless a round says to join, so seams stay invisible.
  • Place the safety eyes before stuffing, since you cannot reset them once secured.
  • Keep your sc tension snug, so no stuffing peeks through the fabric.
  • Use a long tail on every piece meant for sewing, never a short one.
  • Read the overall and sweater rounds slowly, because the shaping turns mid-row.

 Precious Crochet Heart Bunny Doll with Amigurummi Pattern

Conclusion

Your Crochet Heart Bunny Doll is finally complete, and the little face says it all. This sweetheart shines as a nursery decoration, a birthday surprise, or a keepsake for someone special. Pick your softest yarn, take the rounds one at a time, and enjoy every cozy moment of the make.

Similar Posts

Leave a Reply

Your email address will not be published. Required fields are marked *