Adorable Crochet Monkey Amigurumi | Handmade Plush Toy
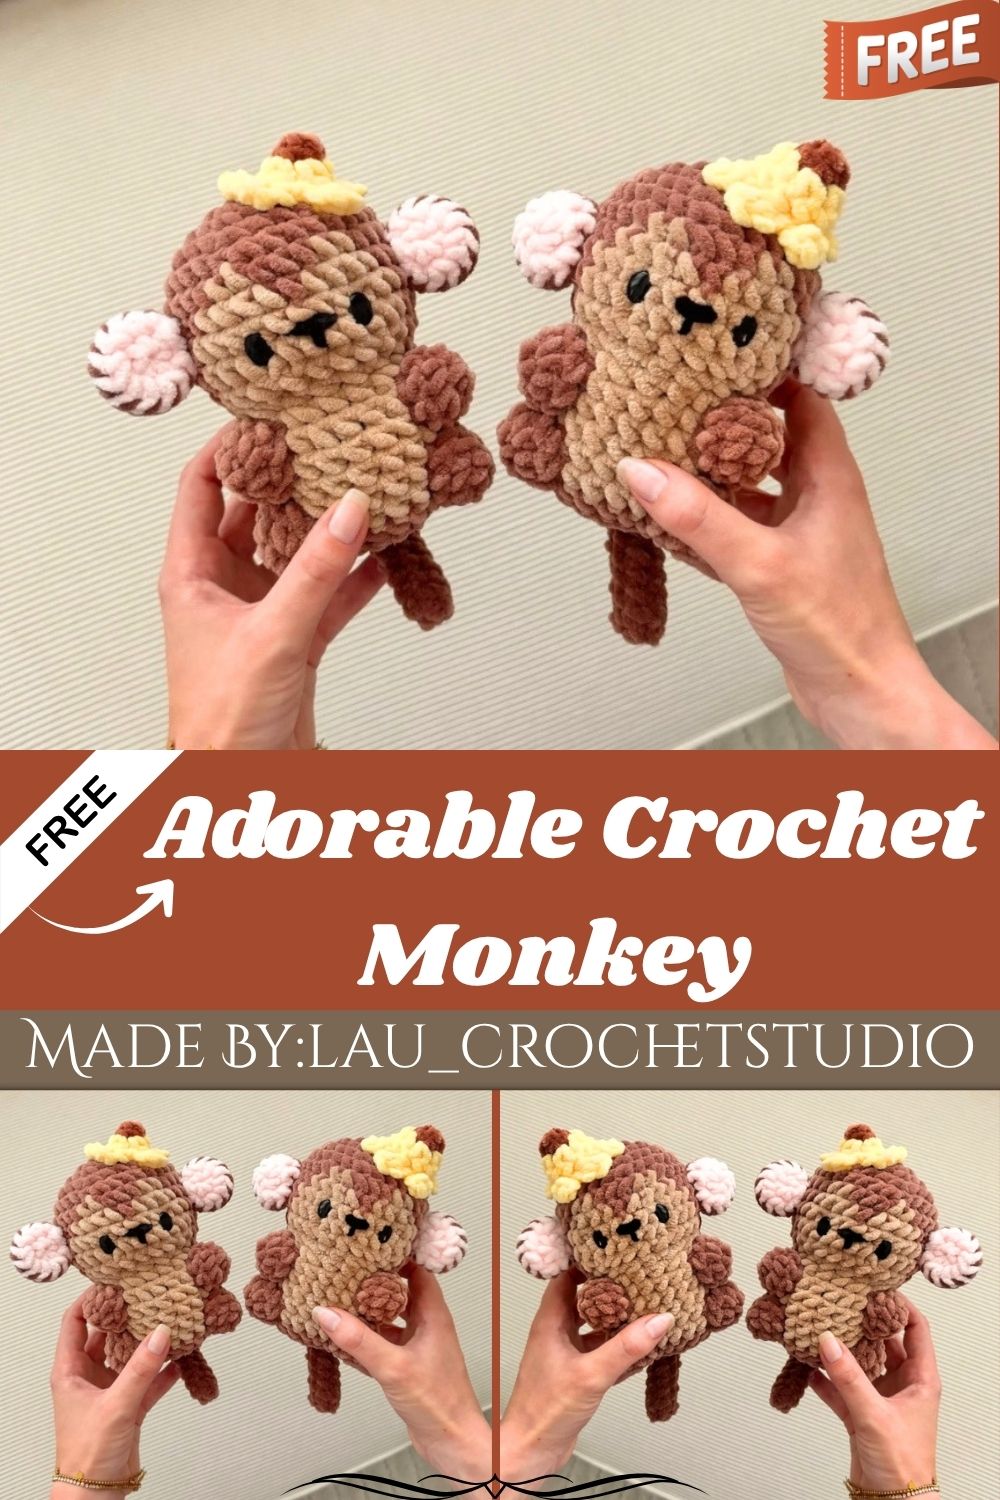
Grab your hook and yarn for a cuddly crochet monkey amigurumi. Honestly, this playful pattern includes a tiny banana accessory too, making it an instant favorite handmade toy gift idea.
Amigurumi monkeys bring warmth and personality to any handmade toy collection. Low-key, this pattern walks you through the head, body, limbs, tail, ears, and a sweet little banana prop. Beginners and experienced crocheters alike will enjoy stitching this expressive character from start to finish, one careful round at a time.
Skill Level
Rated intermediate, this pattern suits crocheters comfortable with magic rings, increases, decreases, and basic shaping. Ngl, first-timers can manage it with patience, though prior amigurumi experience makes seaming easier.
Pattern Overview
- Uses continuous rounds worked in a spiral; no joining slip stitches needed between rounds
- Head and body are crocheted as one continuous piece for a seamless silhouette.
- Arms, legs, tail, and ears are made separately, then sewn onto the finished body.
- A tiny crocheted banana adds a playful, giftable detail to the finished toy
- Safety eyes get inserted mid-pattern, before the head closes and stuffing begins
- Finished size depends on yarn weight and hook tension, roughly palm-sized when complete .lete
Materials
- Yarn in your choice of colors (brown, pink, and yellow work well for this design)
- 5mm crochet hook
- Yarn needle for sewing pieces together
- Polyester stuffing
- Scissors
- Safety eyes
Abbreviations
- MR – Magic Ring
- SC – Single Crochet
- INC – Increase
- CH – Chain
- DEC – Decrease
- HDC – Half Double Crochet
- SL ST – Slip Stitch
Color changes throughout this pattern appear underlined for easy reference.
Special Techniques
- Magic ring starts give a tight, hole-free center for the head and limbs
- Invisible decreases keep the head shaping smooth without visible gaps or bumps
- Sewing eyes between specific rounds keeps facial features perfectly symmetrical
- Two-tone ear pieces get seamed together using a whip stitch for a clean edge
- The banana’s curved tip uses chain stitches combined with SC and HDC for shape
Customization and Variation
- Swap the brown and pink tones for grey and white to create a koala instead
- Use a fuzzy or bouclé yarn for a fluffier, more textured monkey coat
- Add a small crocheted hat or bandana for extra character and personality
- Skip the banana and attach a tiny crocheted heart for a Valentine’s version
- Try embroidered eyes instead of safety eyes for a softer, baby-safe finish
Full Pattern Instructions
Head and Body
Work the head and body in one continuous spiral, starting from the top.
R1. 6 SC in MR (6) R2. 6 INC (12) R3. (SC, INC) x 6 (18) R4. (2 SC, INC) x 6 (24) R5. (3 SC, INC) x 6 (30) R6. 12 SC, 2 SC, 3 SC, 2 SC, 11 SC (30) R7. 11 SC, 4 SC, SC, 4 SC, 10 SC (30) R8-9. 10 SC, 11 SC, 9 SC (2 rounds) (30) R10. (3 SC, DEC) x 2, (3 SC, DEC) x 2, SC, 2 SC, DEC, 3 SC, DEC (24) R11. (2 SC, DEC) x 2, (2 SC, DEC) x 2, SC, SC, DEC, 2 SC, DEC (18)
Insert safety eyes between rounds 8 and 9, spacing them three stitches apart. Stuff the head firmly before closing further.
R12. (2 SC, INC) x 2, (2 SC, INC) x 2, SC, SC, INC, 2 SC, INC (24) R13-17. 8 SC, 9 SC, 7 SC (5 rounds) (24) R18. 24 SC (24) R19. (2 SC, DEC) x 6 (18) R20. (SC, DEC) x 6 (12) R21. 6 DEC (6)
Add more stuffing before closing. Cut the yarn, leaving enough tail to sew the hole shut.
Arms and Legs (make 4)
R1. 5 SC in MR (5) R2. 5 INC (10) R3. 10 SC (10)
Add light stuffing to each piece. Cut the yarn, leaving a long tail for attaching to the body later.
Tail
R1. 5 SC in MR (5) R2-10. 5 SC (9 rounds) (5)
Skip stuffing this piece entirely for a floppy, natural tail shape. Cut the yarn with a tail long enough for sewing.
Ears (make 2)
R1. 6 SC in MR (6) R2. 6 INC (12)
Make two pink circles and two brown circles total. Fasten off the pink pieces without leaving a tail. For the brown pieces, leave a long tail for assembly. Using a yarn needle, sew through both layers to join a pink and brown circle into one ear. Repeat for the second ear.
Banana
R1. 5 SC in MR, using brown yarn (5) R2. 5 SC (5)
Switch to yellow yarn.
R3. 5 INC (10) R4. 10 SC (10)
Chain 3. Skip the first chain, then work a SC and an HDC into the next two chains. Skip one stitch, then work a SL ST into the next. Repeat this sequence five times total to form the banana’s curved shape. Leave a long tail for sewing.
Assembly
Sew the arms, legs, tail, and ears onto the body using the tails left from each piece. Position the ears slightly behind the eyes for a natural look. Attach the tail centered at the base of the body. Finish by embroidering a small nose beneath the eyes, then tuck the banana into one of the monkey’s hands.
Common Mistakes
- Skipping the stitch count check after each round often leads to lopsided shaping
- Placing safety eyes too close together makes the monkey’s expression look off
- Under-stuffing the head causes visible dents once the piece cools and .settles
- Forgetting to leave long tails on limb pieces makes sewing far more difficult
- Rushing the ear seam often leaves a gap between the pink and brown layers
Finishing Tips
- Steam-block finished pieces lightly to smooth out uneven stitches before assembly
- Pin limbs in place with stitch markers before sewing for even, symmetrical. placement
- Weave in every yarn tail twice for extra durability during regular play
- Brush fuzzy yarn gently with a soft brush to blend seams on textured versions
- Store the finished toy away from direct sunlight to keep colors from fading
Gifting Ideas
- Pair the monkey with a small crocheted jungle-themed keychain for a matching set.
- Wrap it in tissue paper inside a mini basket for a baby shower gift
- Attach a handwritten tag naming the monkey for a personalized touch
- Bundle it with a storybook about jungle animals for a themed reading gift
- Add it to a nursery decor gift set alongside soft blankets or a rattle
Frequently Asked Questions
Can I make this monkey without safety eyes? Yes, embroidered eyes work well as a safer alternative for gifts meant for infants.
What yarn weight works best for this pattern? Worsted weight yarn paired with a 5mm hook gives the tightest, most even stitches.
How long does this amigurumi typically take to finish? Most crocheters finish the monkey, banana, and assembly in three to four relaxed evenings.
Can I resize the pattern to make a bigger monkey? Switching to bulkier yarn and a larger hook scales the whole design up proportionally.
Conclusion
Real talk, this crochet monkey amigurumi makes a genuinely fun project from start to finish. Every piece, from the tiny banana to the two-tone ears, adds character to the final toy. No joke, once assembled, this little monkey makes a heartfelt handmade gift for any occasion.