Christmas Crochet Seal Amigurumi Pattern | Free Holiday Plush
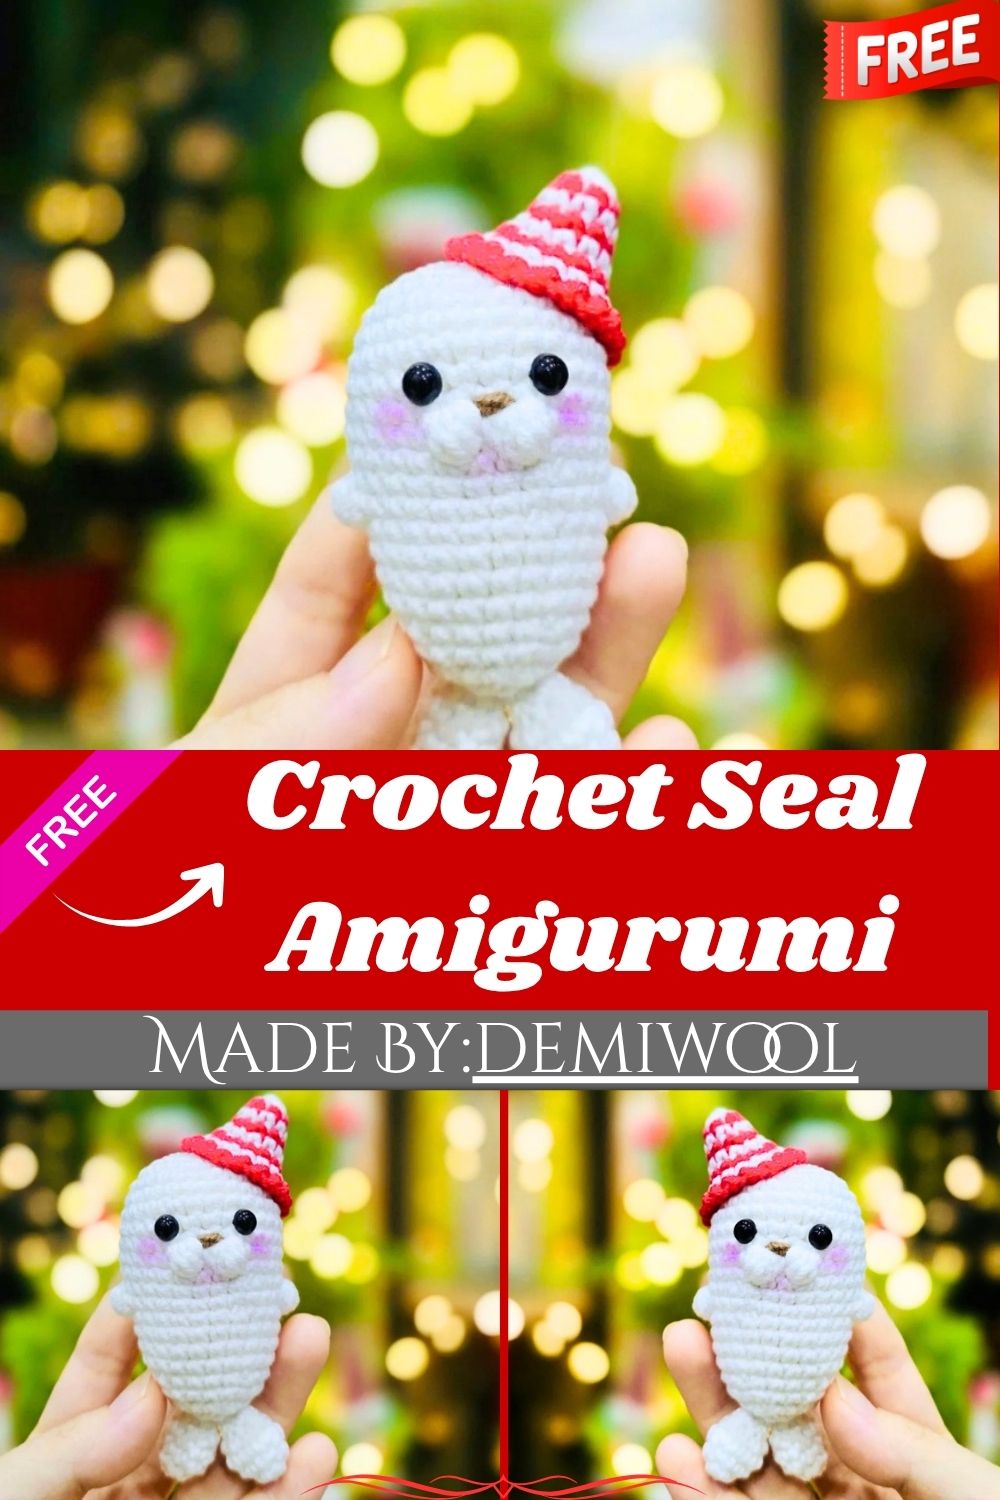
A tiny Santa hat gives this crochet seal instant Christmas charm. Soft white yarn paired with a red-and-white hat brings a warm, festive vibe to this amigurumi. Thanks to its small and adorable shape, it’s a perfect pick for handmade gifts, Christmas decor, or a cozy winter display.
This little seal measures about 7.6cm/3.0in long, not counting the hat, making him small enough to tuck into a stocking or line up along a mantel. His body and head are worked as one continuous piece, with bobble stitches forming a rounded snout and two little arms. Safety eyes and a hand-embroidered nose give him an expressive face, while the striped hat adds a festive finishing touch without extra bulk.
Skill Level
Suitable for beginners with some amigurumi experience. You’ll use a magic ring, single crochet, increase, decrease, and bobble stitch. The hat’s alternating colors add a touch of extra practice.
Pattern Overview
- The finished seal is roughly 7.6cm/3.0in long, not including the hat, using light DK-weight cotton yarn and a 2.0mm hook.
- Head and body are crocheted as one piece, so there’s no seam down the middle and no neck to join separately.y
- Bobble stitches double as the snout and the arms, with no separate limb pieces to sew on afterward
- Two matching tail flippers are made separately, left unstuffed, and sewn to the base of the body
- A striped hat tops off the head, worked in alternating white and red rounds with a chained crown
- Safety eyes and hand embroidery finish the face for a friendly, expressive look that suits holiday displays. lays
- Most pieces are small and quick to work up, making this a good last-minute stocking-stuffer pattern
- The overall shape stays soft and rounded throughout, giving the seal a chubby, huggable silhouette. ouette
Special Techniques
- Magic Ring (MR): the starting point for the head, body, tails, and hat. It keeps the center closed with no visible gap.
- Bobble Stitch (BO): five double crochets worked together into one stitch. It forms the snout in Round 9 and the arms in Round 12.
- Placement Adjustment: tension varies between crocheters, so the Round 12 bobbles may need slight repositioning. The goal is arms that sit evenly with the snout centered.
- Color Change for the Hat: alternate white and red every round from Round 1 through Round 7. Carry or cut yarn as needed to keep stripes clean.
Common Mistakes
- Placing the safety eyes too close together or too low, instead of 3-4 stitches apart above the snout
- Skipping the tension check before Round 12, which can leave the arms uneven or crowding the snout
- Under-stuffing the body before closing the final round, so the seal loses its shape over time
- Losing count during the hat’s increase rounds, which throws off the finished size and fit
- Forgetting to alternate hat colors on the correct rounds, leading to uneven or mismatched stripes
- Pulling the Round 8 chain crown too tight, which can pucker the hat’s finished edge
- Not weighing loose ends in as you go, which can leave yarn’s surface looking messy.
Materials
Gather these before starting so the color changes in the hat don’t catch you off guard.
- Yarn: I used YarnArt Jeans cotton yarn in white and red
- Hook: Size 2.0mm
- Safety eyes: 6.0mm
- Stitch markers
- Yarn needle
- Scissors
- Pins (optional)
Abbreviations
R: round | MR: magic ring | st: stitch | ch: chain | sc: single crochet | inc: increase | dec: decrease | slst: slip stitch | BO: bobble stitch (5dc together)
Head and Body
Using white yarn, work continuous rounds.
- R1: MR, 8sc (8)
- R2: 8inc (16)
- R3: (sc, inc) x 8 (24)
- R4: (3sc, inc) x 6 (30)
- R5-8 (4 rounds): 30sc (30)
- R9: 14sc, BO, 1sc, BO, 13sc (30)
- R10: 30sc (30)
- R11: (8sc, dec) x 3 (27)
- R12: 8sc, BO, 12sc, BO, 5sc (27)
Note: the bobble stitches in R9 form the seal’s snout. The ones in R12 form his arms. Depending on your tension, shift the R12 bobbles slightly so the arms sit evenly on both sides, with the snout centered between them.
Head and Body (cont)
Using white yarn, work in continuous rounds.
- R13: (7sc, dec) x 3 (24)
- R14-17 (4 rounds): 24sc (24)
Insert the safety eyes between R7 and R8, right above the snout, 3-4 stitches apart. Stuff the head and body, continuing to stuff as you go.
- R18: (4sc, dec) x 4 (20)
- R19: 20sc (20)
- R20: (3sc, dec) x 4 (16)
- R21: 8dec (8)
Stuff the body firmly. Fasten off, cut the yarn, close the gap, and weave the yarn in.
Tail
Make 2, using white yarn, working in continuous rounds.
- R1: MR, 6sc (6)
- R2: (2sc, inc) x 2 (8)
- R3-4 (2 rounds): 8sc (8)
- R5: (2sc, dec) x 2 (6)
Do not stuff the tail. Fasten off, cut the yarn, close the gap, and leave a long tail for sewing.
Hat
Work in continuous rounds. Alternate colors: R1, 3, 5, 7 in white, and R2, 4, 6, 8 in red.
- R1: MR, 6sc (6)
- R2: (2sc, inc) x 2 (8)
- R3: (3sc, inc) x 2 (10)
- R4: (4sc, inc) x 2 (12)
- R5: (5sc, inc) x 2 (14)
- R6: (6sc, inc) x 2 (16)
- R7: (7sc, inc) x 2 (18)
- R8: slst into the first st, ch2, slst in the next st. Repeat to the end of the round.
Fasten off, cut the yarn, and leave a long tail for sewing.
Assembly
- Embroider the nose in black or dark brown yarn between R8 and R9, one stitch wide, centered between the bobbles.
- Sew the two tail flippers to the bottom of the body, side by side, so the seal sits flat.
- Sew the striped hat onto the head, positioned so it doesn’t cover the eyes or snout.
- Double-check that the arms and snout still look centered once everything is sewn
- Trim and weave in any remaining loose ends for a clean, finished look
Important Remarks
- Safety eyes are a choking hazard for small children. This seal is best suited as a display piece or a gift for older recipients.
- If your yarn tension differs from the original, weigh your pieces against the round counts rather than gauge aalone
- The bobble stitch placement in R12 is a guideline, not a fixed rule. Trust the visual check for centering over an exact stitch count.
- Keep the hat’s color changes consistent from Round 1 through Round 7, since a missed swap causes uneven stripes.pes
- Weave in loose ends from color changes as you go, rather than leaving them all for the end
- A stiffer cotton yarn like the one used here helps the seal hold its shape without a wire armature.
- Credit to the original pattern designer for the seal’s design. This write-up follows their structure with added explanation.
Conclusion
Ngl, this seal looks far more detailed than it actually is to make. The bobble-stitch snout and arms come together fast. The striped hat is the perfect finishing touch for the season. Give him as a stocking stuffer, add him to a holiday display, or keep him on your desk. Either way, he’s a quick and satisfying make.