Pocket-Sized Crochet Black Cat Doll | Handmade Amigurumi
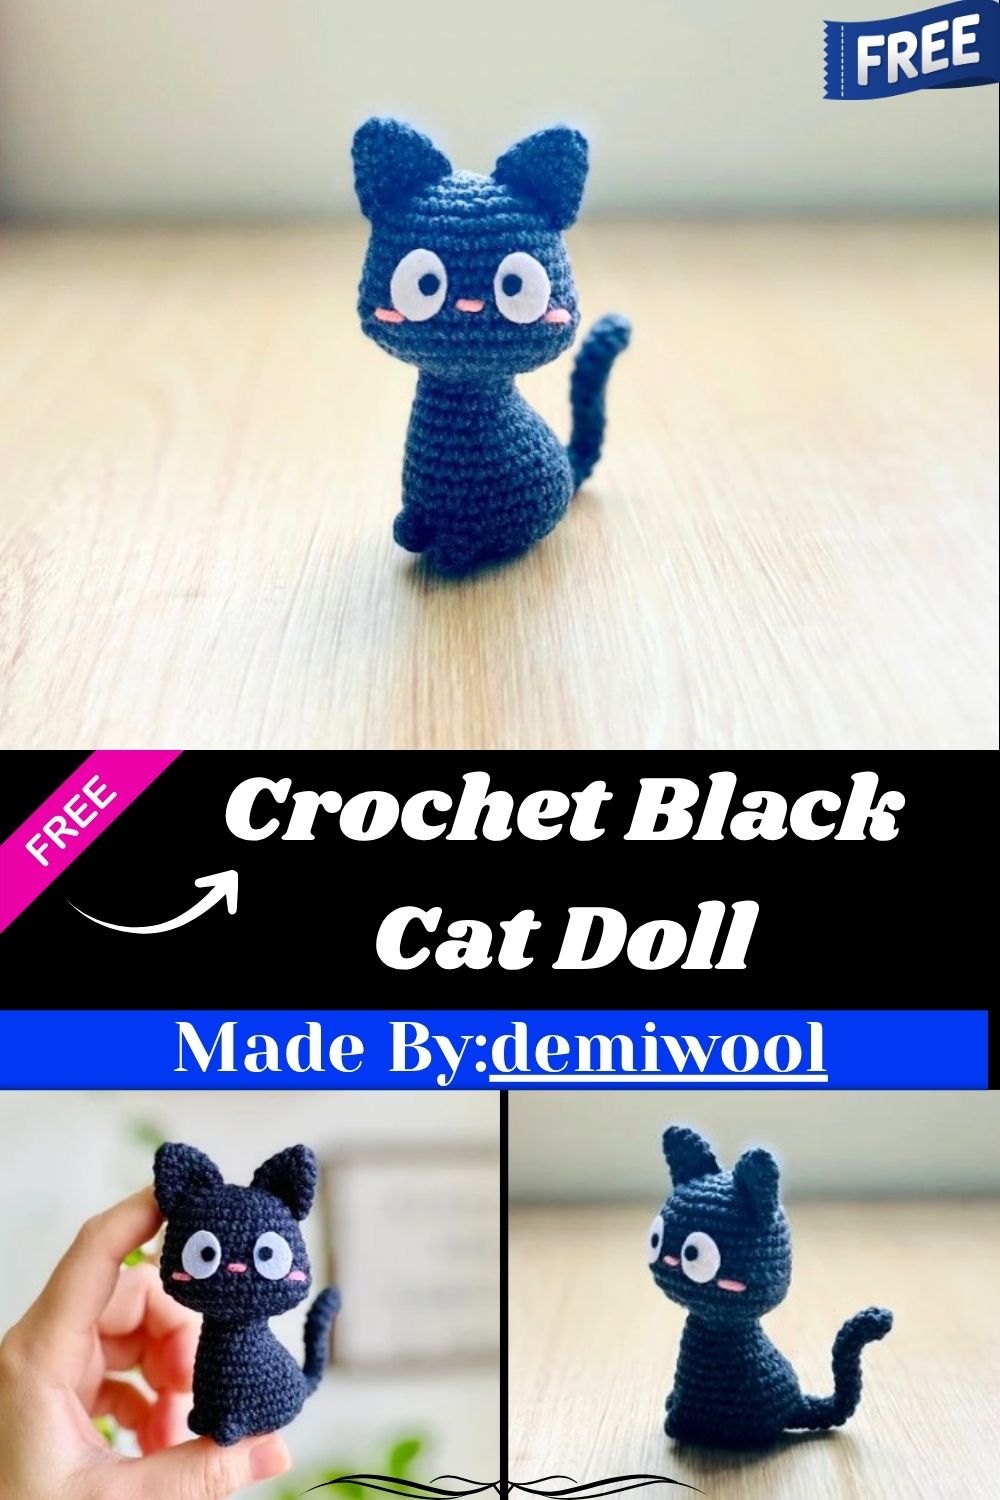
Jiji is a tiny black cat amigurumi that wins hearts instantly with its innocent look and soft texture. This pattern comes together with simple rounds and minimal shaping, so even beginners can complete it with ease. Ready in just a few hours or one relaxed weekend, this soft, huggable cat makes a charming addition as a handmade gift, nursery decor, or a lovely piece in your amigurumi collection.
Jiji stands about 10cm tall once stuffed, a pocket-sized project you can carry along on a trip or finish between errands. Worked in black yarn with a rounded head, curved tail, and folded ears, she has a quiet charm that suits a nursery shelf or a desk at work. Pink embroidery on the nose and cheeks softens her look, while felt eyes give her a hand-finished, boutique feel without extra rounds.
Skill Level
Beginner to intermediate level. You’ll need a magic ring, single crochet, increase, decrease, and bobble stitch. Shaping the legs and shifting stitches for symmetry takes a little extra patience here.
Pattern Overview
- Finished size is roughly 10cm/4 inches tall when made with a light 4-ply cotton-blend yarn and a 2.0mm hook.
- The body is worked in one continuous piece, with a bobble stitch forming both legs directly in the round.
- Head, body, ears, and tail are crocheted separately, then sewn together during assembly.y
- A short length of wire is inserted into the tail so it can be bent and shaped after stuffing.ng
- Felt is used for the eyes instead of safety eyes, giving the face a softer, more handmade look.
- Pink yarn is embroidered on afterward for the nose and cheeks; no extra rounds required. ired
Special Techniques
- Magic Ring (MR): the starting method for every piece, letting you close the center hole tightly so no gap shows once stuffed
- Bobble Stitch (BO): used in Round 5 of the body to form the two front legs directly within the round, honestly one of the more satisfying parts of this pattern
- Shift Stitch: an adjustment technique used before Rounds 9 and 12 of the body, where a few extra single crochets are added so the final stitch of the previous round lands centered between the two legs, keeping the shaping symmetrical.
- Wire insertion: slide a short piece of wire into the finished tail before trimming it to length, which lets you curve the tail into a supportive shape once everything is assembled
Common Mistakes
- Skipping the Shift Stitch before Rounds 9 and 12, which throws off the leg placement and leaves the body looking lopsided
- Stuffing too loosely around the head and body, which makes the finished doll floppy instead of firm and huggable
- Gluing the felt eyes unevenly or too far apart, so double-check placement between Rounds 6 and 11 before it sets
- Forgetting to trim the tail wire to match the tail’s length, leaving a sharp or protruding tip
- Rushing the decrease rounds on the head without stuffing as you go, leading to a lumpy, uneven shape at the end
Materials
Gather everything below before you start so you’re not pausing mid-round to search for a tool.
- Yarn: any cotton/sport/DK lightweight yarn. I used YarnArt Jeans (4ply, 55% cotton, 45% acrylic) in black, plus a little pink forembroideryr.y
- Hook: Size 2.0mm
- Fiberfill
- A short wire
- White and black wool felt to make the eyes
- Stitch markers
- Yarn needle
- Scissors
- Pins (optional)
Abbreviations
R: round | MR: magic ring | st: stitch | ch: chain | sc: single crochet | inc: increase | dec: decrease | slst: slip stitch | BO: bobble stitch
Instructions
HEAD (using black yarn)
- R1: MR, 8sc (8)
- R2: 8inc (16)
- R3: (sc, inc) x 8 (24)
- R4: (2sc, inc) x 8 (32)
- R5-9 (5 rounds): 32sc (32)
- R10: 8sc, 4inc, 8sc, 4inc, 8sc (40)
- R11-12 (2 rounds): 40sc (40)
- R13: 8sc, 4dec, 8sc, 4dec, 8sc (32)
Stuff the head and continue to stuff as you go.
- R14: (2sc, dec) x 8 (24)
- R15: (sc, dec) x 8 (16)
- R16 (optional): 8dec (8)
Note: The head is sewn on at R15 unless you add the optional R16. Adding R16 gives the head a rounder, neater finish, but it won’t affect the pattern either way.
Fasten off, cut the yarn, and weave in the ends. Cut two cat eyes from white and black wool felt, then glue them onto the face between R6 and R11 of the head.
BODY (using black yarn)
- R1: MR, 8sc (8)
- R2: 8inc (16)
- R3: (sc, inc) x 8 (24)
- R4: (2sc, inc) x 8 (32)
- R5: 14sc, BO, 2sc, BO, 14sc (3;2) the two bobble stitches form the cat’s legs.
- R6: 32sc (32)
- R7: (6sc, dec) x 4 (28)
- R8: 28sc (28)
Starting from R9, the body decreases to shape the torso. To keep things symmetrical, do a Shift Stitch here: add a few extra sc so the last stitch of R8 lands centered between the two legs. This may mean adding 2 extra sc, more, fewer, or none at all, depending on how your legs sit at this point — the goal is simply to center that last stitch.
- R9: dec, 3sc, dec, 14sc, dec, 3sc, dec (24)
- R10: dec, 2sc, dec, 12sc, dec, 2sc, dec (20)
- R11: 20sc (20)
After R11, repeat the Shift Stitch so the last stitch again lands centered between the legs.
- R12: dec, 2sc, dec, 8sc, dec, 2sc, dec (16)
- R13-14 (2 rounds): 16sc (16)
Stuff the body, fasten off, cut the yarn, and leave a long tail for sewing.
EARS (make 2, using black yarn)
- R1: MR, 6sc (6)
- R2: (2sc, inc) x 2 (8)
- R3: (3sc, inc) x 2 (10)
- R4: (4sc, inc) x 2 (12)
- R5: 12sc (12)
Do not stuff the ear. Fasten off, cut the yarn, and leave a long tail for sewing. Fold the ear in half and sew the two edges together.
TAIL (using black yarn)
- R1: MR, 5sc (5)
- R2-14 (13 rounds): 5sc (5)
Do not stuff the tail. Fasten off, cut the yarn, and leave a long tail for sewing. Insert the wire into the tail so it’s easier to shape later, then trim the excess wire to match the tail’s length.
Assembly
- Sew the ears onto both sides of the head, positioned between R2 and R7 of the head.d
- Sew the head onto the body, lining it up so the face sits centered above the front legs
- Sew the tail onto the back of the body, between R3 and R6
- Shape the tail into a gentle curve so it helps support the body and lets Jiji sit steadily
- Embroider the nose in pink between the two eyes, then embroider the two cheeks just below them
- Gently shape the body with your hands so the bottom sits flat, letting the finished cat balance on its own
Important Remarks
- The wire in the tail has sharp trimmed edges, so keep the finished doll away from small children who might handle it unsupervised
- Felt eyes are glued rather than sewn, which looks neat but isn’t fully secure for a child’s toy; treat this as a display or gift piece for older recipients
- If you swap yarn brands, weigh your finished pieces against the given round counts rather than gauge alone, since even a slight tension difference changes the final 10cm size.
- The Shift Stitch amount is not fixed; trust the visual check of centering the last stitch between the legs over any set stitch count.t
- Credit to the original pattern designer for the Jiji cat design; this write-up follows their round-by-round structure while explaining each step in plain language
Conclusion
Jiji comes together quickly once the Shift Stitch clicks, and the payoff is a doll with real personality despite her small size. Trust me, the bobble-stitch legs and curved wired tail make her feel much more polished than the round count suggests. Keep her as a shelf companion, clip her onto a bag, or wrap her up for a friend who loves cats; either way, she’s a satisfying weekend hook.