Easy Crochet Mini Potion Bottle Amigurumi Pattern
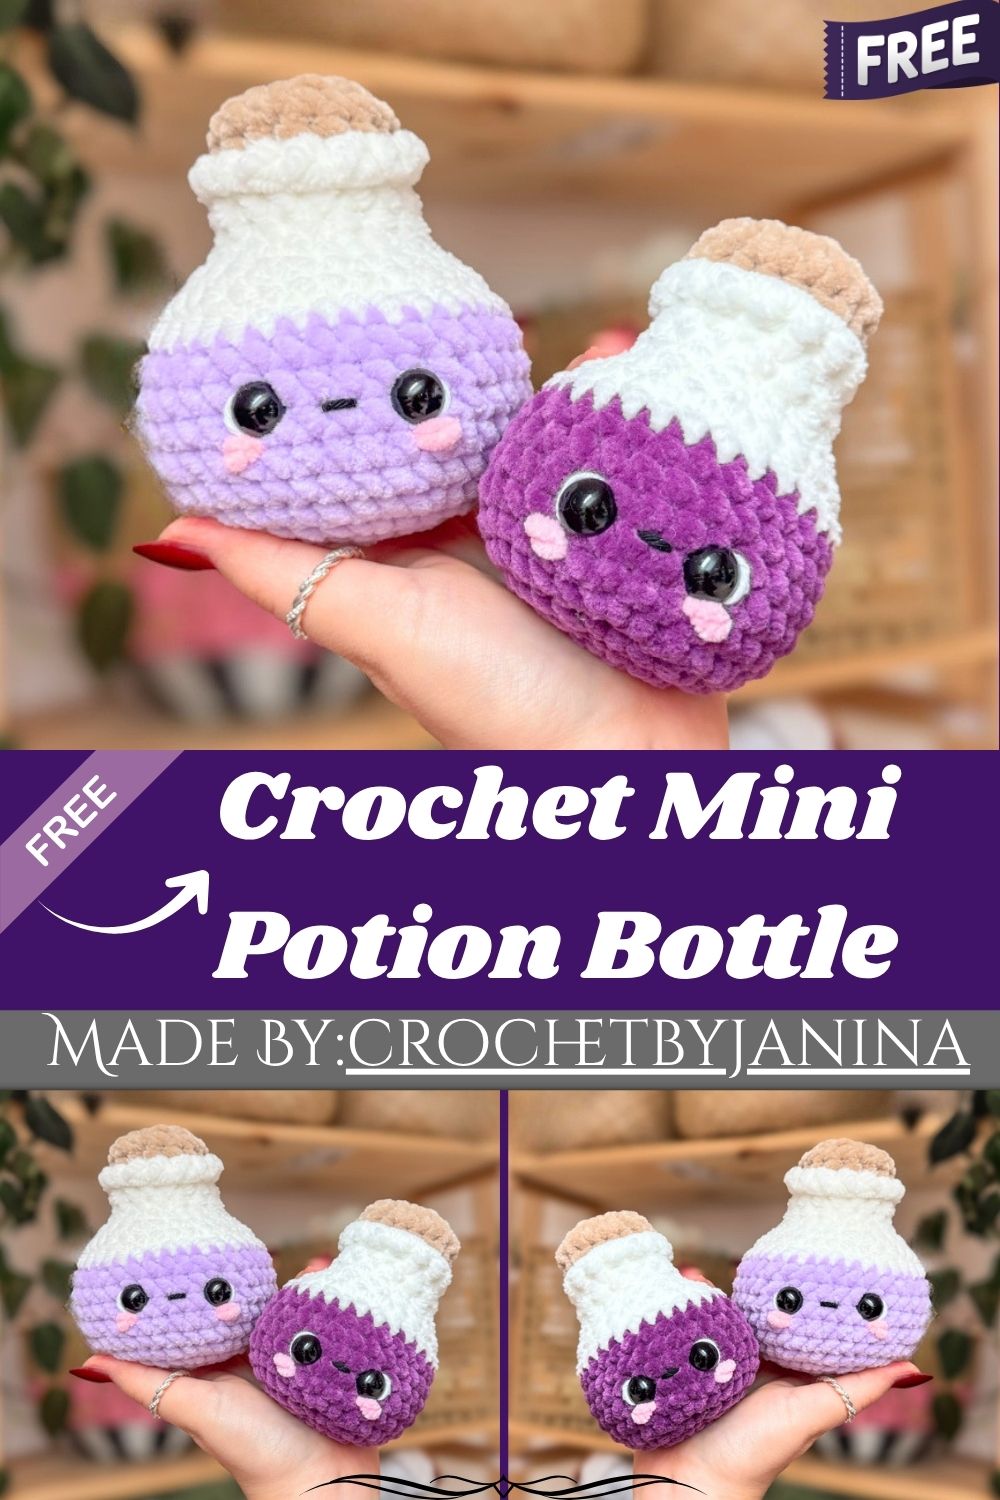
Fantasy-inspired amigurumi lovers, this tiny potion bottle is sure to win your heart. A charming blend of purple, grey, and white yarn gives it a magical look, while its simple design makes it a quick and thoroughly enjoyable crochet project. Once finished, it looks equally stunning as a shelf piece, desk decor, or handmade gift.
Skill Level
Beginner-friendly project overall. You’ll need single crochet, increase, invisible decrease, and a color change. Working in front and back loops only for the lip adds a small, easy detail.
Pattern Overview
- The finished bottle is worked as one continuous piece, from the base all the way up to the neck
- The body starts in purple, then switches to white partway through for a two-tone look
- Safety eyes plus embroidered mouth, black and white details, and pink blush give the bottle a friendly face
- A front-loop and back-loop split creates a raised lip detail near the top of the bottle
- The neck is finished in beige, closed with a simple decrease and stitched shut
- A resizing note is included for making a smaller version of the same bottle shape
- The whole piece stuffs firmly for a solid feel that holds its shape well on a shelf
- No separate pieces are sewn on afterward, so the entire bottle stays seam-free from base to neck
Special Techniques
- Magic Circle (mc): the starting point for the base, keeping the center closed with no gap
- Invisible Decrease (dec): worked through the front loops only of the next two stitches, then closed off for a smooth, nearly invisible decrease line
- Front and Back Loop Split (FLO/BLO): one round is split so the front loops continue the body while the back loops start the lip, creating a raised ridge
- Invisible Fasten Off: the finishing tail is brought through a skipped stitch, then through the back loop of the last stitch, for a seamless final round
- Color Change (cc): switching yarns mid-round without a visible jog, used to move from purple to white and again from white to beige
Common Mistakes
- Losing track of the front-loop and back-loop split, which flattens the lip detail if worked incorrectly
- Placing the safety eyes unevenly, instead of the specified stitches apart between the given rounds
- Under-stuffing the body before closing the final rounds, leaving the bottle soft instead of firm
- Rushing the invisible fasten off, which can leave a visible gap instead of a seamless finish
- Mixing up the round count when making the smaller version, since two rounds are meant to be skipped
- Forgetting to switch colors at the marked rounds, which throws off the two-tone look of the body
- Pulling the color change too tight, which can leave a visible pucker at the join
Materials
Gather everything below before starting so the color changes don’t interrupt your rhythm.
- Yarn: size 6 yarn in purple, white, and beige, plus cotton yarn in white and black for embroidery
- Hook: 4.5mm crochet hook
- Safety eyes: 12mm
- Yarn needle
- Stitch marker
- Scissors
- Stuffing material
Abbreviations
st(s): stitch(es) | sc: single crochet | inc: increase | dec: invisible decrease | yo: yarn over | FO: fasten off | mc: magic circle | ch: chain | cc: color change | FLO: front loop only | BLO: back loop only
Instructions
Worked mostly in continuous rounds. Place a stitch marker in the first stitch of every round to keep track.
- Round 1: 8sc in mc (8)
- Round 2: inc around (16)
- Round 3: (sc, inc) x8 (24)
- Round 4: (3sc, inc) x6 (30)
- Round 5: (4sc, inc) x6 (36)
- Round 6-10 (5 rounds): sc around (36)
Place the safety eyes between Rounds 8 and 9, five stitches apart. Embroider a mouth one stitch wide between the eyes, add small details beside the eyes in black and white, and embroider blush one stitch wide next to the eyes in pink chenille yarn.
Change color to white.
- Round 11: sc around (36)
- Round 12: (4sc, dec) x6 (30)
- Round 13: (3sc, dec) x6 (24)
- Round 14: (sc, dec) x8 (16)
- Round 15-17 (3 rounds): sc around (16)
- Round 18/1: working in FLO only, hdc around (16). Mark the first BLO stitch of this round with a stitch marker.
Use invisible fasten-off and weave in the ends. Stuff the potion firmly. Insert your hook through the first BLO marked in Round 18, then pull a loop of beige yarn through to continue.
- Round 18/2: sc around (16)
- Round 19: (3sc, inc) x4 (20)
- Round 20: dec around (10)
Fasten off, sew the hole closed, and weave in the remaining ends.
Making the smaller portion: crochet the same pattern, but skip Rounds 5 and 12 entirely. Place the safety eyes only three stitches apart instead of five.
Assembly
- Insert the safety eyes and embroider the face details before stuffing, since the head area becomes hard to reach afterward
- Stuff the body firmly as you complete the color-change rounds, adding more as the shape narrows
- Close the final round neatly and weave in every loose end for a clean, finished look
- Set the bottle upright to check that it sits flat and steady on its base
- Give the finished piece a gentle squeeze test to check the stuffing feels even throughout
Important Remarks
- Safety eyes are a choking hazard for small children, so treat this bottle as a display piece rather than a toy
- The front-loop and back-loop split in Round 18 is what creates the raised lip, so take it slowly the first time
- If your yarn weight runs thicker or thinner than size 6, check your piece against the round counts rather than gauge alone
- The smaller potion variant uses the same instructions, just with two rounds removed and closer-set eyes
- Chenille yarn gives the blush a soft, fuzzy texture, but a strand of regular pink yarn works just as well
- Credit to the original pattern designer for this potion bottle design; this write-up follows their structure with added explanation
Conclusion
Trust me, this potion bottle is a satisfying one-piece make once the color changes click into place. The raised lip detail is the star of the design, and it’s simpler to crochet than it looks. Make one in purple, then try the smaller size in a different shade for a whole shelf of potions. Either way, it’s a quick project with a lot of personality.