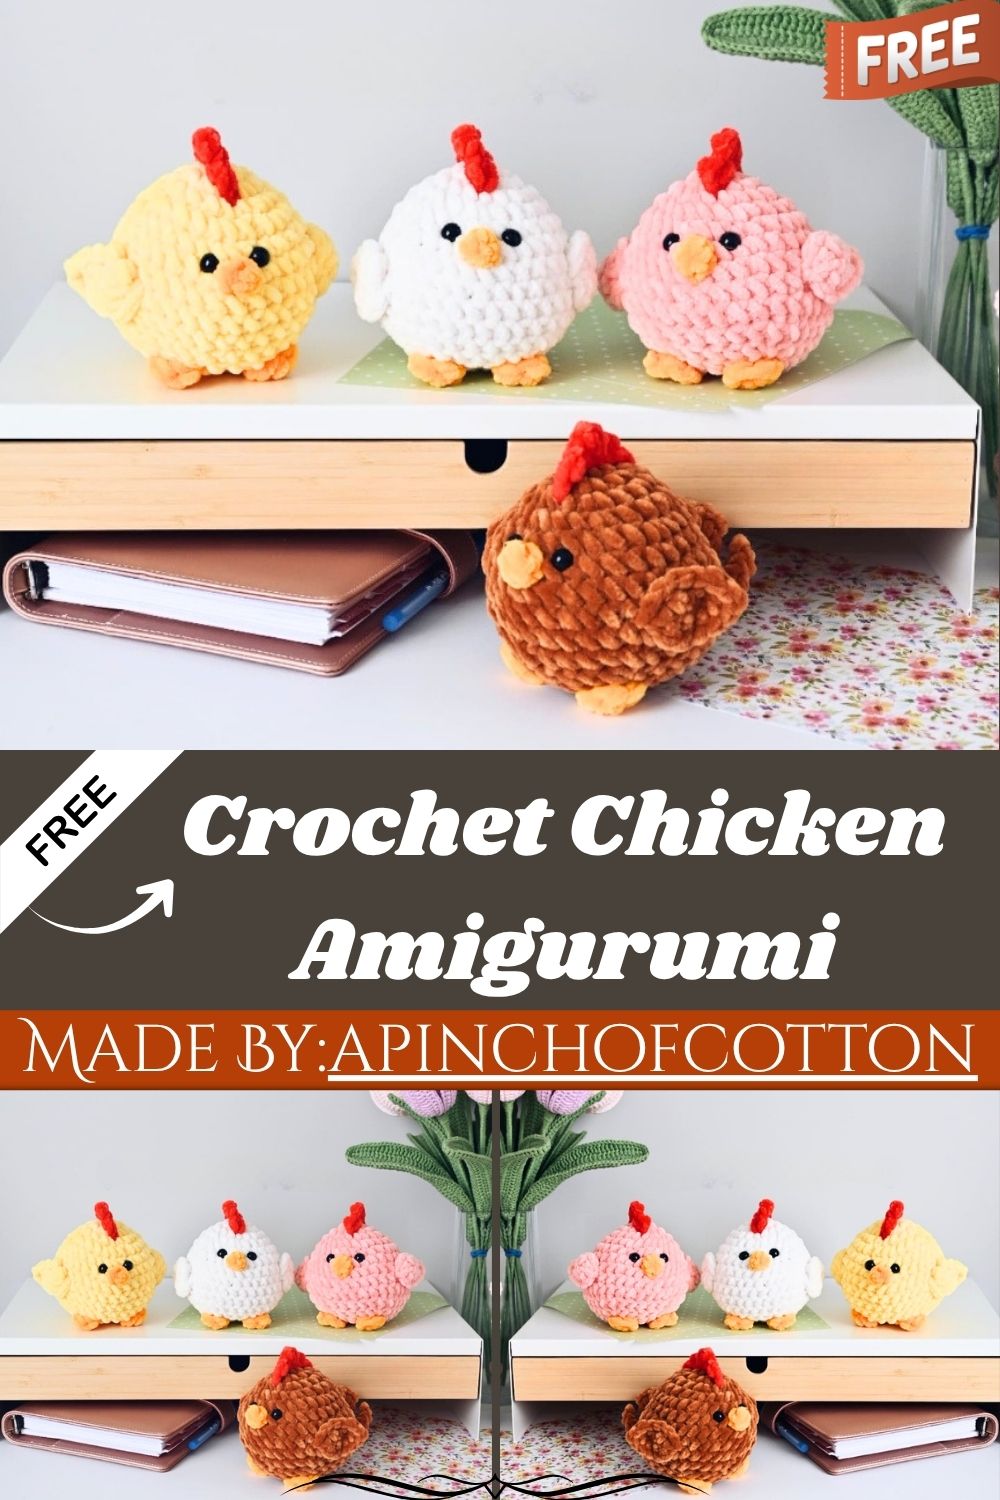
Kawaii Crochet Chicken Amigurumi Plush Toy Pattern
Baby yarn and a handful of stitches can turn into something adorable. This fluffy little chicken amigurumi brings cheerful farmyard charm to any handmade collection, perfect for gifting or display.
Crochet lovers know there’s something special about finishing a tiny amigurumi that instantly makes you smile, and this kawaii chicken pattern delivers exactly that kind of joy. Beginners and experienced crafters alike will enjoy working through simple rounds, basic stitches, and a few small parts that come together really fast.
Skill Level
Confident beginners and intermediate crocheters will handle this project easily, since it only needs magic rings, increases, decreases, basic stitches, and a couple of easy sewing steps involved.
Pattern Overview
- Finished chicken stands roughly palm-sized once stuffed, ideal as a shelf toy or keychain-style gift.
- Overall, the body and head are worked in one continuous piece using light yellow yarn for a seamless look.
- Additionally, the beak, legs, comb, wings, and a three-part tail are crocheted separately, then sewn on.
- Because the eyes go in before closing the head, plan that step ahead of stuffing.
- Meanwhile, a 4.0 mm hook and Himalaya Dolphin Baby yarn keep the fabric soft and beginner-friendly.
- In short, only basic stitches are used throughout: sc, hdc, dc, tr, plus increases and decreases.
Special Techniques
- First, magic ring starts keep the base of the body tight with no visible gap.
- Next, increasing and decreasing in spaced-out patterns shapes the rounded body without flat spots.
- Similarly, sewing safety eyes between specific rounds keeps the chicken’s face symmetrical and centered.
- Finally, closing the round by weaving through front loops only gives a smooth, invisible finish.
- For the wings and tail, working stitches along both sides of a single chain builds shape without extra rounds.
Customization and Variation
- Swap light yellow for white, cream, or speckled yarn to create different chicken breeds.
- Use a brighter red or orange for the comb to change the toy’s overall mood.
- Add a tiny bow or ribbon around the neck for a dressed-up finished look.
- Make the chicken in mini scale using thinner yarn and a smaller hook for keychains.
- Try felt or embroidered eyes instead of safety eyes for a softer, baby-safe version.
Common Mistakes
- For instance, skipping the safety eye placement before stuffing makes it hard to fix later.
- Likewise, uneven tension between rounds can leave the body looking lumpy instead of round.
- Also, forgetting to leave a long tail before fastening off makes sewing pieces on difficult.
- Additionally, rushing the final closing round often leaves a visible hole at the top.
- Finally, attaching wings or tail pieces without checking placement first can throw off the whole look.
Assembly
Gather your materials before starting: a 4.0 mm crochet hook, Himalaya Dolphin Baby yarn in light yellow, dark yellow, and red, soft fiberfill stuffing, 10 mm safety eyes, a tapestry needle, and scissors.
For reference, the abbreviations used below include mr (magic ring), ch (chain stitch), sc (single crochet), hdc (half-double crochet), dc (double crochet), tr (treble crochet), inc (increase), and dec (decrease).
Head and Body
Worked with light yellow yarn.
Rnd 1: 6 sc into the mr [6] Rnd 2: inc x 6 times [12] Rnd 3: (sc in next st, inc in next st) x 6 times [18] Rnd 4: (sc in next 2 st, inc in next st) x 6 times [24] Rnd 5: (sc in next 5 st, inc in next st) x 4 times [28] Rnd 6: (sc in next 13 st, inc in next st) x 2 times [30]
Rnd 7: sc in next 7 st, inc in next st, sc in next 14 st, inc in next st, sc in next 7 st [32] Rnd 8: ch 3, starting from the second chain stitch from hook: sc in next 2 st, sc in next 32 st around the body, sc in next 2 st [36] Rnd 9: inc in next st, sc in next st, inc in next st, sc in next 2 st, inc in next st, sc in next 24 st, inc in next st, sc in next 2 st, inc in next st, sc in next st, inc in next st [42]
Insert the safety eyes into the front of the body between rounds 5 and 6, spacing them 4 stitches apart. Begin stuffing the body firmly with fiberfill at this stage.
Rnd 13: (sc in next 2 st, dec) x 6 times [18] Rnd 14: (sc in next st, dec) x 6 times [12] Rnd 15: dec x 6 times [6]
Fasten off, leaving a long tail. Thread the tail through your tapestry needle, weave it through the front loop of each remaining stitch, then pull tight to close the opening. Weave in the end and stitch closed any small gap near the tail.
Beak
Worked with dark yellow yarn.
Rnd 1: 4 sc into the mr, slst to the first stitch [4]
Fasten off, leaving a tail. Then sew the beak just below the eyes.
Legs
Make 2, worked with dark yellow yarn.
Start with a chain of 2 ch. Rnd 1: all in the second chain stitch from hook: sc, hdc, dc, hdc, sc
Fasten off, leaving a tail. Next, sew both legs to the bottom of the body.
Comb
Worked with red yarn.
Start with a chain of 7 ch. Row 1: sc in second chain stitch from hook, slst in next st, (slst, dc 2) in next st, slst in next st, sc in next st, slst in last st.
Fasten off, leaving a tail. Afterward, sew the comb along the top of the head.
Wings
Make 2, worked with light yellow yarn.
Start with a chain of 6 ch. Rnd 1: dc in the second chain stitch from hook, dc in next st, hdc in next st, sc in next st, (slst, ch 1, slst) in last st. On the other side of the chain: sc in next st, hdc in next st, dc in next st, dc inc in next st, slst to the first stitch of this round.
Fasten off, leaving a tail. Once finished, sew both wings to the sides of the body.
Tail
Three parts, worked with light yellow yarn.
Part 1: chain of 4 ch. Rnd 1: dc in second chain stitch from hook, hdc in next st, sc in next st.
Part 2: chain of 5 ch. Rnd 1: hdc in second chain stitch from hook, dc in next st, hdc in next st, sc in next st.
Part 3: chain of 6 ch. Rnd 1: hdc in second chain stitch from hook, dc in next st, tr in next st, dc in next st, hdc in next st.
Fasten off each piece, leaving a tail. Sew all three tail parts together onto the back of the body, fanning them slightly for a natural look.
Finishing Tips
- First, steam-block small pieces like the wings and comb lightly before sewing for a flatter shape.
- Then pin pieces in place and step back to check symmetry before stitching them permanently.
- Also, use a matching yarn color for sewing so seams stay hidden along curved edges.
- Afterward, trim yarn tails close to the surface once weaving in ends to avoid stray fuzz.
- Finally, reshape the stuffed body gently by hand once assembly is done for a rounder finish.
Gifting Ideas
- For example, attach a small keyring loop to the back for an on-the-go bag charm gift.
- Alternatively, pair the chicken with a handwritten recipe card for a fun kitchen-themed present.
- Or bundle it with matching amigurumi farm animals for a themed nursery gift set.
- For a rustic touch, wrap it in kraft paper with twine for a handmade gifting presentation.
- Lastly, add a small gift tag naming the chicken for a personal touch.
Important Remarks
This pattern is an original design meant for personal use and handmade sales of the finished item only; please don’t resell, copy, or redistribute the written instructions themselves. Additionally, if you photograph your finished chicken for social media, tagging the designer is always appreciated. Finally, double-check gauge before starting if you plan to size the toy up or down significantly.
Frequently Asked Questions
Can I make this chicken without safety eyes? Yes, embroidered eyes or felt circles work well as a safer substitute for babies and toddlers.
What yarn weight works best for this pattern? Baby-weight or DK-weight yarn paired with a 4.0 mm hook gives the closest match to the sample.
How much yarn do I need for one chicken? A single small skein of each color is typically enough, since the pieces are quite small.
Can beginners really finish this pattern? Yes, as long as you’re comfortable with magic rings and basic increases, this project stays approachable throughout.
Conclusion
Bringing this little chicken to life only takes a handful of yarn colors, a few simple pieces, and some patient sewing at the end. Overall, once assembled, it makes a charming addition to any amigurumi collection or a sweet handmade gift for someone special.