Charming Crochet Rabbit Bag Pattern for Everyday Use
Soft cotton loops, a pink hook, and a growing rectangle of stitches set the stage for the Charming Crochet Rabbit Bag Pattern for Everyday Use. Every row builds toward a playful little carrier meant for tucking essentials on the go.
Few projects blend function and personality the way this one does. Rows of tidy single crochet form sturdy panels, while a shaped ear piece adds instant character without extra bulk. Crafters searching for an amigurumi bunny bag or a lighthearted crochet animal purse will find this design hits both marks at once. The crochet rabbit bag pattern rewards patience with a finished piece that looks far more complex than the stitch count suggests.
The pattern exists to turn a simple cotton skein into a wearable, giftable accessory that carries small items with charm.
What Is This Pattern?
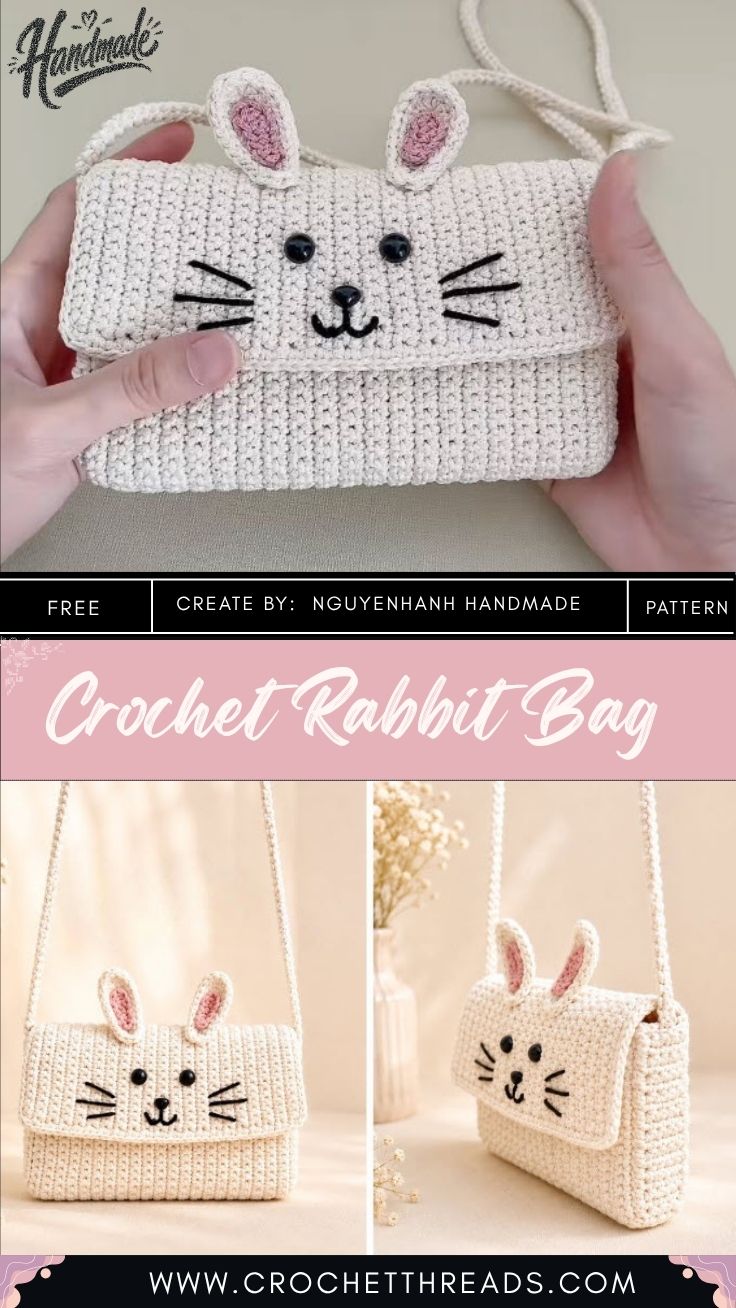
At its core, the crochet rabbit bag pattern is a beginner-friendly bag built from single crochet panels joined at the sides, topped with rabbit-inspired ear shapes for personality. Instead of relying on complicated colorwork or intricate lace stitches, it leans on repetition and clean seaming. Consequently, the fabric turns out dense enough to hold shape without a fabric lining. Meanwhile, the ear detail keeps the project from feeling like a plain pouch, giving it a distinct silhouette that reads as fun rather than fussy.
What Do You Need to Make It?
Materials stay minimal, which keeps the project approachable for a first bag attempt.
- A 3.0mm crochet hook
- Worsted-weight cotton yarn in a neutral or cream shade
- Stitch markers (at least four, ideally in contrasting colors)
- A tapestry needle for seaming
- Small scissors for trimming yarn tails
Because cotton yarn holds structure better than acrylic, it remains the preferred fiber for bag-style projects like this one.
What Will You Learn From This Pattern?
This project introduces several transferable techniques rather than a single repeated motion.
- Building a tidy foundation chain and working single crochet rows evenly across it
- Shaping a rounded, teardrop-style piece through gradual increases
- Seaming two panels together neatly using stitch markers to align edges
What Skills Does It Require?
Beginners with basic single crochet experience can manage this project without much difficulty. Working in the round is not required, so the learning curve stays gentle. However, comfort with counting stitches matters, since even spacing keeps the panels from puckering. Seaming demands a bit more attention than the stitching itself, particularly when lining up stitch markers before whipping the edges together.
How Long Does It Take?
Most crafters finish the piece across two to three relaxed sessions. Prep and swatching typically take fifteen minutes, stitching the panels runs one to two hours depending on tension, and finishing touches like seaming and weaving in ends add another twenty to thirty minutes. Therefore, an evening or a weekend afternoon usually covers the entire build.
What’s the Process Like?
The crochet rabbit bag pattern follows a clear sequence, and each stage below reflects one stitching photo from the tutorial.
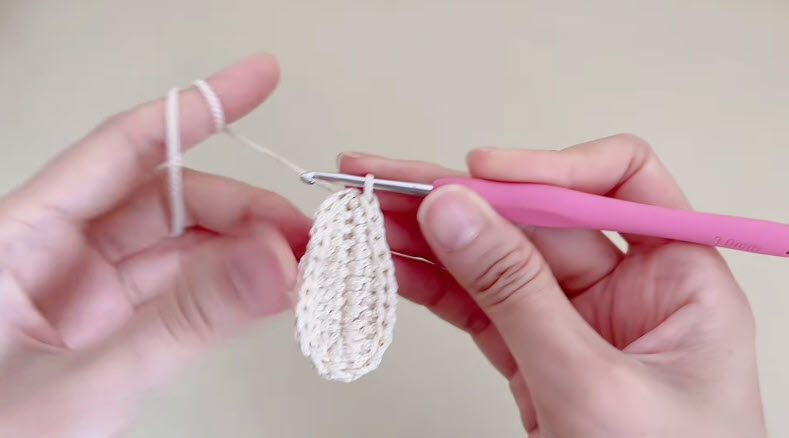
Step 1: Start the foundation loop. Wrap the cotton yarn around a finger and pull it through with the hook to form the initial slip knot, anchoring the very first stitch.
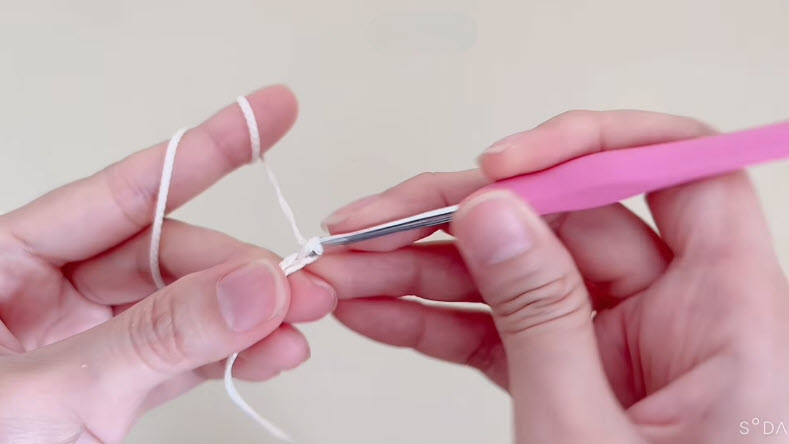
Step 2: Work the opening stitches. With the loop secured on the hook, pull the working yarn through to create the first few single crochet stitches, leaving a short tail hanging free.
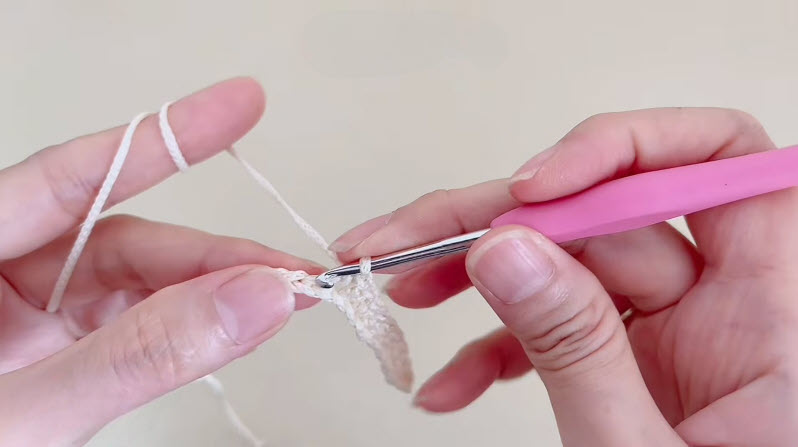
Step 3: Build the first rows. Continue working single crochet stitches back and forth, turning at the end of each row so the small swatch begins taking on a rectangular shape.
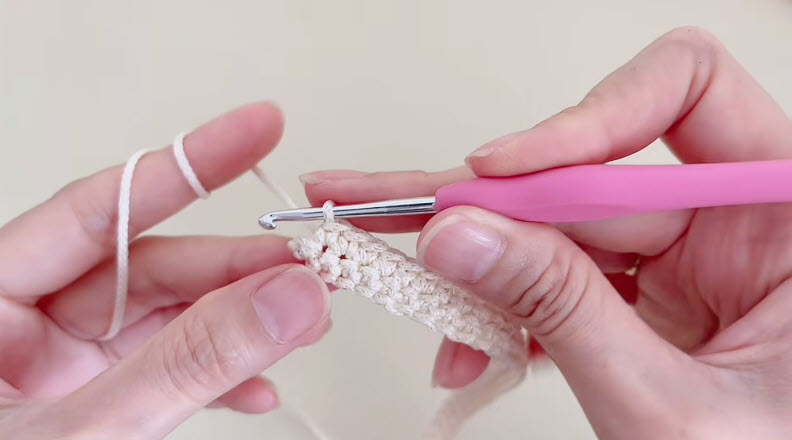
Step 4: Grow the panel. Keep repeating single crochet rows until the rectangle reaches the intended panel height, checking edges periodically so the sides stay straight.
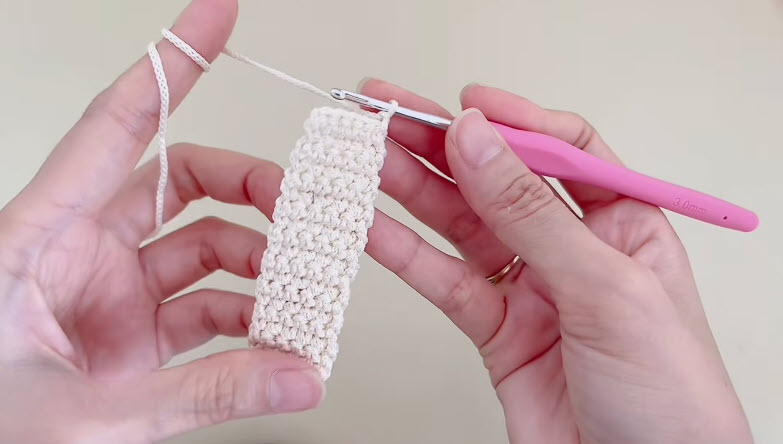
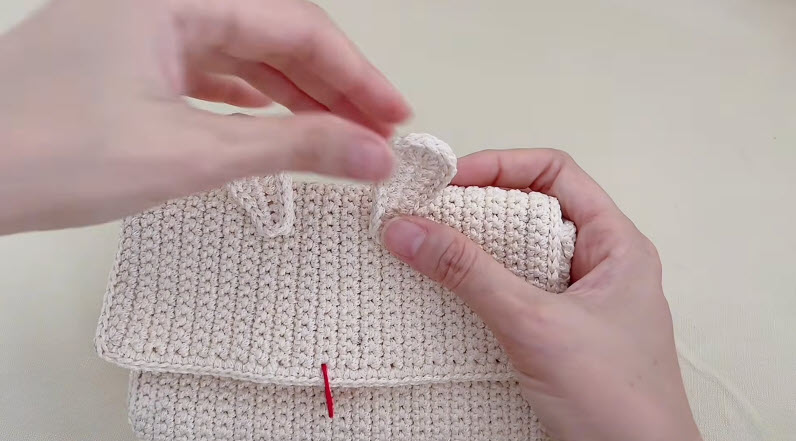
Step 5: Shape the ear piece. Using gradual increases, work a separate section into a rounded, teardrop-style shape that will form one of the signature rabbit ears.
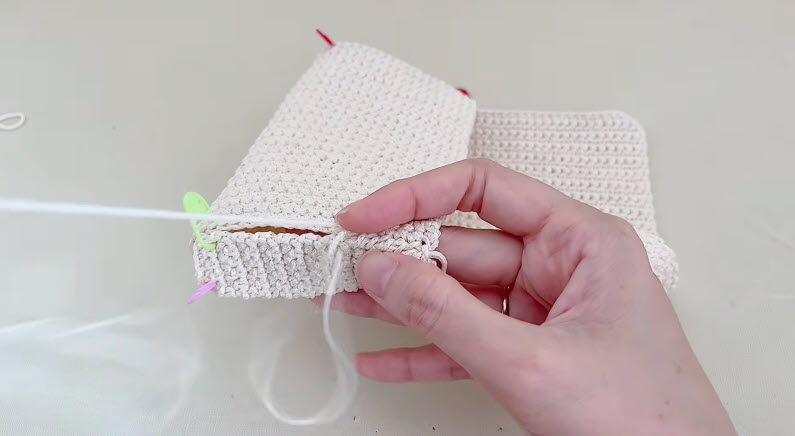
Step 6: Seam the pieces together. Align the two body panels with stitch markers marking matching corners, then whip stitch along the side seam with a tapestry needle to join them into the bag shape.
What Usually Goes Wrong?
Tension issues cause most early frustration. Stitches worked too tightly make seaming difficult, while loose stitches leave gaps along the panel edges. Additionally, miscounted rows often lead to panels that do not match in height, which becomes obvious only once seaming begins. Losing track of which side is the right side is another common slip, especially when the fabric looks similar from both angles.
How Can Mistakes Be Avoided?
Counting stitches at the end of every row prevents most sizing surprises. Placing a stitch marker in the first stitch of each row also helps track row starts accurately. Since seaming reveals uneven panels quickly, laying both pieces flat and comparing them before joining saves time later. Finally, working a small tension swatch before starting the full panel helps calibrate hook grip and yarn tension in advance.
What Else Can You Make With This Pattern?
The panel-and-ear technique adapts easily beyond a single bag design. Smaller versions of the ear shape work well as embellishments on hats or headbands, adding a playful accent without much extra yarn. The same single crochet panel method scales down into coin pouches or keychain pouches for quick gift-making. Larger panels, meanwhile, extend into tote-style bags for anyone wanting more storage while keeping the same construction logic intact.
What Can This Piece Be Used For?
Once finished, the bag suits a range of everyday tasks. Crafters often tuck small essentials like keys, lip balm, or coins inside, or dangle it from a bag strap as a decorative accent. Some attach it to a stroller or diaper bag for quick access to small items, while others hang it near an entryway to corral loose odds and ends.
Is It a Good Project for Beginners?
Yes, the project suits newer crocheters particularly well. Single crochet remains the only stitch required throughout, so nothing beyond basic technique gets demanded of the maker. Additionally, the seaming stage offers a gentle introduction to finishing skills that carry over into more advanced bag or garment projects later.
What Makes It Worth Trying?
Few beginner projects deliver this much personality for so little technical investment. The crochet rabbit bag pattern produces a finished object rather than a practice swatch, which keeps motivation high throughout. Furthermore, the compact size means less yarn commitment than a full garment, so trying a new color palette or fiber feels low-risk.
Why Are People Making This Right Now?
Small, character-driven accessories have surged in popularity across handmade marketplaces recently, and this design taps directly into that trend.
- Compact bags photograph well for social sharing, driving visibility for handmade sellers
- Animal-themed details appeal to gift-buyers shopping for children or animal lovers
- Quick finish times make the pattern ideal for last-minute handmade gifts
FAQ
Can acrylic yarn replace cotton for this bag?
Acrylic works in a pinch, though it produces a softer, less structured bag compared to cotton’s firmer drape.
How much yarn does the project typically require?
Most makers use under 100 grams of worsted-weight cotton, depending on final bag dimensions.
Does the bag need a lining?
A lining is optional; single crochet fabric is dense enough to hold small items without one.
Can the ear shapes be omitted?
Removing the ears turns the piece into a plain pouch, though the rabbit character disappears with them.
What hook size substitutes work best?
A 3.0mm to 3.5mm hook range keeps stitch density consistent without drastically altering finished measurements.
Final thought
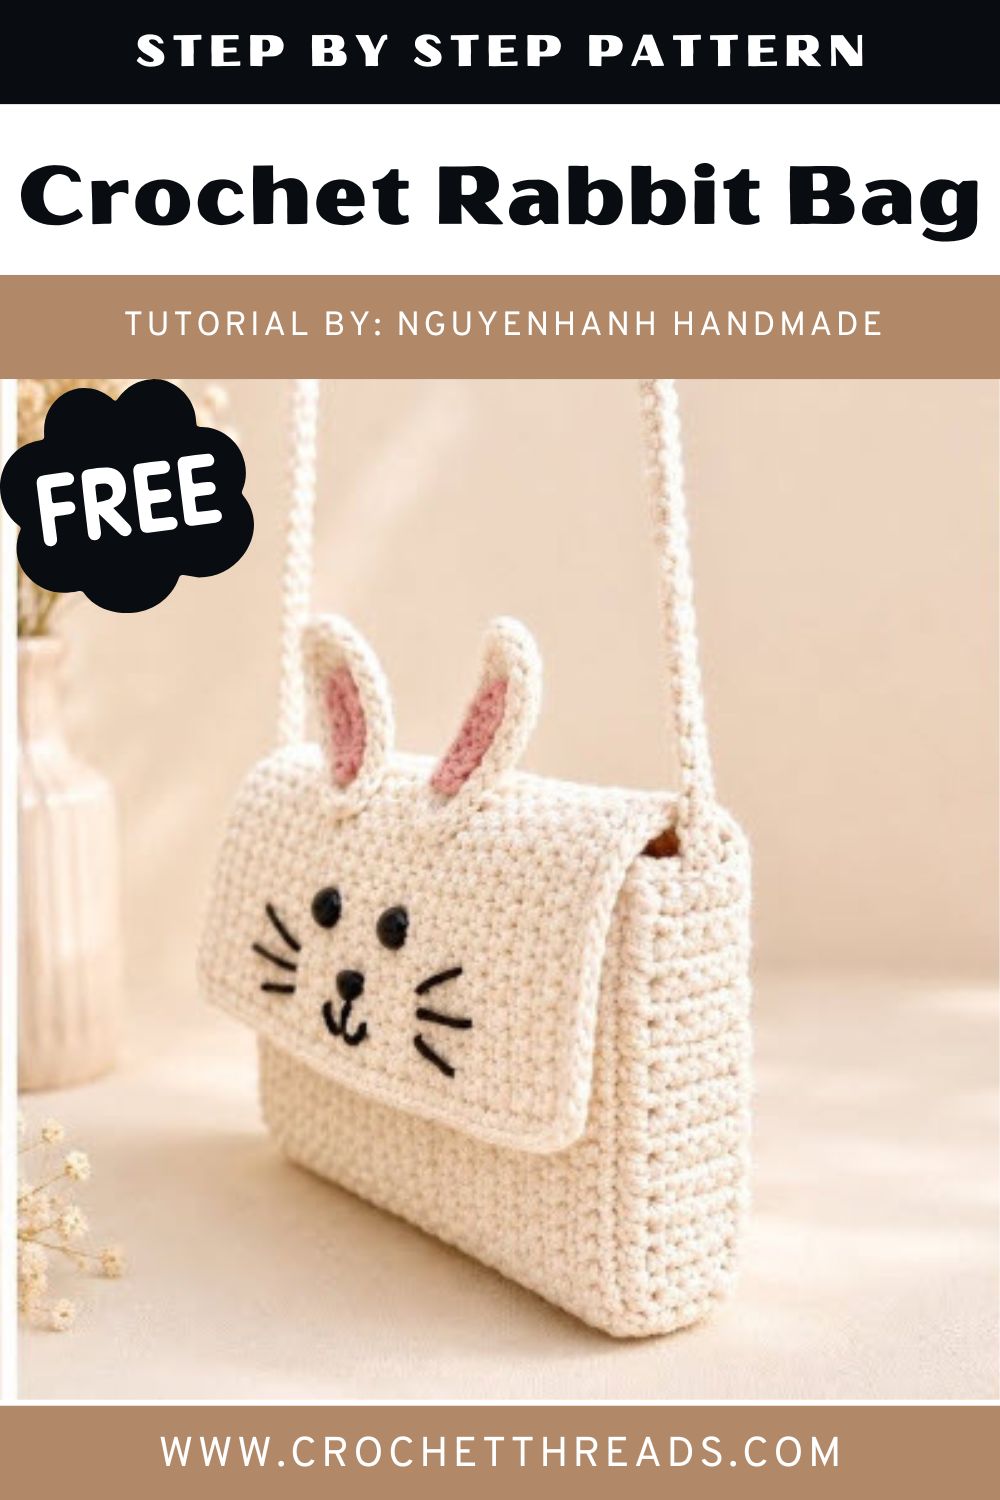
Building the crochet rabbit bag pattern from a single skein of cotton proves that charm does not require complexity. Between the straightforward panel construction and the distinctive ear shaping, the project delivers a satisfying result without demanding advanced skills. Whether gifted, sold, or kept for daily errands, the finished bag earns its spot as a repeatable favorite in any crochet queue.