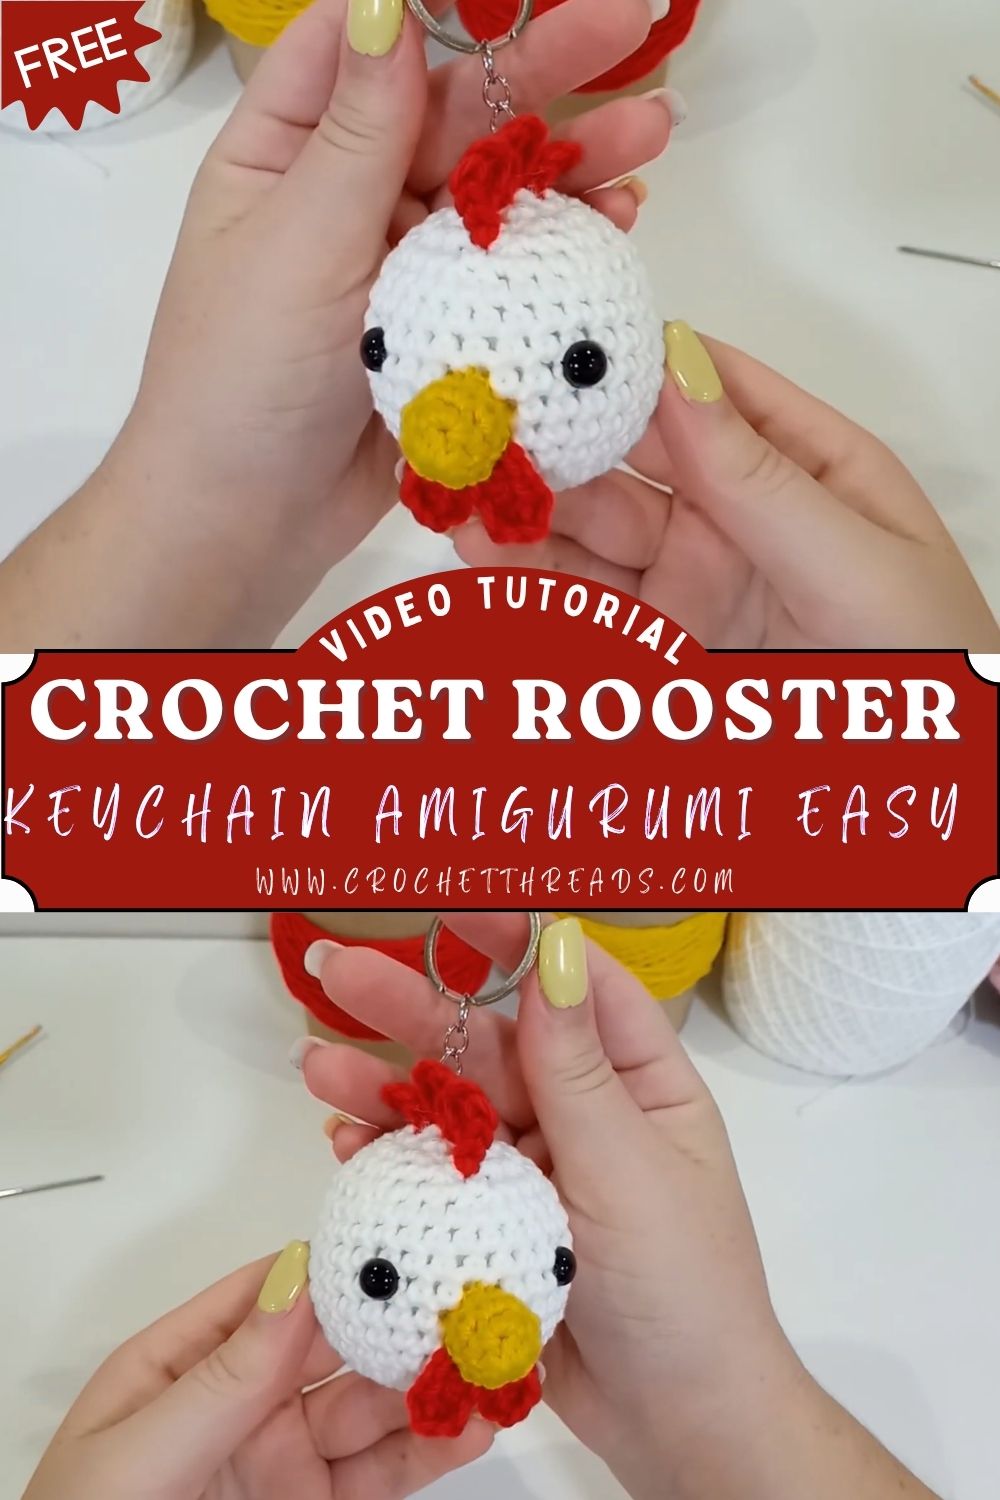
Crochet Rooster Keychain Amigurumi Step-by-Step Pattern
Roosters have always stood for energy, confidence, and a cheerful start to the day. Turning that lively spirit into a tiny Crochet Rooster Keychain amigurumi lets you carry a bit of farmyard charm wherever you go, and it makes an adorable handmade gift too.
A crochet rooster-shaped amigurumi keychain makes a small, quick-to-finish project, worked in continuous rounds using basic single crochet stitches. It’s a great, enjoyable way to practice color changes, shaping, and assembling pieces together, while also turning into a lovely crochet accessory for car keys, home keys, bag charms, handmade gift ideas, and everyday use.
You’ll crochet the rooster’s body, head, comb, wings, and tail separately, then stuff and assemble them. Typically, this whole project comes together in just one or two relaxed evenings.
Skill Level
Beginner to Beginner-Intermediate. If you already know how to single crochet, work a magic ring, and increase or decrease stitches, you’re fully ready for this pattern. New crocheters can also follow along, since the shapes are small and forgiving.
Materials and Supplies
Gather everything before you start so your crochet session flows smoothly.
- Yarn: DK or sport-weight cotton yarn in red, yellow/orange, white or brown, and black (small amounts of each)
- Crochet hook: 2.5mm–3mm, sized slightly smaller than your yarn label recommends for a tight, firm gauge
- Safety eyes: 4–5mm black safety eyes (or embroider eyes with black thread for a child-safe option)
- Stuffing: Polyester fiberfill (non-allergenic)
- Tools: Yarn needle, sharp scissors, stitch markers
- Keychain accessories: Metal keychain ring, jump ring, and optional small bell or bead charm
Crochet Techniques You’ll Use
- Magic ring (MR): To start each piece with a tight, hole-free center
- Single crochet (sc): The main stitch used throughout the pattern
- Increase (inc): Two single crochets in one stitch, for shaping rounder parts
- Decrease (dec): Two stitches worked together, to close off tops and narrow shapes
- Sewing/whip stitch: For joining the head, wings, comb, and tail to the body
Step-by-Step Rooster Pattern Instructions
Making the Head
Start with a magic ring using yellow or brown yarn and work 6 single crochets into it. Increase evenly over the next two rounds until you reach around 18–24 stitches, depending on how big you’d like the keychain. Work a few rounds even (no increasing) to build height, then begin decreasing gradually. Stuff firmly as you close the last few rounds, and finish with a small opening left for attaching to the body later.
Making the Body
The body is worked the same way as the head, just slightly smaller or shaped a touch more oval. Begin with a magic ring, increase to your desired width, work several even rounds for the body’s height, then decrease and stuff. Leave a short yarn tail for sewing the body to the head and attaching the keychain ring at the base.
Wings, Comb, and Tail
- Wings: Small flat or slightly puffed teardrop shapes made in red or contrast yarn, crocheted in rows or rounds and left unstuffed for a delicate look
- Comb: A tiny red zigzag or scalloped strip crocheted flat, then curved and sewn along the top of the head
- Tail feathers: Two or three curved strips in different colors (red, yellow, black) crocheted flat and layered for a colorful fan effect at the back of the body
Facial Details
Insert the safety eyes securely before stuffing the head completely, spacing them evenly for a friendly expression. Add a small orange or yellow triangle-shaped beak using a few single crochet stitches, then stitch tiny cheek blushes with pink thread if you’d like extra sweetness.
Assembly Process
- Stuff the head and body firmly so no lumps or gaps show
- Sew the head onto the top of the body using a whip stitch
- Attach the wings to each side of the body
- Sew the comb along the head’s center top
- Attach the tail feathers to the back of the body, fanning them slightly outward
- Secure the beak in place between the eyes
Finishing Touches
Weave in every loose yarn tail neatly so nothing unravels with regular keychain use. Attach a metal jump ring to the base or back of the body, then clip on your keychain ring. Give the little rooster a gentle fluff and shape check before it’s ready to use.
Helpful Beginner Tips
- Keep stitches tight: Use a hook one size smaller than usual so stuffing never peeks through
- Use stitch markers: Mark the start of each round so you never lose track while working in a spiral
- Stuff a little at a time: Add small amounts of stuffing gradually instead of one big handful, for a smooth, even shape
- Count stitches often: A quick recount after each round keeps your amigurumi symmetrical
Design Customization Ideas
- Swap the classic red-and-yellow combo for pastel or rainbow colors for a modern twist
- Add a tiny bow, bell, or bandana around the neck for extra character
- Make a mini version using thread-weight yarn and a 1.5mm hook for a super tiny charm
- Try different eye styles: googly eyes, embroidered eyes, or colored safety eyes for unique personalities
FAQ Section
What’s the best yarn for amigurumi?
Cotton yarn is the top choice for amigurumi because it holds its shape well, has almost no stretch, and gives stitches a clean, defined look that’s perfect for small toys and keychains.
How do you make a crochet plush firm and sturdy?
Use a smaller hook than your yarn calls for, keep your tension tight, and stuff generously in small increments so the shape stays firm without gaps or sagging.
How long does this Crochet Rooster Keychain project take?
Most crocheters finish this rooster keychain in about 2–4 hours of total working time, making it an ideal project for a single afternoon or split across a couple of short sessions.
Conclusion
This little Crochet Rooster Keychain proves that big charm can come in a small stitch count. Whether you’re crocheting it as a gift, a bag charm, or just for the joy of finishing a quick project, it’s a pattern that rewards patience with a truly adorable result. Grab your hook and yarn, give this pattern a try, and let us know how your rooster turns out!