Free Crochet Turtle Amigurumi Beginner Pattern Step-by-Step
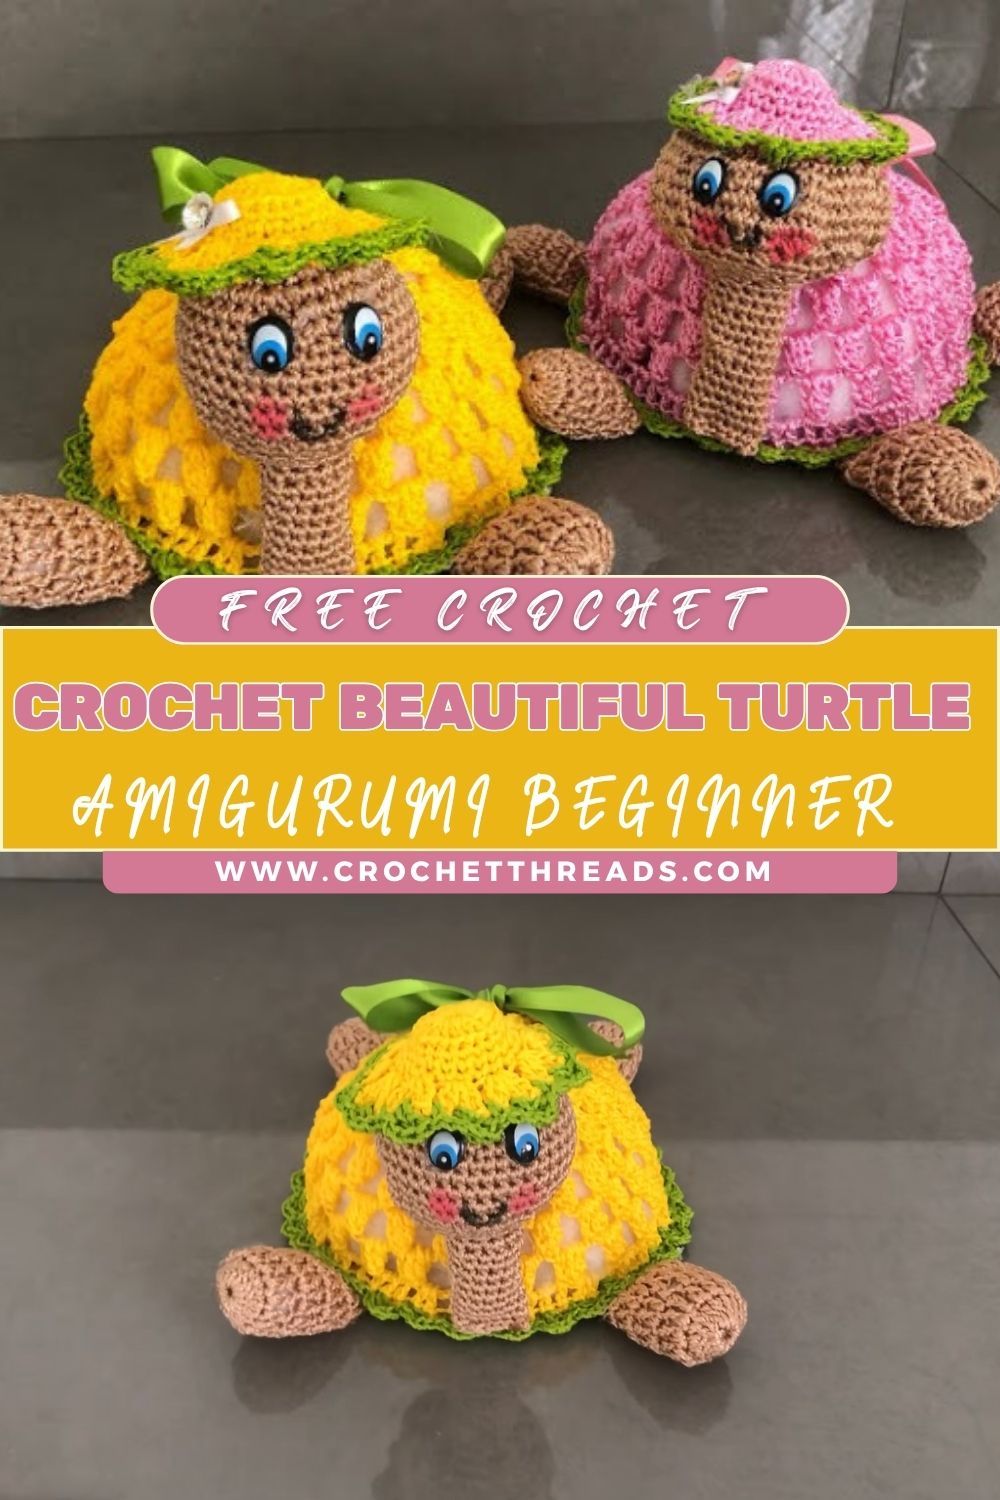
Soft yarn curls into a rounded little shell while tiny legs peek out from underneath, and that image sits at the heart of the Crochet Turtle Amigurumi Beginner Pattern Step-by-Step guide below. Grab a hook, because a pond-ready friend awaits.
Unlike trickier amigurumi projects, this turtle pattern breaks down every part into simple, repeatable rounds, making it genuinely approachable for anyone picking up a hook for the first time. Designed specifically to teach shell shaping and limb attachment together, the beginner-friendly turtle takes an afternoon to work up and doubles as a sturdy toy or shelf decoration once finished.
About This Crochet Pattern
Envision a plump, domed shell sitting atop a soft, rounded body, with four stubby legs, a small head, and a tiny tail tucked underneath. Charm comes easily with this design, since the shape stays instantly recognizable even at a small scale.
Difficulty sits firmly in beginner territory throughout the pattern, relying on single crochet worked in continuous spirals with only occasional increases and decreases for shaping. Toy-makers, nursery decorators, and anyone wanting a satisfying first amigurumi project will find plenty to love here.
Project Details
- Time Box: Prep 5 minutes, Stitching 2–3 hours, Finishing 20–30 minutes
- Finished Size: Approximately 4 inches long, 3 inches tall
- Recommended Yarn Weight: Worsted weight (Medium, #4)
- Crochet Hook Size: 3.5mm (E/4) for a firm, tight fabric
Materials Needed
- Worsted weight yarn in green (body and legs)
- Small amount of contrasting yarn for the shell pattern
- Safety eyes, 6mm
- Fiberfill stuffing
- 3.5mm crochet hook
- Tapestry needle
- Stitch marker
- Scissors
Crochet Stitches & Techniques
- Magic Ring
- Chain Stitch
- Single Crochet
- Slip Stitch
- Increase
- Invisible Decrease
- Color Changes
- Fastening Off
- Sewing Pieces Together
Every technique listed above supports a specific shaping moment in the Free Crochet Turtle Amigurumi pattern, so none of them go to waste along the way.
Pattern Instructions
Creating the Shell
Start with a magic ring and work six single crochet stitches into it, then increase steadily across several rounds until the circle reaches roughly 3.5 inches across. Switch to a contrasting color partway through if a two-tone shell design appeals, then fasten off and set the piece aside.
Crocheting the Body
Begin a second magic ring for the underside of the body, increasing at a slower rate than the shell so the finished piece curves gently rather than flattening out. Stuff lightly as rounds close in toward the final rows, leaving enough space to attach the shell later.
Making the Legs
Work four small legs using short rounds of single crochet, increasing once near the base for a slightly wider foot shape. Stuff each leg only at the tip, leaving the top open and flat for easier attachment to the body.
Shaping the Head and Tail
Crochet a small oval head with gentle increases at the front for a rounded snout, then decrease sharply to close the back before stuffing firmly. Add a tiny tail using just a few rounds of single crochet, worked flat with almost no shaping needed.
Facial Features
Insert safety eyes between the increase rounds on the head, spacing them evenly for a friendly, symmetrical expression. Embroider a small curved mouth beneath the eyes using a contrasting strand of yarn and a simple backstitch.
Joining All Pieces
Pin the head, tail, and all four legs to the body first, checking proportions before stitching anything permanently in place. Sew each piece on using a whip stitch, tucking every knot underneath a fold for a clean finish.
Final Assembly
Center the shell over the stuffed body and pin generously around the edge before sewing it down in small, even stitches. Weave in remaining ends through the body stuffing so nothing shows on the outside once complete.
Common Mistakes to Avoid
Understuffing the body ranks high among common beginner slip-ups, since a soft, floppy turtle loses its shape almost immediately once the shell gets attached. Uneven leg placement throws off the whole silhouette too, so pinning every piece first and stepping back to check symmetry saves plenty of frustration later. Rushing the shell attachment often leaves gaps around the edge, so working slowly with closely spaced stitches keeps stuffing securely tucked inside.
Uses & Benefits
A finished turtle amigurumi works beautifully as a nursery decoration, a soft toy for little hands, or a shelf-sitting keepsake that never really goes out of style. Learning shell shaping through this project also builds skills that transfer directly into other rounded amigurumi designs down the line. Gift-giving becomes simple too, since a handmade turtle costs little in materials yet carries far more sentimental weight than anything store-bought.
Helpful Beginner Tips
- Count stitches at the end of every round without exception
- Keep tension tight enough that stuffing stays hidden
- Use a stitch marker to track the start of each spiral round
- Pin pieces before sewing to check proportions early
- Stuff firmly near seams so the shape holds under gentle pressure
Assembly
Layer the shell over the body carefully, matching the widest point of each piece before pinning around the full circumference. Stitch slowly in small increments, adjusting stuffing through the gap as it closes to avoid lumps or hollow spots.
Fun Turtle Facts to Inspire Your Make
Real turtles carry their shells as part of their actual skeleton, which explains why amigurumi versions look so charming when the shell sits snugly fused to the body rather than floating loosely on top. Some species live well past a hundred years, a fact many crocheters enjoy sharing when gifting a handmade turtle as a symbol of long-lasting friendship or a milestone celebration.
Troubleshooting the Shell Shape
A shell that curls upward at the edges usually signals too many increase rounds worked too quickly, so slowing the increase rate toward the outer rounds helps it lie flatter. Domes that look flat or sunken instead typically need one or two extra stuffing passes underneath before final attachment. Gaps between the shell and body edge close up nicely with a simple running stitch worked just inside the rim before the whip stitch seam goes on top.
Personalization Ideas
Try a Patterned Shell
Work simple color-block stripes or spots across the shell rounds for a more decorative, patchwork look.
Add a Bow or Bandana
Tie a tiny fabric or crochet bow around the neck for a playful, gift-ready finishing touch.
Make a Baby Turtle Version
Scale down the hook and stitch count for a miniature turtle sized for keychains or ornaments.
Swap in Pastel Colors
Trade traditional green for soft pastels to match a nursery color scheme or baby shower theme.
Create a Turtle Family
Crochet several turtles in graduating sizes for a coordinated set of shelf decor.
Best Occasions to Gift or Display This Turtle
Baby showers welcome a soft turtle amigurumi warmly, especially in pastel shades that match nursery decor themes already in place. Graduation gifts and milestone birthdays pair surprisingly well with a turtle too, thanks to the playful nod toward patience and longevity the animal carries. Bookshelves, desks, and window sills all suit a finished turtle just as easily, adding a quiet pop of handmade charm to any room.
Frequently Asked Questions
How long does the turtle amigurumi take to finish?
Most beginners complete the full project across two to three focused sessions, roughly three hours total.
What yarn works best for a firm shape?
Worsted weight acrylic yarn paired with a slightly smaller hook keeps stitches tight enough to hold stuffing securely.
Can safety eyes be swapped for embroidered ones?
Yes, embroidered eyes work well for gifts intended for very young children where safety eyes aren’t recommended.
Does the shell need to be a different color?
No, a single-color turtle looks just as charming, though contrasting shells add extra visual interest.
Is this pattern suitable for a first amigurumi project ever?
Absolutely, the simple rounds and minimal shaping make it one of the friendlier starting projects available.
How much stuffing does the body typically need?
Firm, even stuffing throughout works best, with slightly extra fill near the legs and neck seams.
Can the legs be made poseable?
Adding pipe cleaners inside each leg before stuffing allows light poseability if that feature appeals.
Conclusion
Pick up green yarn and give the turtle amigurumi beginner pattern a try this week; every round builds confidence, and the finished shape makes a genuinely satisfying first amigurumi win. Share a photo once the shell goes on, and enjoy a new little crochet companion ready for any shelf or nursery.