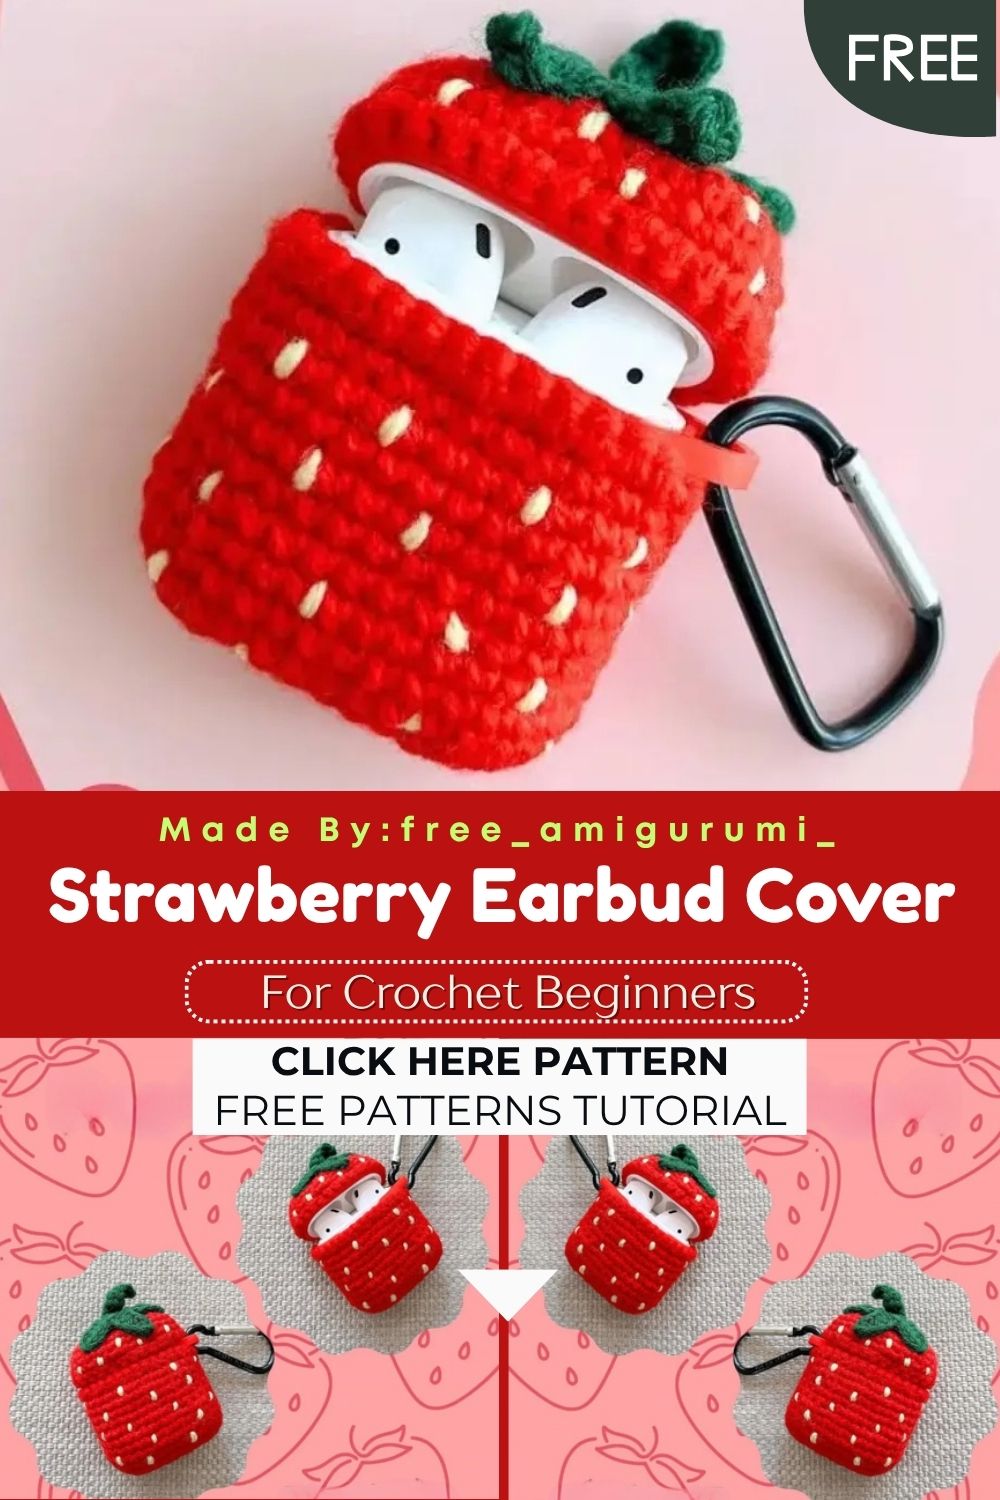
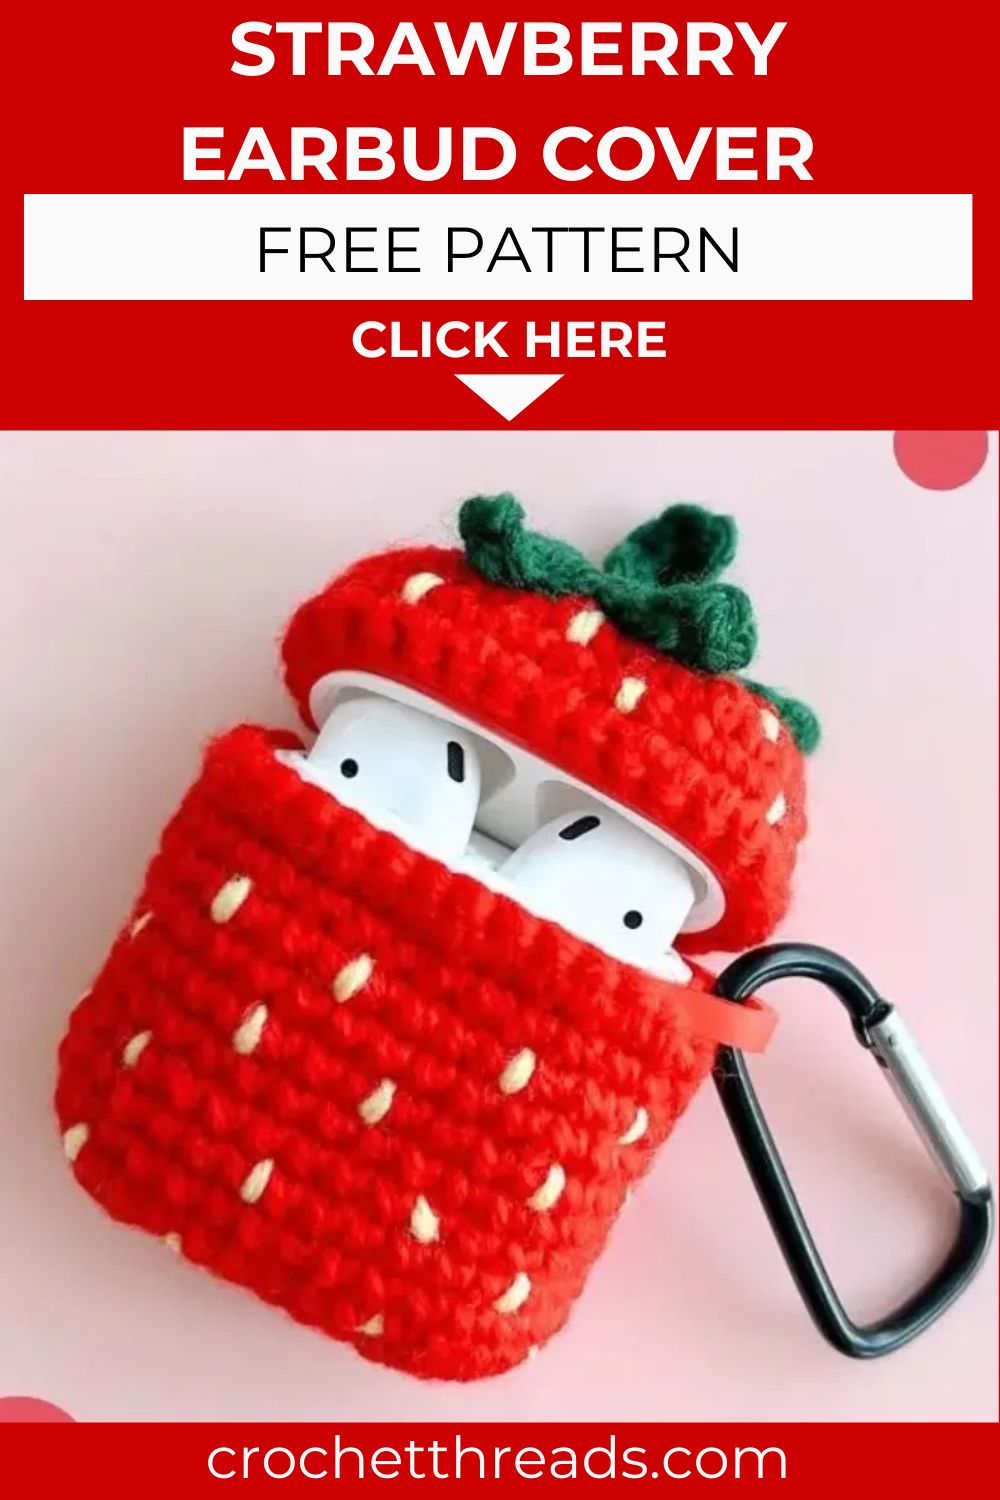
Stitch a Crochet Strawberry Earbud Cover – Free Pattern
Protect your AirPods in the sweetest way possible. This little strawberry case is functional, adorable, and faster to make than you might think!
Phone accessories and crochet rarely cross paths in quite this way, and that is exactly what makes this pattern worth stopping for. A silicone AirPods case sits inside as a structural lining, so the crocheted strawberry keeps its shape perfectly while actually protecting what matters. The bottom half hugs the main case body, the top half forms the lid, and a separately crocheted leaf-and-stem sits right on top for that unmistakable strawberry silhouette. Tiny yellow seed stitches are embroidered directly onto the red surface in whatever arrangement feels natural, and the whole thing comes together with a simple sewn edge join that holds everything neatly in place.
Skill Level
Beginner to intermediate. Foundation chain shaping, basic single crochet rounds, and simple leaf construction using chain loops are all that this pattern requires. The silicone lining does the structural heavy lifting, so the crochet piece never needs to be stiff or overly precise.
Materials You Will Need
Yarn Marvel 8 Ply Acrylic:
- Bright red for the main case body
- Dark green for the leaf
- Pale yellow for the embroidered seeds and stem
Other Supplies:
- Crochet hook — 3mm
- Soft silicone AirPods case (for AirPods 1 and 2) for inner lining
- Stitch markers
- Sewing needle and thread
- Scissors
Abbreviations
- CH — Chain Stitch
- SC — Single Crochet
- HDC — Half Double Crochet
- DC — Double Crochet
- SLST — Slip Stitch
- MR — Magic Ring
- INC — Increase (2 sc in same stitch)
- DEC — Decrease
- FO — Fasten Off
Pattern: Bottom Half
Using bright red yarn
R1: Chain 10. Skip one stitch and work 3 sc in the next stitch, 2 sc, ch3, skip 3 stitches, 2 sc, 3 sc in the next stitch, 7 sc (20)
This foundation chain creates the basic AirPods case outline shape from the very first round, with the chain gap forming the case hinge recess.
R2: 3 inc, 7 sc, 3 inc, slst, and make the next stitch the beginning of R3
R3: 7 sc, (inc, sc) x3, 7 sc, (sc, inc) x3 (32)
R4–12: 32 sc for 9 rounds (32)
R13: Reverse direction and crochet 17 sc, slst. Fasten off.
Pattern: Top Half (Lid)
Using bright red yarn
R1: Chain 9. Skip one stitch, then work 7 sc, 3 sc in the next stitch, 6 sc, inc (18)
R2: inc, 6 sc, 3 inc, 6 sc, 2 inc (24)
R3: inc, 8 sc, inc, 2 sc, inc, 8 sc, inc, 2 sc (28)
R4–5: 28 sc for 2 rounds (28)
R6: 5 sc, reverse direction and work 23 sc. Fasten off.
Pattern: Leaf
Using dark green yarn
R1: 5 sc in MR (5)
R2: For each of the 5 petal loops, work: ch5, skip one stitch, 1 sc, 2 hdc, 1 dc, then slst into the next stitch of the magic ring. Repeat this sequence 5 times around the ring. Fasten off.
The five chain loops create small pointed leaf petals that fan outward from the center, creating the classic strawberry calyx shape.
Pattern: Stem
Using pale yellow or dark green yarn
Chain 6. Skip one stitch and crochet 5 sc back along the chain. Fasten off.
Attach the stem to the center of the leaf piece, threading it through from front to back and knotting securely at the back.
Attach the completed leaf and stem unit to the top center of the lid piece.
Adding the Seeds
Using pale yellow yarn and a sewing needle, embroider small seed stitches across the red surface of both the bottom case and the lid.
Start from the bottom left of each piece and work your way upward from left to right in a slightly scattered arrangement. Tie each seed off with a knot at the back of the work before moving to the next one. The slightly irregular placement looks more natural and realistic than perfectly uniform rows.
Assembly
Insert the silicone AirPods case into the crocheted bottom piece, aligning the case edges carefully with the crocheted opening. Make sure both pieces are fully aligned before sewing; any misalignment at this stage is difficult to correct after the seam is sewn.
Using a matching red thread and a sewing needle, sew along the top edge of the bottom piece to join the crochet and silicone lining together. Keep the stitches small and even for the neatest finished edge.
Repeat the exact same process for the lid piece, inserting the silicone lid and sewing along its joining edge.
Weave in all remaining yarn ends securely. Your strawberry AirPods case is complete.
Customization and Variation Ideas
- Swap the bright red for deep purple and replace the yellow seeds with tiny white embroidered dots for a grape-inspired earbud case using the same construction.
- Try the same pattern in light green with dark green seeds for a kiwi slice variation that photographs brilliantly against neutral backgrounds.
- Use a slightly chunkier yarn with a larger hook for a looser, more textured case that shows off the stitch definition more clearly against the silicone lining.
- Add a small loop of chain-stitched yarn at the top of the leaf for attaching a carabiner or bag clip to the finished case.
- Embroider a tiny face onto the strawberry surface for a kawaii-style case that turns a functional accessory into a genuine character piece.
- Make a matching set in three different berry styles: strawberry, blueberry, and raspberry,y for a complete handmade accessory collection.
Common Mistakes to Avoid
- Skipping the chain gap at R1 of the bottom piece: The chain 3 skip section creates the hinge recess shape that allows the silicone case to sit naturally inside the crochet shell. Filling this in removes the structural fit.
- Inserting the silicone case before completing the seeds: Always finish all embroidery before inserting the lining. Working with the fabric with a lining already inside is significantly harder, and the stitches can catch on the silicone surface.
- Sewing the lining edge too tightly: A tight overedge stitch can distort the opening of the case. Use a whip stitch at a moderate tension that holds without pulling the edge inward.
- Misaligning the case before sewing: Pin the silicone case inside the crochet piece at two or three points before sewing to keep everything from shifting during the joining process.
- Making seeds too large: Each seed should be a tiny straight stitch or a small V shape, not a French knot or large satin stitch. Oversized seeds make the surface look cluttered rather than naturally realistic.
- Attaching the leaf before the lid seam is fully sewn: Complete the lid assembly and weave in all ends before adding the leaf and stem, since working around the leaf afterward is noticeably more awkward.
Finishing Tips
- After sewing the lining into both pieces, gently press each section flat by hand and check that the opening aligns correctly when the top and bottom are brought together.
- Use a thread color that exactly matches the red yarn for the joining seam, even if a slightly off-shade thread is visible at close range against the bright red crochet surface.
- Work the leaf petal loops at a relaxed tension so each petal fans outward naturally rather than curling inward toward the center.
- Attach the stem at a very slight angle rather than perfectly vertical for the most organic, naturally grown appearance.
- When embroidering seeds, vary the angle of each stitch very slightly, rather than keeping them all exactly vertical, like this, which creates a much more realistic strawberry texture.
- Photograph the finished case open beside a real AirPods case to show the scale and the interior lining fit, which tends to be the detail people ask about most when they see this pattern online.
Gifting Ideas
- Present the finished case inside a small clear gift bag with a sprig of dried berries or a few real strawberry candies for a completely on-theme seasonal gift presentation.
- Pair with a matching set of strawberry-themed stickers or a small notebook for a gift bundle that feels cohesive from top to bottom.
- These cases make wonderful friendship gifts, especially when made in a pair,ir one for the giver and one for the recipient, as a matching accessory set.
- A handmade AirPods case is genuinely useful enough to be a thoughtful birthday or Christmas gift rather than just a novelty, which makes it appealing to a much wider range of recipients than most amigurumi gifts.
- Make a few in advance and sell them at craft markets or online. Functionallyl handmade accessories with a clear use case tend to sell more consistently than decorative pieces alone.
- Attach a small swing tag noting the yarn brand and the fact that a silicone case is included inside for buyers who want to know the full details before purchasing.
Conclusion
Low-key, this is one of those patterns that people see and immediately want to make for everyone they know. The silicone lining idea solves every problem that usually comes with crocheted phone accessories. The shape holds, the case opens and closes cleanly, and the whole thing actually protects the AirPods properly. Work the foundation chain carefully on both pieces, embroider the seeds before inserting the lining, and take your time aligning the silicone before sewing the edge. In conclusion, your strawberry AirPods case is ready to live in a bag and make everyone nearby extremely jealous.
Happy crocheting! Cannot wait to see your strawberry case out in the wild.