Easy Crochet Strawberry Pouch Pattern for AirPods
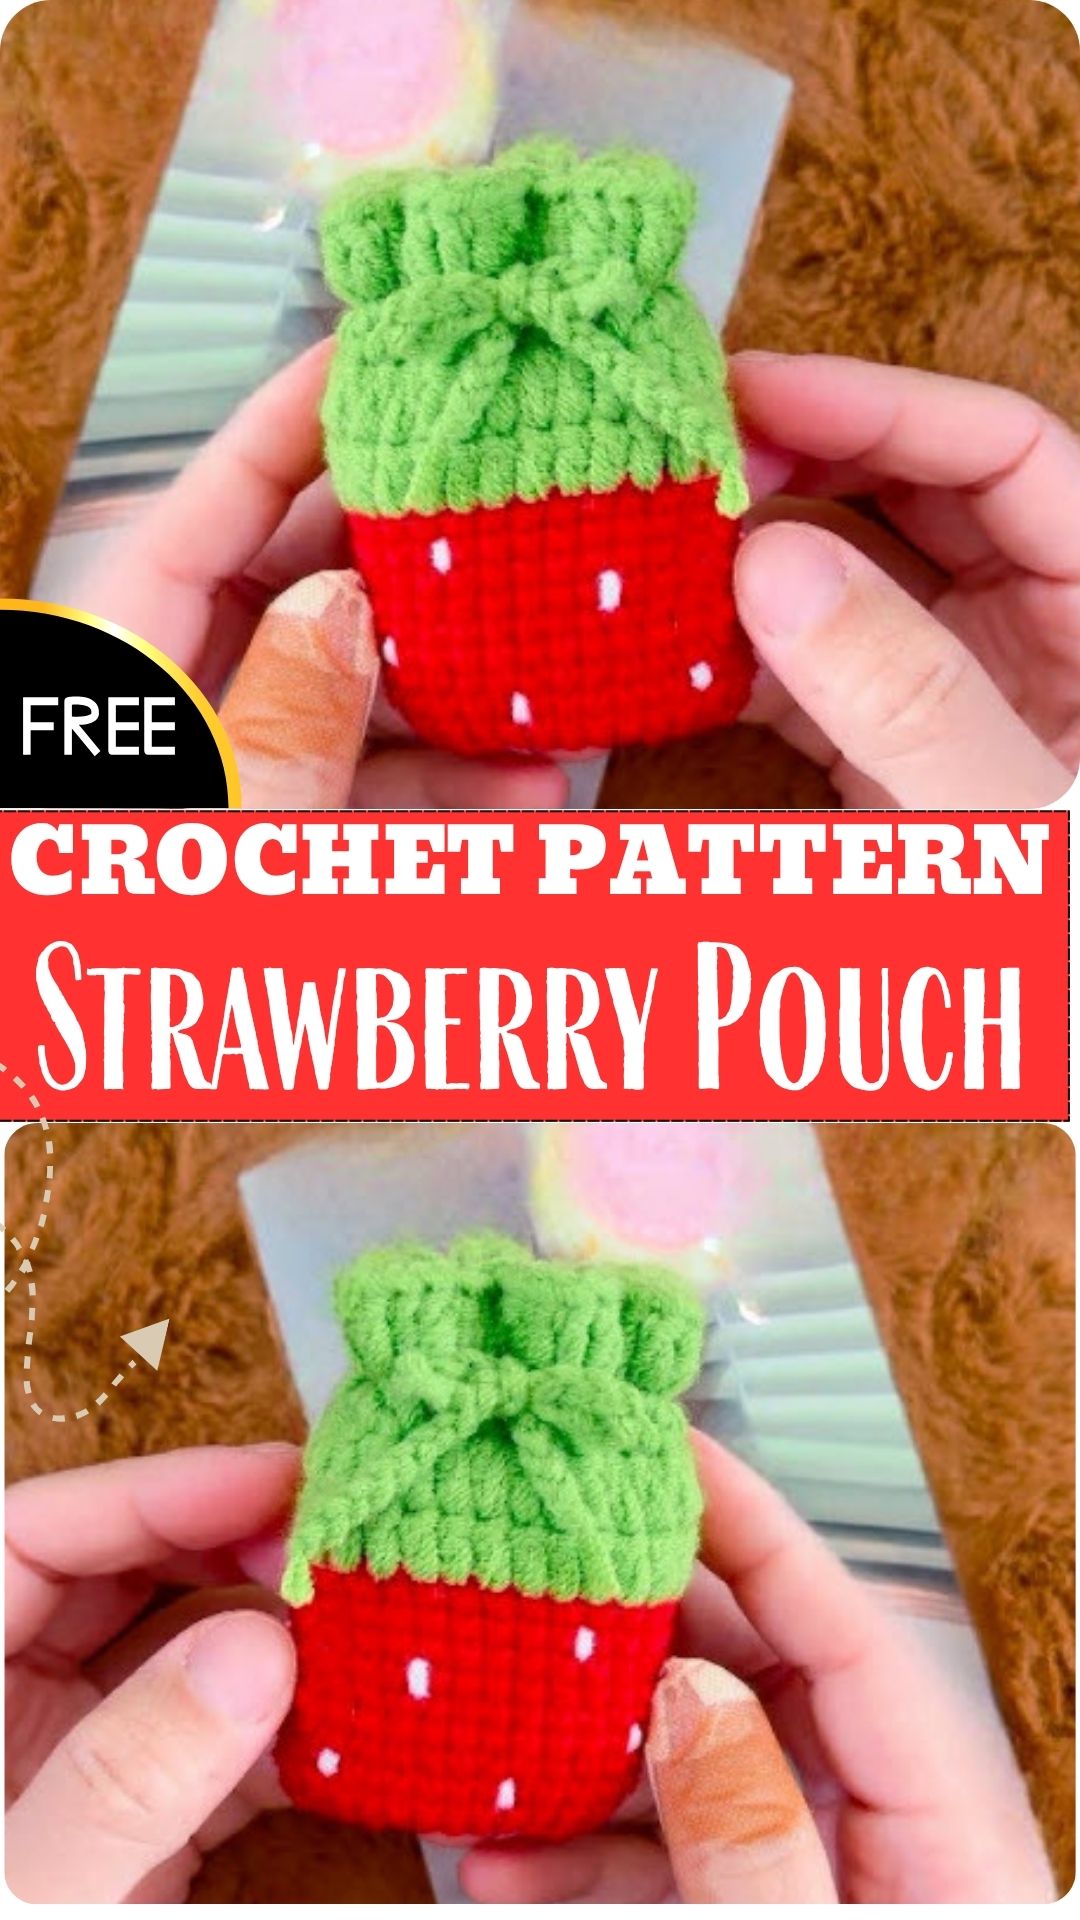
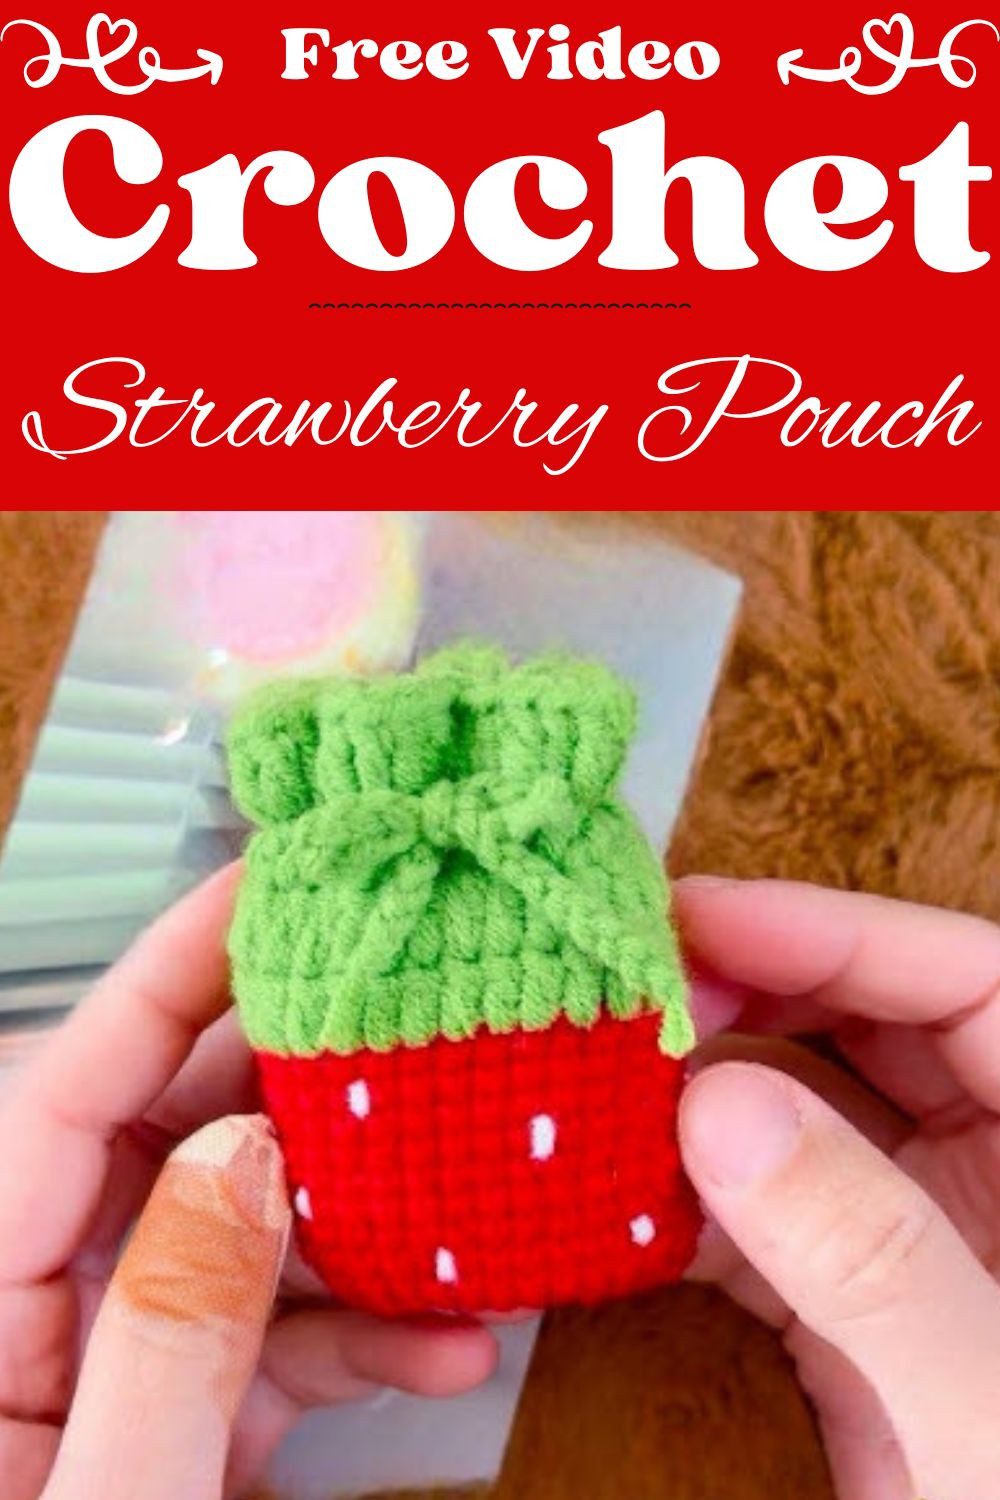
Few small projects are as satisfying as this crochet strawberry pouch pattern. First, you work a plump red body. Then you add a green scalloped top, and finally you finish with a drawstring and a few tiny white seeds that make it look like a real berry. Best of all, it slips easily into a bag or pocket and holds AirPods, lip balm, coins, or other small things you hate to lose.
Beginners can follow this pattern with confidence, because it uses only basic stitches and every step is explained. Also, the yarn stays soft in your hands, while the finished pouch is firm enough for daily use. It works well as a handmade gift too, since its light, airy look suits spring and summer outings.
Crochet Strawberry Pouch Pattern Overview
You make this small pouch from the bottom up. At first, you crochet a red strip, join it into a ring, and close the bottom. After that, you switch to green for the top section, which includes a ribbed collar and an eyelet round for the drawstring. Finally, the white seeds are embroidered on at the very end.
Estimated finished size: about 3 inches (7.5 cm) wide and 3.5 inches (9 cm) tall when laid flat. Once the drawstring is loosened, there is room for a standard AirPods case.
Materials for the Crochet Strawberry Pouch
- Red cotton yarn, worsted weight (#4): about 40 yards (Estimated)
- Green cotton yarn, worsted weight (#4): about 50 yards, drawstring included (Estimated)
- White yarn or embroidery thread: about 5 yards (Estimated)
- 3.5 mm (E/4) crochet hook (Recommended)
- Yarn needle
- Scissors
- Stitch marker
Skill Level, Gauge and Sizing for This Strawberry Pouch Pattern
Skill level: Beginner. In this pattern, you only need chain, single crochet, half double crochet, double crochet, and slip stitch.
Gauge (Estimated): about 5 single crochet stitches per inch at a tight tension. However, exact gauge is not critical. What matters is a firm fabric with no see-through gaps, so loose crocheters should go down a hook size.
Sizing: a body of 30 stitches around fits a standard AirPods case. If you need a bigger case, see the customization section below.
Stitch Abbreviations for the Crochet Strawberry Pouch
Abbreviations (US Terms)
- ch = chain
- sl st = slip stitch
- sc = single crochet
- hdc = half double crochet
- dc = double crochet
- inc = 2 sc in the same stitch
- BLO = back loop only
- sk = skip
- st(s) = stitch(es)
- ch-sp = chain space
Special Stitches Used in the Strawberry Pouch Pattern
Working along both sides of a chain: first, work one sc into the top of each chain. Then turn the chain around and work one sc into the free loop on its underside.
Color change: on the last sc of a round, pull the new color through the final two loops. Afterward, cut the old color and leave a short tail to weave in later.
Straight-stitch seeds: bring the white yarn up from the inside, make one short stitch over a single sc, and take it back down. In other words, each seed is one small, slightly slanted stitch.
Before You Crochet the Strawberry Pouch
- Work the body in a continuous spiral, and put a marker in the first stitch of each round. Then move it up as you go.
- Keep your tension tight, because a firm fabric gives the strawberry its plump shape.
- Around Round 8, hold your AirPods case against the body. If it does not slide in easily, go up a hook size for the next rounds.
- Before you switch to green, weave in the red tail so it does not show through.
Crochet Strawberry Pouch Pattern Instructions
Step 1: Start the Red Strip of the Strawberry Pouch
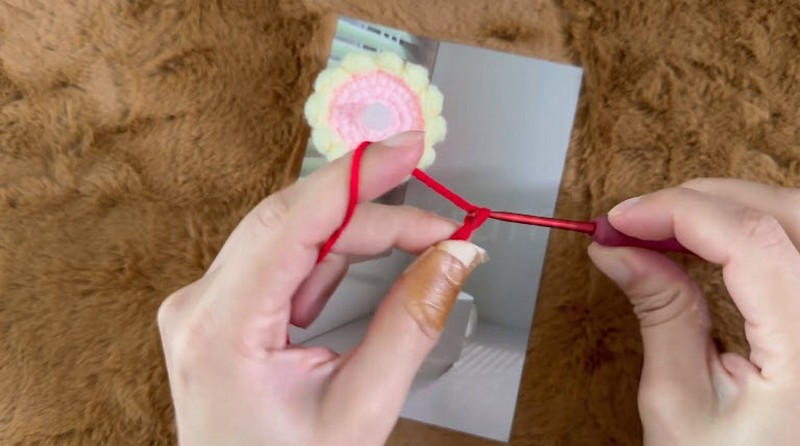
- Begin with a slip knot in red yarn, and place it on your hook.
- Next, chain 11 for the foundation chain, keeping each chain even and not too tight.
- Before starting the first row, count your chains to confirm you have 11.
Step 2: Crochet the Red Rows for the Strawberry Pouch
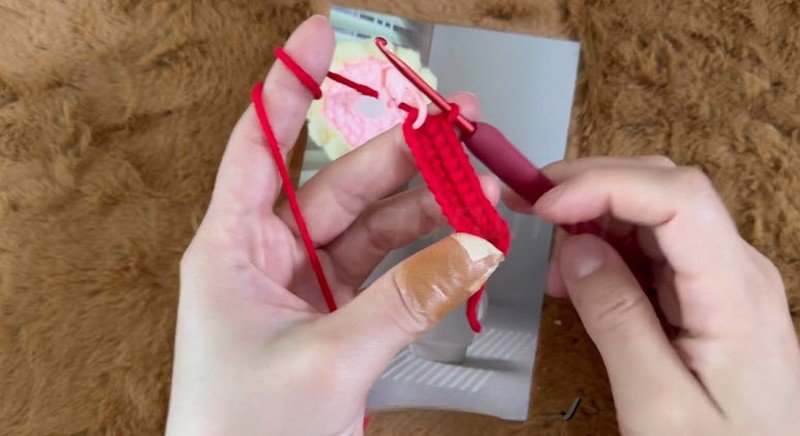
- Start Row 1 by working 1 sc into the 2nd chain from the hook and into each chain across, which gives you 10 sc.
- Then ch 1 and turn your work.
- In Rows 2 to 30, sc in each stitch across, then ch 1 and turn. You should always have 10 sc.
- To keep track of your count, place a stitch marker at the end of Rows 10, 20, and 30.
- After Row 30, fasten off and leave a tail about 12 inches long. By now, the strip should look like a long, dense rectangle.
Step 3: Join the Ring and Close the Strawberry Pouch Bottom
- Turn the strip so the foundation chain edge meets the top of Row 30, with the wrong sides facing out.
- Next, slip stitch through both layers across all 10 stitches to join the two ends into a ring.
- Once the seam is fastened off, turn the ring so the right side faces out.
- Flatten the ring with the seam sitting on one side fold. You should now see 15 stitches along each flat edge of the bottom.
- Finally, join the red yarn to one open edge and sc through both layers across all 15 pairs of stitches to close the bottom. Then fasten off and weave in the ends.
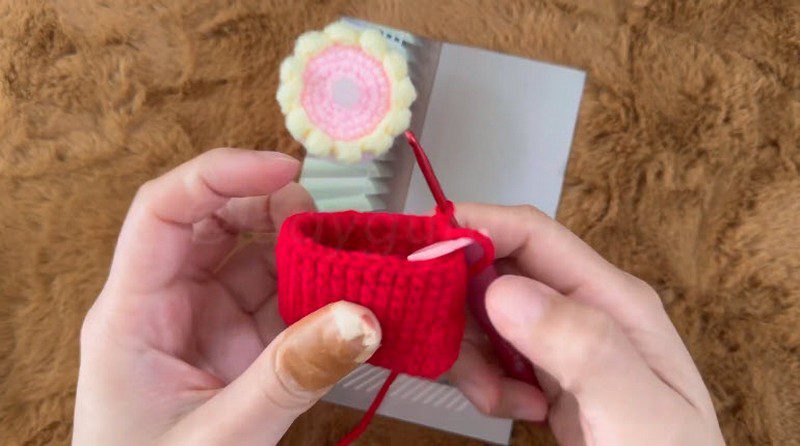
Step 4: Add the Green Top to the Crochet Strawberry Pouch
- With the pouch right side out, join the green yarn at the open top edge.
- Start Round 1 by working 1 sc into the edge of each of the 30 rows around the opening. As a result, you get a clean red and green color line.
- Across Rounds 2 to 5, sc in the BLO of each stitch around, keeping 30 sc in every round.
- Meanwhile, mark the first stitch of each round with a stitch marker and move it up as you go.
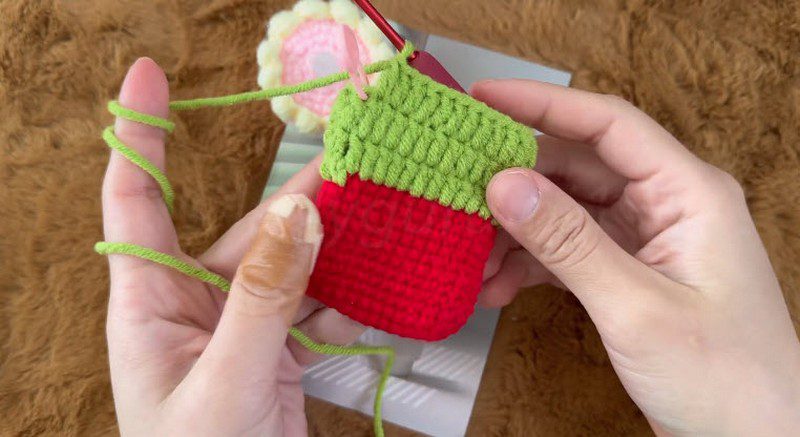
Step 5: Build the Ruffled Collar and Add Seeds to the Strawberry Pouch
- Throughout Rounds 6 to 9, sc in the BLO of each stitch around, keeping 30 sc in every round.
- Next comes Round 10, the eyelet round. Sc in the next st, ch 1, sk 1 st, and repeat this 15 times in total, which gives you 15 sc and 15 ch-sp.
- In Round 11, work 1 sc into each sc and each ch-sp around, ending with 30 sc.
- Afterward, sl st into the next stitch, fasten off, and weave in the tail.
- To make the seeds, thread the white yarn onto your needle and add about 6 to the front of the red body. Use a short, slanted straight stitch over one sc each time.
- Likewise, add another 6 seeds to the back, then knot the white yarn on the inside and trim the end.
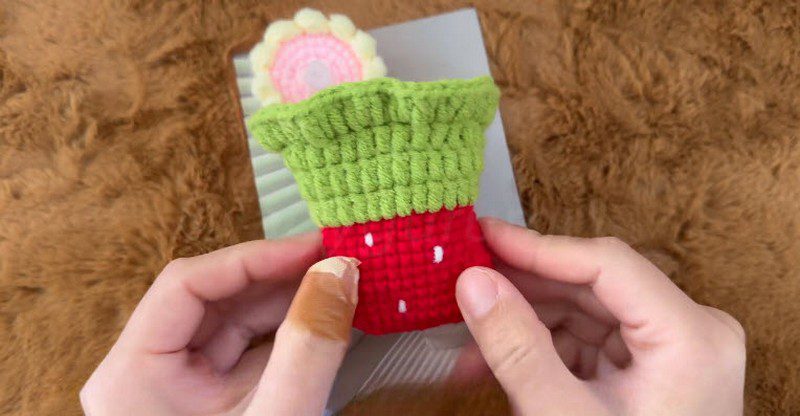
Step 6: Make the Drawstring and Tie the Strawberry Pouch Bow
- Using the green yarn, make a slip knot and ch 90 for the drawstring.
- Then fasten off and weave the tail back into the chain.
- Next, thread one end of the chain onto the yarn needle and weave it through the Round 10 eyelets, going over one and under the next.
- After that, pull both ends up evenly so the collar gathers into soft ruffles.
- Last, tie the two ends into a neat bow at the front of the pouch.
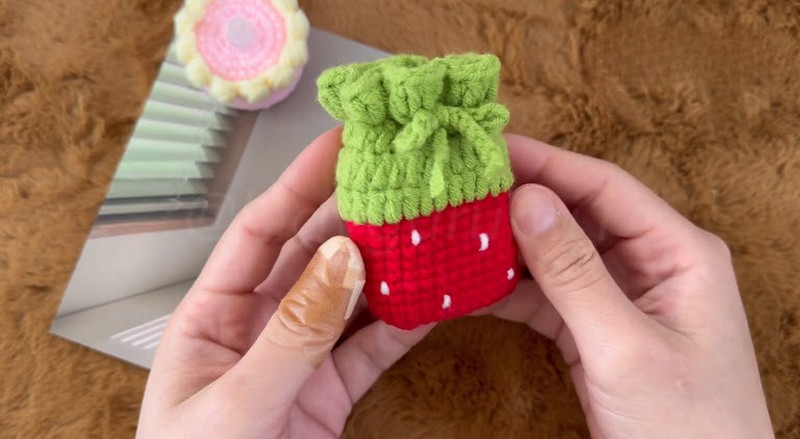
Assembly and Finishing the Crochet Strawberry Pouch
To begin, turn the pouch inside out and weave in any loose ends. Then turn it right side out again. Next, press the scallops gently so they lie flat over the top of the red body. Finally, pull the drawstring to check that the pouch closes smoothly, and adjust the bow until it sits neatly.
Customize Your Crochet Strawberry Pouch
- Color swaps: for instance, blue with pale green makes a blueberry pouch, while yellow with white seeds makes a lemon. Dark red with a light green top gives a cherry feel.
- Bigger case: to get a 36-stitch body, work 36 rows in the red strip instead of 30. After that, keep 36 stitches in every green round.
- Keychain loop: add a 15-chain loop at the base of the bow, then clip on a ring.
- Lining: slip a small piece of felt inside for extra protection against scratches.
Troubleshooting Your Strawberry Pouch Pattern
- Pouch too tight: use a hook one size up, or work the body rounds a little looser.
- Pouch too loose: go down one hook size, and tighten your tension as well.
- Gaps in the fabric: insert the hook under both loops and pull the yarn up snugly.
- Uneven color line: join the green yarn neatly, and keep the first green round even with one sc in each row edge.
- Drawstring puckering: weave the chain through the eyelets evenly. Also, do not pull it too tight before tying the bow.
Care Instructions for Your Crochet Strawberry Pouch
Spot clean with a damp cloth and mild soap, or hand wash gently in cool water. Afterward, squeeze out the water with a towel without wringing. Finally, reshape the pouch while damp and let it air dry flat.
Crochet Strawberry Pouch Pattern FAQs
Can I use this crochet strawberry pouch for AirPods Pro?
Yes, but test the fit around Round 8. Since the Pro case is a little larger, go with the 36-stitch version.
What yarn is best for a small crochet strawberry pouch?
Cotton works best. It holds its shape, feels firm, and handles daily use well.
Is this strawberry pouch pattern good for beginners?
Yes. Because it uses only basic stitches and has no sewn seams, it feels like amigurumi without any tricky shaping.
Can I make the crochet strawberry pouch without the seeds?
You can. The green top still gives the pouch a strawberry look, and you can add the seeds later.
Bonus: Wrap Your Crochet Strawberry Pouch as a Gift Set
A strawberry pouch makes a lovely handmade present, especially for a crochet Christmas gift pouch or an early crochet Valentine’s gift. To put one together, tuck a lip balm and a small candy inside, tie the bow loosely, and add a tiny paper tag in the same shade of green. If you make two or three pouches in different fruit colors, you have a ready-made gift set.
One Last Thing About This Strawberry Pouch
So that is really all there is to it. The pouch is small and quick, which means you can finish one in a single sitting and still have yarn left over. For your first one, try the colors as written, and then play with a blueberry or lemon version next. Honestly, those little seeds are my favorite part, because once they go on, it finally looks like a proper strawberry.