Crochet Sun and Sheep Plush Amigurumi Pattern for Beginners
Whether you’re decorating a nursery, preparing a baby shower gift, or simply crocheting a cozy shelf companion for yourself, this pattern fits every purpose beautifully. Gentle increases, round shapes, and simple stuffing techniques help beginners build real confidence, while experienced crocheters enjoy a quick, satisfying makeover project. From handmade nursery mobiles to personalized baby gifts, this cheerful duo finds its place in almost any setting or occasion.
Brief Explanation of the Crochet Project
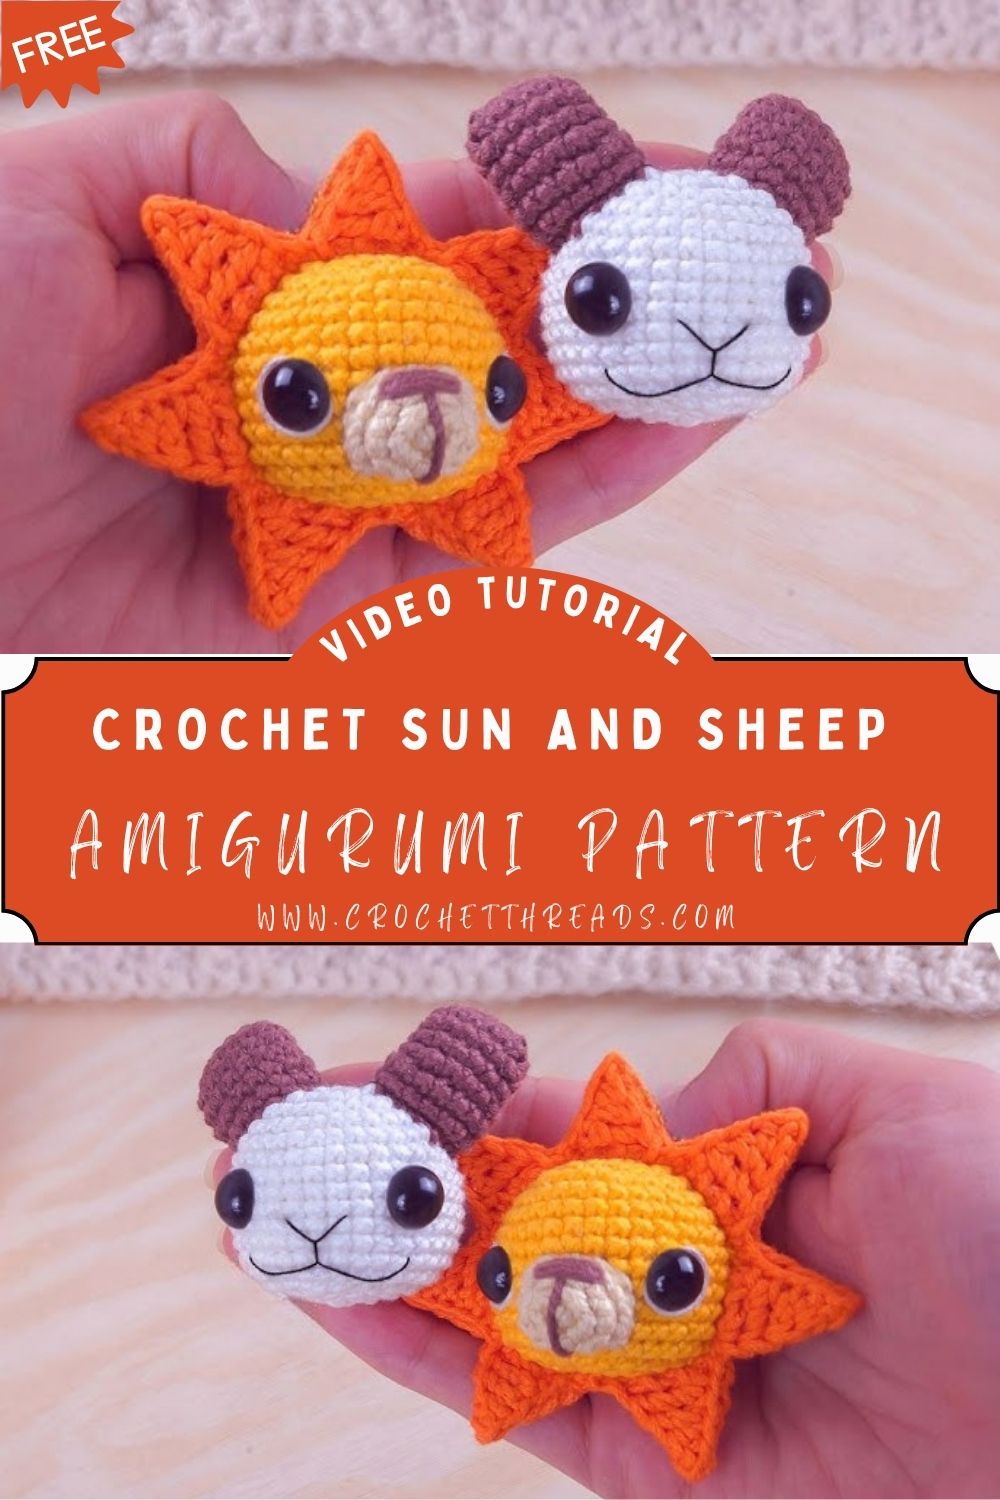
Two figures come together in this Crochet Sun and Sheep pattern: a round, sunny yellow sun with a smiling face, and a plump, wool-like sheep with tiny ears and a gentle expression. Both are worked in continuous rounds using single crochet, then stuffed and finished with simple facial features. The sun shape teaches you how to build a flat or slightly domed circle and attach pointed rays, while the sheep shape introduces basic body shaping along with loop or bobble texture for that fluffy wool look. Because both toys share the same foundation techniques, working on them side by side helps new crocheters practice increases and decreases twice, which speeds up learning without feeling repetitive.
Skill Level
This Crochet Sun and Sheep pattern sits comfortably in the beginner category. A crocheter who already knows how to chain, work a magic ring, and complete a basic single crochet stitch will manage just fine. Counting stitches carefully and pacing yourself through the increase rounds are the only real challenges here, and neither requires advanced experience. Intermediate crocheters looking for a relaxing, low-pressure project will also enjoy this pair, especially if they want to experiment with texture stitches on the sheep’s body.
Required Materials and Supplies
Gathering supplies before you start saves time and keeps the process smooth, so here is everything you need laid out clearly.
Yarn type
- Worsted weight (medium, 4-ply) cotton or acrylic yarn in yellow and orange for the sun
- Worsted weight white or cream yarn for the sheep’s body
- A small amount of black, pink, or brown yarn for facial details and hooves
- Optional fuzzy or bouclé yarn for an extra woolly sheep texture
Hook size
- 3.5mm to 4mm crochet hook, matched to your yarn weight for firm, gap-free stitches
Extra tools
- Polyester fiberfill stuffing
- Stitch markers to track the start of each round
- A yarn needle for sewing pieces together and weaving in ends
- Small safety eyes or black embroidery thread for the face
- Scissors
- Optional fabric glue for extra-secure eye placement on gift items meant for very young children
Crochet Stitches and Abbreviations Used
Knowing your stitches ahead of time keeps the pattern easy to follow, so here is the shortlist you will use throughout.
- MR – Magic ring
- ch – Chain
- sc – Single crochet
- inc – Increase (2 sc in one stitch)
- dec – Decrease (invisible decrease or sc2tog)
- sl st – Slip stitch
- BLO – Back loop only
- FLO – Front loop only
- st(s) – Stitch(es)
Step-by-Step Crochet Instructions
Making the Sun Body
Start with a magic ring and work 6 sc into it, then pull the ring closed and place a stitch marker to mark the beginning of your rounds. In round two, increase in every stitch to reach 12 sc. Round three asks for an increase in every other stitch, bringing your count to 18 sc, and round four repeats that pattern of alternating increases until you reach 24 sc. Continue this steady increase rhythm for two or three more rounds until the circle measures roughly three inches across, then work several rounds without increasing so the disc gains a bit of depth before you begin decreasing and stuffing.
Shaping the Sun’s Rays
Once the main circle is complete, switch to orange yarn and work pointed triangles directly onto the outer edge, spacing them evenly around the circumference. Each ray is built by chaining a short row, turning, and decreasing at both ends until the point closes, which creates that classic sunburst silhouette. Weave in the ends neatly, then stitch on a simple smiling face using pink or brown yarn for the cheeks and mouth.
Building the Sheep’s Body
Begin the sheep the same way, with a magic ring and 6 sc, increasing evenly across the next few rounds until you reach the desired body width, typically around 30 to 36 stitches. Work several rounds even to form the barrel-like body shape, then begin adding stuffing gradually as you go rather than waiting until the very end, since this keeps the shape rounder and prevents lumps.
Forming the Head and Face
The head is worked as a separate piece using the same increase-then-even-rounds method, only smaller. Attach small safety eyes between two rounds before closing the head completely, then stuff firmly. Sew the head onto the body using a whip stitch, tucking the yarn tail inside to hide it.
Adding Ears, Legs, and Wool Texture
Small ear pieces are worked flat in just a few rows. Fold them slightly before sewing them onto the sides of the head. Legs can be crocheted as short tubes and sewn to the underside of the body. For a beginner-friendly finish, they can also be simplified into stitched-on hooves. For the woolly look, work loop stitch or bobble stitch rounds across the body. Gently pull each loop to keep the texture even and full.
Helpful Beginner Tips
- Count your stitches at the end of every round before moving forward, since a missed increase early on throws off the whole shape.
- Use a stitch marker every single round, not just occasionally, because amigurumi has no visible row lines to guide you.
- Keep your tension slightly tight so stuffing does not peek through the gaps between stitches.
- Stuff a little at a time rather than all at once, pushing it into corners with the blunt end of your yarn needle.
- Practice the magic ring separately before starting the project if it feels unfamiliar, since a loose ring center is the most common early struggle.
Common Mistakes and Solutions
Losing track of the stitch count is a common issue for beginners. The fix is simple. Pause after each round and count every stitch out loud before continuing. Uneven tension is another frequent problem. Some stitches may look tight, while others look loose. Work slowly and keep your yarn feed consistent. This usually improves after a few rounds of practice. Visible color jogs can also happen when switching yarn shades. To reduce them, start the new color at the back of the piece. The seam can help hide the transition later. Sagging or lopsided shapes may be caused by uneven stuffing. Redistribute the stuffing with your fingers from the outside. This can help rescue an almost-finished piece.
Pattern Customization Ideas
- Swap the sun’s yellow for a soft peach or gold to create a “sunset” version
- Turn the sheep into a lamb by using pastel yarn instead of white or cream
- Add a tiny knitted or crocheted scarf to the sheep for a seasonal touch
- Attach a keyring or ribbon loop to either shape for a bag charm version
- Stitch a tiny cloud alongside the sun for a matching three-piece nursery set
Size and Color Suggestions
A finished sun typically measures around four to five inches across, including the rays. The sheep usually stands about four inches tall once stuffed. For a nursery mobile or shelf display, pastel yellow, soft cream, and blush pink create a gentle, calming palette. For a playroom, brighter colors can create a cheerful look. Try sunshine yellow, sky blue accents, and warm brown for a high-contrast effect. Slightly adjusting the hook size can also change the finished dimensions. Use a smaller hook for a mini keychain version or a larger hook for an oversized, cuddle-sized plush.
Frequently Asked Questions
Is this Crochet Sun and Sheep pattern really suitable for a first-time amigurumi maker?
Yes, both shapes rely on stitches most beginners already know, and the repeated increase pattern actually builds skill and confidence as you go.
What yarn weight works best for a soft, huggable finish?
Worsted weight (medium 4) yarn paired with a 3.5mm to 4mm hook gives a nice balance of stitch definition and softness.
Can I make these toys without safety eyes for younger children?
Absolutely, embroidered eyes using black yarn or thread are a safer alternative for gifts intended for babies or toddlers under three.
How long does it usually take to finish both pieces?
Most beginners complete the sun in one to two hours and the sheep in roughly two to three hours, so a relaxed weekend is plenty of time for the whole set.
What if my finished shape looks lopsided?
Redistribute the stuffing evenly and check that every round matches the stitch count listed in the pattern, since uneven counts are almost always the cause.
Conclusion
Few beginner projects offer as much charm with so little effort as this Crochet Sun and Sheep pair. The stitches stay simple throughout. The shaping also teaches useful amigurumi skills. The result is a pair of toys full of warmth and personality. You can display them together on a shelf or gift them as a set. You can also give them separately to two different little ones. This project shows that beginner-friendly crochet can still feel special. Pick up your hook and choose your favorite shades. Then enjoy watching a ball of yarn turn into a sunny little friend and its woolly companion.