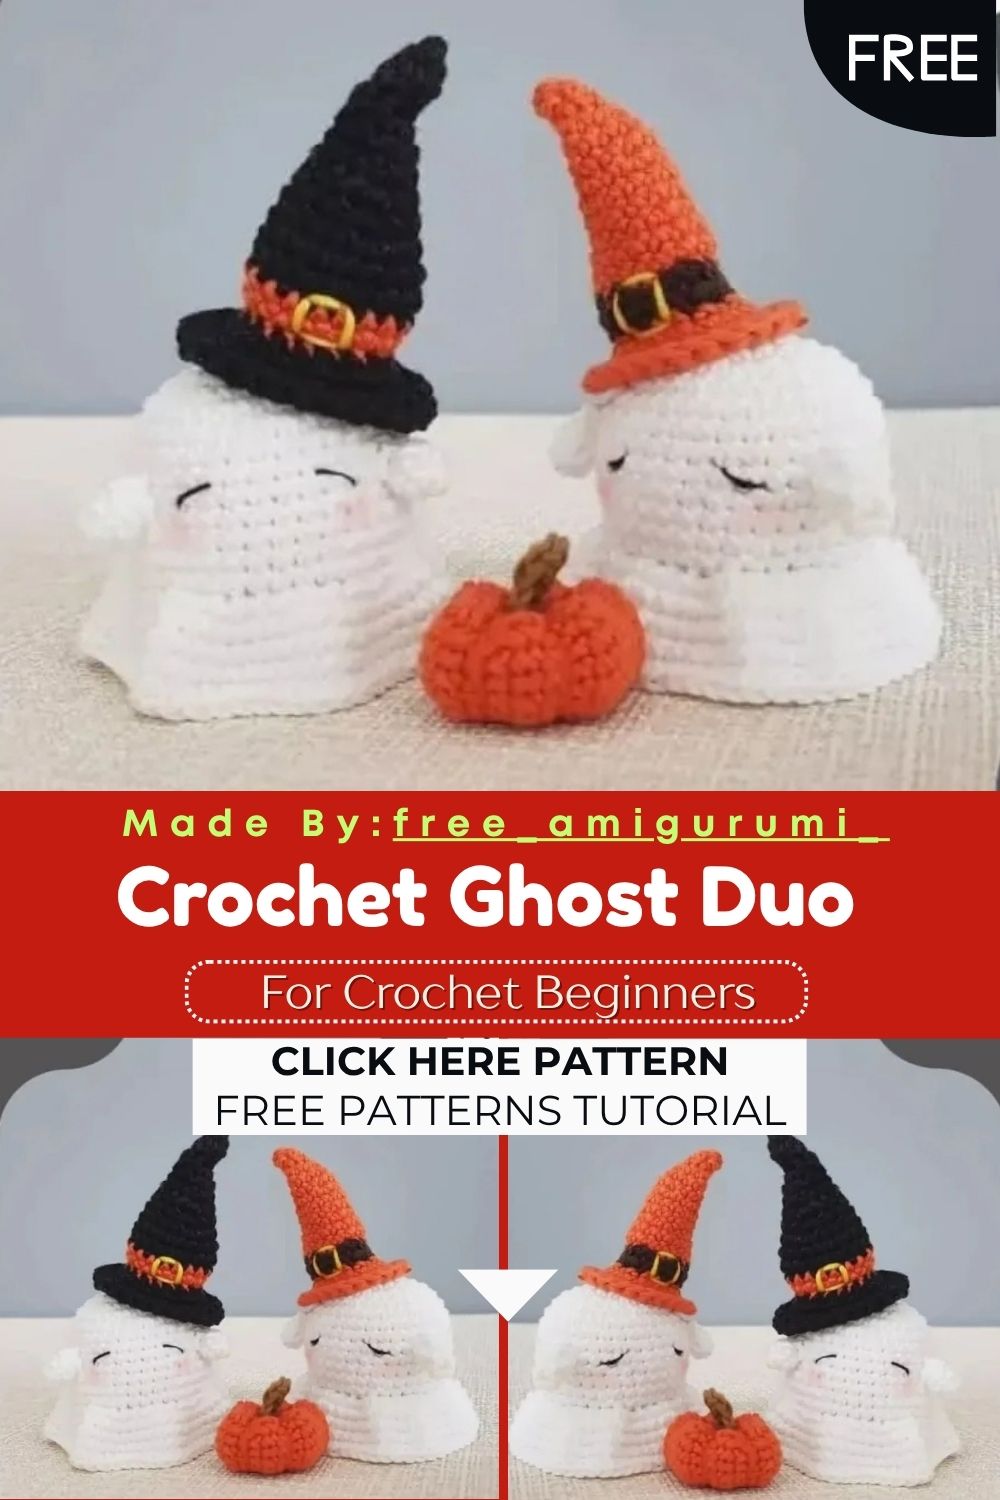
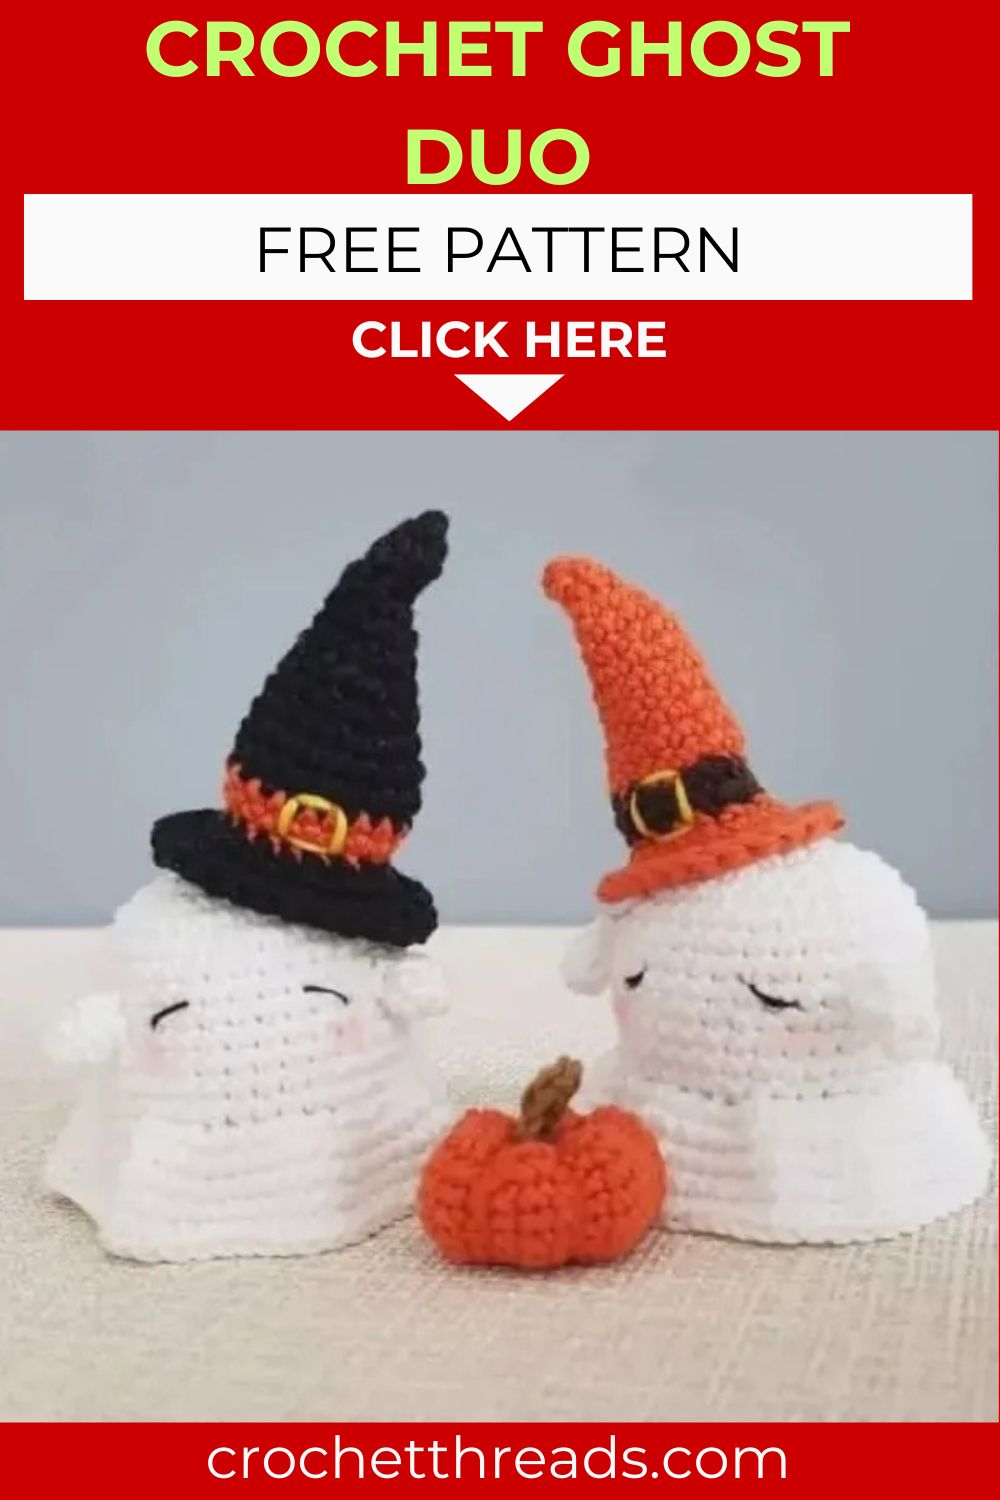
Spooky Crochet Ghost Duo with Witch Hats – Free Amigurumi Pattern
Round, ruffled, and topped with a tiny pointed witch hat, this mini ghost amigurumi is the cutest spooky season project you will ever crochet!
Worked entirely in fine cotton thread with a delicate 2mm hook, this tiny ghost rewards patient stitching with an incredibly detailed finished piece. The front loop-only construction at the base of the body creates a beautifully ruffled hem that flares out exactly like a classic ghost costume sheet. A neatly paired witch hat with a black band and orange accent ring sits perfectly on top, while two simple arm pieces give the ghost a charming, friendly silhouette. Whether displayed as a Halloween decoration, gifted to someone who loves seasonal crafting, or added to a growing collection of holiday amigurumi, this little ghost brings playful spooky charm to every shelf it haunts.
Skill Level
Intermediate. This pattern uses fine cotton thread at a small scale, which requires careful tension and stitch counting throughout. Additionally, the front loop only ruffle technique and two-color hat band introduce satisfying new skills.
Materials You Will Need
Yarn:
- White cotton thread 1mm for the ghost body and arms
- Black thread for the hat band
- Orange thread for the hat accent ring
Other Supplies:
- Crochet hook — 2.0mm
- Tapestry needle
- Scissors
- Stitch marker
- Polyfill fiberfill stuffing
Abbreviations
- MR — Magic Ring
- CH — Chain
- SC — Single Crochet
- INC — Increase
- DEC — Decrease
- SLST — Slip Stitch
- STS — Stitches
- BLO — Back Loop Only
- FLO — Front Loop Only
- (…) x N — Repeat the section in brackets N times
- ( ) — Total stitch count at the end of each round
Pattern: Mini Ghost Body
Using white cotton thread
R1: MR, 6 sc (6) R2: 6 inc (12) R3: (sc, inc) x6 (18) R4: (2sc, inc) x6 (24) R5: (3sc, inc) x6 (30) R6: (4sc, inc) x6 (36) R7–14: 36 sc for 8 rounds (36)
R15: BLO (4sc, dec) x6 (30)
This back loop only round creates a small ridge at the base, which will be used as the foundation for the ruffled bottom edge below.
R16: (3sc, dec) x6 (24) R17: (2sc, dec) x6 (18) R18: (sc, dec) x6 (12) R19: 6 dec (6)
Fasten off. Stuff the body firmly before this final round closes completely.
Ruffled Hem
Return to the front loops of R15.
FLO R15: (sc, inc) x15 (45) R16–19: 45 sc for 4 rounds (45)
Fasten off. This separate flared section creates the classic ghost sheet silhouette, billowing outward from the body in a soft, rounded ruffle.
Pattern: Arms Make 2
Using white cotton thread
R1: MR, 5 sc (5) R2–3: 5 sc for 2 rounds (5)
Fasten off, leaving a long tail. Attach both arms to the body at R10, positioned symmetrically on either side.
Pattern: Witch Hat
Using white cotton thread
R1: MR, 4 sc (4) R2–3: 4 sc for 2 rounds (4) R4: 4 inc (8) R5–6: 8 sc for 2 rounds (8) R7: (sc, inc) x4 (12) R8–9: 12 sc for 2 rounds (12) R10: (2sc, inc) x4 (16) R11–12: 16 sc for 2 rounds (16)
Change to black thread.
R13–14: 16 sc for 2 rounds (16)
Change to orange thread.
R15: FLO 16 sc (16)
This front loop round creates a decorative ridge separating the black band from the brim, with the back loops left available for a contrasting trim detail if desired.
R16: (sc, inc) x8 (24) R17–18: 24 sc for 2 rounds (24)
Fasten off. Sew the finished hat onto the top of the ghost’s head, centered above the body.
Customization and Variation Ideas
- First, make the ghost in soft pastel colors like lavender or mint instead of pure white for a sweeter, less traditional Halloween palette.
- Additionally, swap the black and orange hat bands for purple and silver for a more whimsical, fantasy-witch-inspired variation.
- Moreover, embroider tiny black dot eyes and a small round mouth onto the front of the ghost for an even more expressive, friendly face.
- Furthermore, make a small flock of ghosts in graduating sizes by adjusting the round count proportionally, creating a charming family display for Halloween decorating.
- Also, attach a small loop of thread to the top of the hat for a hanging ornament version, perfect for a Halloween garland or mini tree.
- Finally, add a tiny crocheted buckle detail to the hat band using contrasting thread for an extra storybook witch touch.
Common Mistakes to Avoid
- First, working R15 in both loops instead of the back loop only: The entire ruffled hem construction depends on correctly separating R15 into back loops for the upper body closure and front loops for the flared ruffle attachment. Skipping this technique removes the signature ghost silhouette.
- Additionally, losing stitch count at this small thread scale: Fine 1mm cotton thread at a 2mm hook makes miscounting very easy. Use a stitch marker consistently from R1 onward and count carefully after every round.
- Also, stuffing too late: Stuff the body firmly before R19 closes completely. Waiting until after this round makes it nearly impossible to add adequate filling through the small remaining opening.
- Furthermore, attaching arms before locating R10 precisely: Count carefully to find the correct attachment round, since arms placed even one round off noticeably affect the ghost’s overall proportions and symmetry.
- Moreover, mixing up the hat color change sequence: The hat moves from white to black to orange in a specific order. Working the colors out of sequence disrupts the classic witch hat band appearance.
- Finally, sewing the hat off-center: Pin the hat in place and check from multiple angles before committing to final stitches, since an off-center hat is especially noticeable at this small, detailed scale.
Finishing Tips
- First, when working the FLO ruffle section, keep your tension slightly relaxed compared to the main body rounds. This allows the ruffle to flare and drape naturally rather than sitting stiff and flat.
- Additionally, after closing the body at R19, gently press the bottom of the ghost flat so it can stand upright with the ruffled hem spreading evenly around the base.
- Moreover, use a fine embroidery needle if adding face details, since the small scale of this project requires very precise, controlled stitching.
- Furthermore, when sewing on the hat, anchor it at the front, back, and both sides for a secure, evenly balanced attachment that sits straight rather than tilting.
- Also, weave in every thread end through at least three direction changes before trimming, since fine cotton thread can work loose more easily than thicker yarns without proper securing.
- Finally, photograph the finished ghost duo against a deep black or orange background to make the white thread and hat colors pop dramatically for seasonal photography.
Gifting Ideas
- First, place the finished ghost inside a small black gift box lined with orange tissue paper for a Halloween presentation that feels coordinated and complete.
- Additionally, pair the ghost with a small bag of candy corn or seasonal treats for a playful trick-or-treat themed gift bundle.
- Moreover, these little ghosts make charming additions to a Halloween mantel display alongside pumpkins, candles, and other seasonal decor pieces.
- Furthermore, make a small batch of ghosts in slightly different sizes and string them together as a spooky-cute garland for festive home decorating.
- Also, attach a small keyring to the back of a finished ghost for a fun seasonal accessory that Halloween lovers will enjoy carrying.
- Finally, these little ghosts sell wonderfully at autumn craft markets, where their detailed thread construction and charming witch hats create genuine standout appeal among larger, simpler Halloween crafts.
Conclusion
This mini ghost amigurumi proves that fine thread crochet can produce an incredibly charming, detailed finished piece worth every careful stitch. The front loop only ruffle technique is the heart of this entire pattern, transforming a simple sphere into a recognizable, billowing ghost silhouette. Therefore, count your stitches carefully at this small scale, separate your loops precisely at R15, and take your time with the hat color sequence for the most polished finished look. In conclusion, this sweet little ghost duo is ready to haunt your shelves with nothing but charm and handmade warmth.