Free Crochet Doll Amigurumi Pattern with a Pink Dress
Overview
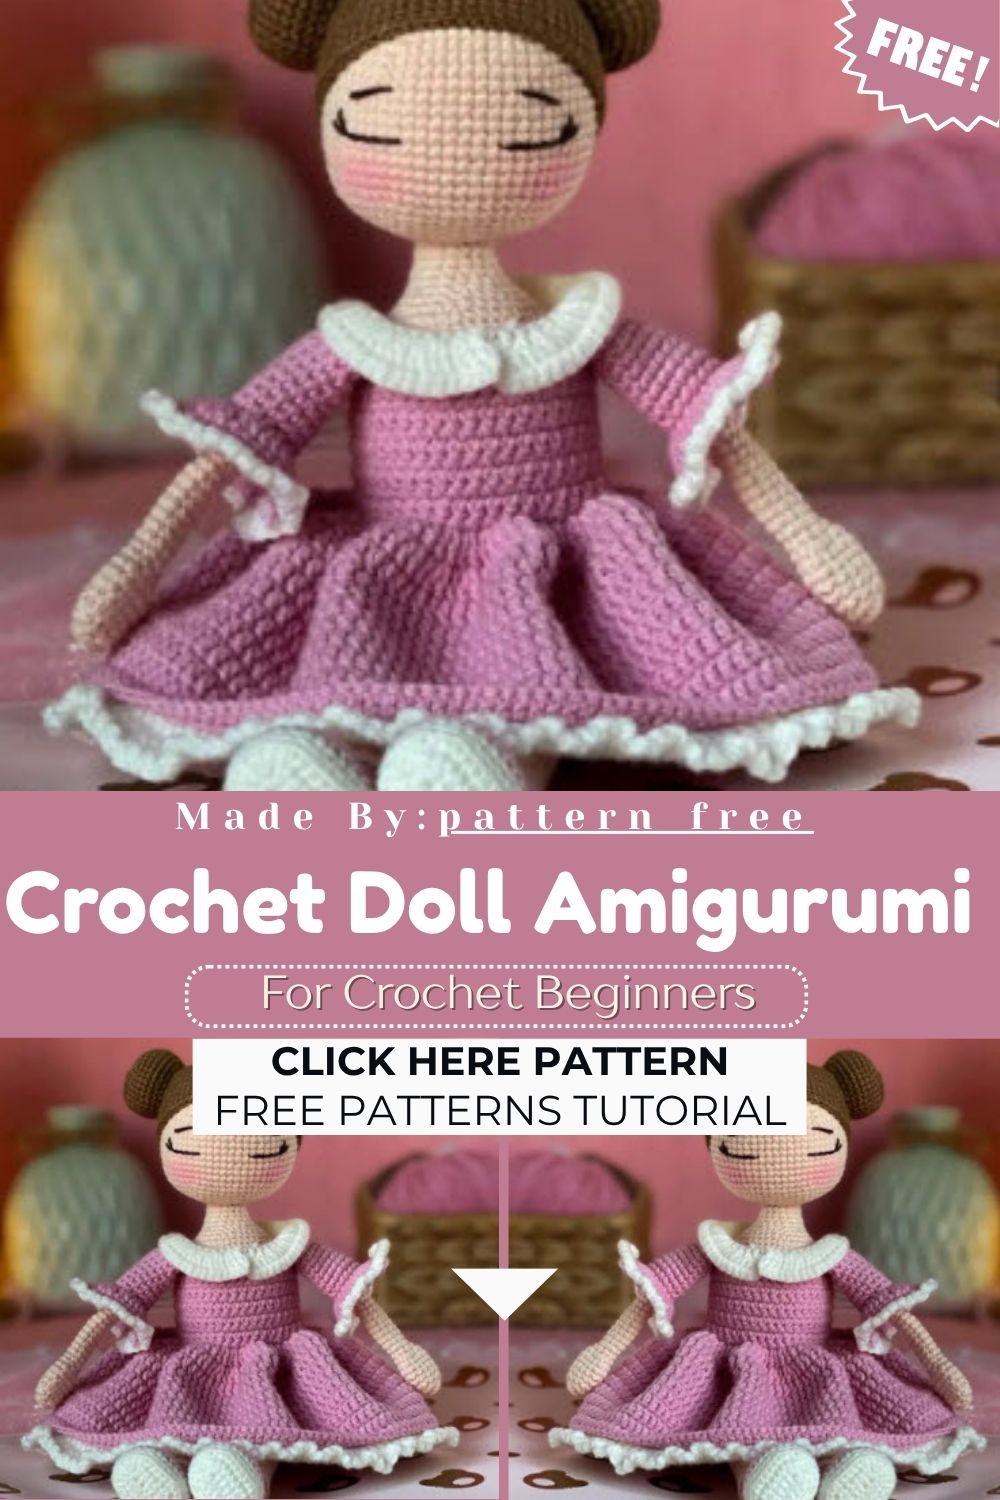
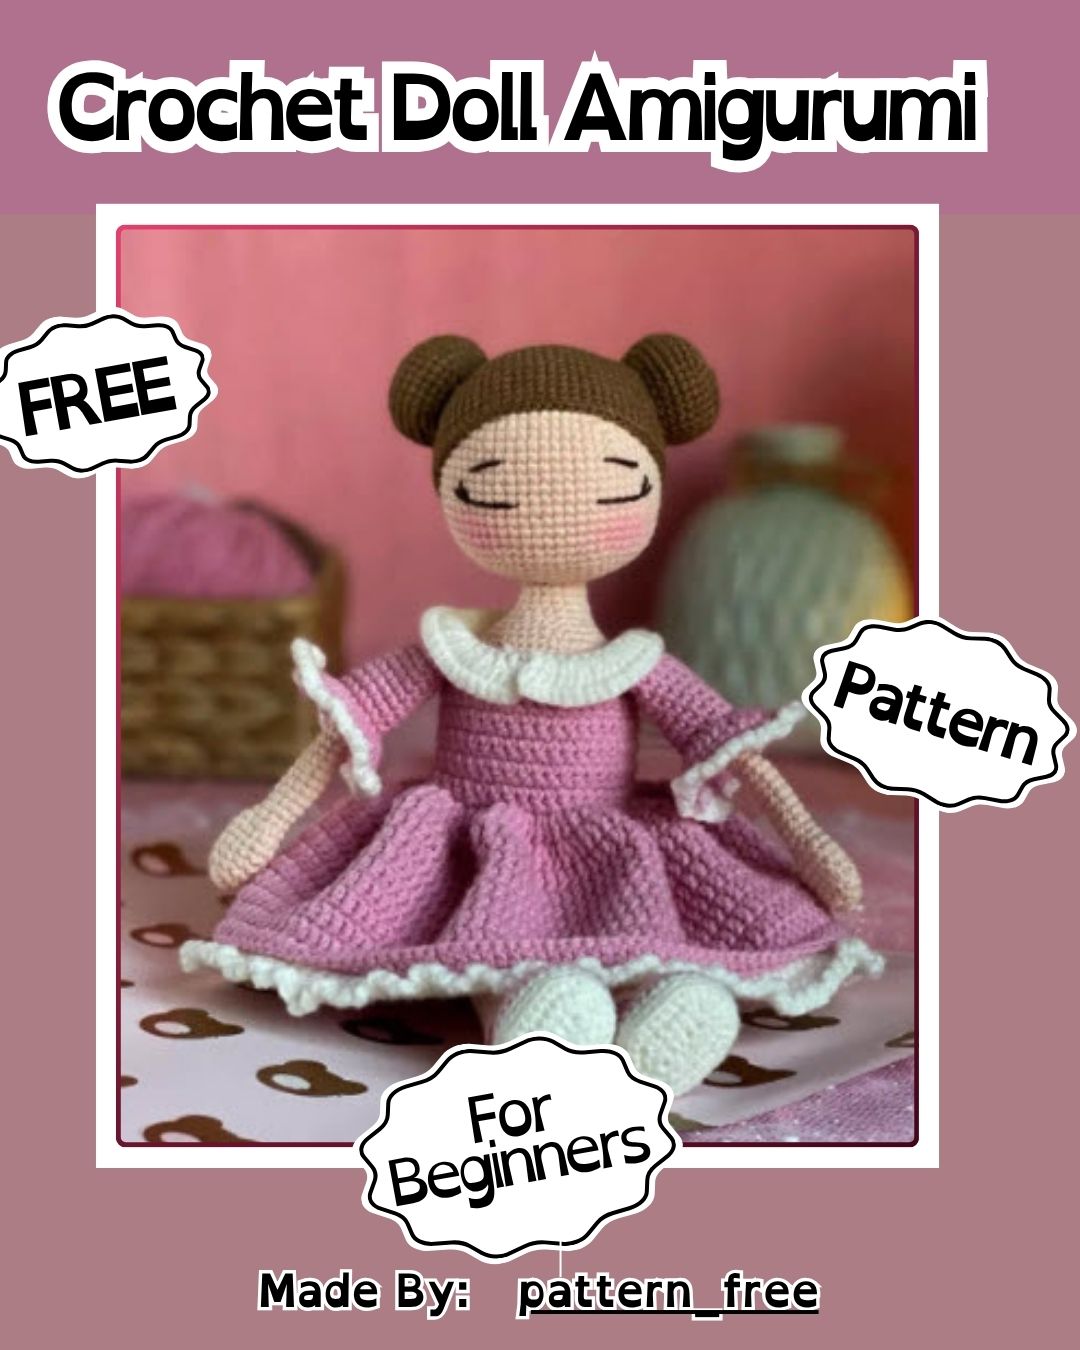
Picture a doll with rosy cheeks, soft brown hair styled into two buns, and a pink dress with a delicate white collar. That’s exactly what this pattern delivers. Skin-toned yarn forms the head and arms, brown yarn creates the wig, and pink and white yarn combine for the legs, dress, and sleeves. Trust me, the finished doll looks far more polished than the stitch count might suggest.
Skill Level
Intermediate crocheters will feel most comfortable with this project since it uses increases, decreases, front and back loop stitches, and basic dress shaping. Beginners with some amigurumi experience can still manage it with patience and a steady hand.
Materials Needed
- 2mm crochet hook
- Fiberfill stuffing
- Scissors
- Sewing pins
- Sewing needle
- Black or brown embroidery thread
- Pink blush makeup powder
- Yarn in skin tone, brown, pink, and white (YarnArt Jeans works well)
Stitch Abbreviations
- MR: magic ring
- Rnd: round
- Ch: chain stitch
- Slst: slip stitch
- St: stitch
- Sc: single crochet
- Hdc: half double crochet
- Dc: double crochet
- Inc-dc: double crochet increase
- Dec: decrease (two single crochets together)
- Inc: increase (two single crochets in the same stitch)
- FLO: front loops only
- BLO: back loops only
Special Techniques Used in This Pattern
Two techniques set this doll apart from a standard amigurumi build. FLO and BLO stitching create visible ridge lines that separate colors cleanly on the legs and dress, giving them a layered, fabric-like texture. The dress itself relies on a V-shaped single crochet stitch for the bodice, which opens up small gaps that shape the neckline naturally instead of relying on extra shaping rounds.
Step-by-Step Guide
Head
Start with skin-colored yarn and work a magic ring of 6 single crochets. Increase every round until reaching 60 stitches by round 10, then crochet 13 even rounds without increasing. Begin decreasing from round 24 down to 18 stitches by round 30, then slip stitch and cut the yarn. Stuff the head fully before sewing. Place the eyes between rounds 18 and 19 with 7 stitches of space between them, each eye spanning 5 stitches. Sew the eyebrows between rounds 14 and 15, leaving 9 stitches between them, each brow measuring 4 stitches wide.
Wig
Switch to brown yarn and repeat the same increase pattern from the head, starting at 6 stitches in a magic ring and increasing up to 66 stitches by round 11. Crochet 8 even rounds afterward, then slip stitch and leave a long tail for sewing. No stuffing goes inside the wig piece.
Hair Buns
Make two identical buns using the same increase method up to 36 stitches, followed by 4 even rounds. Decrease down to 24 stitches, then slip stitch. Stuff each bun lightly and leave a long tail. Attach both buns to the head roughly 7 rows away from the magic ring point for a balanced, symmetrical look.
Arms
Crochet two arms starting from a magic ring of 6, increasing to 12 stitches, then working 2 even rounds. Increase again to 15 stitches, crochet one even round, then decrease back down to 9 stitches over the following rounds. Continue 23 even rounds at 9 stitches for the arm length. Finish by folding the last few stitches together and leaving a tail for sewing onto the body later.
Legs
Begin with white yarn using a chain-and-turn method to form the foot base, increasing up to 30 stitches by round 3. Switch to BLO stitching for round 4, then continue even rounds before transitioning to pink yarn for the ankle area. After a few pink rounds, use BLO again to separate the color change cleanly. Shape the foot with a series of decreases down to 17 stitches, then stuff the foot section before switching to skin-colored yarn for the leg itself. Crochet 34 even rounds at 17 stitches, stuff again, then fold and close the top of the leg. Return to the pink yarn left earlier and finish with a round of slip stitches for a neat pink cuff detail.
Body
Attach white yarn at the back of one leg and work through the front loops of both legs together with chain stitches connecting them. Increase gradually from 42 stitches up to 46 stitches over several rounds while working in white, then switch to skin-colored yarn partway through round 9 for the upper body and remaining rounds. Continue 17 even rounds before starting the neck decreases, tapering down from 46 stitches to 18 stitches by round 35. Sew the head onto the neck opening, then attach the arms between rounds 25 and 26 of the body.
Dress
Work the pink bodice flat in rows starting with a 45-chain foundation, shaping armhole gaps by skipping stitches on row 2. Continue 11 even rows, then close the piece into a round and switch to double crochet stitches, increasing steadily to shape the waist and skirt. Use FLO stitching on the final bodice round before adding a white hem detail with two more rounds of double crochet followed by a decorative chain-and-single-crochet trim.
Sleeves
Attach pink yarn to the armhole opening on each side and crochet 9 even rounds at 16 stitches. Switch to FLO stitching, then increase to 32 stitches for a puffed sleeve cap. Finish each sleeve edge with white yarn using the same chain-and-single-crochet trim as the dress hem. Ngl, this small trim detail ties the whole outfit together beautifully.
Collar and Buttons
Create three small pink chain loops to form decorative buttons down the front of the dress. For the collar, attach white yarn to both the back and front dress edges separately, shaping each half with a mix of double crochet, half double crochet, and increases before joining them at the shoulders.
Usage Ideas
- Display the finished doll on a nursery shelf as a nostalgic decor piece.
- Give it as a handmade birthday gift for a child who loves dolls.
- Use it as a photography prop for craft fair listings or online shops.
Helpful Tips
Keep tension consistent throughout the head and body rounds so the shape stays smooth rather than lumpy. For real, stuffing firmly but evenly makes a noticeable difference in how the doll holds its pose once finished.
Customization & Variations
Swap the pink dress for a different color palette to match a specific theme or season. Hair color and style can change easily too; braids or curls work just as well as the bun style shown here. Adding a small flower crown or headband offers another simple variation without altering the core pattern.
Common Mistakes to Avoid
- Skipping the FLO or BLO instructions, which flattens the color transitions and ruins the layered look.
- Understuffing the head, causing it to look deflated once the eyes and brows are sewn on.
- Miscounting stitches during increase rounds, which throws off the doll’s proportions later.
- Forgetting to leave long tails for sewing, making assembly much harder afterward.
Finishing Tips
Apply pink blush makeup powder gently to the cheeks for a soft, lifelike glow. Double-check that both arms sit at the same height before sewing them permanently, and steam-block the dress lightly if the stitches look uneven after assembly.
Gifting Ideas
This Free Crochet Doll Amigurumi makes a lovely handmade gift for baby showers, birthdays, or as a keepsake passed down between family members. Pairing it with a small handwritten note about the yarn colors used adds a personal touch.
Frequently Asked Questions
What size hook works best for this pattern?
A 2mm hook creates tight, even stitches that prevent stuffing from showing through the fabric.
Can I use a different yarn brand?
Yes, any similar-weight yarn works, though YarnArt Jeans gives a smooth, cotton-like finish.
How long does this Free Crochet Doll Amigurumi project usually take?
Most crocheters finish the doll over several evenings, since the body and dress each take dedicated time.
Do I need embroidery skills for the face?
Basic embroidery stitches are enough for the eyebrows, and the eyes can be sewn using simple straight stitches.
Conclusion
Building this Free Crochet Doll Amigurumi pattern from the head down to the pink dress hem rewards patience with a genuinely charming result. No joke, watching the separate pieces transform into a fully dressed doll feels satisfying every single time. Low-key, this project also teaches useful techniques like FLO, BLO, and the V-shaped dress stitch that carry over into future amigurumi projects, making it a valuable pattern to revisit again and again.