Adorable Velvet Turtle Amigurumi Crochet Pattern (Free & Easy)
Round, squishy, and utterly impossible to put down, this mint green velvet turtle is the easiest amigurumi you will ever fall in love with!
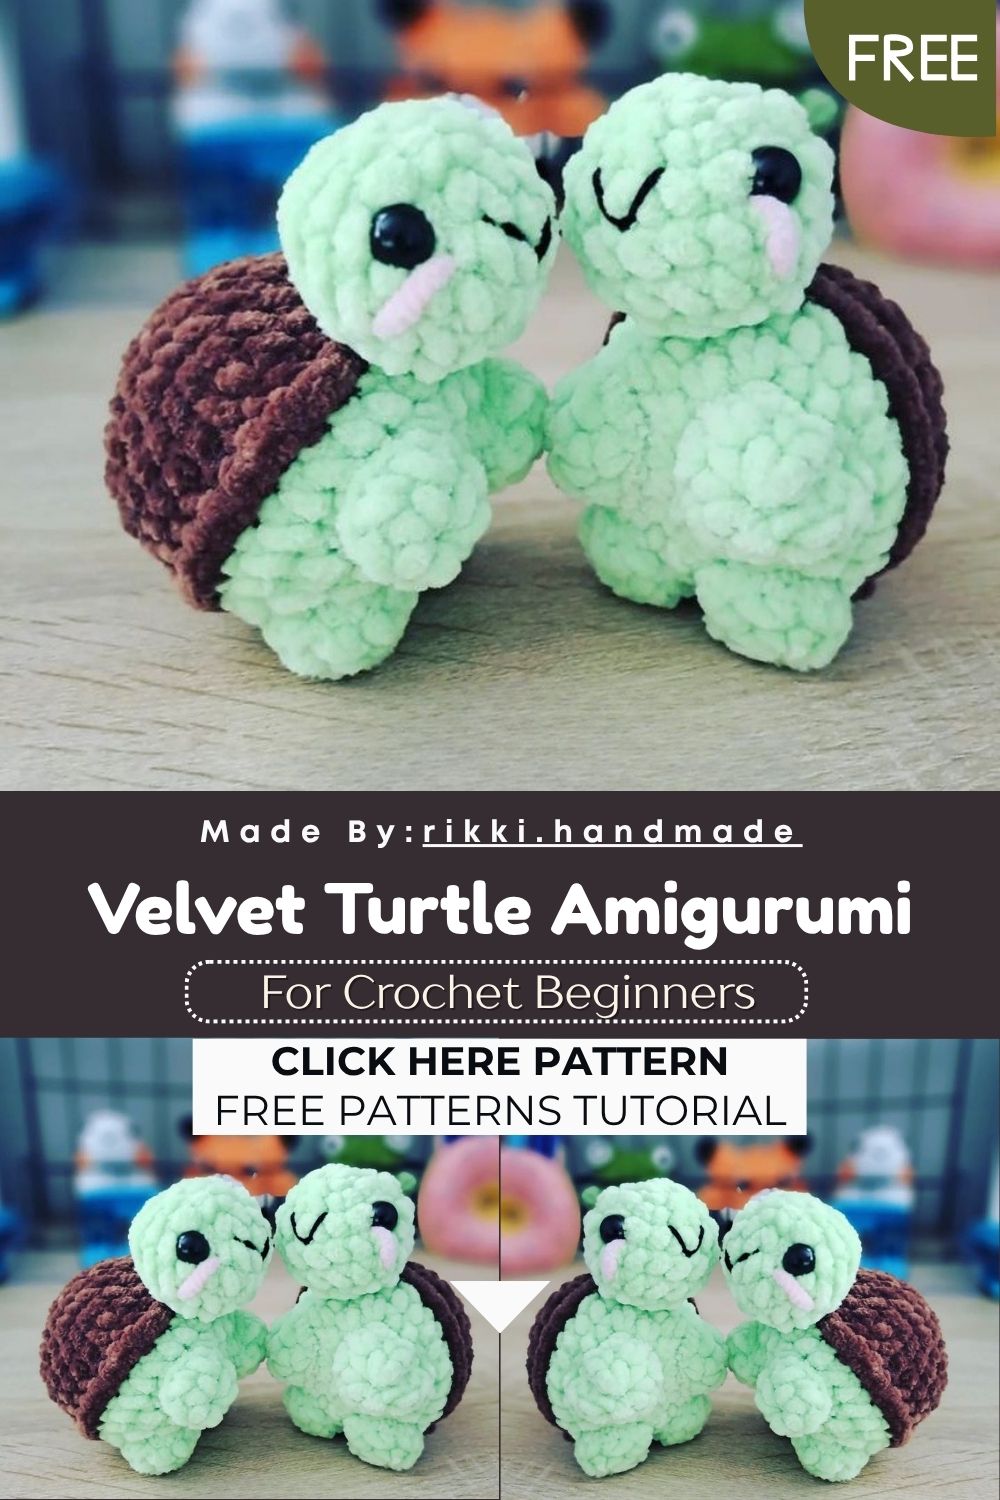
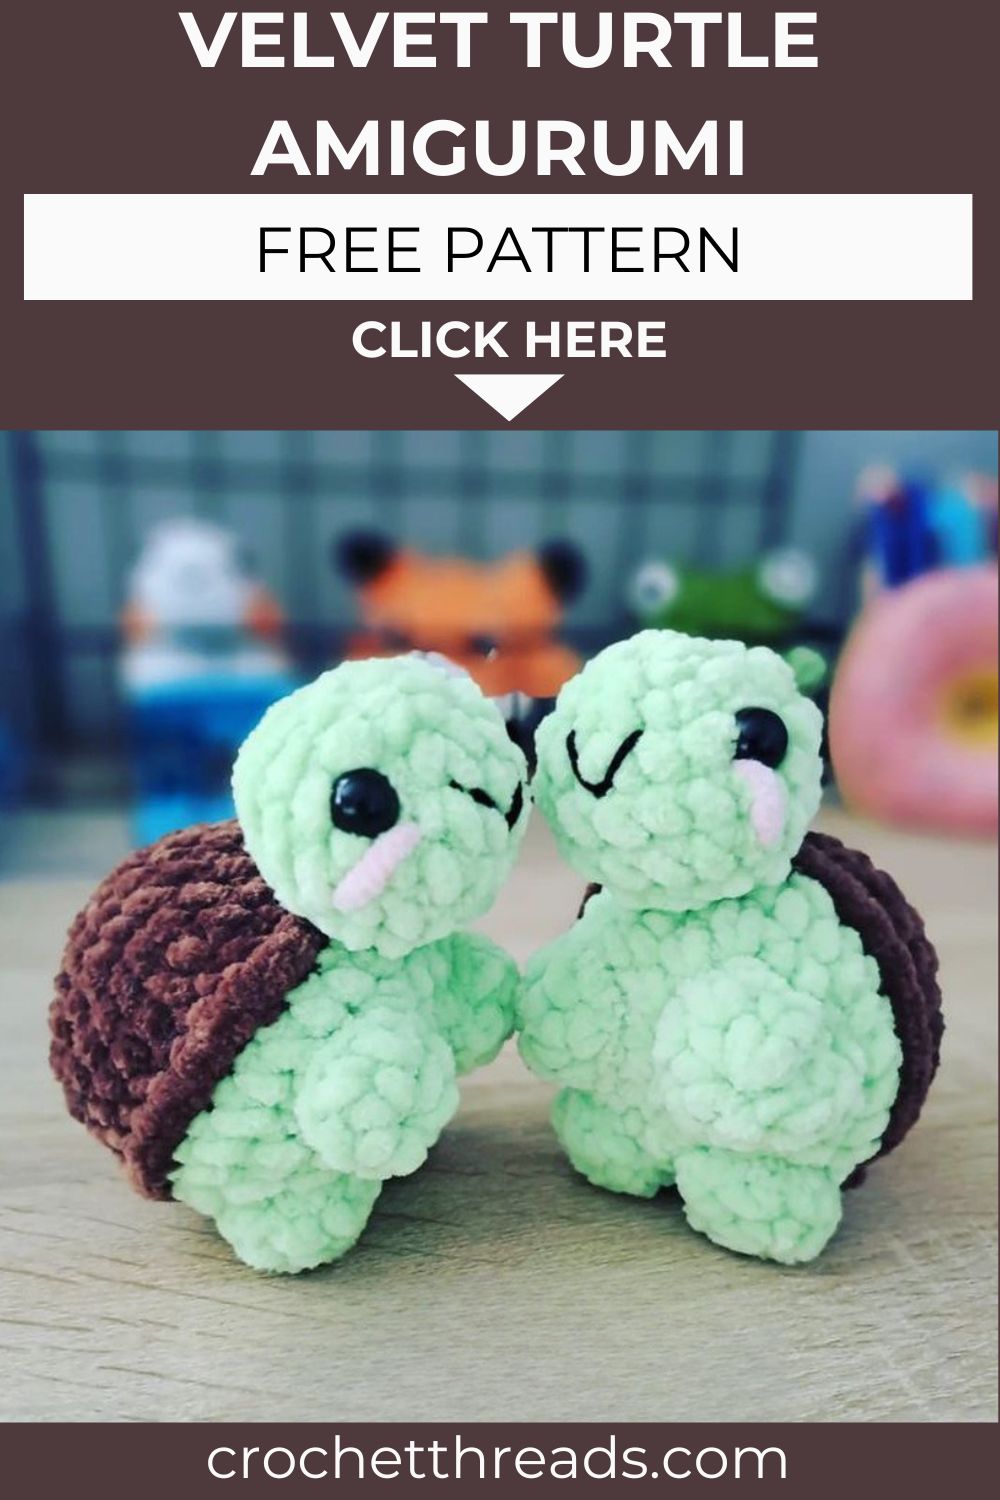
Turtles have a quiet, gentle charm that translates beautifully into crochet. This mini velvet turtle captures every bit of that charm in a small, squishy package worked in soft Himalaya Dolphin Baby chenille yarn. The body uses a clever split loop technique at R9 that creates the natural ridge separating the green belly from the brown shell above it. The head and four legs are worked separately and sewn on cleanly, giving the finished turtle a natural, balanced pose. A five-chain tail and a pair of 10mm safety eyes complete a finished piece that is as satisfying to make as it is sweet to look at.
Skill Level
Beginner friendly. Single crochet in continuous rounds is all you need for the entire pattern. Additionally, the back loop and front loop split at R9 introduces a useful new technique in a completely manageable way.
Materials You Will Need
Yarn — Himalaya Dolphin Baby:
- Color 80366 — dark brown for the shell top
- Color 80350 — mint green for the belly, head, and legs
- Color 80319 — for additional detail if desired
Other Supplies:
- Crochet hook — 4.0mm
- Safety eyes — 10mm
- Polyfill stuffing
- Scissors
- Yarn needle
Abbreviations
- MR — Magic Ring
- SC — Single Crochet
- INC — Increase (2 sc in same stitch)
- DEC — Decrease
- BLO — Back Loop Only
- FLO — Front Loop Only
- SLST — Slip Stitch
- FO — Fasten Off
Pattern: Body
Starting with dark brown yarn color 80366
R1: 6 sc in MR (6) R2: inc x6 (12) R3: (sc, inc) x6 (18) R4: (2sc, inc) x6 (24) R5: (3sc, inc) x6 (30) R6–8: 30 sc for 3 rounds (30)
Shell and Belly Split
Switch to mint green yarn — color 80350.
R9: 30 sc in back loops only (30)
This BLO round creates the natural ridge that separates the brown shell top from the green belly below. The front loops left free from this round will be used immediately after to finish the shell edge.
R10: 30 sc (30) R11: (3sc, dec) x6 (24) R12: (2sc, dec) x6 (18) R13: (sc, dec) x6 (12)
Stuff the body firmly at this point.
R14: dec x6 (6)
Slip stitch and close the opening securely.
Shell Front Loop Edging
Return to the front loops of R9. Join dark brown yarn — color 80366.
R9 FLO: 30 sc in front loops only (30)
Slip stitch to close. This round creates a clean, raised shell edge band that visually separates the two colors and gives the body its characteristic turtle shell look.
Pattern: Head
Using mint green yarn color 80350
R1: 6 sc in MR (6) R2: inc x6 (12) R3: (sc, inc) x6 (18) R4–5: 18 sc for 2 rounds (18) R6: (sc, dec) x6 (12)
Place safety eyes between R3 and R4, symmetrically with 7 stitches between them.
Stuff the head firmly.
R7: dec x6 (6)
Fasten off and leave a long tail for sewing.
Pattern: Legs Make 4
Using mint green yarn
R1: 6 sc in MR (6) R2: inc x6 (12)
Fasten off and leave a long tail for sewing. Do not stuff the legs.
Pattern: Tail
Chain 5. Fasten off and leave a long tail for sewing.
The simple chain tail sits naturally behind the body without any extra construction required.
Assembly
Sew the head firmly onto the front of the body where the shell edge meets the belly section. Position it centered and slightly forward-facing for the most natural turtle pose.
Sew all four legs onto the sides and lower front of the body, evenly spaced. The flat unstuffed legs sit naturally against the body and give the turtle a relaxed, resting pose.
Attach the chain tail at the center back of the body between the shell edge and the base.
Customization and Variation Ideas
- First, try a pale yellow belly with a dark olive shell for an earthy, naturalistic turtle colorway that photographs beautifully against wooden or leaf-covered surfaces.
- Additionally, use a pastel rainbow sequence for the body rounds one round each of pink, lavender, mint, and peach for a tie-dye inspired turtle that is unlike anything else in your collection.
- Moreover, add a tiny crocheted flower on top of the shell using scrap yarn and a 2mm hook for a cottagecore turtle variation that feels completely unique.
- Furthermore, make the legs slightly longer by adding two extra rounds of sc before fastening off. Longer legs give the turtle a more active, crawling pose when displayed on a flat surface.
- Also, embroider a small smile below the safety eyes using black thread for an extra expressive face that adds enormous warmth to the finished piece.
- Finally, make a family set in three sizes using different yarn weights super bulky for a large parent turtle, standard bulky for a medium, and fingering weight for a tiny baby turtle sitting beside them.
Common Mistakes to Avoid
- First, working R9 in both loops instead of back loops only: The entire shell and belly construction depends on correctly separating R9 into back loops for the belly continuation and front loops for the shell edging. Missing this step removes the ridge that defines the turtle’s shape.
- Additionally, stuffing before R13: Begin stuffing at R13 after the decreases have narrowed the opening enough to hold filling in place. Stuffing too early causes the filling to shift unevenly during the closing rounds.
- Also, placing eyes after R6: Safety eyes must go in between R3 and R4 while the head is still wide enough to access comfortably from the inside. Mark the position with pins first before locking them permanently.
- Furthermore, sewing legs before checking symmetry: Always pin all four legs in place simultaneously and check the overall balance from directly above before sewing any of them permanently.
- Moreover, leaving the front loops of R9 unworked: The front loop edging round on R9 is an essential finishing step. Skipping it removes the clean visual separation between shell and belly that makes this turtle look so polished.
- Finally, cutting the tail chain too short: Chain 5 produces the correct tail length for this size turtle. A shorter chain disappears against the body while a longer one flops awkwardly away from the back.
Finishing Tips
- First, when sewing the head onto the body, anchor it at both the top and bottom edge of the head base. A double-anchor attachment keeps the head facing forward confidently rather than drooping downward.
- Additionally, after assembly, give the finished turtle a gentle overall squeeze and reshape it into a round, even dome. Chenille yarn responds beautifully to light hand-shaping while still flexible.
- Moreover, use matching mint green yarn for all leg and head seams and matching dark brown for any shell area joins. Invisible seams make the finished turtle look genuinely professional.
- Furthermore, weave every yarn end in through at least three direction changes before trimming. Dolphin Baby chenille is forgiving but needs proper anchoring to prevent ends from working loose over time.
- Also, photograph the finished turtle from a slightly elevated angle looking down. This viewpoint shows the shell color separation, the tiny legs, and the sweet face all together in one balanced composition.
- Finally, if the shell edge ridge at R9 looks slightly uneven after assembly, run a tapestry needle gently along the ridge line to lift and straighten each stitch. This simple step makes the color divide look crisp and intentional.
Gifting Ideas
- First, nestle the finished turtle inside a small wooden box lined with preserved moss for a nature-themed gift presentation that looks like it came from a boutique woodland shop.
- Additionally, pair the turtle with a tiny handwritten card describing its colors and yarn brand. Craft-loving recipients genuinely appreciate knowing the materials behind a handmade piece.
- Moreover, these turtles make wonderful gifts for children of all ages. The soft chenille yarn, round shape, and gentle expression make this one of the safest and most universally loved amigurumi designs available.
- Furthermore, make a matching pair in two different color combinations and gift them together as a turtle duo. Two turtles displayed side by side on a small wooden surface create a heartwarming handmade scene.
- Also, attach a small keychain ring through the chain tail for a handmade bag charm that turtle lovers will reach for every single day without fail.
- Finally, these turtles sell beautifully at craft markets and handmade boutiques year-round. The soft velvet texture, two-tone construction, and tiny scale together create a display piece that draws immediate attention and genuine affection from everyone who sees it.
Conclusion
This velvet turtle pattern is one of those projects that delivers enormous satisfaction for a very modest investment of time and skill. The BLO and FLO split technique at R9 is the single most important moment in the entire pattern. Furthermore, mastering it here opens the door to using the same technique across dozens of other amigurumi designs in the future. Therefore, work the back loop belly rounds carefully, return to the front loops for the shell edging, and take your time sewing all four legs evenly. In addition, place those safety eyes precisely between R3 and R4 — the expression they create defines the entire personality of this little turtle. In conclusion, this tiny velvet turtle is ready to be made, loved, and displayed somewhere it will make someone smile every single day.