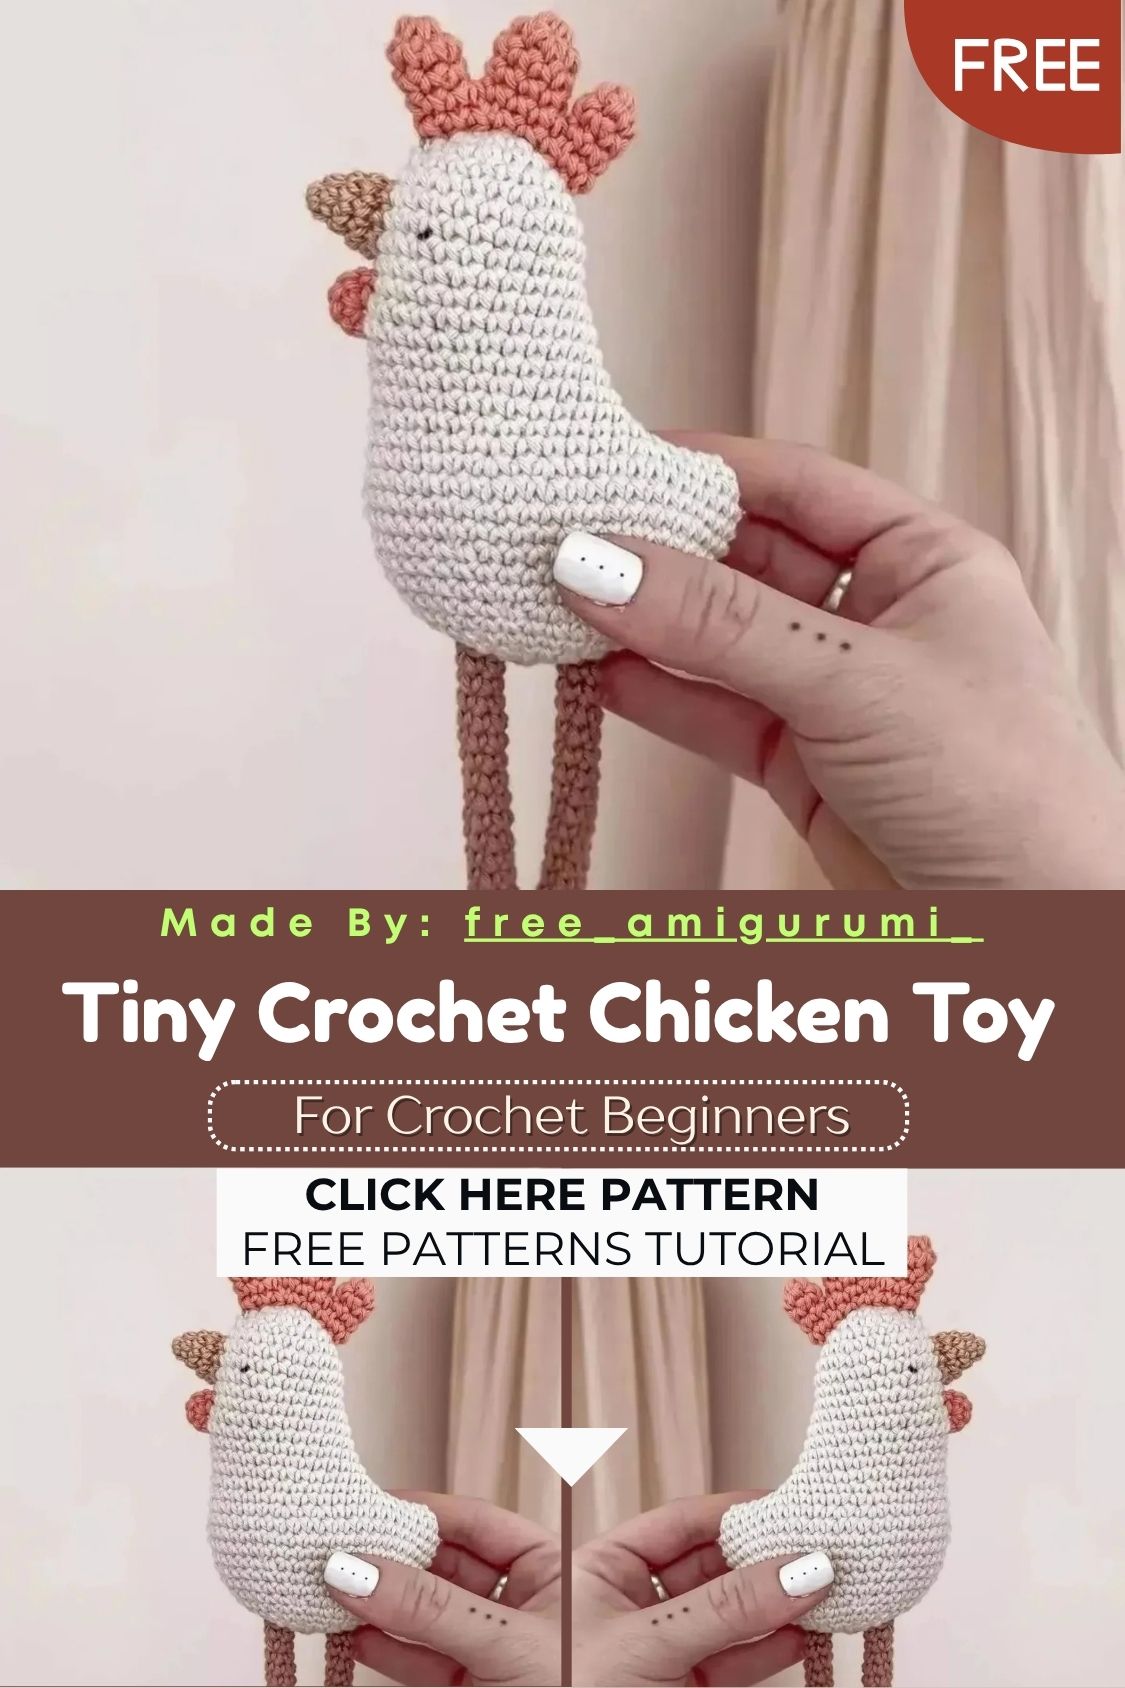
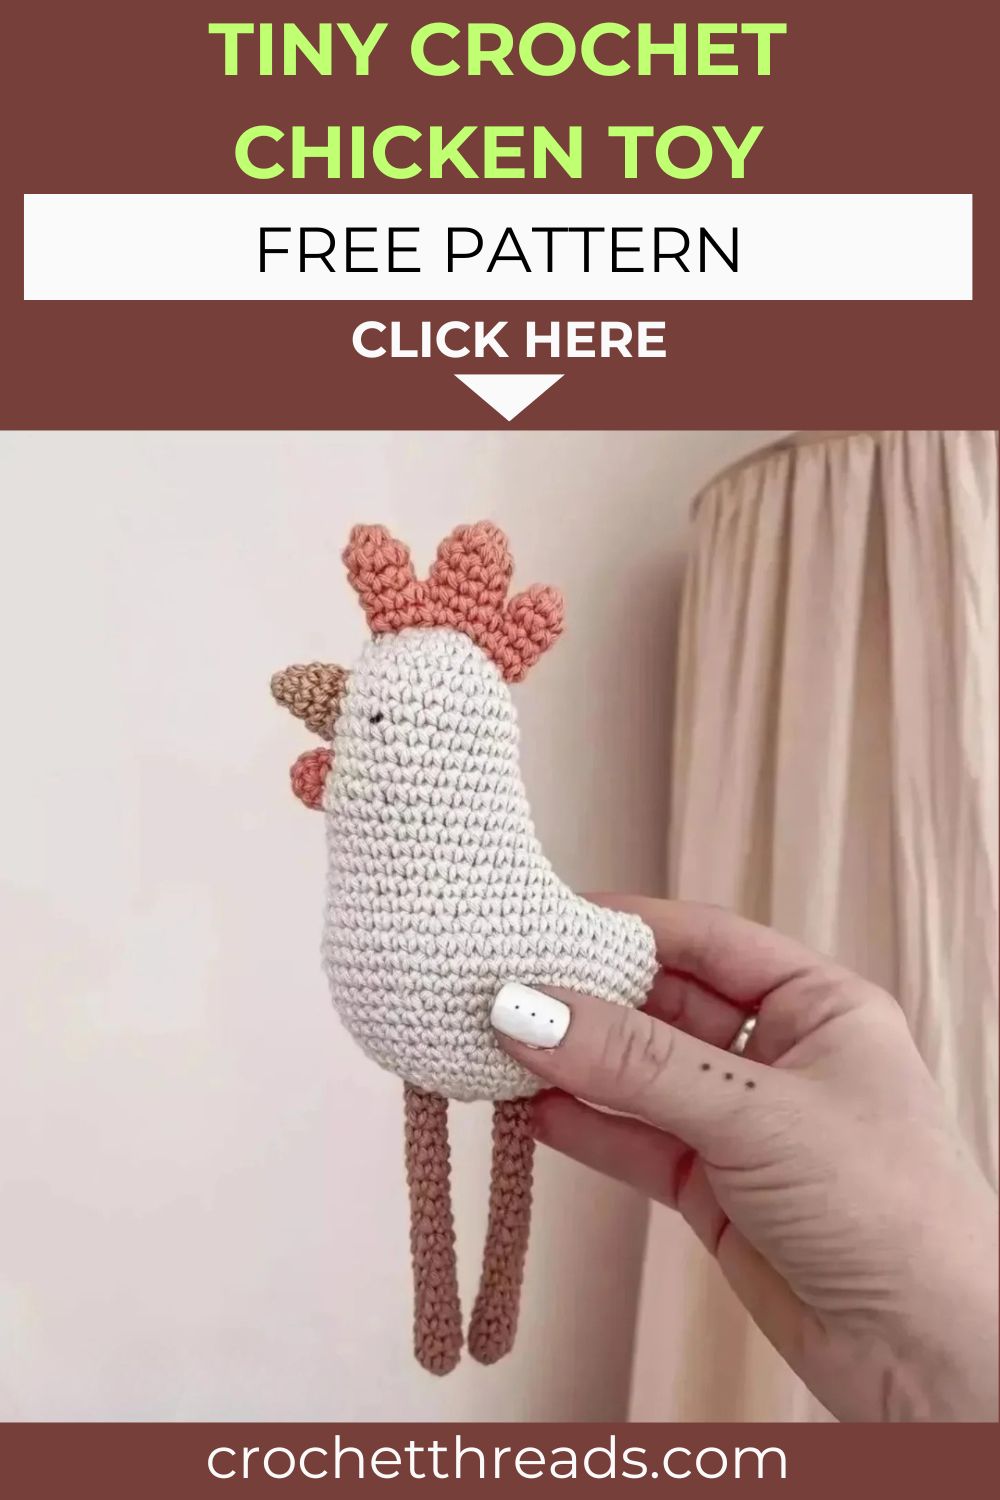
Tiny Crochet Chicken Toy – Free Amigurumi Pattern
Off-white, plump, and topped with a cheerful orange comb, this little hen is the most charming farmyard amigurumi you will ever make!
Crocheted in soft cotton yarn, this tiny chicken brings genuine farmhouse charm to any handmade collection. The body shaping builds gradually from a simple sphere into a naturally egg-like silhouette, complete with a cleverly constructed tail loop worked directly into the body round. The triple-piece comb, simple wattle, and gently shaped beak together create an expressive, recognizable hen face. Whether displayed as a spring decoration, used as a charming table setting, or gifted to someone who loves farmyard animals, this little chicken delivers a finished result that is both technically satisfying and genuinely adorable.
Skill Level
Beginner to intermediate. Basic single crochet, increases, and decreases are the main techniques throughout. Additionally, the tail loop construction and three-piece comb assembly introduce simple new skills that are easy to follow.
Materials You Will Need
Yarn — Ricorumi cotton:
- Off-white (color 061) — 25g for the body
- Brown (color 056) — 25g for the legs
- Camel (color 071) — 25g for the beak
- Orange (color 068) — 25g for the comb and wattle
Other Supplies:
- Pearl cotton size 8 in black — for embroidered eyes
- Crochet hook — 2.5mm
- Embroidery needle
- Polyfill stuffing
Abbreviations
- RD — Round
- ST — Stitch
- CH — Chain
- SLST — Slip Stitch
- SC — Single Crochet
- DEC — Invisible Decrease
- INC — Increase
- … — Repeat sequence until the end of the round
Pattern: Body
Using off-white yarn
Rd 1: 6 sc in MR (6) Rd 2: 1 inc in each st (12) Rd 3: (1sc, 1inc) x6 (18) Rd 4: 1 sc in each st (18) Rd 5: (2sc, 1inc) x6 (24) Rd 6–9: 1 sc in each st for 4 rounds (24) Rd 10: 1 inc, 23 sc (25) Rd 11: 1sc, 1 inc, 23 sc (26) Rd 12: 2sc, 1 inc, 23 sc (27) Rd 13: 3sc, 1 inc, 23 sc (28) Rd 14: 3sc, 1 inc, 24 sc (29) Rd 15: 3sc, 1 inc, 25 sc (30)
Rd 16: 4 sc, then chain 7. Insert your hook in the 2nd stitch from the hook and work 26 sc around the chain and back into the body (36)
This chain loop forms the small tail detail directly built into the body round, eliminating any need for separate tail construction.
Rd 17: (5sc, 1inc) x6 (42) Rd 18: 3sc, 1 inc, (6sc, 1inc) x5, 3sc (48) Rd 19–21: 1 sc in each st for 3 rounds (48) Rd 22: (6sc, 1dec) x6 (42)
Stuff the body at this point.
Rd 23–24: 1 sc in each st for 2 rounds (42) Rd 25: (5sc, 1dec) x6 (36) Rd 26: 1 sc in each st (36) Rd 27: 2sc, 1dec, (4sc, 1dec) x5, 2sc (30) Rd 28: (3sc, 1dec) x6 (24) Rd 29: (2sc, 1dec) x6 (18) Rd 30: (1sc, 1dec) x6 (12)
Finish stuffing the body firmly at this point.
Finish with a slst, then fasten off and close the work. Using your tapestry needle, thread through the back loops only of each stitch from the last round with the tail, then pull firmly to close. Hide the remaining tail inside the body.
Pattern: Legs Make 2
Using brown yarn
Rd 1: 6 sc in MR (6) Rd 2–16: 1 sc in each st for 15 rounds (6)
Do not stuff the legs.
Finish with a slst, then fasten off. Leave a long tail of approximately 30cm for assembly.
Pattern: Comb
Using orange yarn
Big Comb Piece 1
Rd 1: 6 sc in MR (6) Rd 2: (2sc, 1inc) x2 (8) Rd 3–4: 1 sc in each st for 2 rounds (8)
Fasten off and mark the last stitch.
Small Combs Pieces 2 and 3
Rd 1: 6 sc in MR (6) Rd 2–3: 1 sc in each st for 2 rounds (6)
Fasten off and mark the last stitch for piece 2.
For piece 3, do not fasten off. Instead, assemble all three comb pieces as follows:
Work 4 sc on comb 1, 6 sc around comb 2, 4 sc on comb 1 again, then finish with 6 sc around comb 3 for a total of 21 sc, joining all three pieces.
Continue the comb with one final round: 1 sc in each stitch around (21)
Finish with a slst, then fasten off. Leave a long tail of approximately 20cm for assembly. Do not stuff the comb.
Pattern: Wattle
Using orange yarn
Rd 1: 6 sc in MR (6)
Finish with a slst, then fasten off. Leave a long tail of approximately 20cm for assembly.
Pattern: Beak
Using camel yarn
Rd 1: 6 sc in MR (6) Rd 2: (2sc, 1inc) x2 (8) Rd 3: (3sc, 1inc) x2 (10) Rd 4: 1 sc in each st (10)
Finish with a slst, then fasten off. Leave a long tail of approximately 20cm for assembly.
Assembly
Place the assembled comb on top of the head, centered along the highest point of the body.
Sew both legs onto the bottom of the body, spaced approximately 1cm apart from each other.
Position the beak vertically on the face, spanning rounds 6 to 8.
Place the small wattle vertically just below the beak, spanning rounds 10 to 12.
Embroider two small eyes on each side of the beak between rounds 7 and 8 using black pearl cotton.
Table decoration tip: To use this hen as a charming table decoration, you can omit the legs entirely and simply place her at the center of the table or beside each guest’s plate as a sweet seasonal gift.
Customization and Variation Ideas
- First, make a whole flock of hens in different solid colors, such as soft pink, mint, lavender, etc., each creates a completely different decorative personality using the same construction.
- Additionally, try a speckled or variegated cotton yarn for the body for a more naturalistic, free-range hen appearance without any extra technique required.
- Moreover, add tiny crocheted wings worked as simple flat ovals and sewn onto each side of the body for a more detailed and dimensional finished silhouette.
- Furthermore, embroider small wing feather details directly onto the body using contrasting thread for texture without adding any separate pieces.
- Also, skip the legs entirely for a pure decorative version intended purely for tabletop display, exactly as suggested in the original assembly notes.
- Finally, make a miniature version using finer cotton thread and a 1.5mm hook for tiny place card holders or favors at a spring celebration or Easter gathering.
Common Mistakes to Avoid
- First, missing the tail chain loop at Rd 16: This round includes a chain 7 worked into the body construction. Skipping this detail removes the signature tail shape that defines the back of the chicken.
- Additionally, stuffing too early: Begin stuffing at Rd 22 as instructed and continue gradually. Stuffing before the shaping rounds are complete makes it difficult to maintain the gentle egg-like silhouette.
- Also, closing the body with both loops instead of back loops only: The closing technique specifically uses the back loops only of the final round for the cleanest, flattest closure.
- Furthermore, placing the comb pieces in the wrong order during assembly: Follow the stitch counts carefully when joining all three comb pieces together. The sequence determines the final fan shape of the comb.
- Moreover, attaching the beak horizontally instead of vertically: The beak should sit vertically on the face between rounds 6 to 8 for the correct proportions and expression.
- Finally, leaving insufficient tail length on small pieces: Each piece’s legs, comb, wattle, and beak need a generous 20 to 30cm tail. Short tails make secure assembly sewing very difficult.
Finishing Tips
- First, when closing the body, work through the back loops only with steady, even tension before pulling tight. This creates the smoothest possible closure with no visible puckering.
- Additionally, after sewing on the comb, gently shape the three lobes outward with your fingers for a more natural, fanned appearance rather than a flat single mass.
- Moreover, position the wattle slightly below and between the beak for the most balanced, expressive face placement.
- Furthermore, use a single strand of black pearl cotton for the eye embroidery to keep the detail crisp and proportional against the fine cotton body yarn.
- Also, weave in every yarn end through at least three direction changes. Cotton yarn can work loose more easily than wool or acrylic without thorough securing.
- Finally, photograph the finished hen against a natural wood or linen background for the most charming, farmhouse-inspired presentation.
Gifting Ideas
- First, place several finished hens around a spring table setting as charming, functional place markers that double as keepsake gifts for each guest.
- Additionally, pair a finished hen with a small basket of real or chocolate eggs for an Easter gift that feels personal and beautifully coordinated.
- Moreover, these little hens make wonderful housewarming gifts for anyone with a farmhouse or cottage-style home aesthetic.
- Furthermore, make a set of three or four hens in different colors and display them together on a kitchen shelf or windowsill for a cheerful collection.
- Also, attach a small ribbon around the neck of a finished hen for an instant decorative gift topper on a larger Easter or spring present.
- Finally, these hens sell consistently well at spring craft markets and farmers’ markets, where the table decoration angle gives them broad seasonal appeal beyond typical amigurumi buyers.
Conclusion
This tiny crochet chicken is a wonderfully satisfying project that builds gradually from a simple sphere into a genuinely expressive farmyard character. The integrated tail loop and three-piece comb construction both reward careful, patient work. Therefore, follow the shaping rounds closely, keep your comb pieces in the correct assembly order, and take your time with the face placement. In conclusion, this little hen is ready to find her place on a shelf, a table, or in someone’s hands as a truly charming handmade gift.
Happy crocheting! Cannot wait to see your little hen come to life.