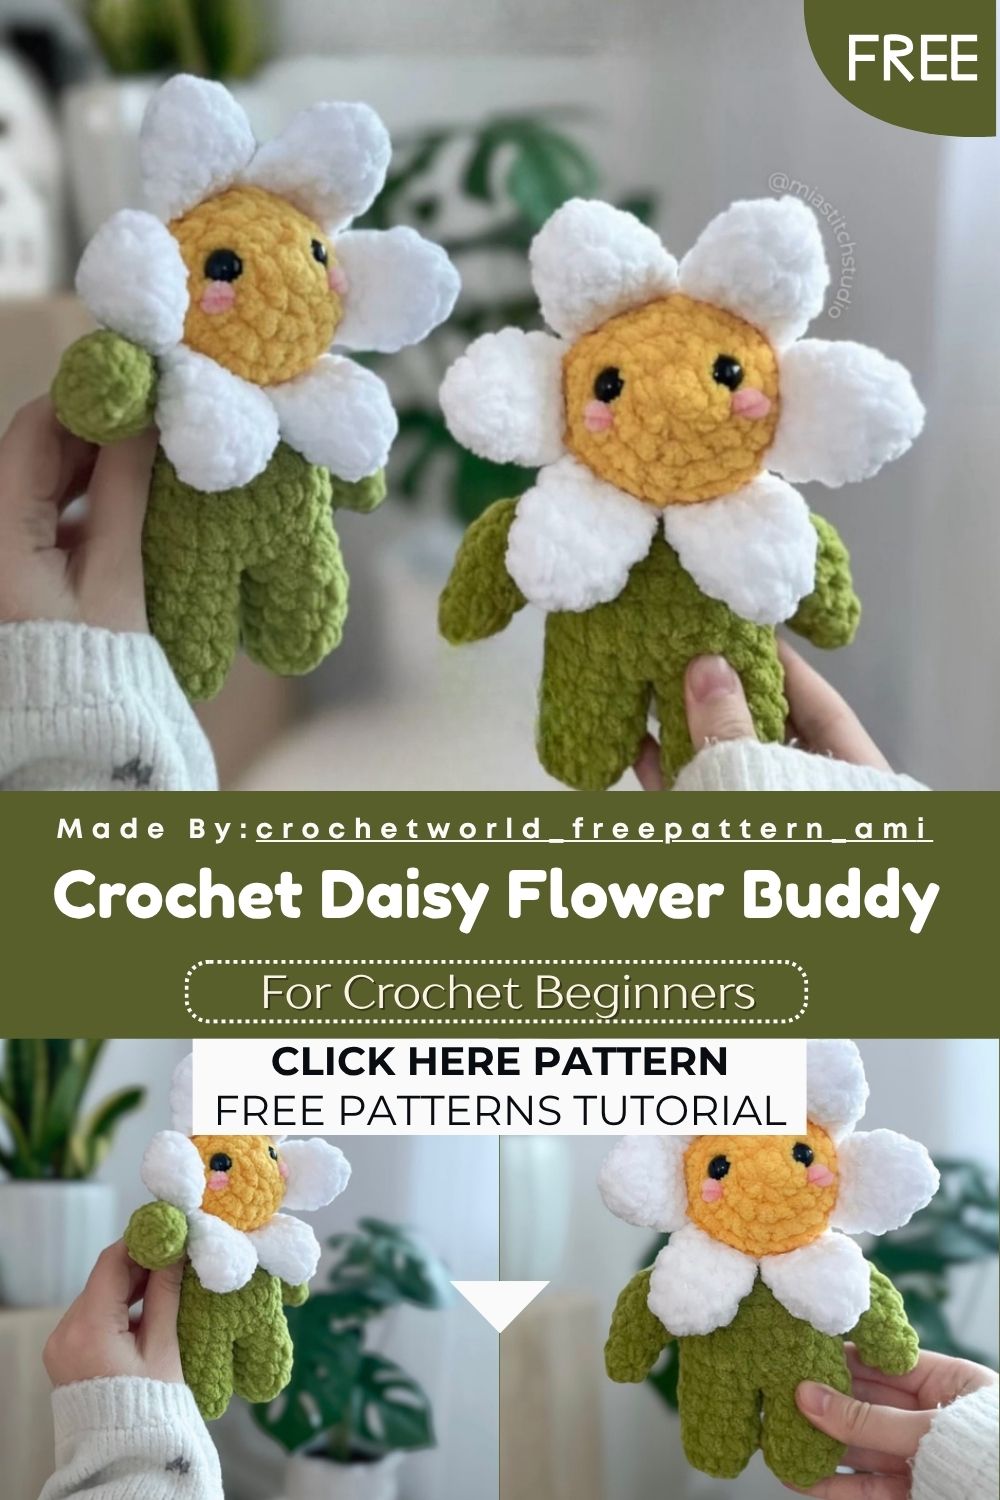
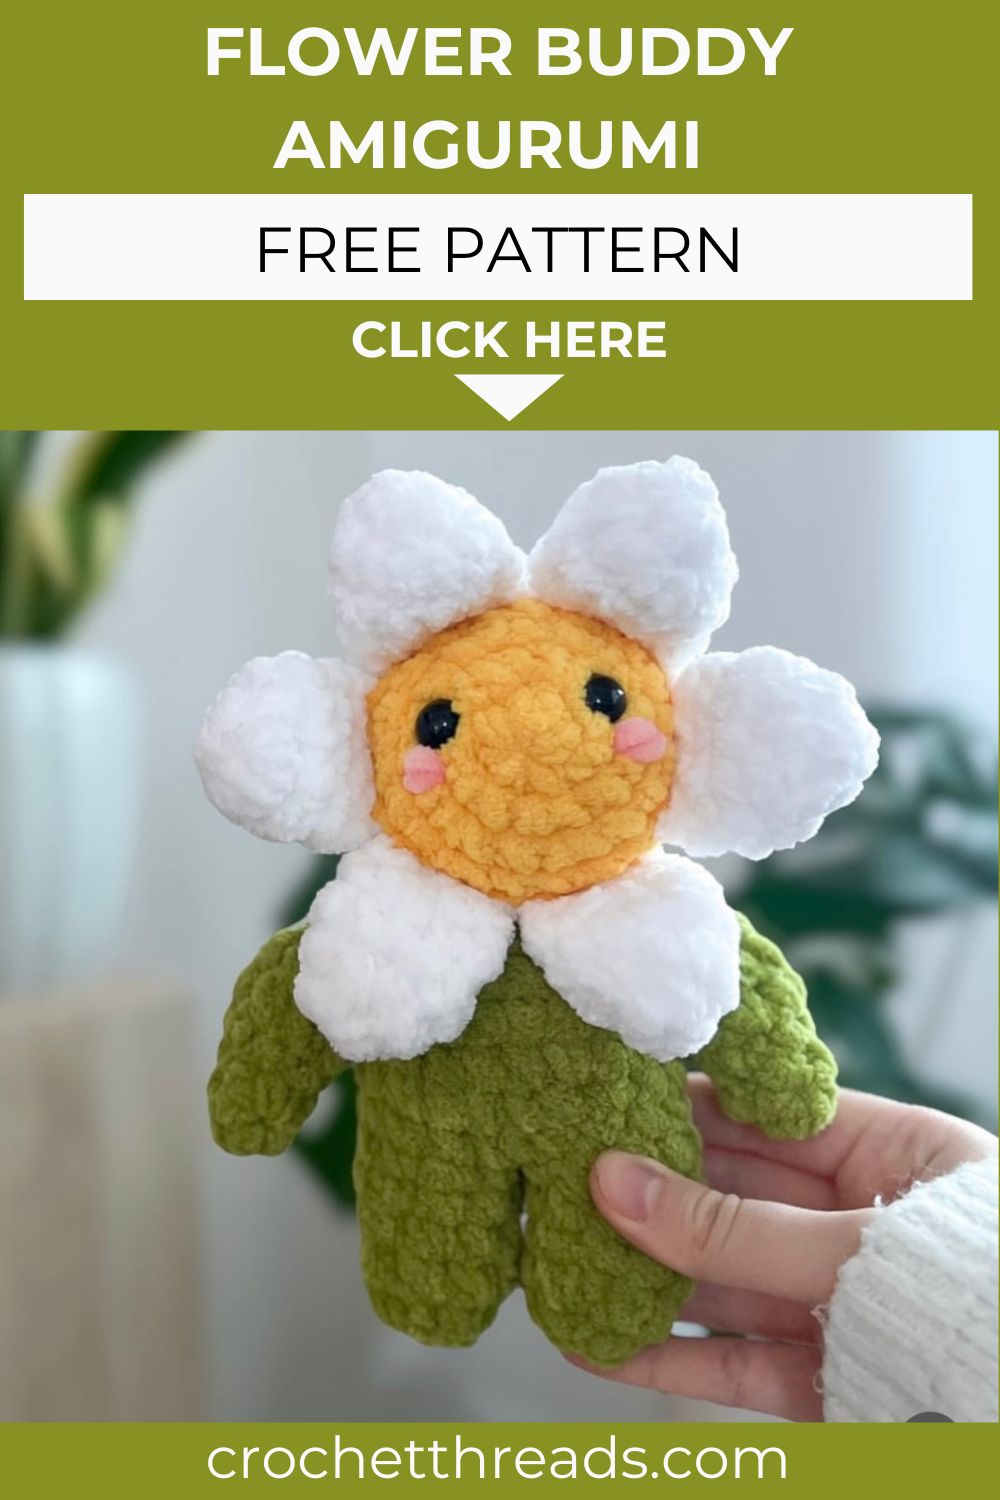
Crochet Daisy Flower Buddy Amigurumi Pattern for Home Accents
Want a cheerful crochet project that brightens any shelf? This Crochet Daisy Flower Buddy amigurumi blends a smiling yellow center with soft white petals and tiny green limbs. It works up fast and adds instant charm to your cozy home accents.
There’s something low-key magical about a flower that smiles back at you. This Daisy Flower Buddy uses super bulky chenille yarn, so the texture stays plush and the whole make feels squishy. You crochet six petals around a bright yellow center, then add green arms and legs for personality. Honestly, it suits beginners and seasoned crocheters alike, and it looks adorable on desks, shelves, windowsills, and any sunny reading nook.
Skill Level
This pattern suits confident beginners ready to move past basics. You should know magic rings, single crochet, increases, and invisible decreases. Working through both layers helps, but stays manageable.
Pattern Overview
Before you grab your hook, here’s the quick rundown of what you’ll build. This overview keeps the whole project clear in your head.
- The finished buddy combines a flower head, a body, arms, and legs into one cuddly piece.
- You work the yellow flower center first, then attach six white petals neatly around it.
- Green arms and legs give the daisy a playful, character-style look that feels alive.
- Chenille yarn keeps every part soft, plush, and surprisingly beginner-friendly to handle.
- The whole make stays small, so it usually finishes in a single cozy afternoon.
Special Techniques
This little Crochet Daisy Flower Buddy uses a handful of core amigurumi skills. Master these, and the rest of the rounds flow smoothly.
- Magic ring: It starts each piece tight, with no gap or hole in the center.
- Invisible decrease: This keeps your fabric smooth, so no bumpy bulges appear along the shaping.
- Working through both layers: You close flat petals and arms with a clean, tidy edge.
- Joining pieces mid-round: You attach arms and petals directly while crocheting, instead of sewing later.
- Safety eye placement: You set the face before final stuffing, so the expression stays centered.
Supplies
Gather everything first, and your build stays relaxed from start to finish.
- 5 mm crochet hook
- Super bulky chenille yarn (size 6):
- Alize Velluto Yellow #216
- Alize Velluto White #55
- Alize Velluto Green #11
- 12 mm safety eyes
- Scissors
- Polyester stuffing
- Stitch markers
- Sewing needle
- Optional: pink bulky yarn for blush
Abbreviations
Keep this handy while you read the rounds. It makes every instruction quick to follow.
- Ch – Chain
- Rnd – Round
- st – stitch
- sts – stitches
- Mr – Magic ring (or ch 2 and sc in the second ch from the hook)
- Sc – Single crochet
- Inc – Increase (two sc in same st)
- Dec – Decrease (invisible)
- Sl st – Slip stitch
- YO – Yarn over
- FO – Fasten off
The Crochet Daisy Flower Buddy Pattern
Now for the fun part. Work each section in order, and count your stitches after every round.
Arms (Make 2)
Crochet both arms in green yarn.
- Rnd 1: 4 sc in mr (4)
- Rnd 2: 4 sc (4)
- Rnd 3: (1 sc, Inc) x2 (6)
- Rnd 4: (2 sc, Inc) x2 (8)
- Rnd 5–6: 8 sc (8)
Stuff the arms lightly.
- Rnd 7: dec x4 (4)
Fold the arms flat, then work 2 sc through both layers to close the opening. Cut a short tail. You will sc the arms to the body later.
Legs (Make 2)
Crochet both legs in green yarn.
- Rnd 1: 6 sc in mr (6)
- Rnd 2: (1 sc, Inc) x3 (9)
- Rnd 3–5: 9 sc (9)
Sl st to finish the first leg and FO, leaving a short tail. Make the second leg by repeating Rnds 1–5. Do not FO. Stuff both legs, then continue to join them.
Body
You now connect both legs and build the body upward.
- Rnd 6: Ch 1. Join the first leg with 1 sc in the stitch next to the sl st, 8 sc around the first leg, 1 sc in the ch, 9 sc around the second leg, 1 sc in the ch (20)
- Rnd 7–9: 20 sc (20)
- Rnd 10: (2 sc, dec) x5 (15)
Stuff the body. In the next round, you will attach the arms. You may need to adjust their placement with one or two sc to align them on each side.
- Rnd 11: 2 sc, ARM with 2 sc, 6 sc, ARM with 2 sc, 3 sc (15)
Tie the yarn ends of the arms inside the body.
- Rnd 12: (1 sc, dec) x5 (10)
Finish stuffing the body. Sl st and cut the yarn, leaving a long tail to attach the flower center later.
Petals (Make 6)
Crochet all six petals in white yarn.
- Rnd 1: 5 sc in mr (5)
- Rnd 2: Inc in every st (10)
- Rnd 3: 10 sc (10)
- Rnd 4: (2 sc, dec) x2, 2 sc (8)
Do not stuff. Fold the petals flat, then work 4 sc through both layers to close the opening. FO, leaving a short tail. You will sc the petals to the flower center later.
Flower Center
Crochet the center in yellow yarn.
- Rnd 1: 6 sc in mr (6)
- Rnd 2: Inc in every st (12)
- Rnd 3: (1 sc, Inc) x6 (18)
- Rnd 4: (2 sc, Inc) x6 (24)
In the next round, you attach the petals to the flower.
- Rnd 5: PETAL 1 with 4 sc, PETAL 2 with 4 sc, PETAL 3 with 4 sc, PETAL 4 with 4 sc, PETAL 5 with 4 sc, PETAL 6 with 4 sc (24)
- Rnd 6–7: 24 sc (24)
- Rnd 8: (2 sc, dec) x6 (18)
Insert the safety eyes between Rnd 2 and Rnd 3, placed 4 stitches apart. A stitch marker should sit centered below the eyes. Optional: sew a little blush under the eyes. Stuff the flower center.
- Rnd 9: (1 sc, dec) x6 (12)
Common Mistakes to Avoid
Even quick makes have a few easy traps. Watch for these, and your daisy turns out crisp.
- Skipping stitch markers, then losing track of where each round begins.
- Overstuffing the petals, which makes them bulge instead of lying flat and tidy.
- Placing the safety eyes too late, after the opening has already closed.
- Crocheting too loosely, so the chenille shows gaps and the stuffing peeks through.
- Forgetting to leave long tails, which makes joining the flower and limbs harder.
Assembly
Once your pieces are ready, assembly pulls the whole buddy together. Follow this order for the cleanest result.
- Attach both legs first, then crochet the body rounds straight across them.
- Join the arms during Round 11, adjusting their placement for balance on each side.
- Secure all loose yarn tails inside the body before you close it up.
- Sew the finished flower center onto the body using the long tail you left.
- Add the optional pink blush under the eyes for an extra touch of charm.
Important Remarks
Keep these pointers close while you stitch. They make a real difference in the final look.
- Stuff firmly but gently, since chenille hides lumps far less forgivingly than regular yarn.
- Keep your tension even across all six petals, so they match in size.
- Count your stitches after every round to stop your count from drifting.
- Use a contrasting stitch marker on the center front, so your eyes stay aligned.
- Block lightly only if needed, because chenille rarely requires any blocking at all.
Conclusion
And that’s your Crochet Daisy Flower Buddy, ready to spread a little sunshine. Trust me, this cheerful make looks great as a handmade gift, a shelf companion, or a sweet desk friend. Because the pieces are small, you can whip up a whole bouquet of buddies in different shades. They also make lovely party favors, nursery accents, or a thoughtful surprise for a fellow crafter. Grab your chenille yarn, follow the rounds, and enjoy every squishy stitch along the way.