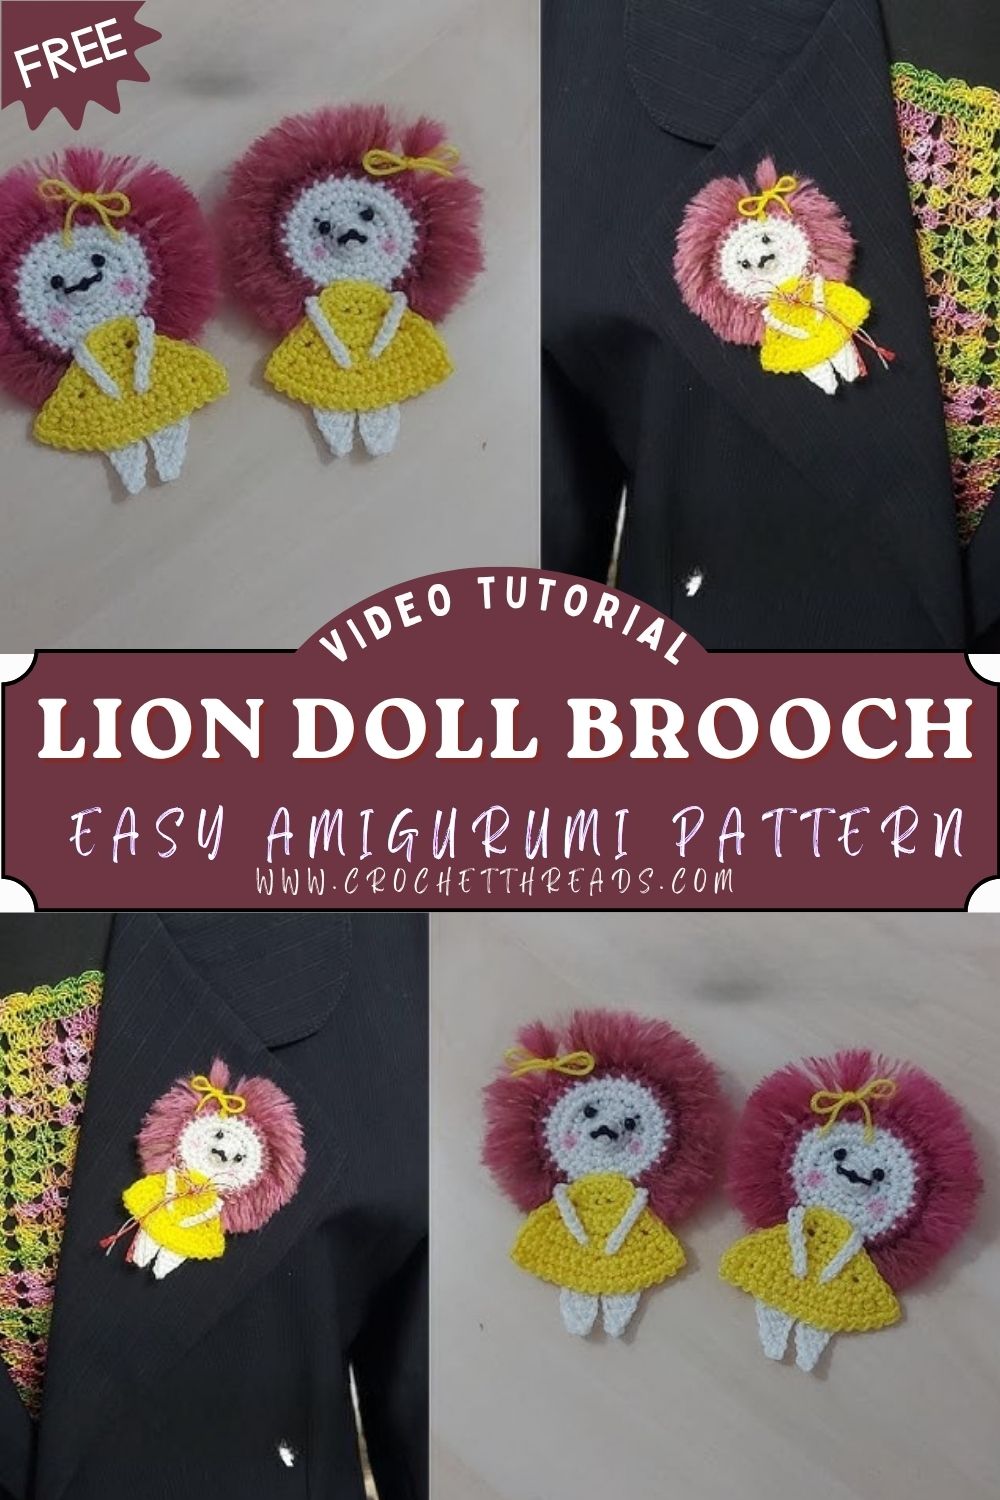
Uplifting Crochet Lion Doll Brooch Easy Amigurumi Pattern for Beginners
Cozy yarn, a sweet little face, and a fluffy mane create instant charm in a small project. Crochet Lion Doll Brooch Amigurumi brings that plush feeling into a wearable piece that looks adorable on everyday outfits.
Bright, happy details turn a simple project into a standout accessory. A crochet lion brooch like this pairs a soft lion amigurumi pattern with the fun of a wearable accessory, making a lovely, beginner-friendly brooch and a truly cute crochet animal to show off.
Crochet brooches and mini amigurumi accessories are trending because little handmade details feel personal. A small pin adds warmth to a plain jacket, makes a tote bag look special, and turns a simple scarf into something gift-worthy. Best of all, a brooch-style amigurumi is quick to finish and easy to carry, so it fits nicely into busy crafting days.
A lion design works especially well for a wearable because the round face reads clearly even at a small size, and the textured mane adds instant “wow” without complicated shaping. The tiny dress keeps the body lightweight and flat enough for pinning, while the bow makes it feel styled and playful. Perfect for jackets, backpacks, project bags, scarves, hats, party favors, and sweet handmade gifts.
Materials Needed
- Yarn
- Cream or white (face): 8 g
- Fluffy yarn for mane (pink or brown, faux fur or textured): 6 g
- Yellow (dress/body): 10 g
- Small amount of black yarn (facial details): 2 g
- Crochet hook: 2.25 mm to 3.0 mm (small hook helps keep stitches tight)
- Stuffing: 5 g (light amount only)
- Needle: tapestry needle for sewing
- Stitch marker
- Scissors
- Brooch pin backing: 25 mm to 30 mm bar pin (or locking pin back)
- Optional: ribbon bow (2 cm wide, 5 cm long), blush powder, or pink pastel chalk
Abbreviations
- MR = magic ring
- sc = single crochet
- inc = increase (2 sc in one stitch)
- dec = decrease (single crochet 2 together)
- sl st = slip stitch
- ch = chain
- BLO = back loop only
- FLO = front loop only
Skill Level
Beginner / Easy Beginner
Simple rounds for the face, a straightforward ruffle dress shape, and basic sewing. The mane looks fancy, but it is mainly texture and repetition.
Estimated Time
- Total time: 1.5 to 2.5 hours
- Face (head): 20 to 30 minutes
- Mane: 20 to 35 minutes
- Body + dress: 20 to 30 minutes
- Arms + legs: 15 to 20 minutes
- Assembly + brooch backing: 15 to 25 minutes
Important Notes Before Starting
- Work tight stitches so the brooch looks neat and firm.
- Use a small hook for clean detail at a small size.
- Add light stuffing only to keep the pin lightweight and flat.
- Take your time with feature placement (eyes, smile, bow) to achieve the cutest expression.
- Secure the brooch backing with strong thread, making extra passes.
Step-by-Step Pattern
Finished size: about 6-7 cm tall (depending on the yarn and hook).
Work in continuous rounds unless noted.
Face (Head)
- Create the round face
- Round 1: MR, 6 sc (6)
- Round 2: inc around (12)
- Round 3: (sc, inc) around (18)
- Round 4: (2 sc, inc) around (24)
- Round 5: sc around (24)
- Shape and soften the edge
- Round 6: (2 sc, dec) around (18)
- Round 7: sc around (18)
- Stuff lightly and close
- Add a small pinch of stuffing. Keep it soft, not puffy.
- Round 8: (sc, dec) around (12)
- Round 9: dec around (6)
- Fasten off, close the hole, weave in ends.
Eye placement tip:
- Mark positions between Rounds 4 and 5, about 5 to 6 stitches apart.
- Embroidered eyes allow more expression and keep the piece lighter than safety eyes.
Mane (Fluffy Circular Mane)
Two easy options work well. Pick the one that matches the yarn on hand.
Option A: Faux fur or fluffy yarn ring (simple and soft)
- With fluffy yarn, ch 26 and join to form a ring with a sl st (be careful not to twist).
- Round 1: ch 1, sc around the ring (26 sc).
- Round 2: (inc, sc) around (39) for a fuller circle.
- Fasten off, leave a long tail.
Attach the mane:
- Place the face centered on the mane ring.
- Sew around the edge of the face, catching the inner edge of the mane so the fluff frames the cheeks evenly.
- Keep it soft and even by checking the circle from the front after every few stitches.
Option B: Loop stitch mane (for cotton or acrylic yarn)
- Create a flat circle similar to the face, up to 24 stitches, then add a loop-stitch round for fluff.
- Loop stitch can be done by pulling a loop of yarn to the front before completing each sc.
Next, the tiny dress body adds a “doll” look while remaining brooch-friendly and lightweight.
Body + Dress
Use yellow yarn.
- Start at the neck
- Round 1: MR, 6 sc (6)
- Round 2: inc around (12)
- Round 3: sc around (12)
- Flare into a simple dress (flat and cute)
- Round 4: (sc, inc) around (18)
- Round 5: (2 sc, inc) around (24)
- Round 6: sc around (24)
- Add a small decorative edge
- Round 7: (sl st, ch 1, sl st) in each stitch around for a tiny scallop look (optional).
- Fasten off, leave a long tail for sewing.
Brooch-friendly tip:
- Skip heavy stuffing in the body. A flat dress sits better on clothing and stays lightweight.
Arms
Make 2 in yellow (or cream for cute contrast).
- Ch 7
- Starting in the second chain from the hook: sc 6
- Fasten off, leave a tail for sewing.
- Optional: fold the arm slightly and add 1 or 2 stitches at the top to keep the shape neat.
Legs
Make 2 in yellow.
- Ch 6
- Starting in the second chain from the hook: sc 5
- Fasten off, leave a tail.
After that, facial details bring the lion to life.
Facial Details
- Eyes
- With black yarn, embroider two eyes in the marked spots.
- A simple style: small vertical stitches or tiny circles.
- Optional highlight: add one tiny white stitch on the top corner of each eye.
- Nose and smile
- Stitch a small triangle or rounded nose centered low on the face.
- Add a short curved smile line beneath.
- Optional blush
- Lightly add blush to cheeks for a warm, friendly look.
Bow Detail
Two easy choices, depending on the style wanted.
Crocheted bow
- Ch 8
- Row 1: sc in second ch from hook and across (7 sc)
- Rows 2 to 4: ch 1, turn, sc across (7 sc)
- Fasten off, leaving a long tail.
- Wrap the middle several times with the tail to pinch into a bow shape.
- Sew a bow to the top side of the head, slightly off-center.
Ribbon bow
- Tie a small ribbon bow and stitch it securely to the mane.
Assembly
- Join head to body
- Sew the top of the dress body to the bottom of the head.
- Add only a tiny bit of stuffing behind the head area if a little dimension is desired.
- Attach arms
- Sew the arms to the sides where the head meets the dress.
- Keep arms symmetric and slightly angled forward for a “hug” look.
- Attach legs
- Sew legs to the bottom of the dress, spaced evenly.
- A short gap between the legs looks cutest in a mini-doll style.
- Attach bow
- Stitch the bow securely through the mane and into the head stitches.
- Attach the brooch pin backing
- Sew the pin to the back of the body area, not the fluffy mane.
- Use a strong thread or matching yarn, and stitch through the pinholes multiple times.
- Add extra stitches across the pin bar for stability.
Balance check:
- Hold the brooch upright and make sure the head is centered above the dress.
- Adjust with a few extra stitches before tying off.
Finishing Touches
- Fluff and shape the mane with fingers, then trim stray fibers only if needed.
- Make final stuffing adjustments so the brooch stays light and neat.
- Pull all loose ends to the back and weave in securely.
- Check the pin attachment again with a gentle tug.
Tips for Beginners
- Use tight stitches and a smaller hook to keep the face smooth.
- Work slowly on the mane attachment so the circle stays even.
- For neat sewing, pin pieces in place first, then sew with small stitches.
- Eye placement looks best when counted and measured rather than guessed.
Common Mistakes
- Loose stitches: gaps show, a nd the brooch looks messy. Fix with a smaller hook and tighter tension.
- Uneven face: missed increases cause bumps. Count stitches each round.
- Incorrect placement: eyes or bow too great or too close changes the expression. Mark spots before stitching.
- Overstuffing: the brooch becomes bulky and droops on the fabric. Use only a light amount.
- Weak pin attachment: The pin comes loose over time. Stitch through holes many times and secure knots firmly.
Customization Ideas for ( Crochet Lion Doll)
- Switch dress colors: mint, coral, lilac, or classic red.
- Add accessories: a tiny scarf, a micro hat, or a little heart patch on the dress.
- Create a matching set of lion, bear, bunny, and cat brooches in the same doll style.
- Turn it into a keychain by sewing a small loop at the top and adding a clasp.
Conclusion
Soft texture, a round face, and a sweet little dress make a brooch feel special and personal. Crochet Lion Doll Brooch Amigurumi offers a fun mix of mini toy charm and wearable style, perfect for brightening jackets, bags, and gift wrapping.
Play with mane colors, switch up the bow, and try different dress shades to make the lion feel like a true one-of-a-kind accessory. Each tiny stitch adds personality, and the finished brooch is ready to travel everywhere.