Crochet Long-Limbed Lemon Pattern for Car Hanging
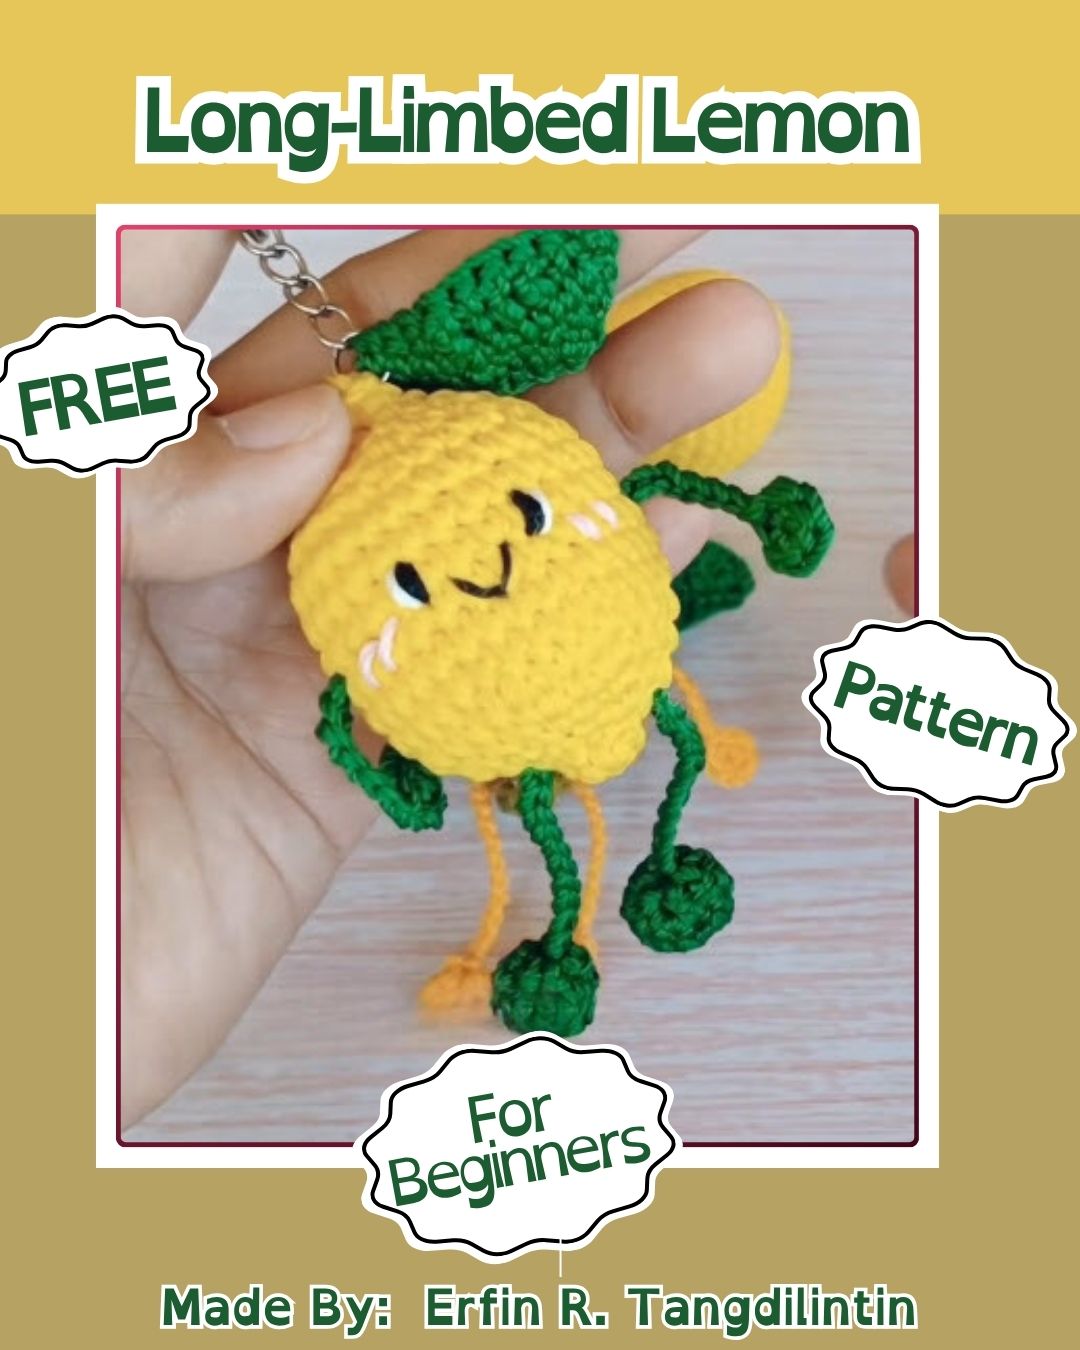
A round yellow lemon face paired with impossibly long, dangling limbs makes this little Crochet Long-Limbed Lemon one of the quirkiest car accessories a crocheter can create. Anyone drawn to fruit-themed amigurumi, quirky car mirror charms, or gift-makers hunting for something genuinely different will find this pattern instantly fun to work through. It’s a project that turns a simple round shape into a character bursting with playful personality.
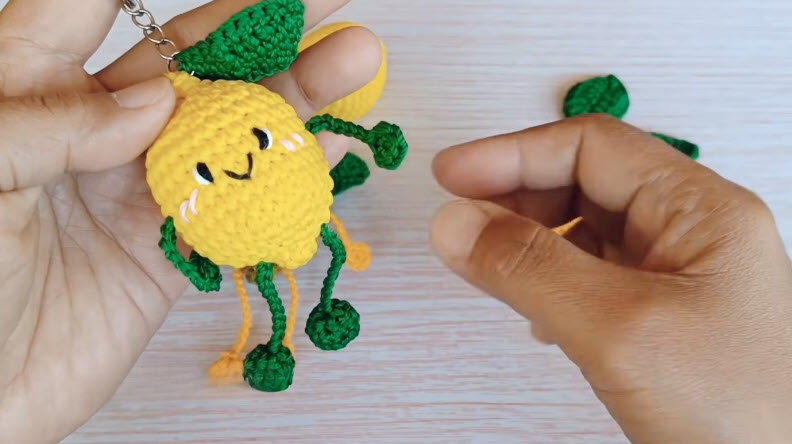
Built around a plump, rounded lemon body finished with a sleepy, smiling embroidered face, this Crochet Long-Limbed Lemon design leans fully into its charming, cartoon-like appeal. Long, thin green limbs dangle loosely from the body, giving the finished piece movement and a slightly goofy, endearing wobble whenever it swings from a car mirror.
What sets this pattern apart is that dramatic limb length, since most fruit amigurumi keep their proportions compact while this design stretches the arms and legs out for a distinctly playful, elongated silhouette. That extra length also means the limbs sway naturally with motion, making this lemon a genuinely fun accessory to watch dangling from a rearview mirror rather than a static decoration.
Project Details
- Skill Level: Beginner to Intermediate
- Finished Size: Approximately 4–5 inches including dangling limbs
- Estimated Time Required: 3–4 hours
- Recommended Yarn Weight: DK or worsted weight
- Crochet Hook Size: 2.5mm–3mm for a tight, durable fabric
Materials Needed
- Yarn in yellow (for the lemon body)
- Yarn in green (for the long limbs and leaf details)
- Small amount of orange or white yarn (for facial blush details)
- Crochet hook (2.5mm–3mm)
- Fiberfill stuffing
- Tapestry needle
- Black embroidery thread (for the facial features)
- Keyring or car mirror hanging clasp
- Scissors
Crochet Stitches & Techniques
- Magic Ring
- Chain Stitch
- Single Crochet (sc)
- Increase (inc)
- Invisible Decrease (invdec)
- Fastening Off
- Sewing Pieces Together
Keeping the stitch list straightforward here means the challenge lies more in the shaping and assembly than in learning new techniques, making this approachable for confident beginners.
Pattern Instructions
This lemon comes together through several individually crocheted pieces, including the body, limbs, and leaf details, before everything joins into the finished hanging character. Working through the stages below in order keeps each piece consistent and makes the final assembly far smoother once every part is ready.
Step 1: Starting a Limb With a Foundation Chain
Begin by working a small foundation into your green yarn, anchoring your hook before starting the narrow rounds that will build one of the long, thin limbs. Keep tension snug here, since these limb pieces stay slim throughout their length rather than widening like a typical amigurumi arm or leg. This narrow starting point sets the pace for the entire limb’s length.
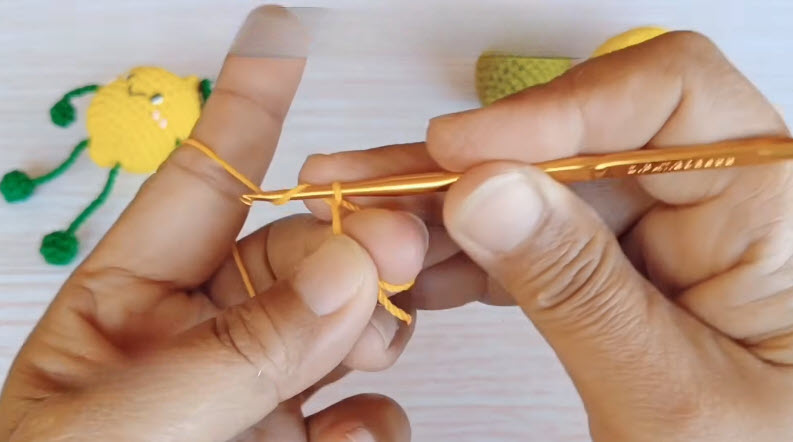
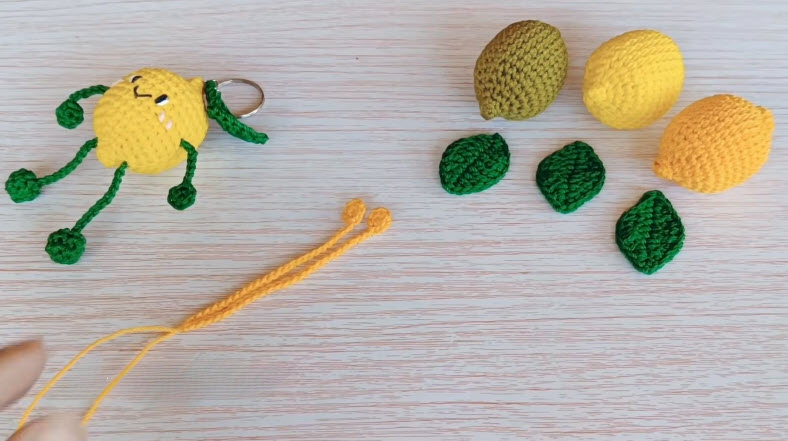
Step 2: Completing the Limbs and Reviewing the Fruit Pieces
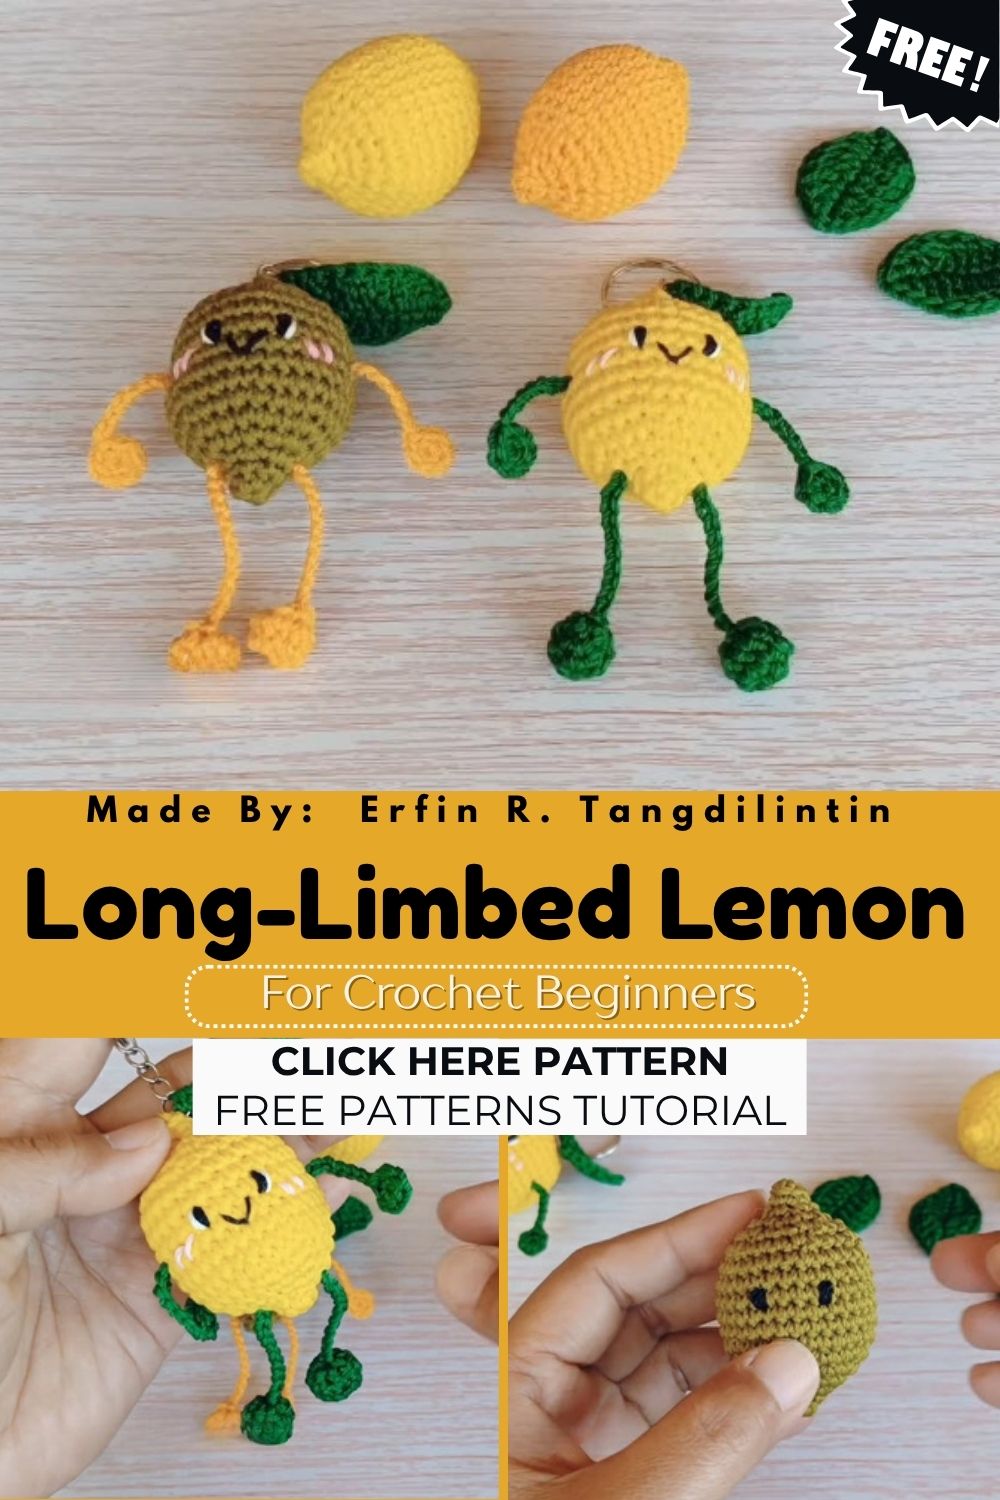
Continue working the limb piece to its full length, then fasten off and set it aside alongside any other completed limbs and fruit pieces. Lay your finished lemons, leaves, and limbs out together to get a sense of proportion before moving into the main body construction. This checkpoint helps confirm that limb length looks balanced against the size of the rounded fruit body before everything gets joined together.
Step 3: Starting the Main Lemon Body
Form a magic ring using your yellow yarn and begin working the opening rounds that will grow into the lemon’s rounded body. Increase steadily through the early rounds to build outward roundness, keeping tension consistent so the shape grows smoothly rather than unevenly. This forms the central piece that every other element, from limbs to leaves, will eventually attach to.
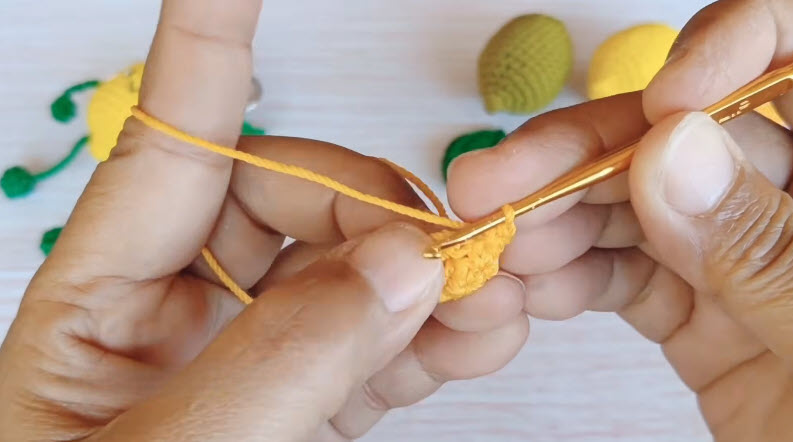
Step 4: Shaping the Body and Adding the Face
Continue working the body rounds, decreasing gradually as the piece narrows toward the top or bottom point that gives the lemon its characteristic oval shape. Stuff the body firmly as you close the final rounds, then embroider a sleepy, smiling face using black thread for the eyes and mouth. Add a touch of orange or white stitching on the cheeks for that warm, blushed expression that gives the lemon its charming personality.
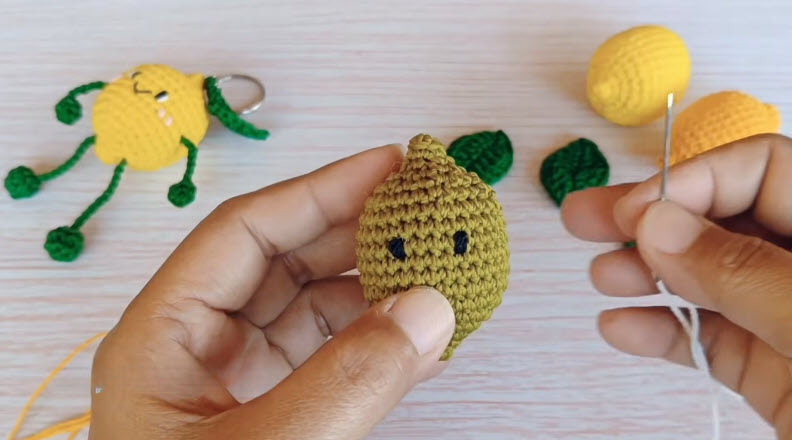
Step 5: Attaching the Limbs and Leaves
Sew each long limb onto the underside and sides of the lemon body, positioning them so they hang loosely and naturally rather than sitting stiff against the fruit. Attach the leaf pieces near the top of the body, arranging them so they frame the hanging clasp attractively. Take your time checking that the limbs dangle evenly on both sides for a balanced, symmetrical finished look.
Joining All Pieces
Double-check that every limb, leaf, and facial detail sits securely attached before moving to the final step, giving each piece a gentle tug to confirm it won’t come loose with regular handling. Adjust limb positioning slightly if the finished character looks lopsided when held up by its hanging point.
Final Assembly
Weave in every loose yarn end neatly through the back of the stitching, trimming excess close to the surface. Attach the keyring or car mirror clasp securely at the top of the body, giving it a firm tug to confirm it holds before the finished lemon is ready to hang and sway from its new home.
Tips for Success
- Keep limb pieces slim and even in tension throughout their entire length.
- Lay all pieces out together before assembly to check proportions ahead of time.
- Stuff the body firmly enough to hold its shape without over-stuffing and losing the oval silhouette.
- Embroider facial features carefully, since they define most of the character’s expression.
- Attach limbs loosely enough that they swing naturally rather than sitting rigid.
- Reinforce the hanging clasp attachment point with extra stitches for durability.
Personalization Ideas
Swapping the classic yellow for a lime green or orange citrus shade instantly turns this into a completely different fruit character using the same construction technique. A whole hanging set featuring a lemon, lime, and orange together makes for a fun, colorful car accessory trio.
Adding a tiny embroidered wink or a different facial expression changes the character’s personality entirely, and a mini version stitched in fingering weight yarn works beautifully as a bag charm instead of a car accessory. Attaching a small bell to one of the limbs also adds a playful jingling detail as the lemon sways.
Common Mistakes to Avoid
- Uneven limb lengths: Measure each finished limb against the others before attaching them.
- Overstuffed body: Add fiberfill gradually to preserve the lemon’s characteristic oval shape.
- Off-center facial features: Plan placement with pins or light marks before embroidering permanently.
- Stiff limb attachment: Sew limbs on loosely enough to allow natural swinging movement.
- Weak hanging point: Reinforce the clasp attachment with several extra stitches for long-term durability.
Frequently Asked Questions
What yarn weight works best for this Crochet Long-Limbed Lemon pattern?
DK or worsted weight yarn holds the rounded body shape well while keeping the limbs manageable to work with.
How long does this project usually take to complete?
Most crocheters finish within three to four hours, often working the pieces across a couple of sessions.
Can I make the limbs shorter if I prefer a more compact look?
Yes, simply reduce the number of rounds worked on each limb before fastening off.
Is this Crochet Long-Limbed Lemon pattern good for someone newer to amigurumi?
Yes, since the individual pieces are small and simple, it’s a manageable project for building confidence with assembly.
What’s the best way to keep both sides of limbs symmetrical?
Count your rounds carefully on each limb and compare them side by side before attaching to the body.
Can I turn this into a keychain instead of a car hanger?
Yes, simply swap the car mirror clasp for a standard keyring attachment.
How do I keep the limbs from tangling during use?
Attach them with enough spacing around the body so they hang independently rather than crossing over each other.