Chunky Crochet Baby Shark Plushie & Pattern for All Levels
Bulky yarn is what makes this design especially quick and easy to work up. It builds volume in fewer rounds compared to standard worsted-weight yarn, letting the soft, stuffed body take shape fast. That same quality makes it a great pick for a quick weekend project, an adorable kids’ gift, nursery decor, or anyone drawn to sea creature designs.
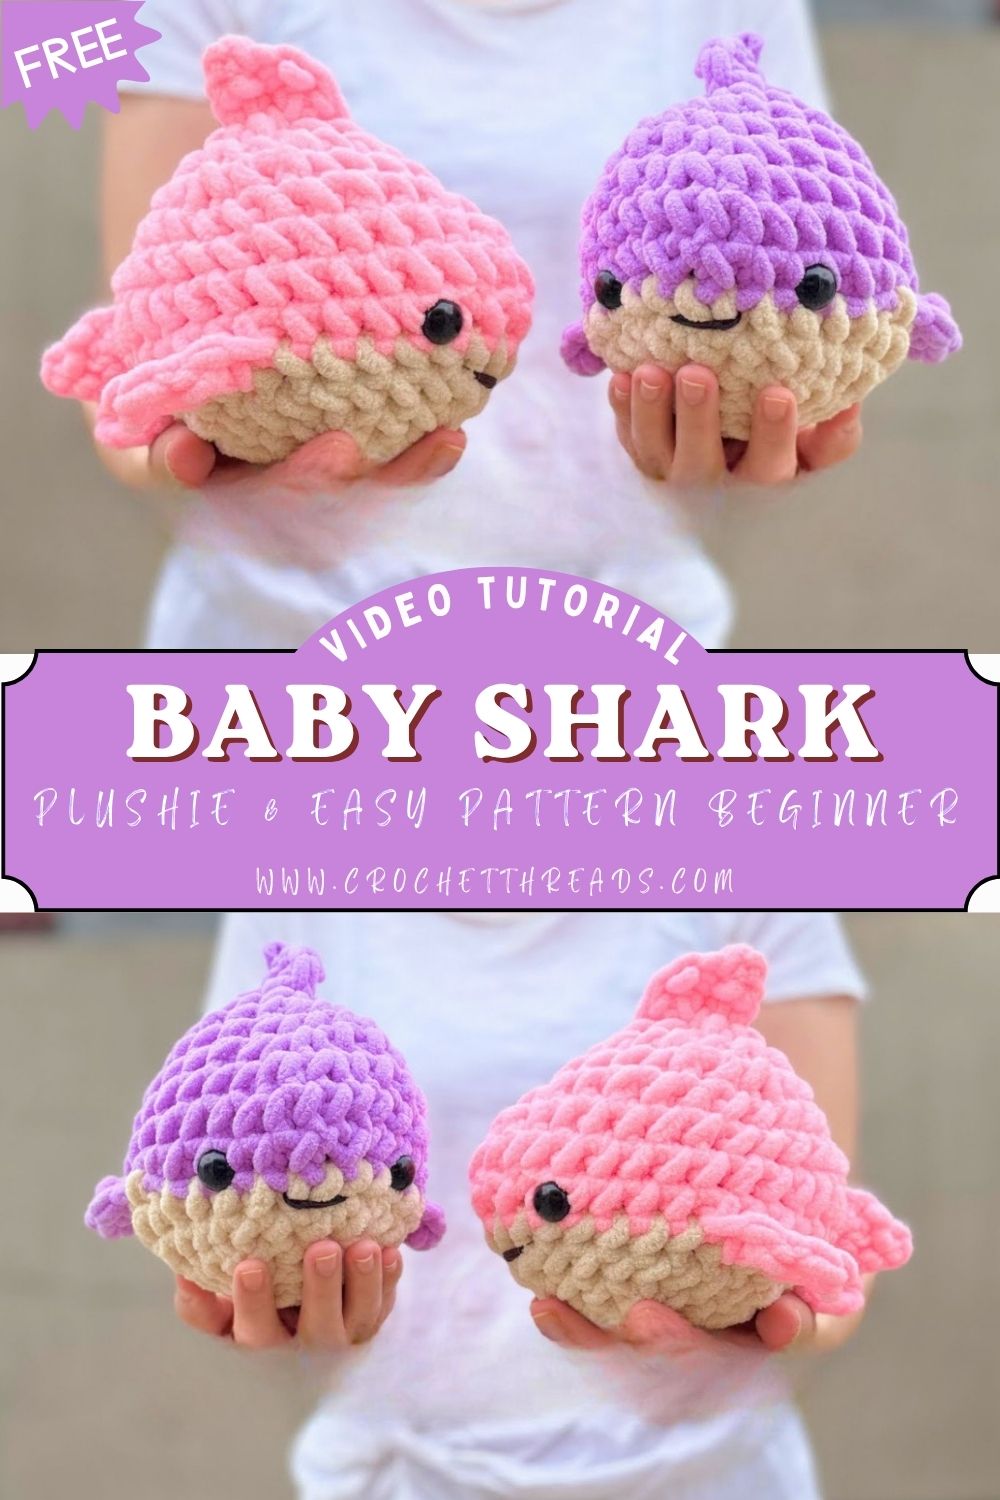
Despite its plush, oversized look, the construction stays refreshingly simple. Basic increases and decreases shape the body, fins attach with minimal fuss, and there’s no complicated colorwork to slow you down. Newer crocheters get a confidence boost, while experienced makers get a satisfying, low-stress project to enjoy between more demanding patterns.
Project Details
- Skill Level: Beginner to Intermediate
- Finished Size: Approximately 10–12 inches long
- Estimated Time Required: 4–6 hours
- Recommended Yarn Weight: Bulky (Weight 5) or Super Bulky (Weight 6)
- Crochet Hook Size: 6.5mm (K) or 8mm (L), depending on yarn thickness
Materials Needed
Gathering supplies ahead of time keeps the whole project moving smoothly.
- Bulky-weight yarn in gray or blue for the body
- Small amount of white yarn for the belly and teeth
- 6.5mm or 8mm crochet hook
- Two 12–15mm safety eyes
- Fiberfill stuffing
- Tapestry needle for sewing and weaving in ends
- Stitch markers
- Scissors
- Optional: felt scraps for extra facial details or a small bow for personalization
Crochet Stitches & Techniques
Nothing on this list should intimidate a beginner, but a quick refresher never hurts.
- Magic Ring (MR)
- Chain Stitch (ch)
- Slip Stitch (sl st)
- Single Crochet (sc)
- Increase (inc)
- Invisible Decrease (inv dec)
- Color Changes
- Fastening Off
- Sewing Pieces Together
Single crochet forms the backbone of nearly every round, so comfort with that one stitch carries a maker through almost the entire pattern.
Pattern Instructions
Creating the Main Body
Start with a magic ring and 6 sc into it. From there, increase every round until the body reaches its widest point, then work several rounds even to build height and depth. Chunky yarn fills out the shape fast, so it’s easy to see the shark’s silhouette taking form within the first few rounds.
Round 1: 6 sc in MR (6) Round 2: Inc in each st (12) Round 3: Sc, inc repeat around (18) Round 4: 2 sc, inc repeat around (24) Round 5: 3 sc, inc repeat around (30) Rounds 6–14: Sc around, even (30)
Begin decreasing gradually once the body reaches its intended length, tapering toward the tail end while stuffing firmly as the opening narrows.
Shaping the Head and Snout
The head blends directly into the body rather than attaching as a separate piece, which keeps the finished plush sturdy and seam-free at the neck. Widen the front rounds slightly to form the rounded snout, then taper back in before placing the safety eyes. Position the eyes a few rounds back from the nose tip, spaced evenly for a friendly, symmetrical expression.
Making the Tail Fin
Work the tail as a flattened triangle attached at the narrow end of the body. Chain a small foundation row, build up in half double crochet for extra body, then decrease sharply at the top to create the classic upright shark tail silhouette. A light single-crochet border around the edge keeps everything neat and prevents curling.
Crafting the Side Fins and Dorsal Fin
Small triangular pieces worked flat and folded slightly before sewing give the side fins their natural curve. The dorsal fin follows the same basic shape but stands taller and attaches along the center of the back. Pin all three fins in place before stitching so the proportions look balanced from every angle.
Adding Facial Features
White yarn shapes the belly patch and a simple curved mouth, giving the plush its signature cheerful grin. Small white triangles or straight stitches along the mouth line create playful teeth without adding bulk. Keep stitches small and controlled here, since facial details make the biggest difference in how expressive the final toy looks.
Joining All Pieces
Thread a tapestry needle and attach the tail, fins, and belly patch using small, even stitches that catch only a few strands of yarn on the body’s surface. Working from the inside out on visible seams helps hide the thread path almost completely.
Final Assembly
Give the body one last firm stuffing check before closing the final round. A gentle squeeze test at this stage reveals any soft spots that need topping off. Close the opening with an invisible decrease or a whip stitch cinch, weave in every loose end, and the shark plushie is officially ready to swim.
Tips for Success
- Count stitches at the end of every round, especially during increase rounds
- Use a stitch marker on round one and move it up each round to avoid losing your place
- Stuff a little at a time rather than all at once for even firmness
- Pull yarn tails to the inside before trimming to keep the surface clean
- Block fins lightly with your fingers before sewing for a natural curve
- Sew pieces on before fully closing the body opening, since it’s easier to work with the plush still slightly open
Personalization Ideas
- Swap gray or blue for pastel shades to make a nursery-friendly version
- Add a tiny knit or crochet bow for a girly twist
- Create a mini keychain-sized version using worsted-weight yarn and a smaller hook
- Go jumbo by doubling the yarn strands for an oversized floor pillow shark
- Give it a goofy, open-mouthed expression instead of a closed smile for extra character
- Stitch a small heart or star onto the belly for a seasonal or gift-specific touch
Common Mistakes to Avoid
Losing track of stitch count during increase rounds ranks among the most common slip-ups, and it usually shows up as a lopsided body later on. Marking the beginning of each round solves this almost instantly.
Underestimating stuffing needs is another frequent issue. Bulky yarn stretches more than finer weights, so a plush that looks full while stuffing can end up saggy once it settles. Erring on the firmer side prevents that disappointment.
Finally, rushing the fin placement leads to a shark that looks off-balance in photos even if it feels fine in hand. Taking an extra minute to pin and step back before sewing saves a lot of unpicking later.
Frequently Asked Questions
What yarn works best for this Crochet Baby Shark pattern?
Bulky or super bulky acrylic yarn holds shape well and keeps the project affordable, though chenille yarn adds an extra-soft texture if you don’t mind a slightly fuzzier finish.
Can I make this with worsted-weight yarn instead?
Yes, though the finished size will shrink and stitch counts may need slight adjustment to keep proportions balanced.
Is this Crochet Baby Shark pattern safe for babies?
Safety eyes and small parts make this best suited for children old enough not to mouth toys. For infants, embroider the facial features instead of using plastic eyes.
How much yarn do I need?
Roughly one to two skeins of bulky yarn for the body, depending on brand and yardage, plus a small amount of white for accents.
Can I felt the eyes on instead of using safety eyes?
Absolutely. Felt circles sewn or glued on work well for a softer, baby-safe alternative.
Why is my Crochet Baby Shark body lumpy?
Uneven stuffing is almost always the cause. Removing the stuffing and redistributing it in smaller handfuls usually fixes the shape.
Can this pattern be turned into an ornament or keychain?
Yes, simply scale down using a smaller hook and thinner yarn, and add a loop or clasp during the final assembly step.
Conclusion
Few amigurumi projects deliver this much personality for so little effort, and that combination makes the Crochet Baby Shark plushie worth adding to any crochet queue. Whether it becomes a nursery decoration, a thoughtful handmade gift, or a fun stash-buster, this pattern rewards makers of every skill level with a toy that looks far more impressive than the time it takes to make. Grab a hook, pick a favorite shade of gray or blue, and give this playful little swimmer a chance to come to life in your hands. Once finished, share a photo of your creation and inspire the next maker to dive in too.