Crochet Pumpkin Coaster Spice Cup for Halloween & Fall
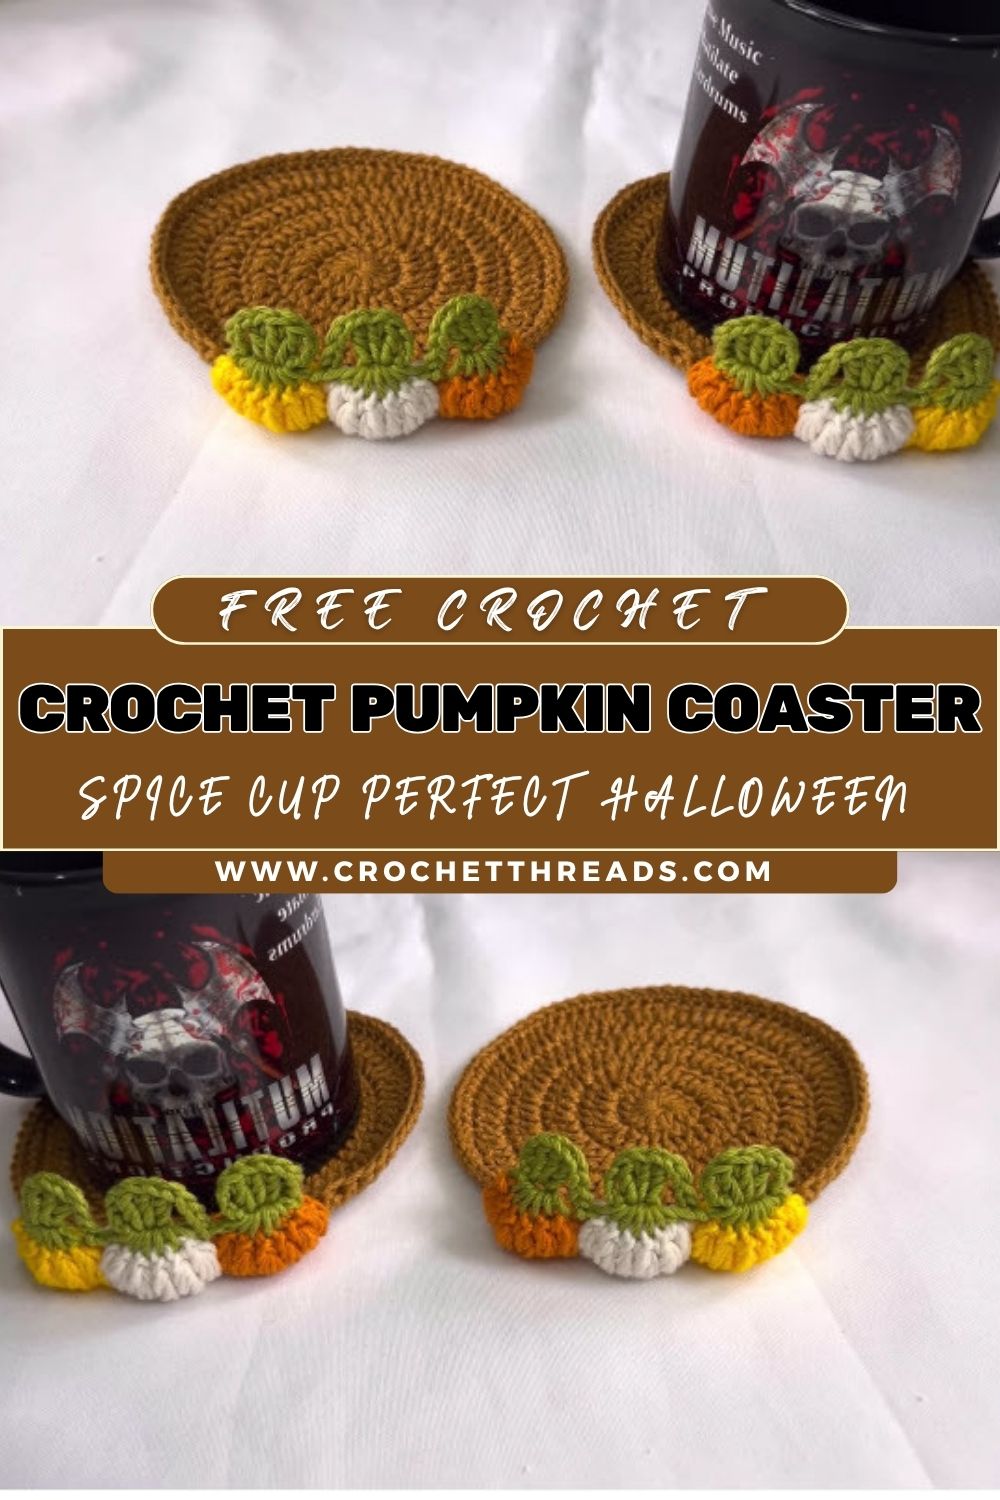
Warm spiced cider steams in your favourite mug while a cheerful little Crochet Pumpkin Coaster Spice Cup sits underneath, catching every drop and adding a burst of autumn charm to your table. Grab a hook and orange yarn, because a cozy crochet coaster is calling.
Beyond looking adorable, this pumpkin coaster solves a real problem: protecting wooden tables and countertops from hot mugs during chilly fall mornings. Built specifically to cradle a small spice cup or mug snugly, its ribbed shape keeps drinks steady while its crochet pumpkin coaster design brings festive texture to any kitchen counter or coffee bar throughout Halloween season. It suits fall gatherings, cozy coffee corners, or a fall home decor hostess gift especially well.
About This Crochet Pattern
Picture a squat, rigid pumpkin shape flattened just enough to sit stable under a cup, stitched in rounds of pumpkin-orange yarn with a stubby green stem poking out the top. Charm radiates from every curve, and beginners tend to fall for its simplicity almost instantly.
Difficulty stays approachable throughout, since the coaster relies on basic single crochet worked in a spiral, with only light shaping needed to create the rigid pumpkin sections. Fall decor lovers, gift-makers, and anyone wanting a quick weekend project will find plenty to enjoy here.
Project Details
- Time Box: Prep 5 minutes, Stitching 45–60 minutes, Finishing 10–15 minutes
- Finished Size: Approximately 4 inches in diameter
- Recommended Yarn Weight: Worsted weight (Medium, #4)
- Crochet Hook Size: 4.0mm (G/6) or size needed to achieve gauge
Materials Needed
- Worsted weight yarn in pumpkin orange (main color)
- Small amount of green yarn for the stem
- 4.0mm crochet hook
- Tapestry needle
- Scissors
- Stitch marker
- Small amount of fiberfill (optional, for a slightly padded stem)
Crochet Stitches & Techniques
- Magic Ring
- Chain Stitch
- Single Crochet
- Slip Stitch
- Increase
- Invisible Decrease
- Front Post/Back Post Single Crochet (for the pumpkin ridges)
- Fastening Off
- Sewing Pieces Together
Nothing fancy sneaks into the pumpkin coaster spice cup, which keeps the whole project friendly for anyone still building confidence with a hook.
Pattern Instructions
Creating the Base
Start with a magic ring and work six single crochet stitches into it, pulling the loop closed to form a tight center circle. Increase evenly across the following two rounds until the base reaches roughly 3.5 inches across, then work one round even without increasing to set the flat foundation.
Building the Ridged Sides
Switch to front post and back post single crochet stitches, alternating every few stitches around the round to create raised pumpkin ridges. Two to three rounds worked this way give the coaster its signature textured, segmented pumpkin look without adding real height.
Shaping the Rim
Work one final round of regular single crochet around the edge to smooth out the rim and keep the coaster lying flat under a cup. A slip stitch join finishes the round cleanly before fastening off.
Making the Stem
Chain four and join with a slip stitch to form a small ring, then work single crochet around for two short rounds using green yarn. Stuff lightly if extra dimension feels appealing, then fasten off, leaving a long tail for sewing.
Joining All Pieces
Position the stem at the center top of the pumpkin coaster and sew it securely in place using the tapestry needle. Weave in every loose end afterward so the underside sits smooth against the table.
Common Mistakes to Avoid
Skipping stitch markers ranks among the most frequent slip-ups, since spiral rounds blur together fast without one and rows quietly drift off track. Uneven tension across ridge rounds often flattens the pumpkin texture, so keeping front post and back post stitches consistent in height matters more than it might seem. Rushing the final rim round tends to leave a wavy edge instead of a flat coaster, so slow down and check the shape lies flush against a table before fastening off.
Uses & Benefits
Functional decor rarely gets cuter than a coaster shaped like a tiny pumpkin, ready to protect wood surfaces from a warm spice cup or seasonal latte. Kitchen counters, coffee bars, and Halloween party tables all benefit from a handmade touch that costs pennies in yarn yet delivers charm for years. Gift-giving becomes effortless too, since a set of three or four pumpkin coasters wrapped with twine makes a thoughtful, low-cost fall present.
Helpful Beginner Tips
- Count stitches after every round to catch mistakes early
- Keep tension relaxed but consistent across ridge stitches
- Use a stitch marker on round one and move it up each round
- Block the coaster lightly if edges curl after finishing
- Weave in ends through several stitches to prevent unraveling
Assembly
Layer the finished rigid pumpkin body flat, center the stem carefully, and pin it in place before stitching to keep alignment even. A whip stitch around the stem base secures it firmly while leaving the coaster surface smooth enough to sit flush under a mug.
Where Can You Use This
A spice cup coaster earns its keep on a kitchen counter beside the coffee maker, tucked under mugs during Halloween movie nights, or arranged along a fall-themed table runner for guests. Office desks welcome one too, protecting laptops and papers from stray drips during a busy autumn workday.
Why Beginners Will Enjoy Crocheting This
Simple stitches carry the entire project, so newer crocheters practice increases, decreases, and post stitches without tackling anything overwhelming. Quick completion time also means a finished, giftable project shows up within a single evening, which builds confidence fast.
Tips and Tricks
Swapping in a slightly thicker yarn adds extra ridge definition, while a smaller hook tightens stitches for a firmer, sturdier coaster. Working ridges in two contrasting shades of orange creates dimension without any extra stitch changes needed.
Why This Pumpkin Coaster Is Trending This Season
Cozy fall aesthetics keep dominating home decor feeds, and small handmade accents like Crochet Pumpkin Coaster fit perfectly into that warm, seasonal mood. Quick-to-finish projects also trend heavily among crocheters looking for satisfying weekend makes, and a pumpkin coaster checks every box: fast, festive, and genuinely useful.
Personalization Ideas
Try Seasonal Color Swaps
Swap orange for deep burgundy, mustard yellow, or forest green to match a broader autumn color scheme.
Add a Tiny Face
Stitch or embroider a simple jack-o’-lantern face onto one coaster for a playful Halloween twist.
Make a Mini Version
Scale down the hook size and stitch count slightly for a coaster sized for espresso cups.
Turn It Into an Ornament
Add a small loop of yarn to the stem and hang finished pumpkins on a fall-themed wreath or tree.
Create a Matching Set
Crochet several coasters in graduating shades for a coordinated table setting during holiday gatherings.
Frequently Asked Questions
How long does one pumpkin coaster take to crochet?
Most crocheters finish a single coaster within about an hour, prep and finishing included.
What yarn works best for this pattern?
Worsted weight acrylic or cotton yarn holds ridge shaping well and washes easily afterward.
Can the coaster handle hot mugs safely?
Yes, though placing a small dish or trivet underneath extra-hot cups adds extra table protection.
Does the pattern require special stitches?
Front post and back post single crochet create the ridges, but both stay beginner-friendly with practice.
Can this pattern scale up into a full pumpkin?
Absolutely, repeating the ridge rounds longer before closing the top turns it into a stuffed pumpkin decoration.
How many coasters make a good gift set?
Four coasters typically fill a small gift box nicely and cover a standard table setting.
Is cotton or acrylic yarn better for coasters?
Cotton offers more absorbency for drips, while acrylic holds shape and color slightly longer over time.
Conclusion
Grab a skein of orange yarn and give the pumpkin coaster spice cup pattern a try this weekend; it stitches up fast, looks adorable on any fall table, and makes a genuinely thoughtful handmade gift. Share a finished photo once it’s off the hook, and enjoy a cozy new addition to autumn coffee mornings.