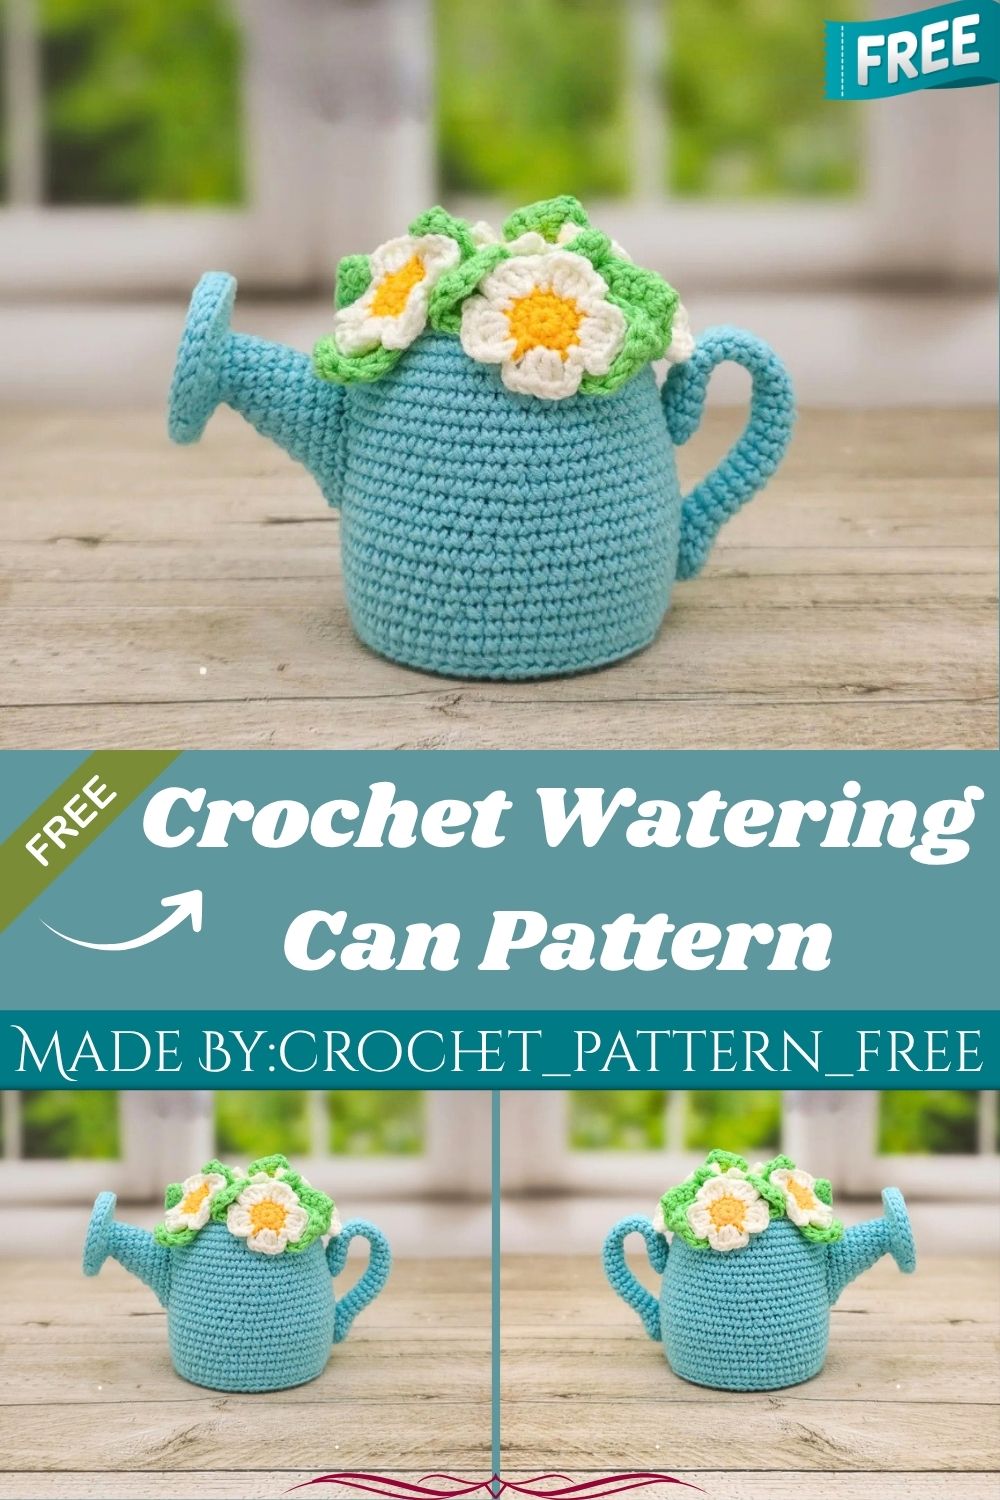
Free Crochet Watering Can Pattern with Daisy Flowers
Garden lovers, grab your hooks! Tiny crochet watering cans topped with cheerful daisies make the sweetest spring decor. Honestly, this pattern turns a few cotton yarn scraps into a piece that instantly brightens any shelf, basket, or table setting.
Spring decor projects rarely get more charming than a miniature watering can dressed up with daisy blooms. Blue cotton yarn forms the sturdy base, cardboard adds shape support, and five little flowers complete the look. Trust me, beginners and seasoned crocheters both enjoy how quickly this piece comes together. It works beautifully as a shelf accent, a gift topper, or a spring table centerpiece that guests always ask about.
Skill Level
Intermediate crocheters will feel right at home here. Basic stitches like single crochet, increases, and decreases carry the whole project, though shaping the spout and attaching the handle needs a little extra patience and care.
Pattern Overview
- Main title: Free Crochet Watering Can Pattern with Daisy Flowers
- Yarn used: Gazzal Baby Cotton in blue, yellow, white, and green
- Hook size: 2.00mm
- Extra supplies: stuffing, cardboard, glue, scissors, stitch marker, pins, and a yarn needle
- Stitches involved: magic ring, single crochet, increase, decrease, back loops only, slip stitch, half double crochet, double crochet, and double treble crochet
- Components: a rounded main base, a curved spout, a coiled handle, and six daisy-style flowers
- Finish size: compact enough for a shelf, mantel, or gift box display
Special Techniques
- Back Loops Only (BLO): used around Round 11 and Round 30 to create a visible ridge that shapes the can’s body naturally
- Cardboard insert: cut to match the base diameter and placed inside before closing the bottom, giving the can a flat, stable stand
- Front loop attachment: the spout starts by working into the front loops of Round 2, which keeps the seam clean and nearly invisible
- Slip stitch joining: the spout pieces are joined with 30 slip stitches worked through both layers at once
- Chain-loop petals: the daisy petals use a repeated chain-3, treble cluster, chain-3, slip stitch sequence for that classic flower shape
Common Mistakes
- Skipping the cardboard circle, which leaves the base wobbly and prone to collapsing
- Losing track of stitch counts during the increase rounds, especially between Round 3 and Round 10
- Forgetting to switch to BLO at Round 11, which changes the entire silhouette of the can
- Attaching the spout too high or too low instead of sewing it between Rounds 17 and 26
- Overstuffing the handle, which makes it stiff instead of leaving it soft and unstuffed as the pattern calls for
Uses & Benefits
A tiny crocheted watering can serves more purposes than most people expect. It brightens a nursery shelf, dresses up a gardener’s desk, or works as a charming photo prop for spring markets. Low-key, it also makes a thoughtful handmade gift since it costs very little in yarn but carries real sentimental value. Crafters get a satisfying mix of shaping, color work, and floral detailing in one manageable project, which keeps the process fun without feeling repetitive.
Helpful Beginner Tips
- Count stitches after every increase round before moving forward
- Use a stitch marker at the start of each round without exception
- Cut the cardboard circle slightly smaller than the base diameter for an easier fit
- Keep tension consistent, especially through the BLO rounds
- Weave in ends as you go rather than leaving them all for the end
Assembly
- Crochet the main base following Rounds 1 through 36, inserting the cardboard circle before closing the bottom
- Fold the top opening flat and join both layers with 30 slip stitches to form the spout base
- Continue the spout in a spiral through Rounds 1 to 4, shaping it with the increase and decrease pattern given
- Crochet the handle as a straight tube of 8 single crochets across 24 to 25 rounds, left unstuffed
- Sew the spout between Round 17 and Round 26 on one side of the can
- Attach the handle on the opposite side, securing it between Round 16 and Round 23
- Make six daisy flowers using the yellow center and white chain-petal pattern
- Glue one flower at the center front and arrange the remaining five evenly around it
Where Can You Use This Case?
- On a kitchen windowsill next to real potted herbs
- As a centerpiece for a spring or garden-themed party table
- Tucked into a gift basket alongside seeds or gardening gloves
- Displayed on an Easter or spring mantel arrangement
- As a photo prop for handmade craft fairs or Pinterest content
Why Beginners Will Enjoy This Pattern
Every part of this design stays approachable. The base uses a simple repeating increase sequence, the spout is small enough to finish in one sitting, and the flowers use only basic chain and treble stitches. No joke, the hardest part is just keeping track of round counts, and even that gets easier once the cardboard insert locks the shape into place.
Tips and Tricks for Success
- Pre-cut the cardboard circle before starting Round 11 so there’s no delay mid-project
- Test the spout’s slip stitch seam on scrap yarn first if it’s a new technique
- Match yarn tension between the base and spout so the colors blend seamlessly
- Arrange the flowers with pins before gluing to check spacing
- Store extra stuffing nearby since the base needs a generous, firm fill
Why This Crochet Pattern Is Trending
For real, mini garden-themed amigurumi has become one of the most searched crochet categories this season, and watering cans paired with daisies hit that cottagecore aesthetic people keep pinning and sharing.
- Cottagecore and garden decor trends keep pushing floral amigurumi searches upward
- Compact decor pieces fit small apartments and desk setups, which boosts their popularity
- Daisy details photograph beautifully, making this pattern a favorite for craft-selling platforms and Pinterest boards
Conclusion
A miniature watering can topped with daisies proves that small projects can carry big charm. Between the cardboard-supported base, the neatly seamed spout, and the cheerful flower cluster, this pattern delivers a decor piece worth every stitch. Anyone looking for a quick, gift-worthy amigurumi project will find this one checks every box.