Crochet Book Keychain Pattern for Perfect Charm Gifts
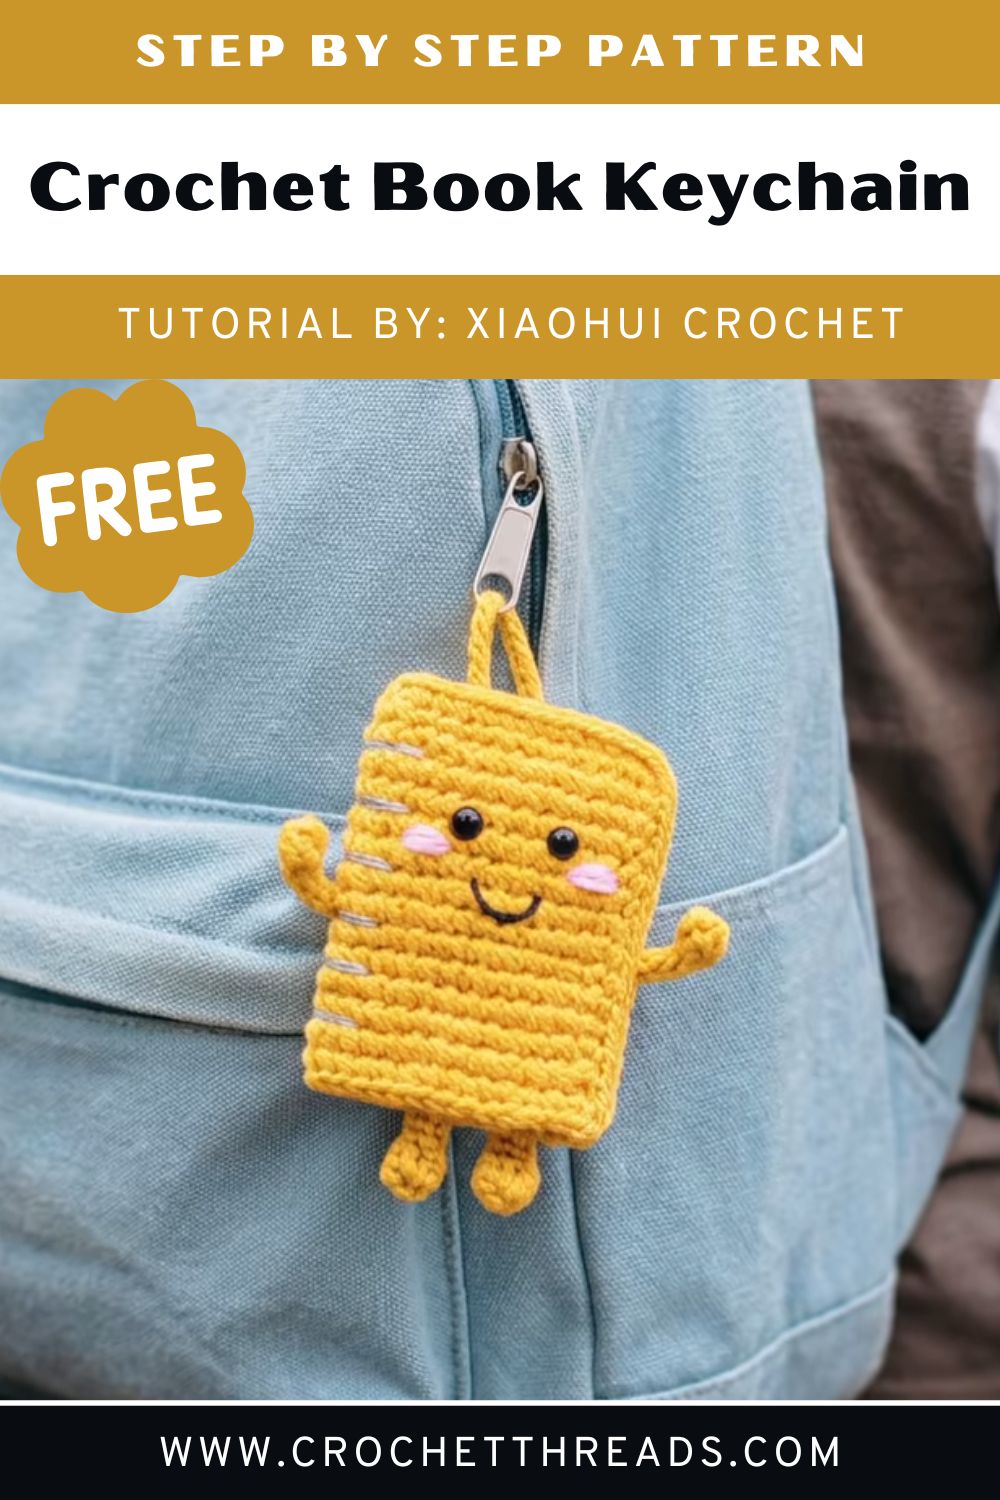
A tiny yellow book with a smiling face, wobbly little limbs, and a snug page block tucked inside? Meet the crochet book keychain pattern that turns leftover yarn into a handmade charm gift people actually clip onto their bags. Beginners handle the stitches comfortably, gift-makers love the quick finish, and bookworms fall for the cover on sight. Grab a hook and give the little fellow a go.
Picture a pocket-sized storybook worked in sunny mustard yarn, with a crisp white page block peeking out of the cover. Tiny cord arms and legs give the character plenty of personality, while a slim loop at the top lets it swing from zippers, house keys, or backpack straps.
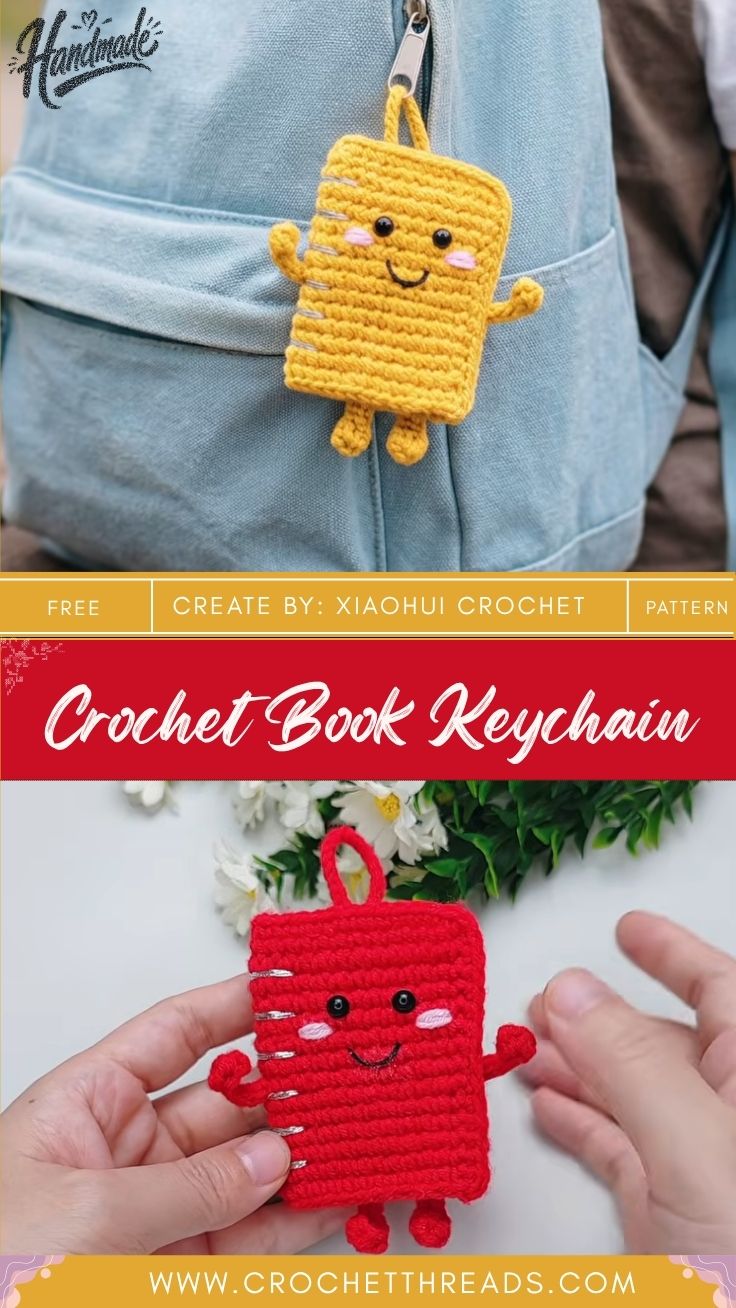
Difficulty stays refreshingly gentle. Single crochet does nearly all of the work, and the only shaping comes from a simple oval base plus a flat white rectangle. Sewing takes the longest, yet it delivers the best payoff, because the book seems to wake up the moment its face goes on.
Project Details
- Skill Level: Beginner (basic chains, single crochet, and simple hand sewing)
- Finished Size: About 2.5 in (6.5 cm) wide and 3.5 in (9 cm) tall, not counting the loop or dangling legs
- Estimated Time: Around 3 hours in total: 20 minutes of prep, 90 minutes of crocheting, and 70 minutes of sewing and finishing
- Recommended Yarn Weight: DK or light worsted (weight 3) acrylic or milk cotton
- Crochet Hook Size: 2.5 mm (US C-2)
Materials Needed
- Mustard yellow yarn, about 50 yards, for the cover, arms, legs, and hanging loop
- White yarn, about 15 yards, for the pages
- 2.5 mm crochet hook
- Two small black beads (around 4 mm) for the eyes
- Black sewing or embroidery thread for the beads and the smile
- Clear nylon thread and a fine sewing needle for attaching the pages
- Tapestry needle
- Stitch marker (a scrap of contrasting yarn works too)
- Small binder clip
- Scissors
- Optional: pink yarn or felt for cheeks, plus a key ring or lobster clasp
Crochet Stitches & Techniques
Nothing fancy hides in the pattern. A small toolbox of basic skills covers every piece.
- Chain (ch): Forms the foundation of the cover and pages, and it makes every cord. Keep each loop relaxed and even.
- Single crochet (sc): Insert the hook, yarn over, pull up a loop, yarn over again, and draw through both loops. Nearly every stitch here is sc, which gives a dense, sturdy fabric.
- Increase (inc): Work 2 sc into the same stitch. Only the rounded ends of the cover base need it.
- Working around a foundation chain: Stitch along one side of the chain, turn the corner, and return along the underside to build the oval base.
- Continuous rounds: Spiral without joining, and let a stitch marker show where each round ends.
- Slip stitch (sl st) and fastening off: Closes the last round of the cover and locks every piece.
- Sewing and embroidery: Whipstitch the pages with invisible thread, attach bead eyes, and stitch a small smile.
Pattern Instructions
Start with the mustard cover, move on to the white pages, craft the cords next, and save the sewing for last.
Abbreviations: ch = chain, sc = single crochet, sl st = slip stitch, st = stitch, inc = 2 sc in the same stitch.
Step 1: Chain the Foundation
Make a slip knot on the 2.5 mm hook and leave a tail about 6 inches (15 cm) long, since it gets woven in later.
Chain 14. Yarn over, pull through the loop on the hook, and repeat until 14 chains sit below the hook. The loop still on the hook doesn’t count. Keep each chain relaxed rather than tight, because the next row goes right back into them.
Why it matters: a twisted foundation chain shows up later as a wobbly edge on the finished cover.
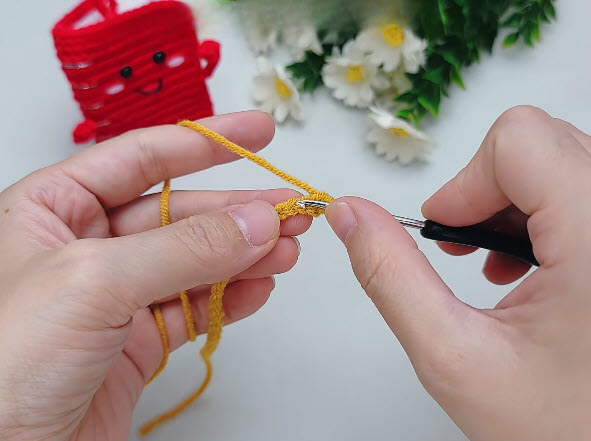
Step 2: Crochet the First Row Along the Chain
Flip the chain so the bumpy back ridge faces you. Push the hook into the second chain from the hook, wrap the yarn, and draw up a loop. Wrap again and pull through both loops to complete one sc.
Work a second sc into that same chain, which makes a tiny increase at the start of the oval. Then make 1 sc in each of the next 11 chains. That’s 13 stitches so far, with one chain left at the far end.
Pro-Tip: Pick one insertion spot and stick with it on every chain. Mixed insertion points create a lumpy edge that’s hard to hide later.
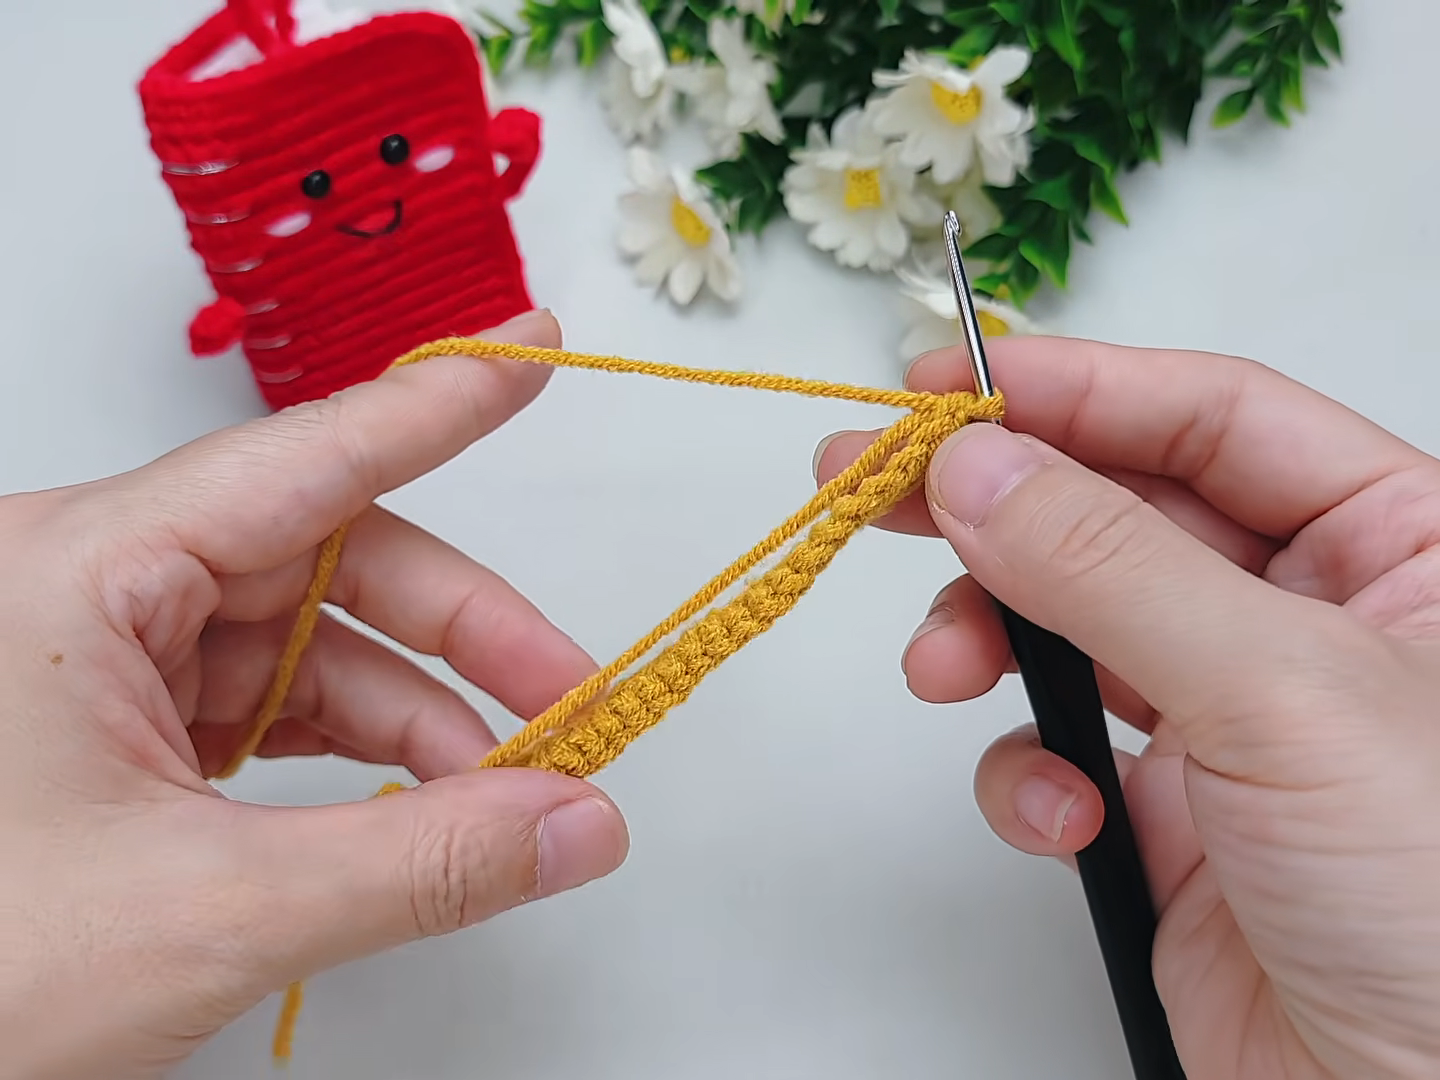
Step 3: Turn the End and Return Along the Underside
After the 11th sc, one chain waits at the tip. Make 4 sc in that end chain, and the corner rounds itself into a curve.
Rotate the work a half turn so the bottom of the chain faces upward, then spot the row of small leftover loops. Insert the hook into the first loop and make 1 sc in each of the next 11 loops. Finish with 2 sc in the last loop, the one sitting right beside your very first stitches.
Slide a stitch marker into that final stitch. From here on, the work spirals without joining, so the marker tells you where each round ends.
Stitch check: count 30 sc in total, made of 13 on the first side, 4 at the tip, and 13 on the return side.
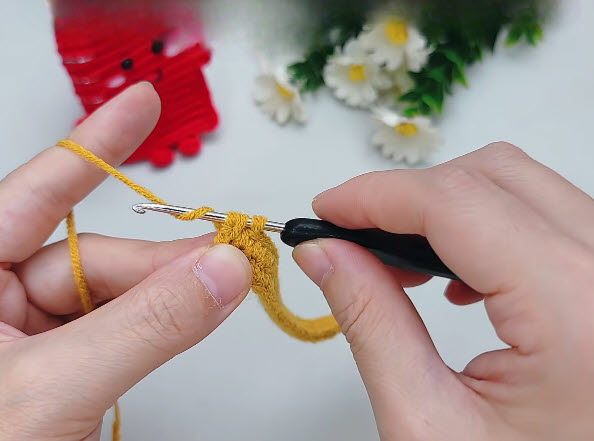
Step 4: Grow the Oval Base
Round 2 adds the only real shaping. Work 2 sc in each of the first 2 stitches, sc in the next 11, 2 sc in each of the next 4, sc in the next 11, then 2 sc in each of the last 2 stitches. Move the marker up. You now have 38 stitches.
All the increases land on the rounded ends, so the long sides stay straight, and the base grows into a neat oval. Take a look at photo four: the base lies flat, and the slanted stitches march in tidy rows. A ruffled end means an increase went missing, while a cupped one means an extra crept in.
Why it matters: a flat, even base is what lets the finished cover sit square instead of tilting to one side.
Step 5: Work the Walls of the Cover
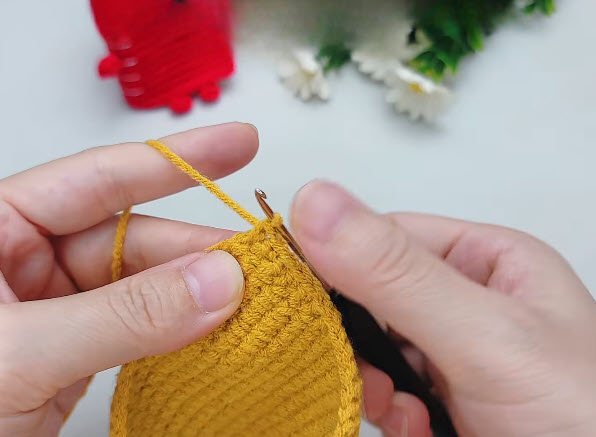
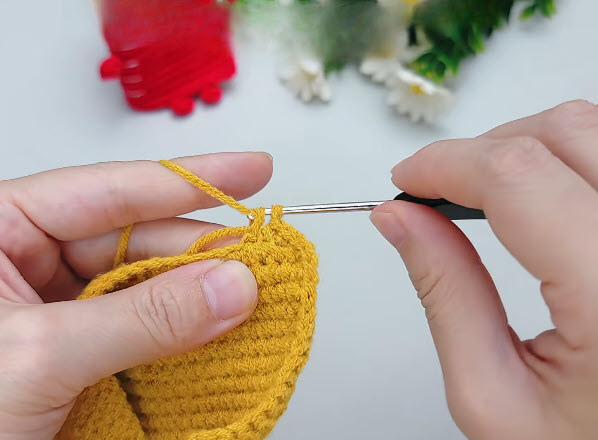
Now the widening stops. Make 1 sc in each of the 38 stitches for Rounds 3 through 24, moving the marker up at the end of every round.
Around Round 5, the edge starts curling upward, and the flat oval turns into a shallow bowl, just as photo five shows. Keep stitching, and the bowl grows into a soft-sided pouch with an open top.
After Round 24, sl st in the next stitch, cut the yarn with a 6-inch tail, and pull it through the loop to fasten off. Thread the tail on a tapestry needle and weave it down the inside wall for about an inch.
Stitch check: count 38 stitches at Rounds 6, 12, and 18. A round that drifts from 38 usually means the marker slipped out.
Pro-Tip: Squeeze the pouch flat after Round 12. If one side looks taller than the other, hunt for a skipped stitch before adding more rounds.
Step 6: Crochet the White Pages
Switch to white yarn and chain 16. For Row 1, work 1 sc in the second chain from the hook and in each chain across, giving 15 sc. Ch 1 and turn.
For Rows 2 to 12, sc in each stitch across (15 sc), then ch 1 and turn at the end of every row. After Row 12, cut the yarn with an 8-inch tail and fasten off.
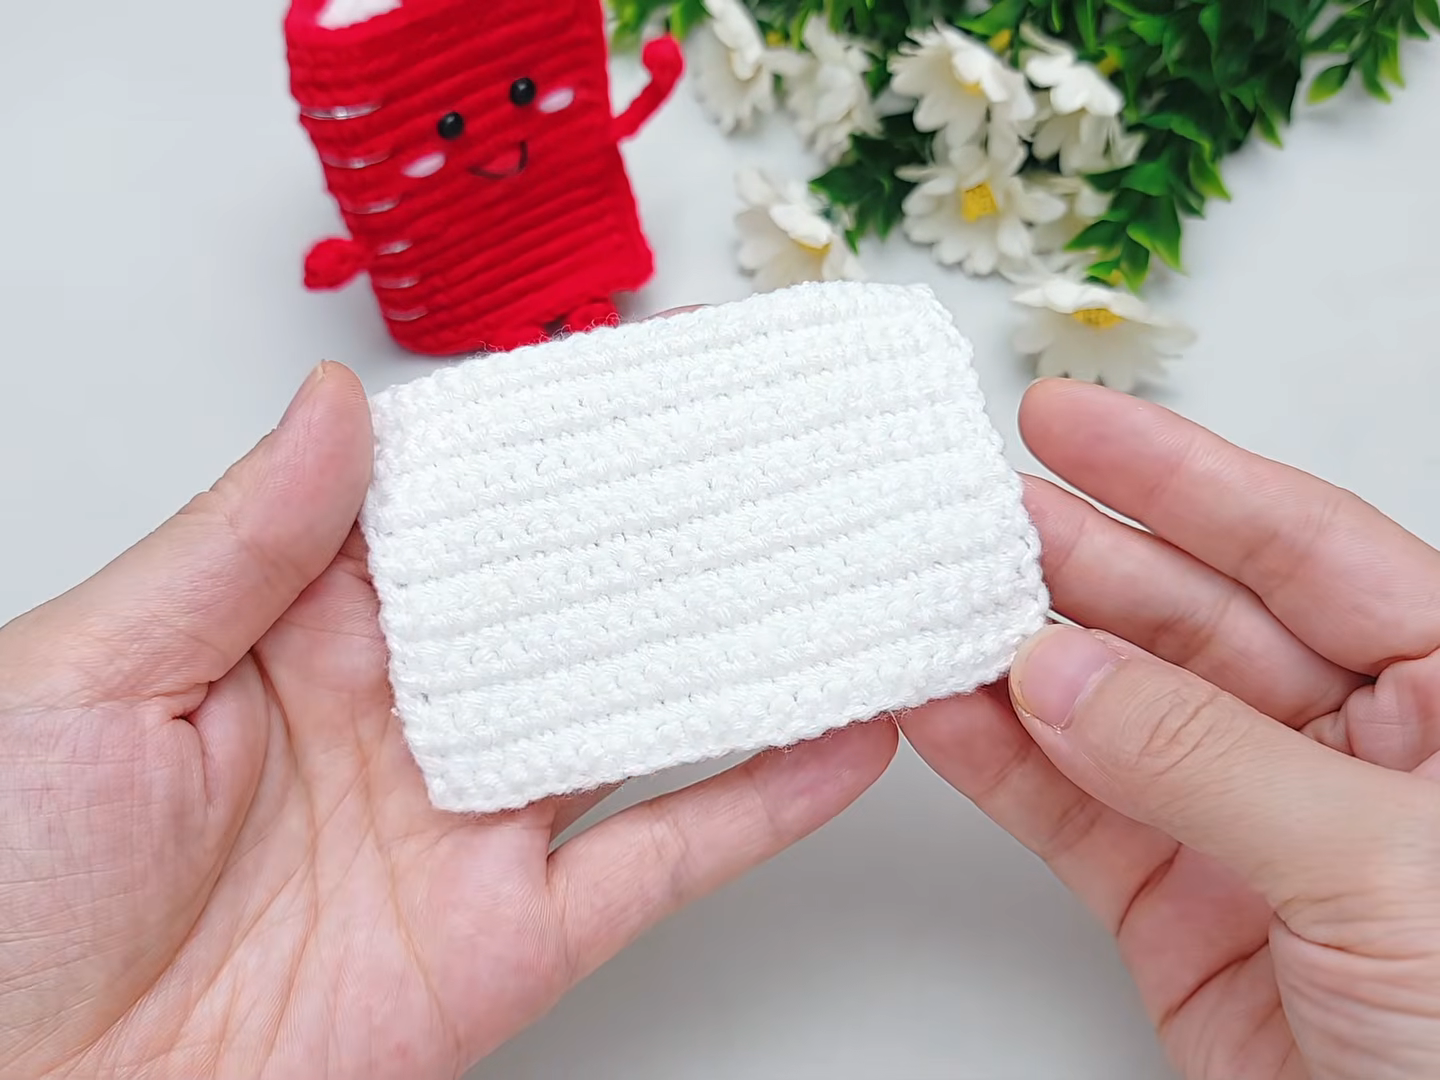
Photo six shows the goal: a tidy white rectangle with straight edges and crisp horizontal ridges. The turning chain never counts as a stitch, so tuck your first sc of each row into the very first stitch, not into the chain.
Press the rectangle flat, then fold it in half by bringing the top edge down to meet the bottom edge. Two layers now sit together, giving the pages the plump thickness of a real little book.
Step 7: Make the Arms, Legs, and Hanging Loop
Grab the mustard yarn again for the cords. For each arm or leg, chain 13, then sc in the second chain from the hook and in each chain across (12 sc). Fasten off with a 6-inch tail. Repeat until four cords are done.
Turn the starting end of each cord into a hand or foot. Roll the first 3 to 4 stitches into a tight coil, like a snail shell, and pass the tail through the coil several times with a tapestry needle to lock the curl. Photo seven shows the result: a slender cord ending in a small round knob.
For the hanging loop, chain 25, sc in the second chain from the hook and in each chain across (24 sc), then fasten off with an 8-inch tail. Set all five cords aside; photo eight shows them lined up on the table, ready to go.
![[Stationery Pals] Cute DIY Crochet Book Charm! Perfect Back to School Gift 10-59 screenshot](https://www.crochetthreads.com/wp-content/uploads/2026/09/Stationery-Pals-Cute-DIY-Crochet-Book-Charm-Perfect-Back-to-School-Gift-10-59-screenshot.png)
Step 8: Anchor the Page Block Inside the Cover
Slide the folded white pages through the top opening of the cover, tucking them between the front and back layers. Nudge the block until an even yellow border surrounds it, as photo eight shows.
Clip the top edge with a binder clip so nothing shifts. Pins can snag the yarn, and a clip holds the layers firmly without leaving holes.
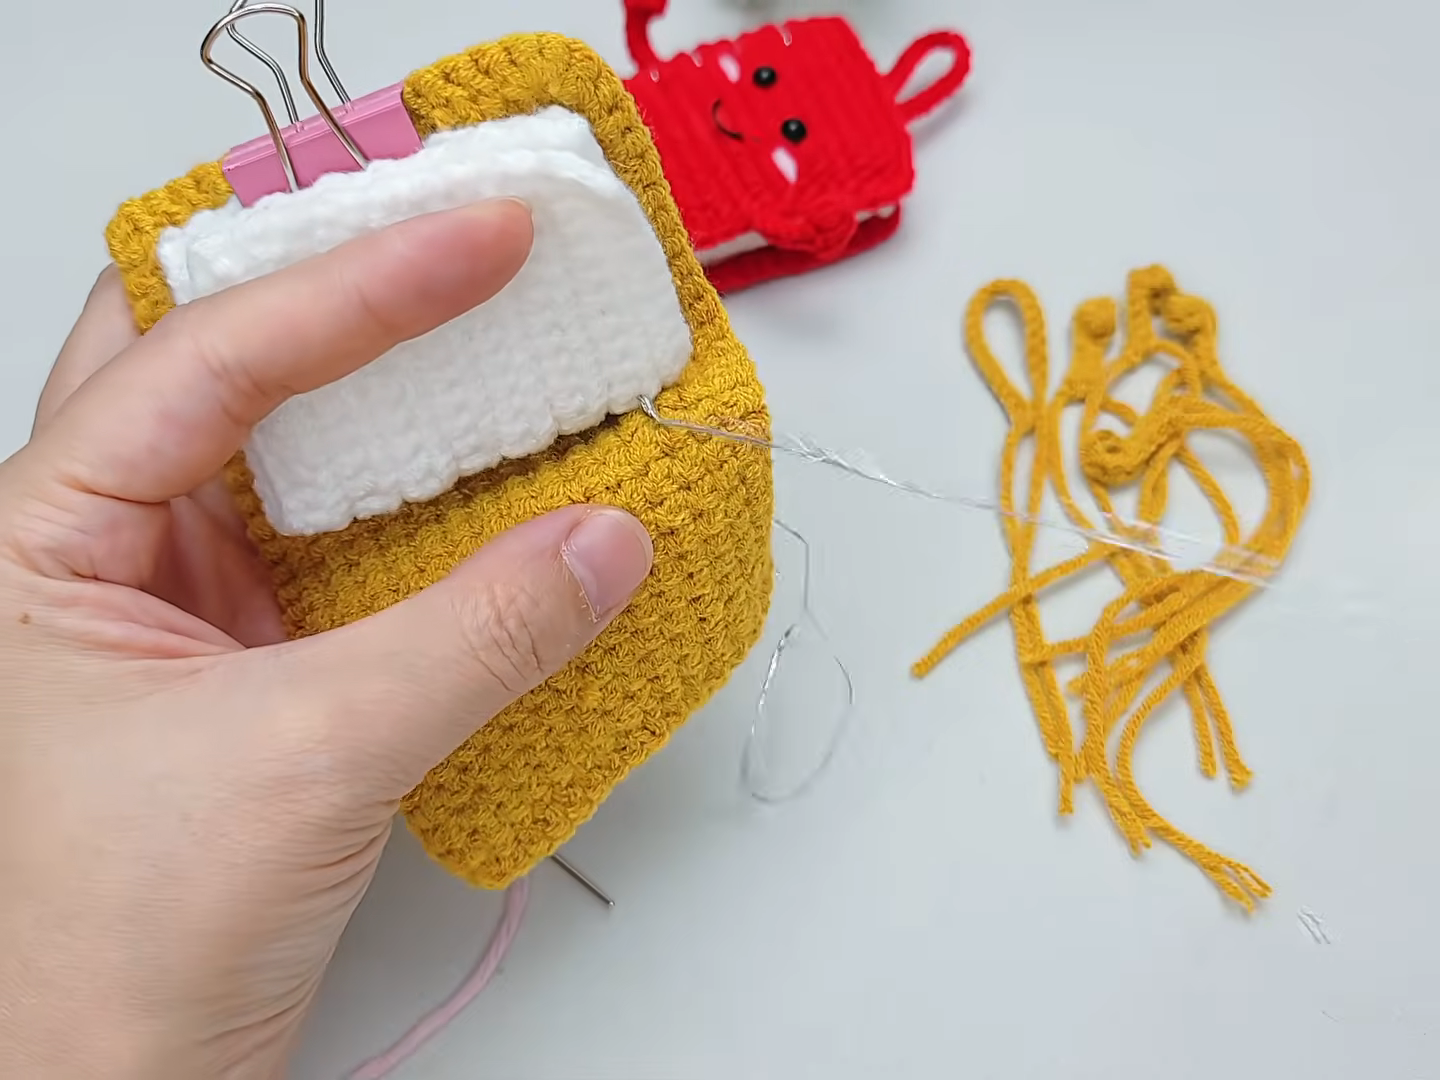
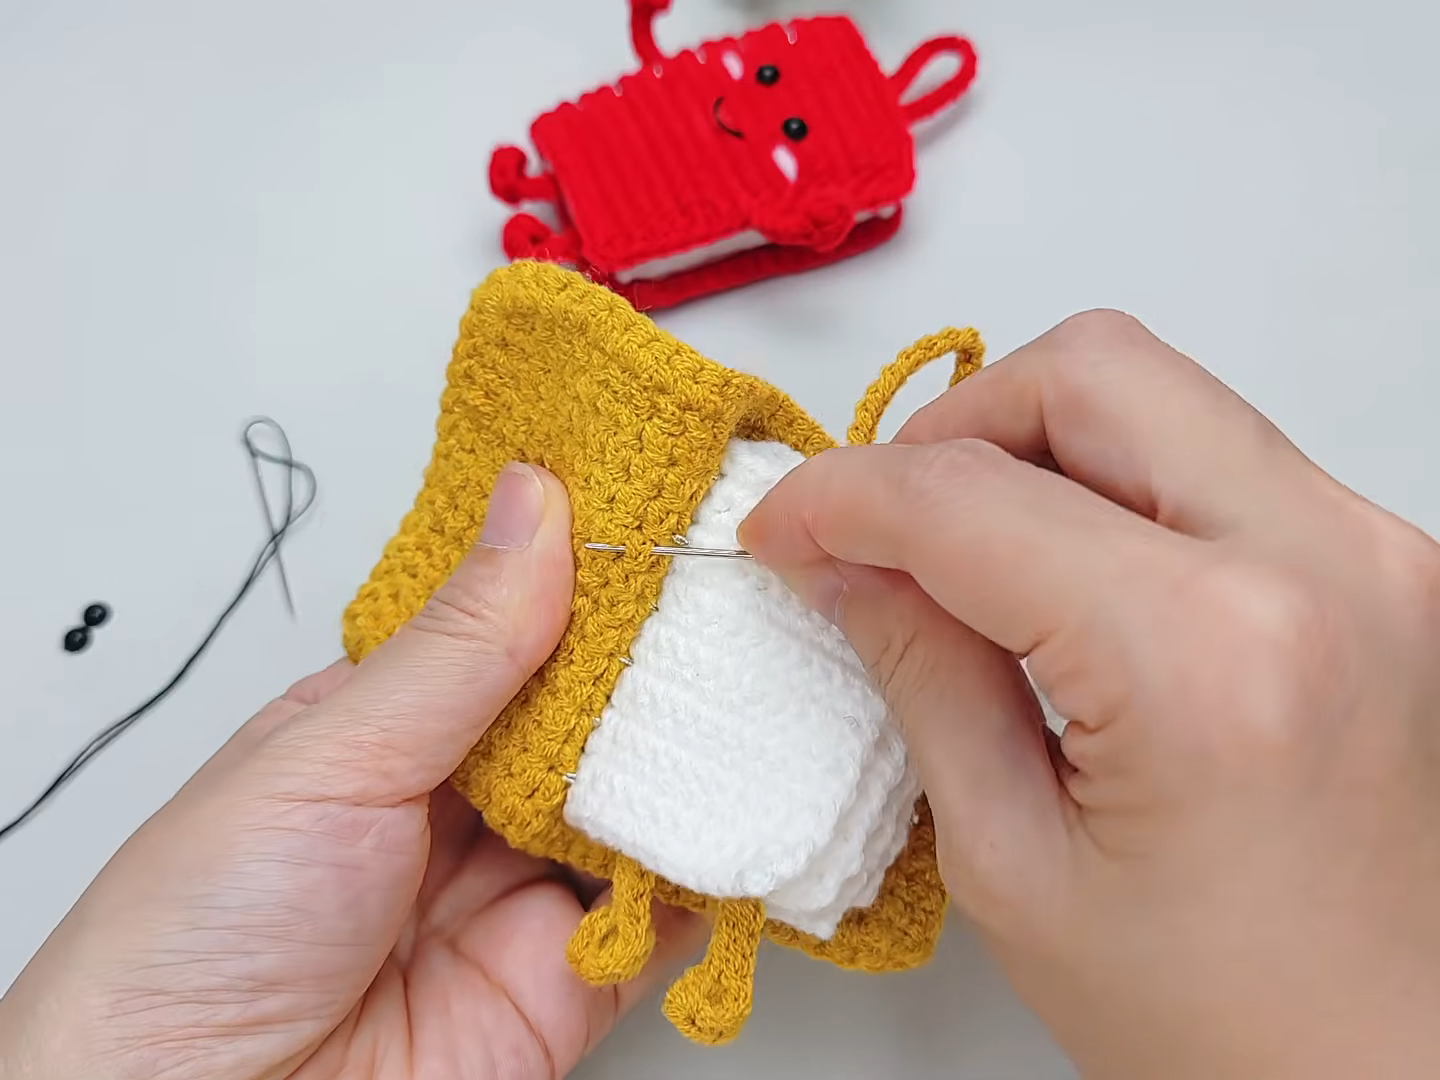
Thread the fine needle with clear nylon thread and knot the end. Sew a whipstitch along the bottom edge of the pages: pass the needle through the outer loops of the yellow front, then through the white layers, and repeat every stitch or two. Keep the stitches small, since invisible thread only stays invisible when it hugs the yarn.
Pro-Tip: Work near a window, because clear thread is hard to see. Pull each stitch just snug, never tight, or the cover will pucker.
Step 9: Sew the Sides, Then Add Limbs, Loop, and Face
Continue the same whipstitch up both sides of the page block, exactly like the needle in photo nine, until the pages sit securely on three edges.
Legs come next. Pin two cords at the bottom edge, about four stitches apart, and sew each tail through the cover several times before knotting inside. Attach the arms to the sides, roughly one third of the way down from the top, so they hang naturally. Fold the long cord into a loop, then sew both ends inside the top edge of the back layer, centered.
For the face, choose the plain yellow area of the cover, well clear of the page block. Thread the needle with doubled black thread and knot the end. Bring the needle out where one eye belongs, slide on a bead, and go back down one stitch away. Repeat two or three times so the bead stays put, then repeat for the second eye about five stitches to the side.
Finish with a smile. Bring black thread out just under the eyes and stitch a small U shape from three or four short straight stitches. A dab of pink yarn on each side makes sweet cheeks if you like.
Why it matters: symmetrical eyes and a centered smile give the character its charm, so measure by counting stitches instead of guessing.
Step 10: Final Touches
Weave in every remaining tail, trim the ends, and give the cords a gentle tug to test each seam. Slip a key ring or lobster clasp through the top loop, and the little storybook is ready to travel.
Tips for Success
- Tighten the tension a touch. A firm fabric hides the page block’s edges and keeps the pouch upright.
- Count as you go. A quick tally at Rounds 6, 12, and 18 catches mistakes while they’re still easy to fix.
- Mark every round. Spiral crochet has no seam to follow, so a stitch marker is your only map.
- Bury ends inside. Weave tails through the inner wall of the cover, where nobody will spot them.
- Flatten before sewing. Rest the cover under a heavy book for an hour, and the walls settle into crisp lines.
- Test the bead knots. Tug each eye lightly before gifting, especially if the keychain heads to a busy bag.
Personalization Ideas
Color Combinations
Swap mustard for teal, blush pink, or forest green, and let the pages stay white or turn cream. Two-tone covers look striking too, with a contrasting shade for the last three rounds.
Seasonal Twists
Deep burgundy with a tiny orange leaf suits autumn, while red and white stripes shout holiday cheer. Pastel yarn turns the book into a lovely spring charm.
Expressions and Faces
Try sleepy closed eyes made from short black stitches, a tiny surprised “o” mouth, or a wink. Each mood creates a brand-new personality.
Tiny Accessories
A miniature bow, a felt bookmark ribbon peeking from the pages, or round crocheted glasses give the character a bookish look.
Mini and Jumbo Sizes
Fingering-weight yarn with a 2 mm hook shrinks the project into a charm for earrings or zipper pulls. Chunky yarn with a 5 mm hook creates a jumbo cushion-style book for a desk or shelf.
Gift and Display Options
Clip it to a bag, hang it on a tree as an ornament, or dangle it from a car mirror. The same body also works as a plush bookmark topper.
Bonus: Gift Packaging Ideas
Presentation turns a cute handmade charm into a memorable present. Tuck the finished book into a small kraft box lined with tissue, and add a tag that says “a little story for you.” Tie the box with twine, or slide the keychain into a clear bag with a mini notebook. Bookish friends will treasure the pairing.
Common Mistakes to Avoid
- Chaining too tightly: A stiff foundation chain makes the first row painful. Relax your grip, or drop one hook size only for the chain.
- Losing the marker: Missing stitches follow quickly. Move the marker at the end of every round, without exception.
- Skipping the increases: Leaving out Round 2’s increases produces a narrow, crooked pouch. Recount to 38 before moving on.
- Sewing with tight thread: Over-tightened nylon puckers the cover. Aim for snug, flat stitches.
- Uneven cord lengths: Arms and legs of different sizes look accidental. Count the 13 chains each time and compare the finished cords side by side.
Frequently Asked Questions
Is the crochet book keychain suitable for beginners?
Absolutely. Chains and single crochet are the only stitches involved, and the shaping happens in one simple round.
Which yarn works best?
Smooth acrylic or milk cotton in DK weight gives crisp stitches and holds its shape after months on a keyring. Fuzzy yarns hide the stitch definition, so skip them.
How can I make the book bigger?
Chunky yarn with a larger hook scales everything up automatically. For a taller cover, add extra rounds after Round 24 and enlarge the pages by a few rows.
Are bead eyes safe for children?
Small beads can loosen, so embroider black french knots for toddlers or babies. Older kids and adults can enjoy the beads as written.
Can I wash the finished keychain?
Spot cleaning with a damp cloth and mild soap works best. Submerging the piece may loosen the invisible thread, so avoid the washing machine.
What’s the easiest way to attach the keychain hardware?
Slide a lobster clasp or key ring through the top loop and pull it snug. Stitching the loop’s ends twice adds extra strength for heavy keys.
Wrapping Up
Few projects deliver as much charm per hour as a tiny crochet book with a smile. Gather your yarn, follow the steps at a relaxed pace, and enjoy watching a flat oval blossom into a little character. Once the first one is done, a whole shelf of colorful storybooks will probably follow. Share your finished keychain with friends, tag your photos, and tell fellow crocheters which color combination won your heart.