Free Crochet Pumpkin Keychain With a Smiling Face
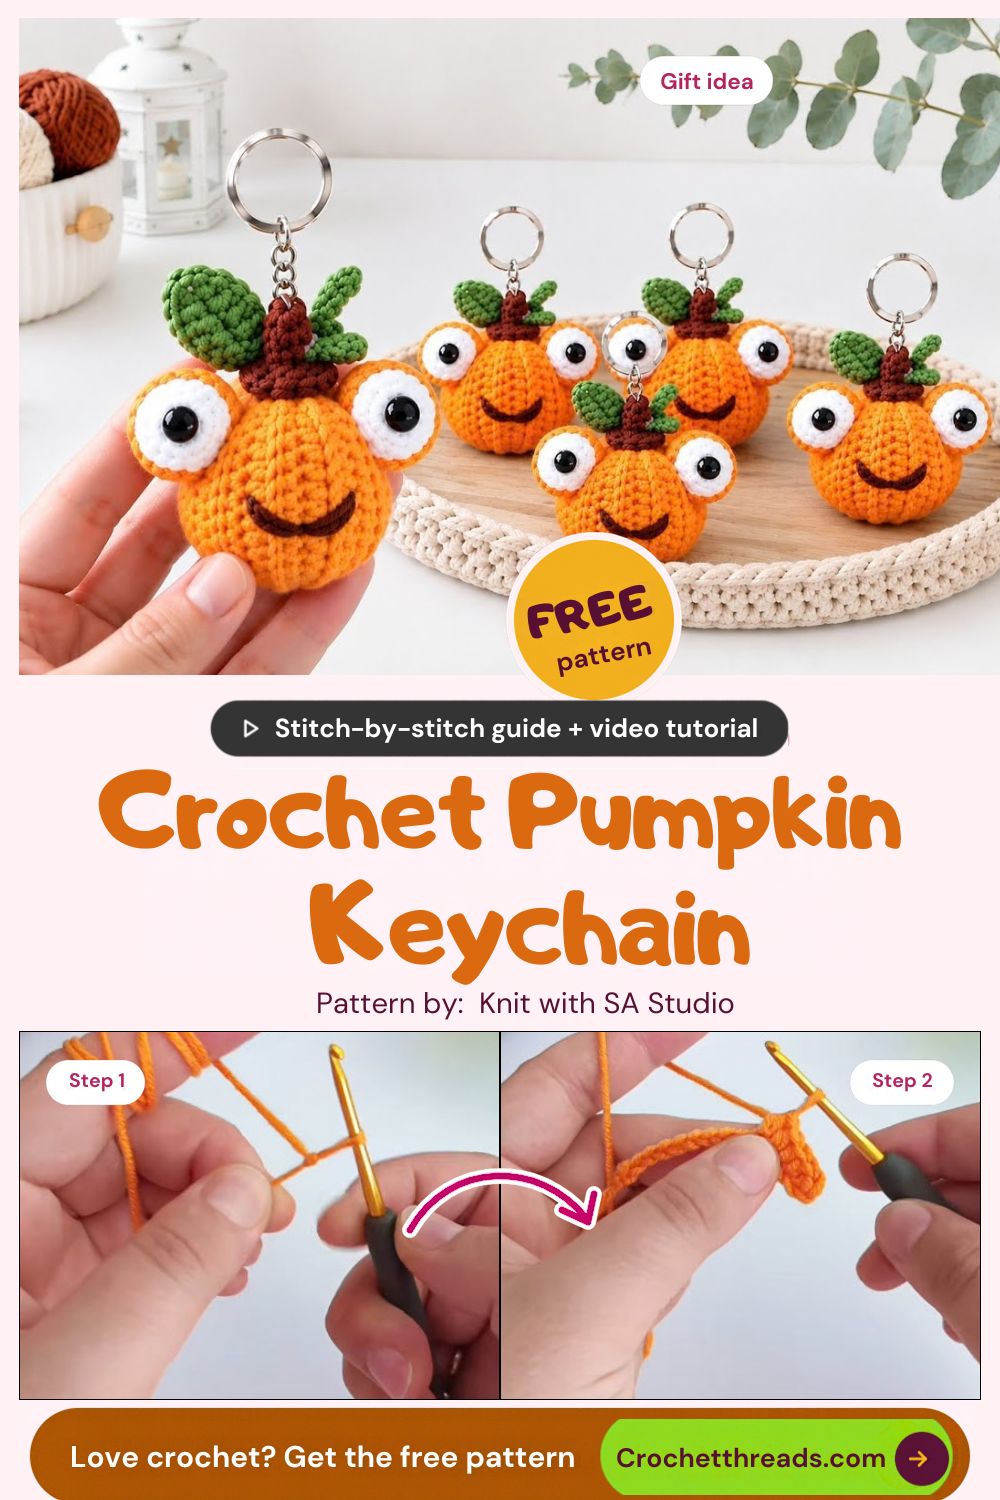
This cute crochet pumpkin keychain starts with a simple ribbed strip and turns into a tiny stuffed pumpkin with a cheerful face. The finished piece is small enough to clip onto your keys, purse, backpack, or zipper, making it a fun little fall project.
In this Free Crochet Pumpkin Keychain With a Smiling Face pattern, you will work the pumpkin body flat, use back-loop-only stitches to create the raised ribs, then seam and stuff the piece into shape. Two small crocheted eye cups, felt eye whites, safety eyes, and a stitched smile give this pumpkin its playful expression.
If you enjoy small handmade accessories, you can also browse our crochet keychain patterns for more quick projects to make for gifts, craft fairs, or your own bag.
Pattern Overview
The pumpkin body begins as a flat rectangle made with 16 short rows. Working the rows through the back loop creates the raised texture that gives the finished pumpkin its ribbed look.
Once the panel is complete, you will seam the two short edges together to form a tube. One end is gathered, the body is lightly stuffed, and the second end is closed to create the pumpkin shape. Small crocheted cups hold the eyes, while a simple embroidered smile completes the face.
The finished pumpkin measures approximately 2 inches (5 cm) wide, depending on your yarn, hook, and tension.
Time Box
- Prep: About 10 minutes to gather the yarn, tools, felt, eyes, stuffing, and key ring.
- Stitching: About 25–30 minutes for the ribbed panel and two eye cups.
- Finishing: About 20–30 minutes for seaming, stuffing, attaching the eyes, embroidering the smile, and adding the ring.
Most crocheters can finish one pumpkin keychain in around an hour.
Materials for the Crochet Pumpkin Keychain
This pattern uses standard US crochet terminology.
- Orange worsted-weight (#4) acrylic yarn, approximately 20 yards
- Small piece of white felt for the eye whites
- Two 8 mm black safety eyes
- 3.5 mm (E-4) crochet hook
- Small amount of black yarn or embroidery floss for the smile
- Fiberfill stuffing
- Yarn needle and scissors
- Stitch marker
- 25 mm split key ring
Abbreviations (US Terms)
- ch – chain
- st – stitch
- sc – single crochet
- hdc – half double crochet
- inc – 2 sc in the same stitch
- BLO – back loop only
- MR – magic ring
- sl st – slip stitch
How to Crochet a Pumpkin Keychain Step by Step
Step 1: Start the Foundation Chain
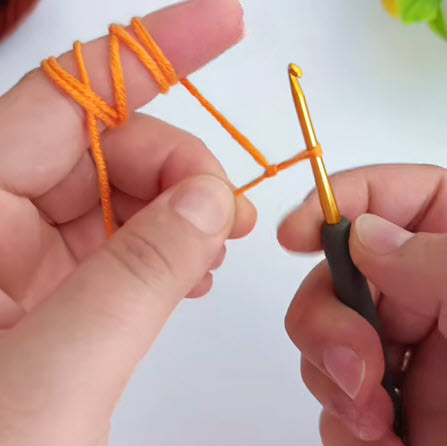
Make a slip knot and place it on your hook. Chain 12. Keep your tension even, but avoid pulling the chain too tightly because you will need to work into it for the first row.
A relaxed foundation chain makes the first row easier to work and helps keep the bottom edge of the panel from curling.
Step 2: Build the Ribbed Rows
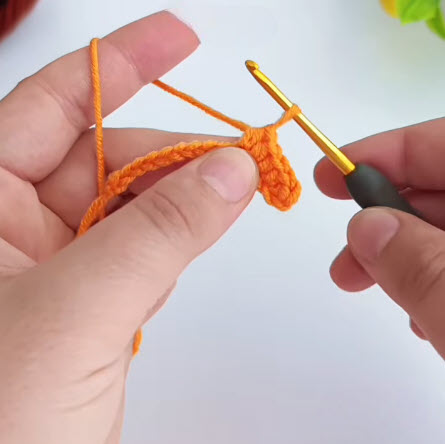
The pumpkin texture comes from working the following rows through the back loop. This creates the raised ridges that will become the pumpkin’s ribs when the panel is shaped.
- Row 1: Hdc in the 3rd ch from hook and in each ch across. (10)
- Rows 2–16: Ch 2, turn. The ch-2 does not count as a stitch. Hdc BLO in each stitch across. (10)
After a couple of rows, you should have a short, sturdy strip with visible horizontal ridges. Before moving on, count your stitches and make sure each row has 10 hdc.
Pro Tip: Ribbed crochet can make the edge stitches easy to miss. If you tend to lose the last stitch of a row, place a stitch marker in it while you work.
Step 3: Finish the Panel and Sew the Seam
After Row 16, fasten off and leave an approximately 18-inch yarn tail for sewing. Fold the ribbed panel so the first and last rows meet.
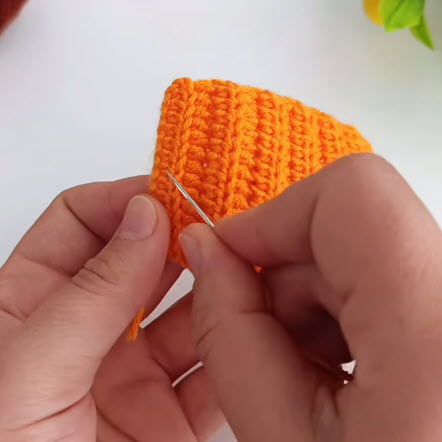
Use the yarn tail and a yarn needle to whipstitch the two edges together. Match the corresponding stitches as you work down the seam. Take your time here because a neat seam will help the finished pumpkin keep its shape.
Step 4: Gather the First Opening
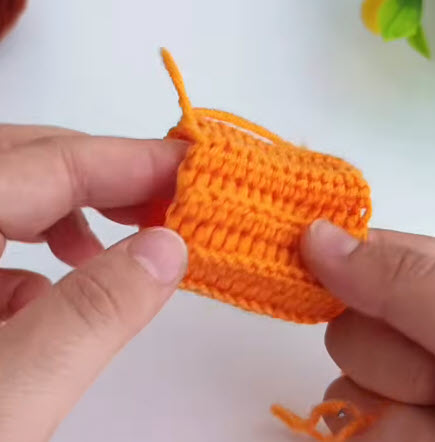
You should now have a short ribbed tube. Cut a separate 12-inch strand of orange yarn and thread it onto your needle.
Weave the yarn in and out around one open edge, catching each row end as you go. Pull the yarn slowly to gather the opening. As the edge closes, the ribbed fabric will begin to curve inward and take on a pumpkin-like shape.
Pull the gather firmly enough to close the opening, then secure the yarn with a couple of knots.
Step 5: Stuff and Close the Pumpkin
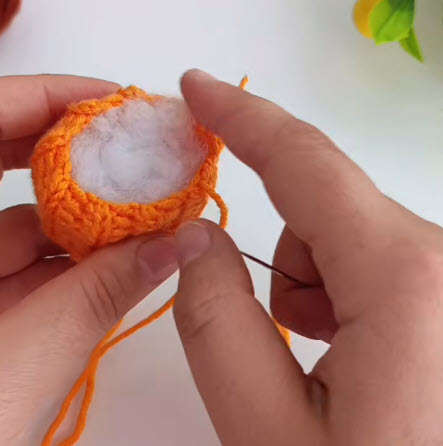
Turn the gathered opening to the bottom and begin adding small amounts of fiberfill. Work the stuffing into the sides first so the pumpkin fills evenly.
Avoid overstuffing. You want the body to feel firm while still allowing the raised ribs to remain visible. Once the pumpkin is filled, use another strand of orange yarn to gather the remaining open edge.
Pull the opening closed, knot the yarn securely, and weave the tail into the body. For a slightly rounder pumpkin, you can also run the needle from the bottom through the center of the body and back again a few times. Pull gently to create a small indentation at the top and bottom.
Pro Tip: Add the stuffing a little at a time rather than using one large piece. Small tufts are easier to position around the inside of the ribs.
Step 6: Make the Two Eye Cups
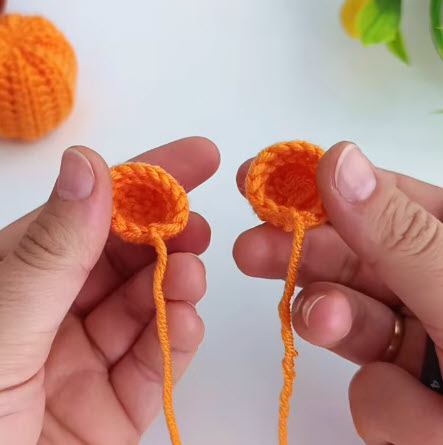
The eye cups are worked separately in orange yarn. Work each one in a continuous spiral:
- Rnd 1: 6 sc in a MR. (6)
- Rnd 2: Inc in each st around. (12)
- Rnd 3: Sc in each st around. (12)
Sl st to the next stitch and fasten off, leaving approximately a 10-inch tail for sewing. Make two eye cups.
The third round gives each cup a little depth. When finished, they should resemble two tiny shallow bowls that can sit on top of the pumpkin.
Step 7: Add the Eyes and Attach Them
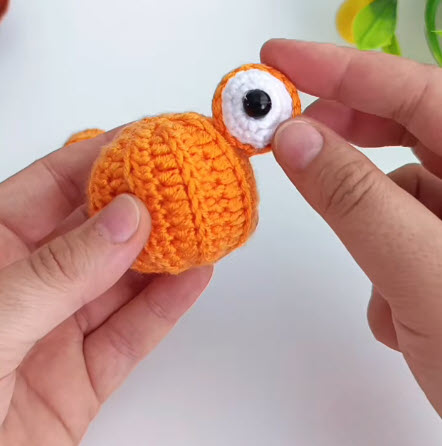
Cut two white felt circles measuring approximately 5/8 inch (15 mm) across. Push one 8 mm safety eye through the center of each felt circle and then through the center of an orange eye cup. Secure each safety eye with its washer.
Before sewing the cups to the pumpkin, place both of them on top of the body and check their position from the front. Keeping them close together gives the pumpkin its surprised, cheerful expression.
Spacing Check: Aim for roughly two pumpkin ribs between the eye positions, then adjust slightly according to the shape of your finished body.
Once you are happy with the placement, sew each eye cup securely to the pumpkin using its yarn tail.
Step 8: Stitch the Smile and Add the Ring
Thread your needle with black yarn or embroidery floss. Below the eyes, stitch a small curved smile approximately 3/4 inch wide. Three or four short backstitches are enough to create a simple expression.
To make the hanging loop, chain 6 with orange yarn. Sew both ends securely to the top center of the pumpkin, making sure the attachment passes through several stitches rather than relying on one stitch alone.
Once the loop is firmly attached, slide the 25 mm split key ring through it.
For another small seasonal project, you can also explore our crochet vampire pumpkin for a Halloween-inspired variation.
Crochet Pumpkin Keychain Mistakes to Avoid
- Leaving the gather too loose. A loose opening can allow stuffing to peek through. Pull the drawstring firmly and make an extra pass around the opening if necessary.
- Mixing up the loops. The ribbed texture depends on working the designated rows through the back loop only. Accidentally working through both loops can make the ridges uneven.
- Skipping the third eye-cup round. The extra round gives the cups their shallow bowl shape. Without it, the eye pieces will sit flatter against the pumpkin.
- Placing the eyes too low. Position the eye cups near the top of the pumpkin and check the face from the front before sewing them permanently.
- Making the hanging loop too weak. Because a keychain gets pulled and moved regularly, secure both ends of the loop through several stitches and hide the yarn tails well.
Personalization Ideas
Try Different Colors
Orange gives this project its classic pumpkin feel, but you can easily change the color. Cream, muted green, brown, or even a soft mustard shade can give the same design a different seasonal look.
A slightly speckled or variegated yarn can also add subtle texture while helping disguise small changes in tension.
Change the Face
The smile is only the starting point. Try a wink, a tiny open mouth, or a surprised expression. For Halloween, you could even embroider two small fangs beneath the smile.
Make a Mini Pumpkin Set
Make several pumpkins in different colors and give each one a slightly different expression. You can also add a tiny green leaf or a curled yarn vine to the top for extra detail.
If you like making tiny accessories, our crochet amigurumi keychains collection has more small projects that can be clipped to bags, backpacks, and keys.
Making Your Crochet Pumpkin Keychain Strong Enough for Daily Use
- Keys are handled frequently, so a keychain needs to be a little sturdier than a decorative amigurumi. If your stitches look very loose, try a smaller hook such as a 3 mm to create a denser fabric.
- Secure the ch-6 hanging loop through several stitches at the top of the pumpkin. This distributes the pulling force instead of putting all the strain on one stitch.
- Knot your sewing tails securely before weaving them into the body. Trim only after the tails are tucked away.
- Check the safety-eye washers before using the finished keychain. They should be firmly attached and fully seated.
For more small accessories to make, take a look through the Crochet Threads keychain pattern collection.
FAQs
How long does a crochet pumpkin keychain take to make?
Most makers can finish one in about an hour. The ribbed body works up fairly quickly, while the seaming, stuffing, face, and final assembly take most of the finishing time.
Is a crochet pumpkin keychain safe for young children?
This version uses safety eyes and a key ring, so it is not recommended for children under 3 because of the small parts. For a child-safe alternative, embroider the eyes and facial details with yarn or embroidery floss instead of using safety eyes.
What yarn works best for a crochet pumpkin keychain?
Worsted-weight acrylic works well because it is easy to find, holds its shape, and handles everyday use. Cotton yarn is another good option if you prefer a firmer fabric and crisp stitch definition.
Can I make this pumpkin without safety eyes?
Yes. For a version without safety eyes, embroider two small black eyes directly onto the crocheted eye cups or use black yarn to create simple stitched eyes.
Can I make this pumpkin as a bag charm instead?
Absolutely. The finished pumpkin works just as well on a backpack, purse, zipper, or tote bag. Simply use a suitable clasp or key ring for the item you want to attach it to.
Ready to Clip It On?
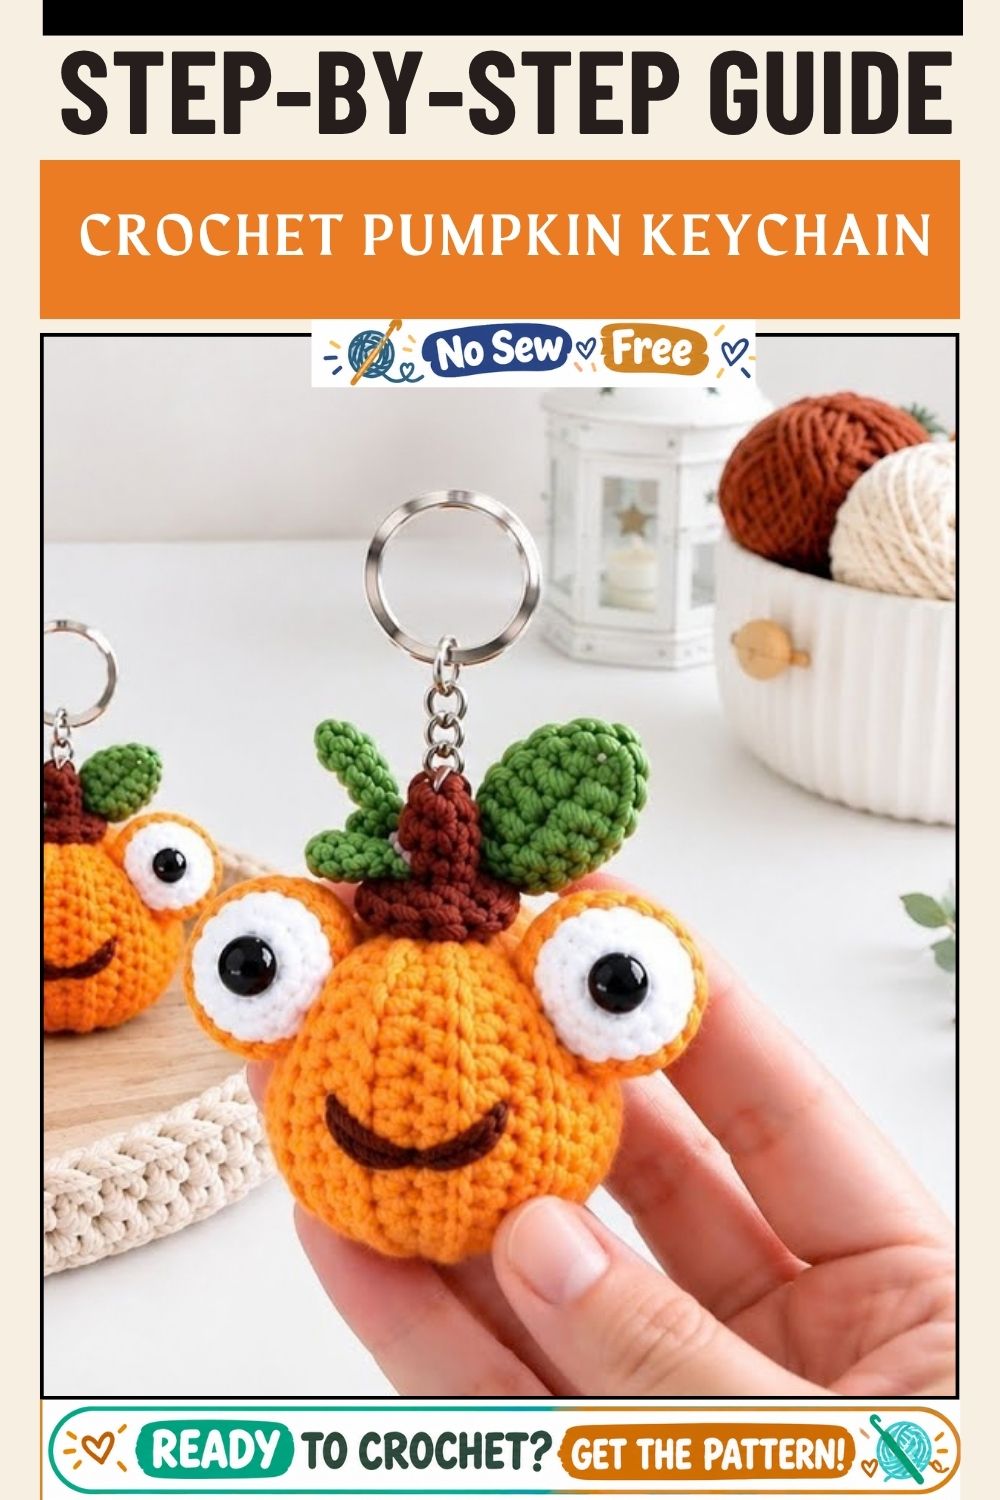
This little pumpkin begins as nothing more than a flat strip of ribbed crochet. After a few simple finishing steps, it becomes a round, stuffed charm with bold eyes and a cheerful smile.
Make one for yourself, add it to a fall gift bag, or crochet a few in different colors for friends. Once you have made the first one, the next pumpkin usually comes together even more quickly.
If you enjoy quick handmade accessories, keep exploring Crochet Threads’ crochet keychain patterns for more small projects to add to your handmade collection.