Handmade Crochet Eyes Attached Amigurumi Pattern Toy
This amigurumi project is a small, huggable toy finished with crocheted eyes that are worked in layers of black, caramel, and white yarn. Each eye is made separately, then sewn onto the face. It works up pretty quickly, uses very little yarn, and gives your toy a really warm, expressive look.
You do not need advanced skills here. If you can make a magic ring and work basic single crochet stitches, you can finish this cute project in one relaxed afternoon.
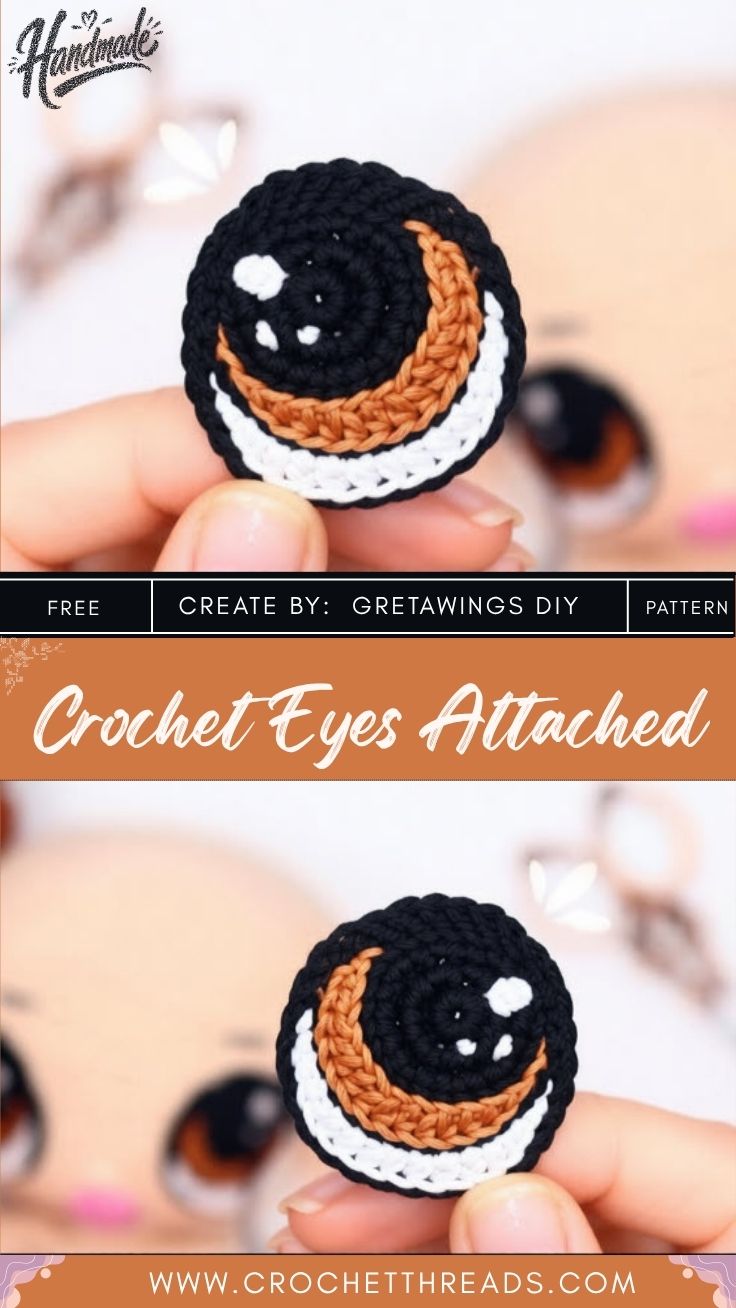
Big, sparkly eyes can turn a simple crochet toy into a character full of personality. Inspired by soft, storybook-style plush animals, this pattern shows you how to make layered handmade eyes and attach them neatly for a truly handmade look.
Project Overview
This amigurumi project is a small, huggable toy finished with crocheted eyes that are worked in layers of black, caramel, and white yarn. Each eye is made separately, then sewn onto the face. It works up pretty quickly, uses very little yarn, and gives your toy a really warm, expressive look.
You do not need advanced skills here. If you can make a magic ring and work basic single crochet stitches, you can finish this cute project in one relaxed afternoon.
Skill Level
Beginner to confident beginner. The toy itself is just circles and tubes. The eyes are tiny, so they need a little patience, but nothing about them is tricky. If you’ve followed any beginner crochet tutorial before, you’ll be fine.
Materials and Supplies
Yarn colors
- Black cotton yarn (pupils and eye outline)
- Caramel or light brown cotton yarn (the iris)
- White cotton yarn (the eye highlight)
- Cream or beige yarn for the body, head, and ears
Hooks
- 1.6 mm steel hook for the eyes (this is the size shown in the tutorial photos)
- 2.5 mm hook for the toy body
Other supplies
- Safety eyes, 8 mm (optional, if you’d rather skip crocheted eyes on a future toy)
- Polyester fiberfill stuffing
- Tapestry needle
- Sharp scissors
- Stitch markers (a small pink one works great against dark yarn)
- Keychain ring or small clasp (optional)
- Straight pins for placing the eyes
Crochet Techniques Used
- Magic ring
- Single crochet (sc)
- Increase (inc): 2 sc in the same stitch
- Decrease (dec): sc two stitches together
- Slip stitch (sl st)
- Working in the back loop only (BLO)
- Sewing parts together with a tapestry needle
Crochet Eye Pattern: Step by Step
Let’s start with the eyes, since they’re the star of this crochet pattern. Every step below matches one of the photos, so you can follow along as you stitch. Make two eyes.
Step 1: Start with a Magic Ring in Black
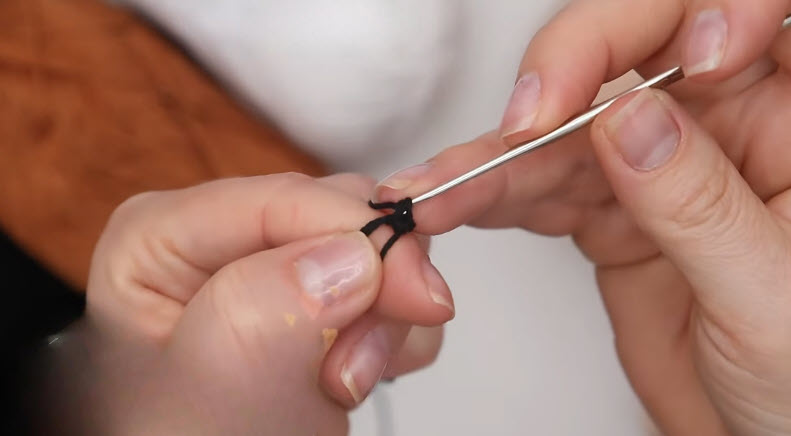
Take your black yarn and your 1.6 mm hook. Make a magic ring, then work 6 sc into it. You’ll see a tiny black loop sitting right on the hook, just like in the first photo. Hold the ring gently between your thumb and finger so the stitches don’t slip. Pull the tail to close the ring, but not so hard that it puffs up.
Step 2: Build the Black Pupil
Now grow that little ring into a flat circle. Place a stitch marker in the first stitch of every round so you never lose your place.
- Round 2: inc in each stitch (12)
- Round 3: (1 sc, inc) repeat around (18)
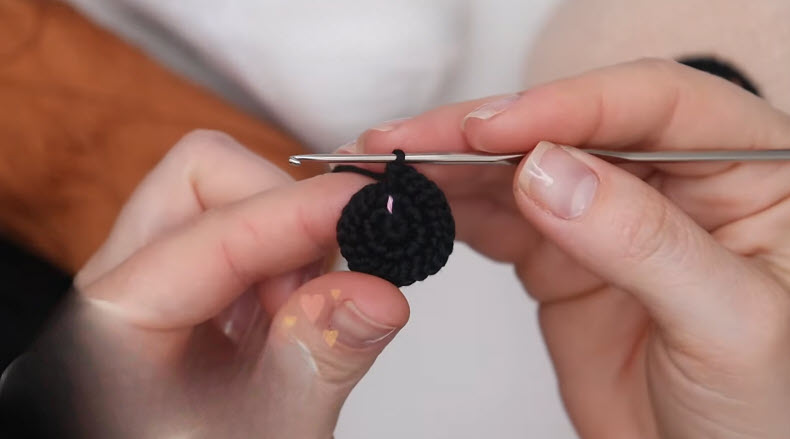
Stop when you have a small, flat black disc, about the size of a pea. The second photo shows this stage, with the hook sitting at the edge and the marker glowing pink in the middle. Keep your tension tight so the circle stays neat and doesn’t ruffle.
Step 3: Join Caramel Around the Edge
Don’t cut the black yarn yet. Let it rest on the back side. Join your caramel yarn at the edge of the black disc and start working around the outside.
- Round 4: sc in the back loop of each stitch around (18)
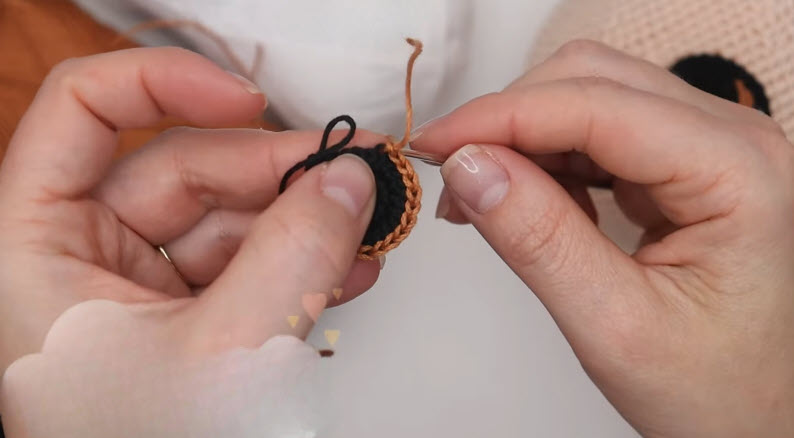
Working in the back loop makes a sharp little line where black meets caramel, so the pupil looks defined. Leave a short caramel tail, and tuck it away later. You can see that tail sticking up in the third photo.
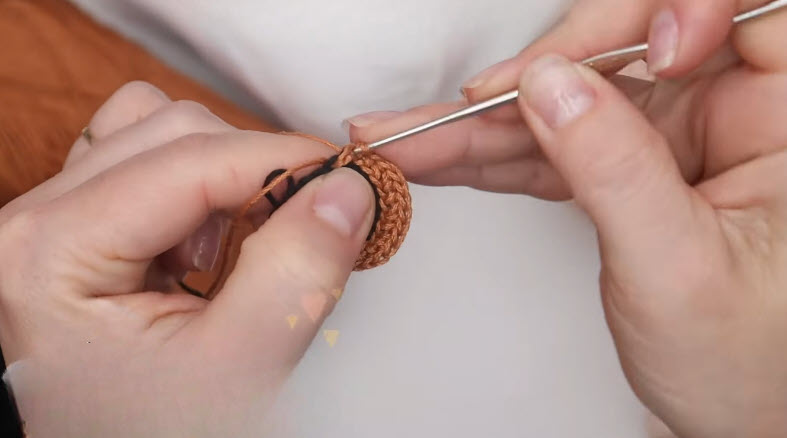
Step 4: Finish the Caramel Iris Ring
Keep going with caramel so the iris forms a thick, cozy band around the pupil.
- Round 5: (2 sc, inc) repeat around (24)
Slip stitch into the first stitch to close the round. In the fourth photo, you can see how the caramel wraps around the black center like a little rim. Check that the piece is lying flat. If it’s curling up, you probably pulled too tight, so loosen up on the next round.
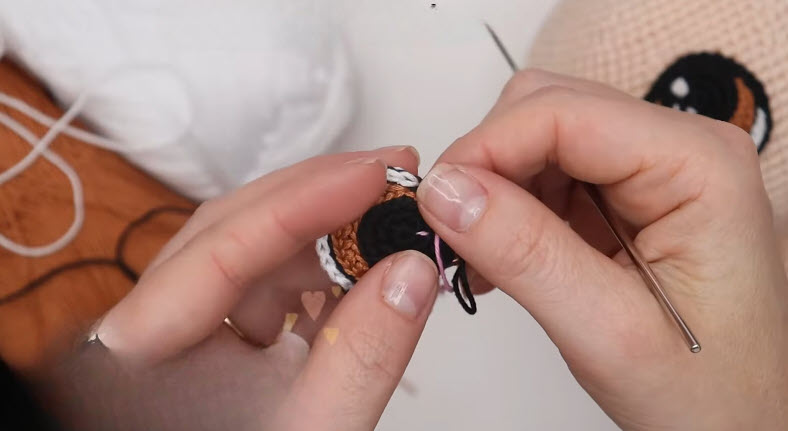
Step 5: Add the White Highlight
This is the step that makes the eye look alive. Join white yarn and work only across part of the edge, not all the way around. Work about 12 sc along the lower side, then slip stitch and stop. The white makes a crescent that looks like a light reflection. Leave the black yarn hanging at the back. You’ll pick it up again in the next step, and it’s visible dangling near the bottom in the fifth pic.
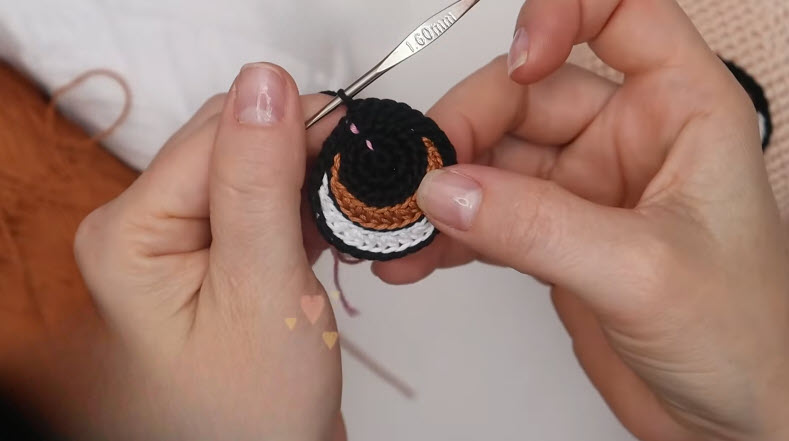
Step 6: Outline Everything in Black (Image 6)
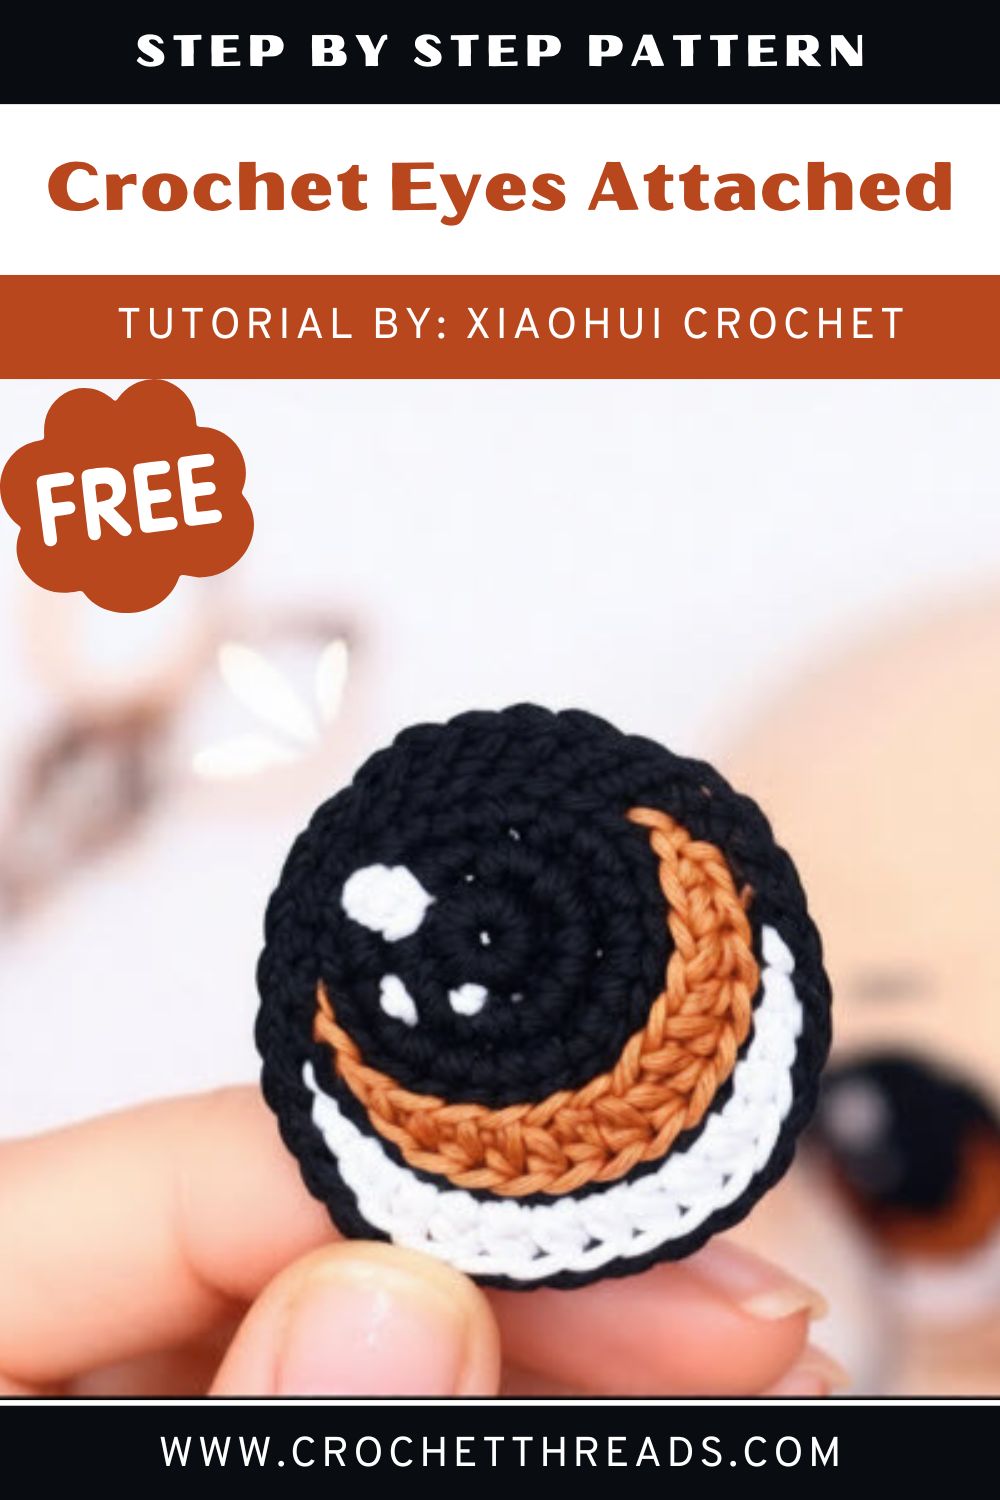
Pick your black yarn back up. Single crochet around the whole eye, including over the white crescent, working one sc in each stitch and adding a couple of increases where the curve gets tight. This black outline frames the eye and gives you the finished layered look shown in the last photo, with the black pupil on top, the caramel ring, the white crescent below, and a clean dark border around it all.
Slip stitch to finish. Cut a long black tail, about 20 cm, for sewing. Make the second eye the same way, and try to match them as closely as you can.
Toy Pattern: Head, Body, and Extras
Switch to your 2.5 mm hook and cream yarn. Use a stitch marker at the start of each round.
Head
- R1: 6 sc in a magic ring (6)
- R2: inc x 6 (12)
- R3: (1 sc, inc) x 6 (18)
- R4: (2 sc, inc) x 6 (24)
- R5: (3 sc, inc) x 6 (30)
- R6: (4 sc, inc) x 6 (36)
- R7: (5 sc, inc) x 6 (42)
- R8-R15: sc around (42), 8 rounds
- R16: (5 sc, dec) x 6 (36)
- R17: (4 sc, dec) x 6 (30)
- R18: (3 sc, dec) x 6 (24)
Stuff the head firmly. Fasten off, leaving a long tail for sewing to the body.
Body
- R1: 6 sc in a magic ring (6)
- R2: inc x 6 (12)
- R3: (1 sc, inc) x 6 (18)
- R4: (2 sc, inc) x 6 (24)
- R5: (3 sc, inc) x 6 (30)
- R6-R12: sc around (30), 7 rounds
- R13: (3 sc, dec) x 6 (24)
- R14-R16: sc around (24), 3 rounds
Stuff the body, then fasten off with a long tail.
Ears (make 2)
- R1: 6 sc in a magic ring (6)
- R2: inc x 6 (12)
- R3-R4: sc around (12)
Don’t stuff these. Flatten each ear and leave a tail for sewing.
Tail
- R1: 6 sc in a magic ring (6)
- R2: inc x 6 (12)
- R3: sc around (12)
- R4: dec x 6 (6)
Add a tiny bit of stuffing and close the hole.
Facial Details
Pin your finished eyes to the head between rounds 9 and 11, about 6 or 7 stitches apart. Step back and look at it from a distance before sewing. Then use the black tail to sew each eye down with small, hidden stitches all the way around the outline. For the nose, embroider a small black oval or a little “Y” shape between and just below the eyes. A tiny pink blush with leftover yarn is optional, but it’s adorable.
Assembly Process
- Sew the head onto the body, matching the 24-stitch openings.
- Attach the ears on top of the head, angled slightly outward.
- Sew the tail to the back of the body.
- Weave in every loose end and trim them close.
Finishing Touches
Give the toy a quick squeeze and check for any thin spots in the stuffing. Pinch in extra fiberfill with your needle tip if needed. If you want a keychain, sew a small loop of yarn on top of the head or between the ears and attach the ring.
The Pin-Test for Perfect Eye Placement
Before you sew anything down, pin both eyes on the head and take a photo with your phone. Photos show uneven placement much faster than your own eyes do. Move the eyes closer together for a sweeter, younger look, or further apart for a silly one. It takes two minutes and saves you from unpicking stitches later.
Helpful Beginner Tips
Keep Your Stitches Tight
Amigurumi should have no gaps. Use a smaller hook than the yarn label suggests and keep steady tension. Tight stitches hold the stuffing in and give the toy a clean, professional finish.
Use Stitch Markers Every Time
Spiral rounds have no visible start, so mark your first stitch each round. The tiny eyes especially need this, since it’s easy to lose count with a 1.6 mm hook.
Stuff the Right Way
Add small pieces of fiberfill at a time and push them into the corners first. Overstuffing stretches the stitches and shows the filling, and understuffing gives a floppy toy. Aim for firm but still a little squishy.
Design Customization Ideas
Different colors: Try blue or green irises, pink outlines for a pastel toy, or all-gray eyes for a sleepy look.
Cute accessories: Add a tiny scarf, a bow on one ear, a little flower, or a felt heart on the chest.
Mini size variations: Use thinner yarn and a smaller hook for a keychain-sized version, or go up with chunky yarn for a big cuddly one. Scale the eyes with the toy so the proportions still look right.
Frequently Asked Questions
What is the best yarn for amigurumi?
Cotton yarn is a favorite because it’s strong and holds its shape, and it shows stitch definition well. That makes it perfect for tiny details like eyes. Acrylic is softer and cheaper, so it works well for big cuddly toys.
How do I make a crochet plush firm?
Use a smaller hook, keep tight tension, and stuff in small handfuls. Push the filling into every curve, and don’t skip the ears and tail if you want them to stand up.
How long does this project take?
Most crocheters finish it in about 3 to 5 hours. The eyes take roughly an hour for the pair, and the rest is the head, body, and assembly. Beginners may take a bit longer, and that’s completely normal.
Closing Thoughts
You now have a full crochet tutorial for making layered handmade eyes and a sweet little toy to go with them. It’s an easy crochet project, but the eyes make it look far more advanced than it is. Don’t worry if your first pair isn’t perfect, because every stitch gets you closer.
If you enjoyed these handmade crochet ideas, save this pattern, share your finished toy with us, and tell us which colors you picked.