Crochet Mushroom Keychain Pouch From Granny Squares
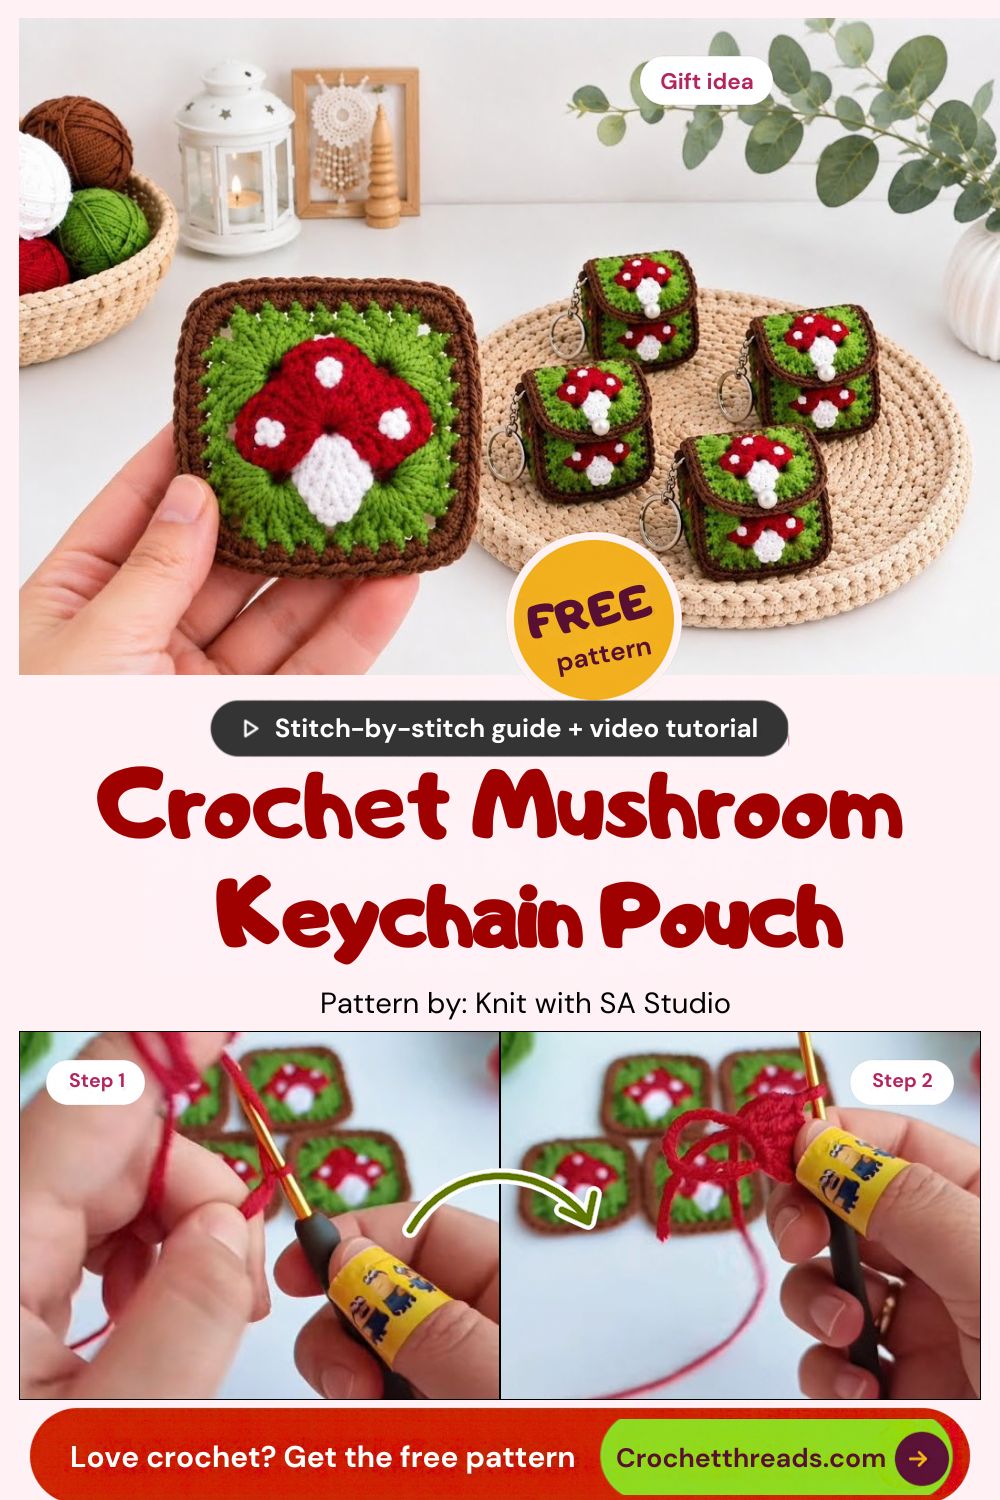
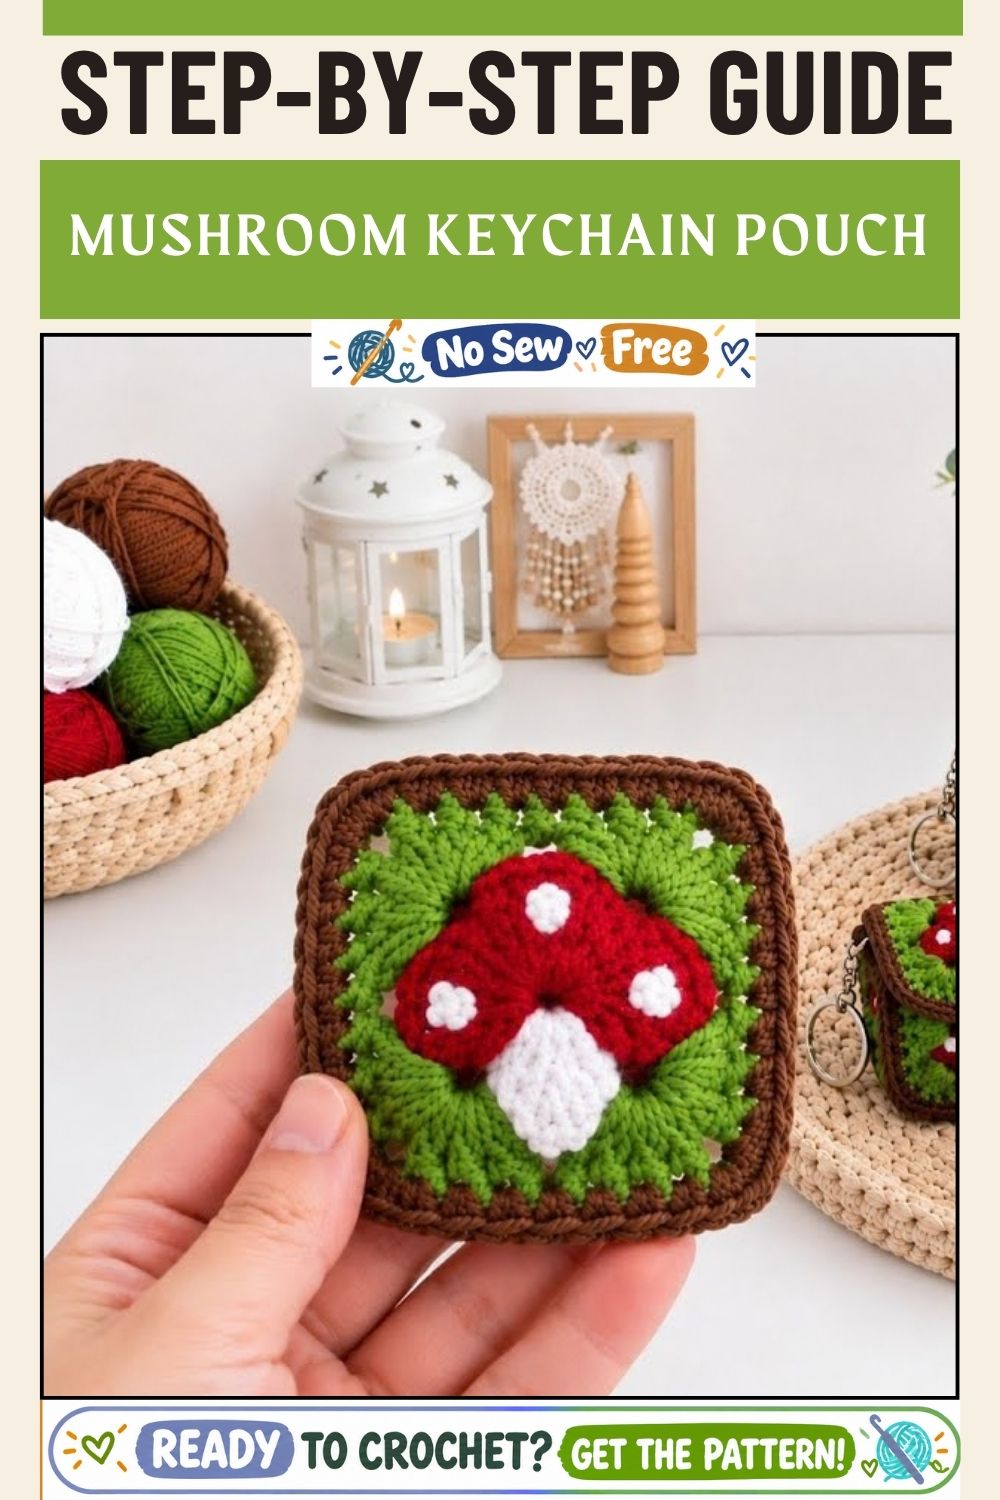
Tucked inside a chocolate-brown border, a red toadstool freckled with white dots sits on a patch of green, and a pair of those tiny panels makes up the Crochet Mushroom Keychain Pouch From Granny Squares. Clip it to your keys, and the mini crochet pouch keeps earbuds or lip balm within reach.
Most granny squares grow outward from a plain ring, but here the picture comes first. A red cap and white stem take shape before a single background stitch goes in, and the green and brown rounds then build the square around them. You end up with a mushroom granny square that reads clearly at palm size, and once two are joined, you have a granny square keychain with real storage inside.
Pattern Overview
Every square follows the same build order, so after the first one you can work the rest almost from memory:
- Red cap
- White stem
- Green background
- Brown square frame
- White spots on the cap
After two matching squares are finished, they’re joined into a small pouch and fitted with a key ring.
Materials
- Yarn in red, white, green and brown. Smooth cotton or a cotton blend gives the crispest stitch definition at small sizes.
- Crochet hook one size smaller than your yarn label suggests, for a firm fabric
- Tapestry needle
- Small scissors
- Stitch markers
- Key ring or lobster clasp
- Optional: small zipper, button or snap for closing the pouch
Keep the yarn weight identical across all four colors. Mixed weights make the finished square buckle.
Time Box
- Prep: 10 minutes to wind colors and gather tools
- Stitching: 30 to 45 minutes per square
- Finishing: 20 to 30 minutes for spots, weaving ends and joining
Expect the second square to go noticeably faster than the first.
Stitches and Abbreviations (US Terms)
- ch – chain
- sl st – slip stitch
- sc – single crochet
- hdc – half double crochet
- dc – double crochet
- tr – treble crochet
Tall trebles give the cap its rounded dome, while shorter stitches fill the corners and keep the frame flat.
Special Techniques
- Picture-first motif: the mushroom is worked as a shape, and the square is built around it. Stitch placement around the curve matters more than in a standard granny square.
- Clean color changes: finish the last yarn-over of the old color with the new color, so no stray loop of red peeks into the white or green.
- Surface stitching: the white spots are sewn on afterward with a tapestry needle rather than crocheted in, which keeps the cap smooth.
Before You Start
Crochet a quick test square in green only. If it cups, go up a hook size. If it ruffles or looks lacy, go down one.
Small motifs magnify every tension change, so try to finish each square in a single sitting.
How to Crochet the Mushroom Granny Squares
Step 1: Start the Red Cap
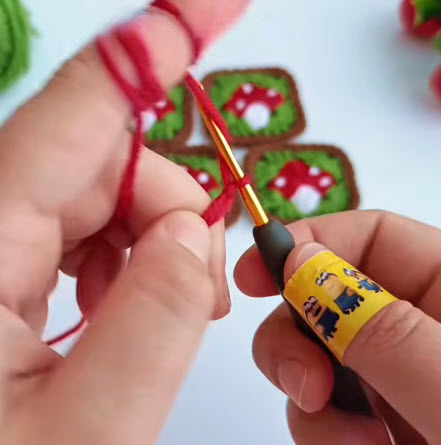
Wrap the red yarn over your left index finger, make a short chain, and begin working treble stitches into it. The finger wrap keeps tension steady while the first stitches form, and those stitches decide how clean the top of the cap looks.
Pull the starting chain or ring closed firmly so no gap shows at the crown.
Step 2: Shape the Cap
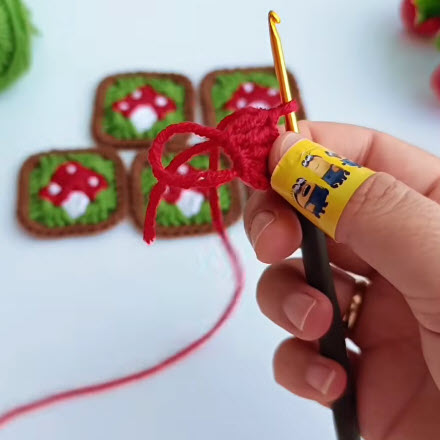
Keep working red until the piece forms a rounded dome with a flat lower edge. At the end of the step, you’ll have a fan-shaped red piece with the yarn tails still hanging free.
Shape check: Lay the cap flat. The curve should look even from side to side, and the bottom edge should sit straight. A lopsided cap makes the finished mushroom lean.
Step 3: Add the White Stem
Join white yarn along the lower edge of the cap and work the stem downward. Center it under the dome, with an equal amount of red showing on either side.
Pro tip: If the stem drifts toward one side, pull it out now. Fixing it after the green background goes on means undoing far more work.
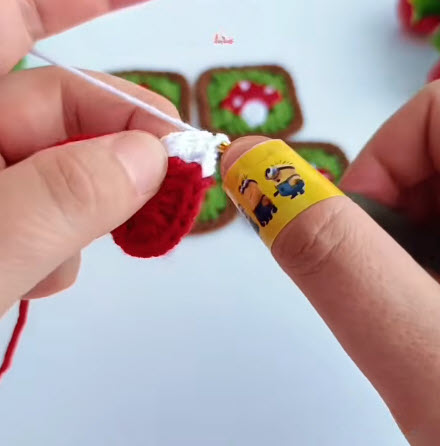
Step 4: Work the Green Background
Join green and crochet around the whole mushroom, cap and stem together. The first green rounds turn the mushroom into a rounded patch, and corner clusters then start pushing it toward a square.
Pro tip: Spread stitches evenly around the cap’s curve. Packing too many into the top pushes the mushroom downward, while too few pulls the green tight and puckers the red.
Place a stitch marker at each spot where a corner will form. The markers make the switch from round to square much easier to track.
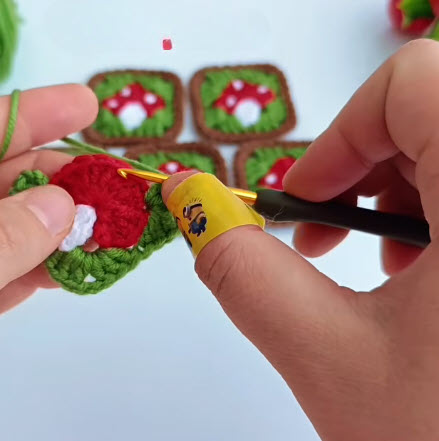
Step 5: Square Off the Green
Repeat the green round, working corner clusters into each marked spot, until all four sides sit straight and the mushroom looks centered in its patch of grass.
Straight sides now mean an easy, even brown frame in the next step.
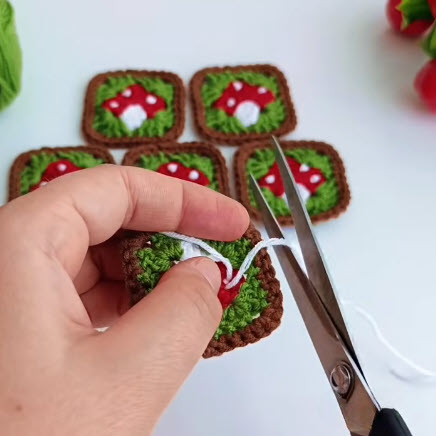
Step 6: Frame the Square in Brown
Switch to brown for the outer edge. The brown frame locks in the square shape and gives each panel a tidy border for joining later.
Corner check: All four corners should match in height and sharpness. Count the stitches along each side before fastening off.
Step 7: Add the White Spots and Tidy the Back
Thread white yarn onto a tapestry needle and stitch small dots across the red cap. On the back of the square, the white strands carry behind the work.
Secure each spot before cutting: knot the tail or weave it under nearby stitches, then trim close. Loose strands on the back can snag keys once the square becomes a pouch.
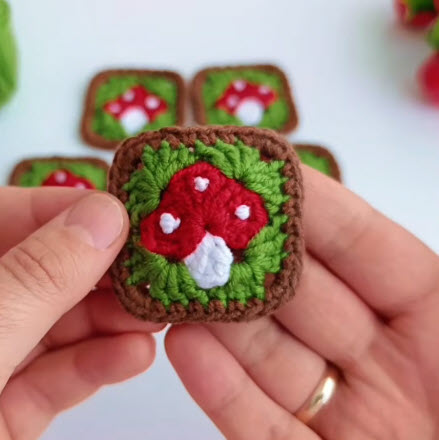
Step 8: Check the Finished Square
A finished square shows a red cap with scattered white dots, a centered white stem, even green all around and a clean brown frame.
Size check: Hold each new square against the first one. Both panels need to match before joining.
How to Assemble the Crochet Mushroom Keychain Pouch
Place two squares back to back with the right sides facing out. Join three sides with single crochet or slip stitch through both brown edges, and leave the top open.
Attach the key ring at one top corner, working a few extra stitches through the corner to reinforce it. For a closed pouch, sew a snap, button loop or small zipper along the opening. Watch the video below for the full joining method.
Common Mistakes
- A gap at the cap’s crown: the starting ring wasn’t pulled tight.
- An off-center stem: the white was joined too far toward one side.
- Cupped squares: tension ran too tight in the green rounds.
- Wavy squares: too many stitches landed in one round.
- Spots that pull loose: the white tails were cut without being secured.
- Mismatched panels: squares were made on different days with different tension.
Uses and Benefits
A pouch small enough to dangle from a key ring solves the everyday problem of loose earbuds, coins and hair ties rattling around a bag. The squares use only small amounts of yarn, so leftover scraps finally have a purpose. Each motif works up in under an hour, which makes the project a smart pick for craft fair stock or last-minute gifts, and the mushroom design adds a cheerful cottagecore touch to backpacks, purses and lanyards.
Beginner Tips
- Practice the treble stitch on a scrap chain before starting the cap.
- Weave in ends after each color change instead of leaving them all for the end.
- Use a contrasting stitch marker color so the markers stand out against green yarn.
- Photograph your first finished square to use as a visual reference for the second.
Matching Square Sizes Before You Join
Even small differences show once squares sit side by side. Before joining, pin each finished square to a foam board, mist it lightly with water and let it dry flat.
After blocking, stack the squares. Any panel that’s noticeably smaller or larger should be remade rather than stretched, because stretched squares spring back after the first wash and distort the pouch seams.
Materials Substitution Ideas
- Acrylic instead of cotton: softer and cheaper, though stitches look slightly fuzzier at a small scale.
- Embroidery floss for the spots: gives sharper, rounder dots than yarn on a tiny cap.
- Felt lining instead of fabric: no hemming needed and it adds stiffness to the pouch.
- Split ring instead of a key ring: sturdier for heavy key bunches.
Personalization Ideas
Color Swaps
Try a brown or orange cap with cream spots for a woodland look, or a pale blue background in place of green.
Tiny Details
Stitch a small face onto the stem with embroidery thread for a playful gift version.
Hardware Choices
Swap the key ring for a lobster clasp to hang the pouch from a bag strap, or add a wrist loop instead.
FAQs
What can a mushroom keychain pouch hold?
Earbuds, lip balm, a folded bill, coins or a spare hair tie fit comfortably inside a two-square pouch.
Is the pattern beginner friendly?
Yes, if you’re comfortable with basic stitches and color changes. The cap shaping takes a little practice, but the rest is simple rounds.
Can I make the squares bigger?
Work extra green or brown rounds, or use thicker yarn with a larger hook. The pouch grows with the squares.
Do I need to line the pouch?
Lining isn’t required, but a small fabric or felt lining stops tiny items from slipping through stitch gaps.
How should I wash it?
Remove the metal hardware if possible, hand wash in cool water and lay flat to dry.
Final Thoughts
Once the first mushroom square is done, the second goes much faster: red cap, centered stem, green background and brown frame, in the same order every time. Keep tension steady, block both panels before joining and secure every spot tail so nothing catches on your keys. Change the colors later, and the same squares can turn into a whole set of pouches for gifts or craft fair tables.