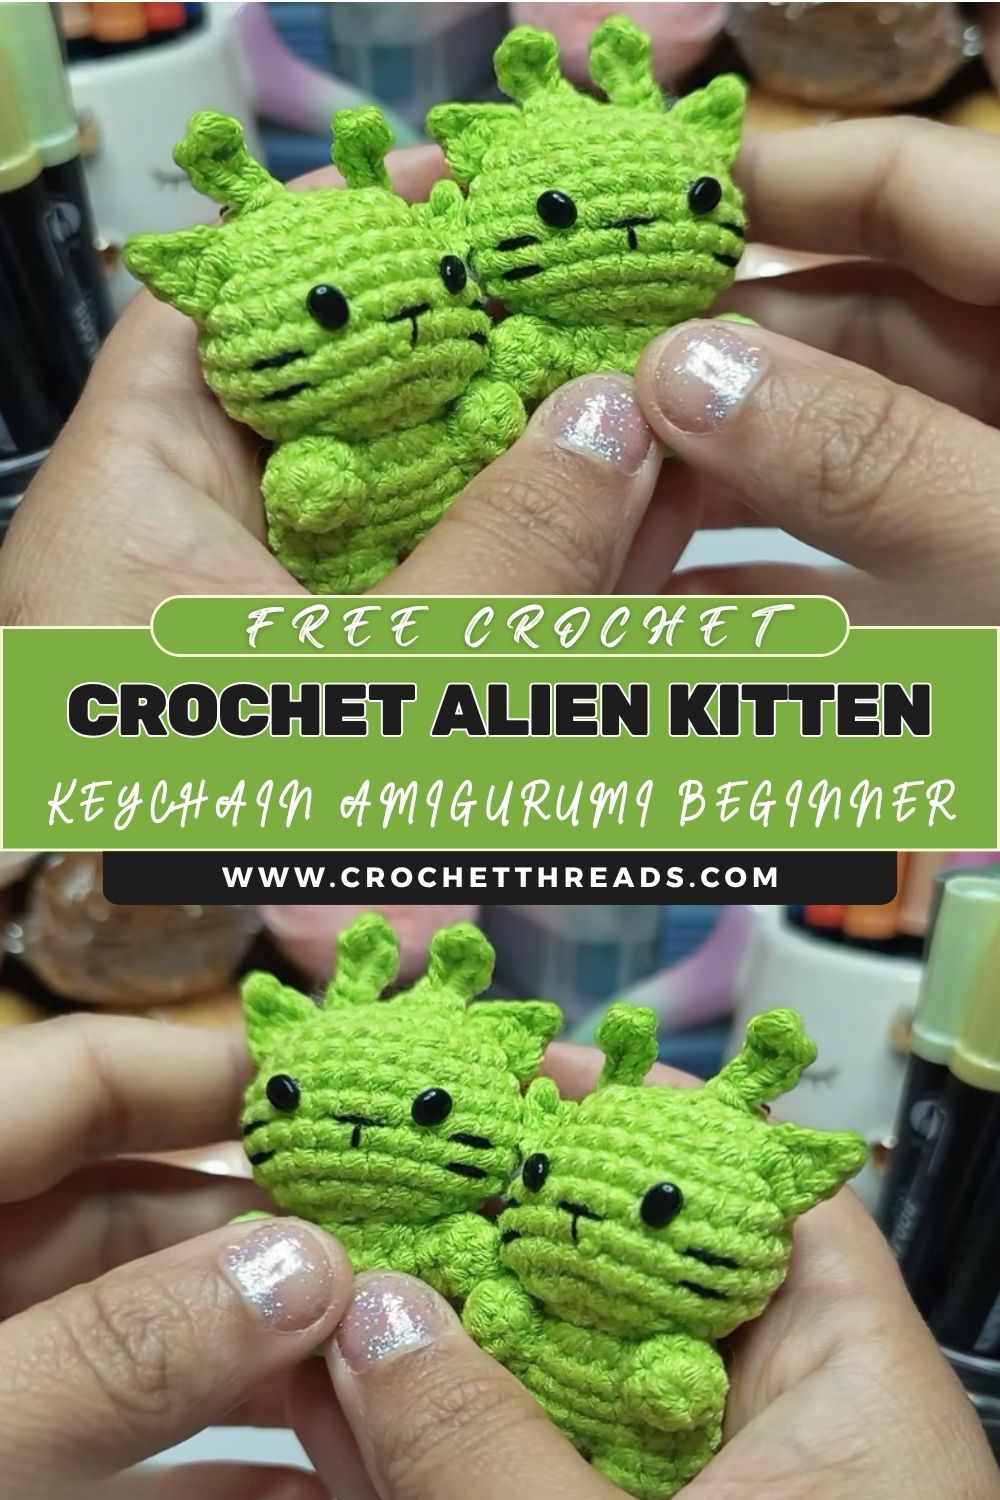
Precious Crochet Alien Kitten Keychain Amigurumi Beginner Pattern Step by Step
This alien kitten crochet keychain pattern (Llavero Gatito Alien) is the perfect mix of cute and creative, like a tiny space kitty you can carry everywhere. With its little ears, mini antennae, and sweet amigurumi face, it makes an adorable handmade accessory for your keys, backpack, or pencil case.
If you love small projects, this beginner amigurumi keychain is a fun DIY crochet craft: quick to finish, easy to personalize, and super giftable for friends who love cats, kawaii, or anything “alien” themed.
Materials List
Yarn (DK/#3 or worsted/#4):
- Green (main alien kitten color)
- Pink or light green (inner ears/cheeks, optional)
- White (tiny eye highlights, optional)
- Black (embroidery for nose/mouth, optional if not using safety eyes)
Hook:
- 2.5 mm (for DK and a tight keychain finish)
or 3.0 mm (if your tension is very tight)
Notions & tools:
- Safety eyes: 6 mm or 8 mm (keychain size)
- Fiberfill stuffing
- Keychain ring: 25–30 mm split ring (jump ring optional)
- Yarn needle
- Scissors
- Stitch marker (recommended)
Abbreviations (Beginner-Friendly)
- MR = Magic ring (adjustable loop to start crocheting in the round)
- sc = Single crochet
- inc = Increase (2 sc in the same stitch)
- dec =Decreasee (use invisibleDecreasee for smoother shaping)
- ch = Chain
- sl st = Slip stitch (joins or finishes neatly)
- FO = Fasten off (cut yarn and secure)
Note: This pattern is worked in continuous rounds (no joining) unless otherwise stated.
Pattern Overview (What you’ll crochet)
You’ll make these parts:
- Headbody (one piece, stuffed)
- Ears (2 small triangles)
- Antennae (2 small stalks + optional tiny tips)
- Arms (optional, 2 small tubes)
- Face details (eyes + embroidered nose/mouth)
- Keychain loop (stitched or chained loop)
Headbody (one piece)
With green yarn:
Round 1: MR, 6 sc (6)
Round 2: inc x6 (12)
Round 3: (sc, inc) x6 (18)
Round 4: (2 sc, inc) x6 (24)
Rounds 5–7: sc around (24) (3 rounds)
Place safety eyes
Insert eyes between Rounds 6–7, about 5–6 stitches apart (adjust for your preferred “cute” look).
Round 8: (2 sc, dec) x6 (18)
Round 9: (sc, dec) x6 (12)
Stuff firmly and evenly (small pieces of stuffing help avoid lumps).
Round 10: dec x6 (6)
FO, close the hole, weave in the end.
Tip for shape: If you want a slightly longer “body” look, add 1–2 extra rounds of sc at 24 stitches before Round 8.
Ears (make 2)
With green yarn (or add a pink inner ear later with embroidery/felt):
Round 1: MR, 4 sc (4)
Round 2: (sc, inc) x2 (6)
Round 3: sc around (6)
FO, leave a long tail for sewing.
Pinch the base flat to form a small triangle.
Sew ears on top of the head, slightly forward.
Antennae (make 2)
With green yarn:
Round 1: MR, 4 sc (4)
Rounds 2–3: sc around (4) (2 rounds)
FO, leave tail.
Optional antenna tip (cute “alien” dot)
With pink (or lighter green):
MR, 4 sc (4), FO.
Sew the tiny dot on top of each antenna.
Attach antennae centered on the top of the head (between/near ears).
Arms (optional, make 2)
With green yarn:
Round 1: MR, 5 sc (5)
Rounds 2–4: sc around (5) (3 rounds)
FO, leave tail. Lightly stuff (or leave unstuffed for a flatter arm).
Flatten the open edge and sew to the side of the body.
Face Details (eyes + nose + mouth)
Safety eyes
If using safety eyes, you already placed them before closing.
Embroidered nose/mouth
With black yarn (or dark thread):
- Stitch a tiny triangle or small horizontal nose centered below the eyes.
- Add a short vertical stitch down.
- Add a small smile curve (one curve or two tiny curves).
Optional cheeks
With pink yarn, add two tiny blush stitches under the eyes.
Stuffing (how to keep it neat)
- Stuff in small pieces, shaping as you go.
- Aim for firm (keychains get squeezed), but don’t overstretch stitches.
- If gaps appear, switch to a smaller hook or tighten the tension on the next one.
Sewing & Assembly Order (easy workflow)
- Sew ears first (symmetry check from the front)
- Sew antennae next
- Attach arms (optional)
- Re-check the face position and add embroidery
- Hide all yarn tails inside the body
Hide ends: Thread tail through the body, pull gently, snip end; retracts inside.
Attach the Keychain Ring Securely
Option A: Crochet chain loop (beginner-friendly)
- Insert hook at the top of the head (between antennae/ears).
- Pull up yarn and ch 12–18 (depending on ring size).
- sl st back into the same area to form a loop.
- Knot and weave ends inside.
- Add a split ring through the loop.
Option B: Jump ring attachment (strongest)
- Pass a jump ring through several stitches at the top of the head, close tightly, then add your keychain ring.
Durability tip: Attach through multiple stitches, not just one.
Color & Customization Tips
- Pastel alien cats: mint green + lavender cheeks
- Classic alien: neon green + black mouth + pink antenna tips
- Accessories:
- Tiny scarf: ch 25–35, sl st back or tie on
- Collar: surface crochet a thin line around the neck area
- Add a tiny star charm to the keyring
- Expressions:
- Straight mouth = calm
- Wide curve = happy
- Add tiny eyebrows = playful/sassy
- Make it bigger: Use thicker yarn and a larger hook (keep stitch counts the same for a larger plush).
Troubleshooting & Tips for Beginners
- Stitches look holey? Go down a hook size (2.5 mm → 2.0 mm) or tighten the tension.
- Can’t “see” stitches in fuzzy yarn: use a stitch marker and count each round slowly.
- Lopsided shape: check that you didn’t add/drop a stitch; recount after each round.
- Safety eyes feel tricky: embroider sleepy eyes with black yarn instead.
- Parts look crooked: pin first, sew second; pause halfway and re-check symmetry.
Conclusion
You did it—your Llavero Gatito Alien is ready to travel the galaxy on your keys or bag! This alien kitten crochet keychain pattern is a great beginner amigurumi project because it’s small, quick, and teaches the basics of shaping, stuffing, and assembly. Thanks for following along, and congratulations on finishing your alien kitten keychain! Share a photo of your finished cutie and if you enjoyed this pattern, try more keychain amigurumi projects!