Mini Crochet Frankenstein Keychain for Spooky Season
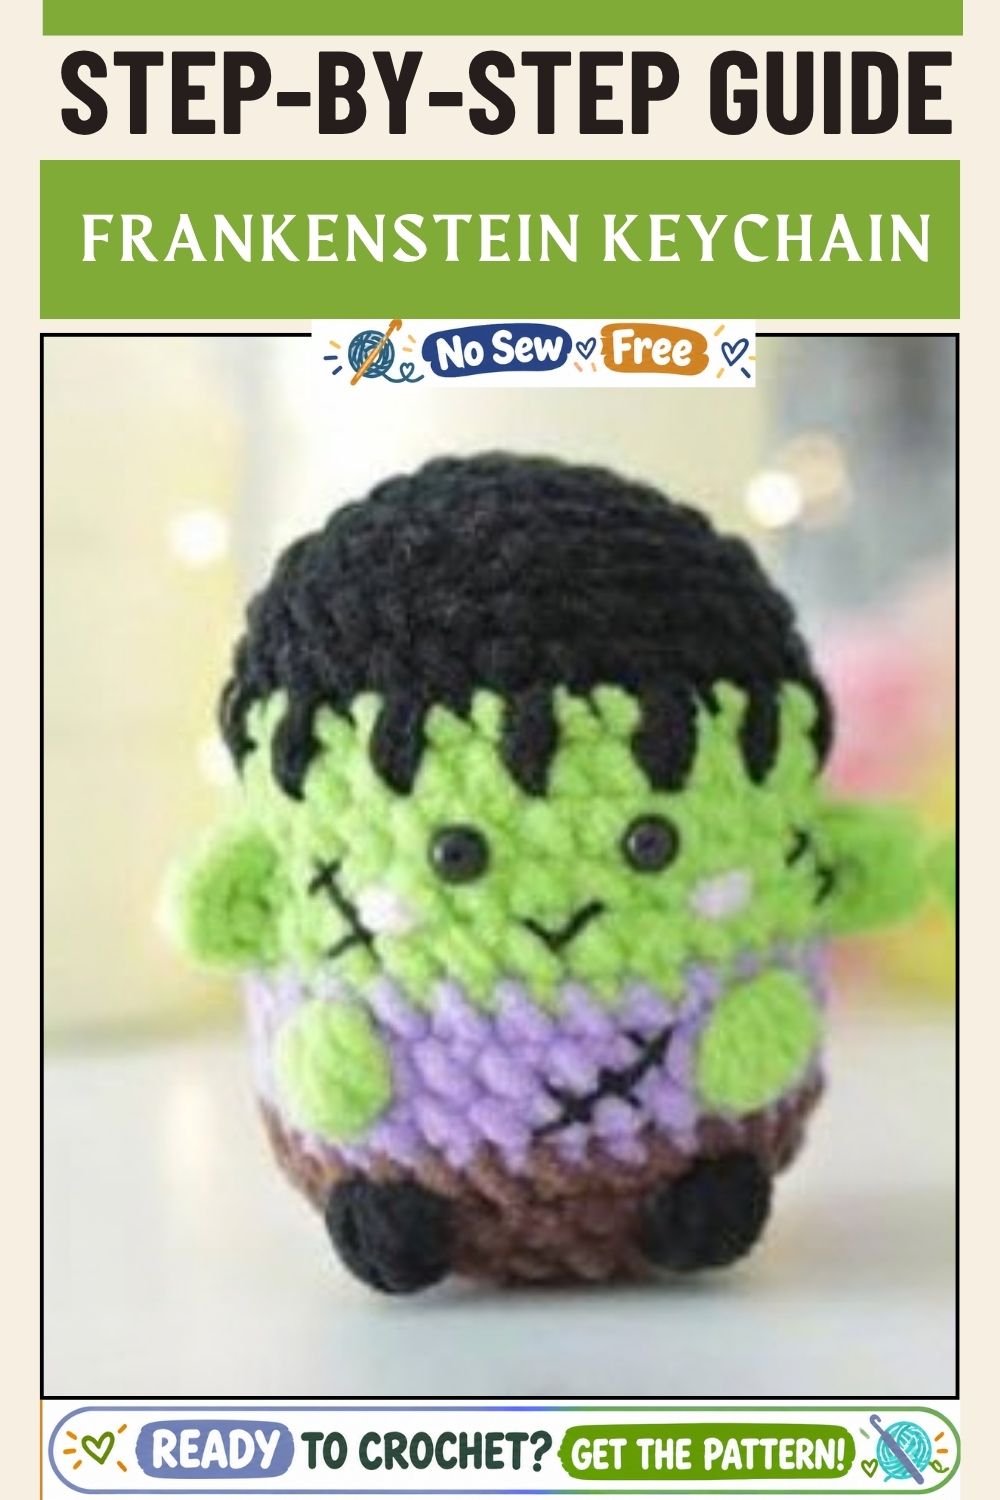
Lime green, soft lilac and inky black stack up in the Mini Crochet Frankenstein Keychain for Spooky Season, a pocket-sized amigurumi monster with glossy eyes and a shaggy fringe. Clip it onto keys or a backpack zipper, and a little Halloween fun travels everywhere.
Most Halloween amigurumi need a pile of separate parts. Here the body works as one seamless tube from hair cap to base, and color changes handle the character work, so the monster appears as you stitch. Even the hands pop out as bobbles mid-round. A firm disc in the bottom lets the figure stand upright, turning the amigurumi Halloween keychain into a desk buddy and a ready-made spooky crochet pattern for market tables.
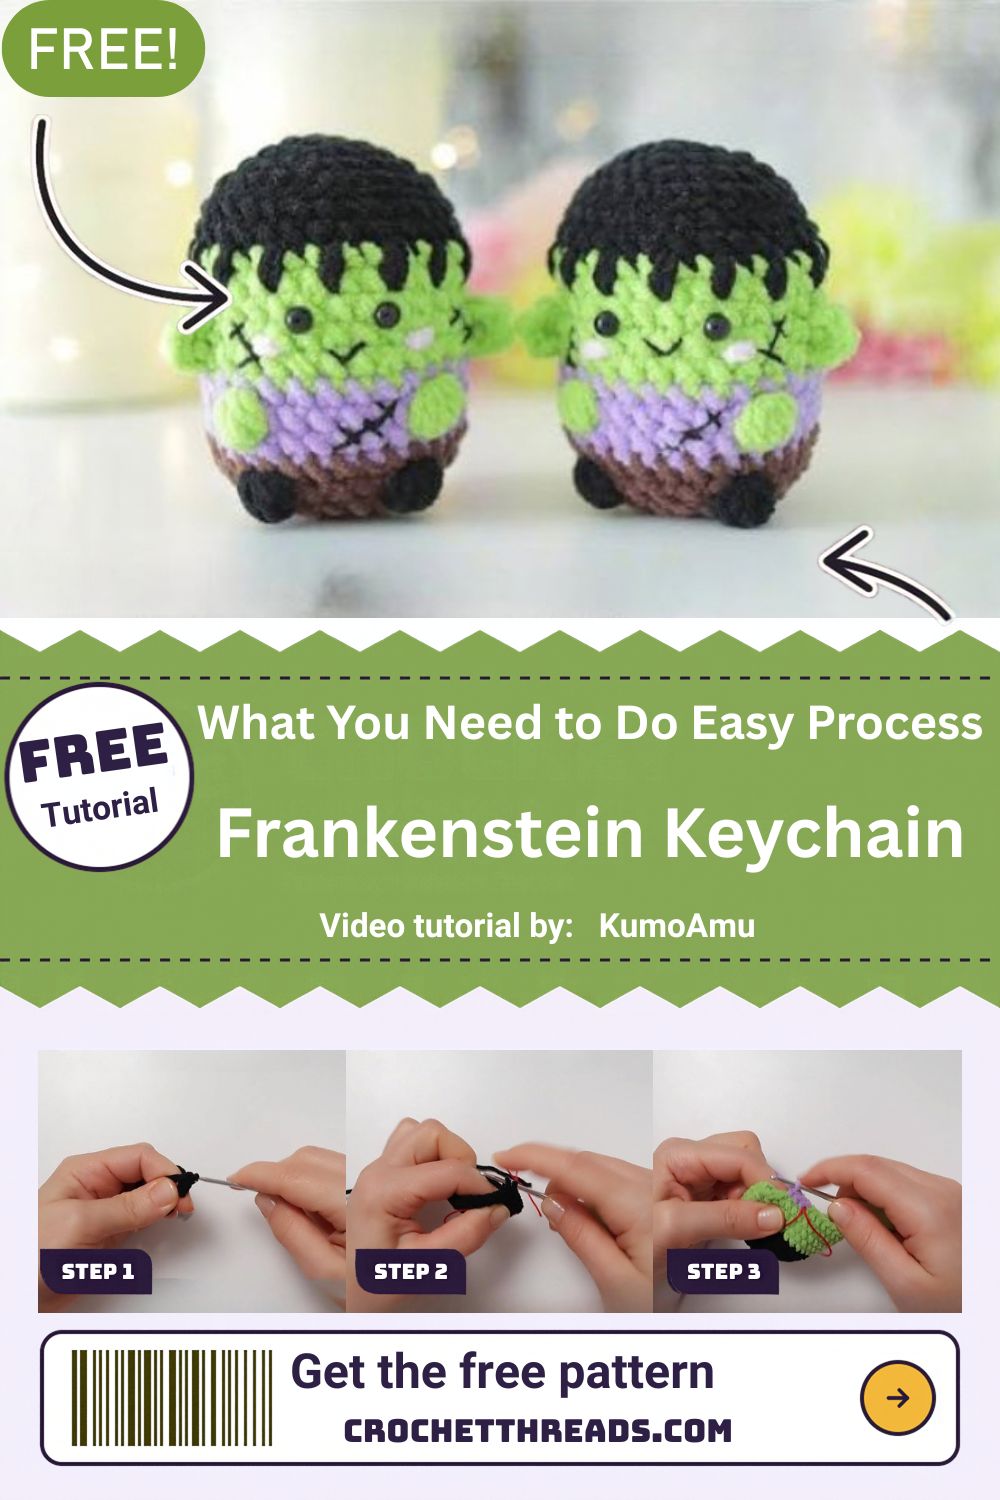
Who the Pattern Suits Best
Crocheters who know the magic ring and single crochet will feel at home right away. Anyone hunting for a practical make will also appreciate a crochet Frankenstein keychain that keeps house keys easy to spot in a crowded bag.
- Advanced beginners ready to practice color changes in the round
- Market sellers who need fast, eye-catching autumn stock
- Parents or teachers putting together small class treats
- Stash-busters holding leftover plush and worsted scraps
Time Box
- Prep: 10 minutes for winding yarn and cutting the base disc
- Stitching: roughly 1.5 to 2 hours
- Finishing: about 30 minutes for fringe, feet and hardware
Plush yarn hides its stitches, so counting takes more patience than technique. Most makers finish one monster in a single evening.
Supply Checklist
- Chenille-style plush yarn (bulky, category 5) in lime green, lilac and chocolate brown
- Black worsted-weight acrylic for the hair cap, fringe and feet
- 3.5 mm hook for the black section and 4 mm hook for the plush rounds
- One pair of 6 mm safety eyes
- Stiff circle of plastic canvas or cardboard, about 4 cm across
- Polyester fiberfill
- Red scrap thread to mark the round start
- Key ring with a jump ring
- Tapestry needle and sharp scissors
Stitches and Abbreviations (US Terms)
- MR – magic ring
- ch – chain
- sl st – slip stitch
- sc – single crochet
- inc – 2 sc in the same stitch
- dec – invisible single crochet decrease
- BLO / FLO – back loop only / front loop only
- bobble – several unfinished double crochet in one stitch, closed together
Special Techniques
- Clean color changes: switch colors on the final pull-through of the previous stitch so each band starts crisply.
- Mid-round bobbles: the green hands are worked straight into the lilac band, so there’s nothing to sew on later.
- Weighted flat base: a stiff disc inside the brown rounds keeps the figure standing upright.
How to Crochet the Frankenstein Keychain
Step 1: Start the Hair Cap
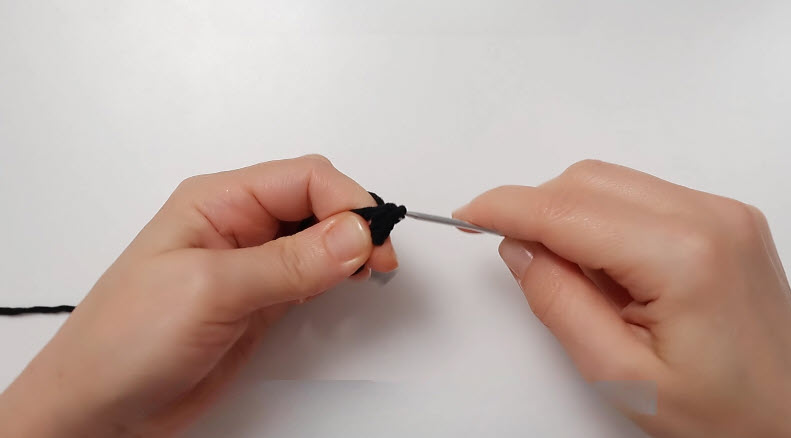
Form a magic ring with black yarn and the 3.5 mm hook. Work 6 sc into the ring, then pull the tail snug. Pinch the tiny disc between thumb and finger to keep the first stitches from twisting.
Step 2: Build the Cap and Mark the Edge
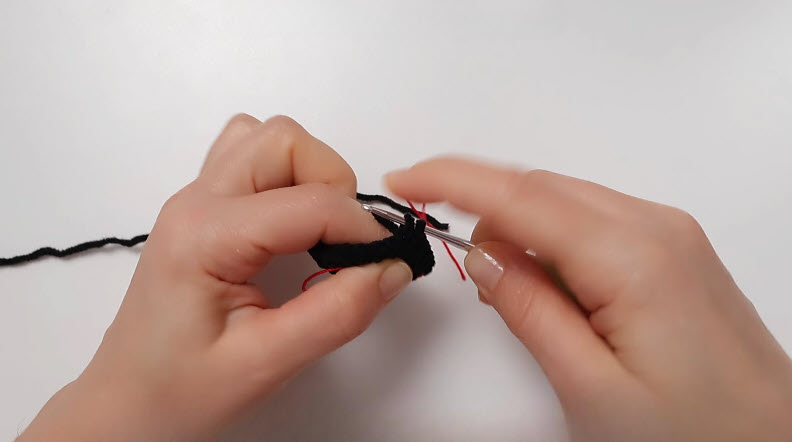
Increase each round evenly until the flat circle reaches about 36 stitches. Lay the red scrap thread across the first stitch to track every round start. Next, work one round in BLO, then a few even rounds so the edges curl into a shallow cup.
The BLO ridge gives the fringe a neat sewing line later, and red thread stands out clearly against black yarn.
Step 3: Switch to Green Plush
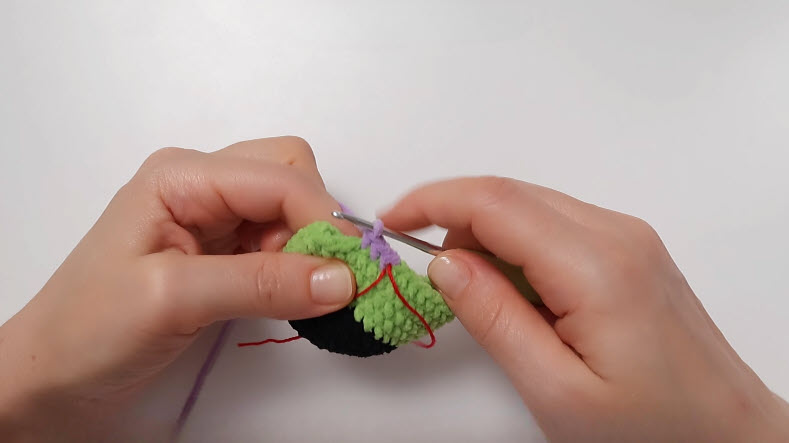
Change to lime green on the final pull-through of the last black stitch. Switch to the 4 mm hook and work even rounds for the face. Near the lower edge of the green, join the lilac yarn the same way for the shirt.
Step 4: Work the Lilac Shirt and Bobble Hands
Continue in lilac for a few even rounds, carrying the resting green strand inside the tube. On the hand round, bring green forward and work one bobble at each side of the body, then drop green and finish the round in lilac. Tug the fabric gently after each round to reveal hidden stitches.
Pro tip: Plush yarn buries its V-shapes. Feel for the top loops with a fingertip instead of relying on sight alone, and push each bobble outward before moving on.
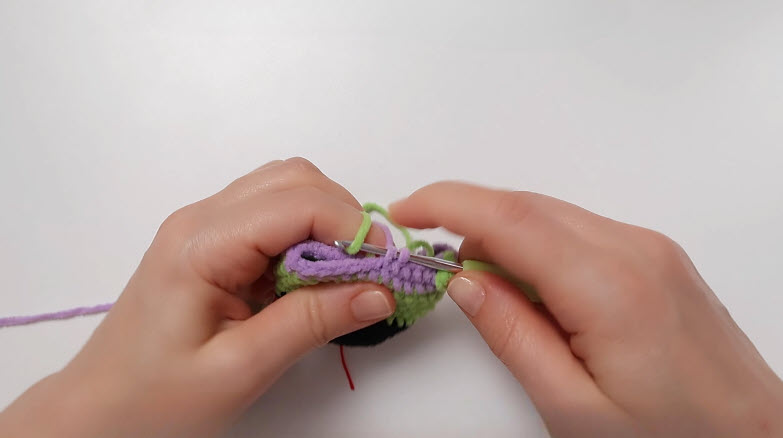
Step 5: Add the Eyes and Start the Brown Base
Insert the safety eyes across the green section, roughly 5 stitches apart, and lock the backs inside. Then join brown and work one round in BLO to start the base.
Eye check: Look at the face straight on before locking the backs. Once snapped in, safety eyes can’t be moved.
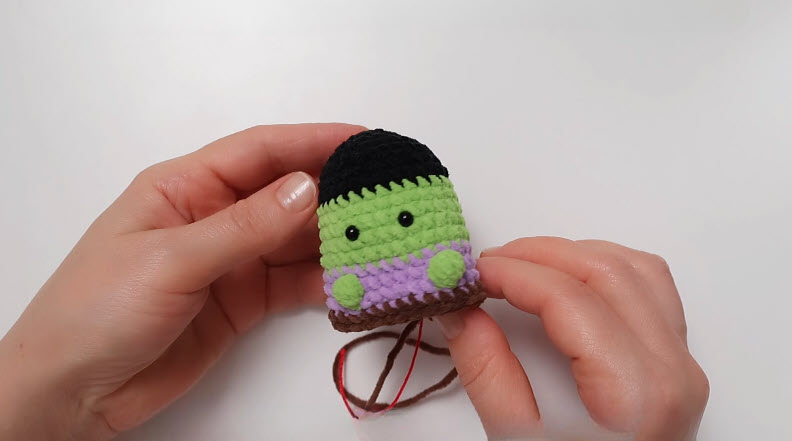
Step 6: Insert the Disc and Close the Base
Begin decreasing the brown rounds. Once the opening narrows, stuff the body firmly and press the stiff disc flat against the bottom. Keep decreasing around the disc until a small gap remains, then fasten off and weave the tail through the FLO to cinch the hole shut.
Pro tip: Stuff above the disc, never below it. Fiberfill under the disc makes the base rock instead of sitting flat.
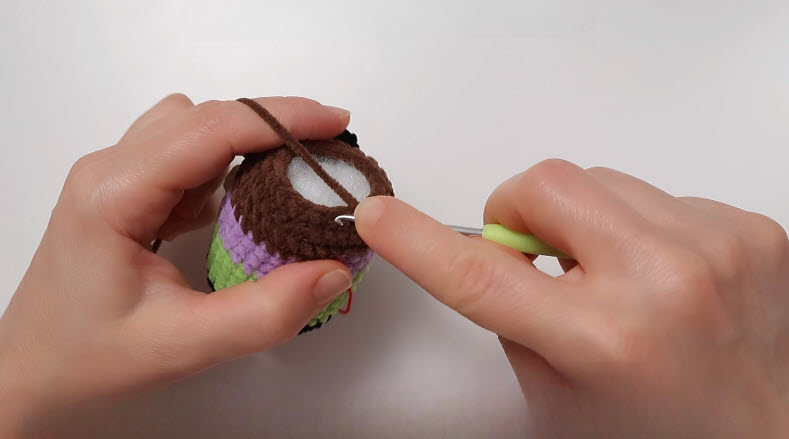
Step 7: Finish With Fringe, Feet and Hardware
Crochet short black chains and sew them along the BLO ridge of the cap to form the drippy fringe. Make two small black ovals and attach them under the front of the base as feet. To finish, thread a jump ring through the top of the cap and add the key ring.
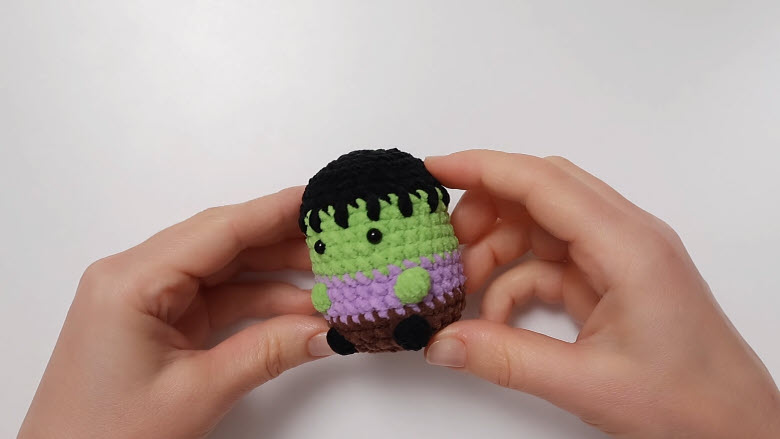
Where Beginners Usually Go Wrong
- Losing the round start. Fix: Move the scrap marker up every round, not every few rounds.
- Jagged color jogs. Fix: Slip stitch into the first stitch of the new color, then carry on.
- Placing eyes too late. Fix: Set safety eyes before stuffing, because the backs won’t lock through fiberfill.
- Loose plush fabric. Fix: Drop half a hook size if stuffing peeks between stitches.
Beginner Tips
- Practice a bobble on a scrap swatch before the hand round.
- Count stitches on the black cap carefully; the worsted section is easier to count than the plush.
- Keep yarn balls on opposite sides of your lap so the colors don’t tangle.
- Cut the base disc before you start, so it’s ready when the brown rounds begin.
Troubleshooting Extra
- The figure tips over. Fix: Trim the disc slightly smaller so it sits flat, or add stuffing above it.
- Fringe pieces shed. Fix: Knot each tail twice inside and dab clear fabric glue on the knots.
- Hardware pulls through. Fix: Anchor the jump ring through two rows of the cap instead of one.
- Plush pile looks flattened. Fix: Brush gently with a soft toothbrush to lift the fibers.
Signs You Did It Right
- The body stands on its own without leaning
- Color bands run level all the way around
- Both bobble hands sit at the same height
- Eyes sit evenly and feel firmly locked
- The ring stays secure when the keys get a tug
Uses and Benefits
A bright monster hanging from a key ring makes keys easy to find at the bottom of any bag. The project uses small amounts of yarn, so leftover plush finally gets put to work. Since the body stands on its own, it doubles as a desk or shelf figure once Halloween ends. Quick finishing times also make a crochet Frankenstein keychain a strong pick for craft fair stock, class treats and last-minute party favors.
Washing and Care Basics
Spot cleaning works best for small marks. Dab the area with cool water and a drop of mild soap, then press dry with a towel. For a deeper clean, hand wash in cool water and skip the wringing. Reshape the body and let it air dry upright. Avoid the dryer, since heat can melt plush fibers and loosen the eyes.
Storage Tips
Between seasons, tuck the monster into a breathable cotton pouch. Keep it out of direct sun, because lilac and lime fade quickly. Store it upright so the base disc stays flat, and keep a lavender sachet nearby to deter moths during the off months.
Creative Projects You Can Make With the Pattern
The seamless tube shaping adapts easily to a crochet ghost Halloween amigurumi, and a few minigurumi ghost patterns pair nicely with the monster for a themed keychain set. For more variety, try these spins:
- Monster charm trio: Stitch three in different skin tones as a matching gift set.
- Halloween garland: Skip the hardware and string several along a twine cord.
- Shelf-size version: Size up with super bulky (category 6) yarn and a 6 mm hook for tabletop decor.
- Party favor tags: Swap the ring for a ribbon loop and tie one to each treat bag.
Personalization Ideas
Color Swaps
Try mint and dove gray for a softer pastel monster, glow-in-the-dark green for evening trick-or-treating, or orange skin with a black cap for a pumpkin-headed twist.
Face Details
Embroider a stitched scar across the forehead or two small gray neck bolts with scrap yarn for a classic monster look.
Display Options
Hang one from a lamp pull chain, perch it on a bookshelf beside mini pumpkins, or group several in a glass jar as a spooky centerpiece. Add a few crochet cauldron Halloween patterns nearby to round out the display.
Gift Packaging Ideas
- Slip each monster into a small clear cellophane bag tied with orange ribbon.
- Attach it to a kraft paper card with a handwritten “Happy Haunting” note.
- Nestle it in a mini matchbox-style box lined with black tissue for a coffin effect.
Why It’s Popular Right Now
Tiny Halloween amigurumi keep trending because they finish fast and photograph well, and character charms appeal to kids and adults alike.
- Plush yarn gives a squishy texture shoppers love to touch
- Small seasonal charms sell quickly at autumn craft fairs
- Short projects fit busy schedules during the holiday rush
FAQs
Can regular worsted yarn replace the plush yarn?
Yes. Use the 3.5 mm hook throughout for a slightly smaller figure with clearer stitch definition.
Is the keychain safe for small children?
Safety eyes and small parts pose a choking risk for kids under three. For young children, embroider the eyes with black yarn instead.
How big is the finished piece?
With plush yarn, expect roughly 6 to 7 cm in height.
What can replace the plastic disc?
Tape-covered cardboard, a trimmed yogurt lid or several layers of stiff felt all work well.
How long does the fringe take?
Plan for about 15 minutes, including sewing each strand in place.
Conclusion
Color changes, bobble hands, safety eyes and a weighted base all fit into one small, cheerful monster. Once those skills feel natural, larger amigurumi with separate limbs become far less intimidating. Size the pattern up next, or build a whole spooky crew to keep it company. For a keychain with a working pocket, the crochet card holder keychain makes a fun next project.